Summary
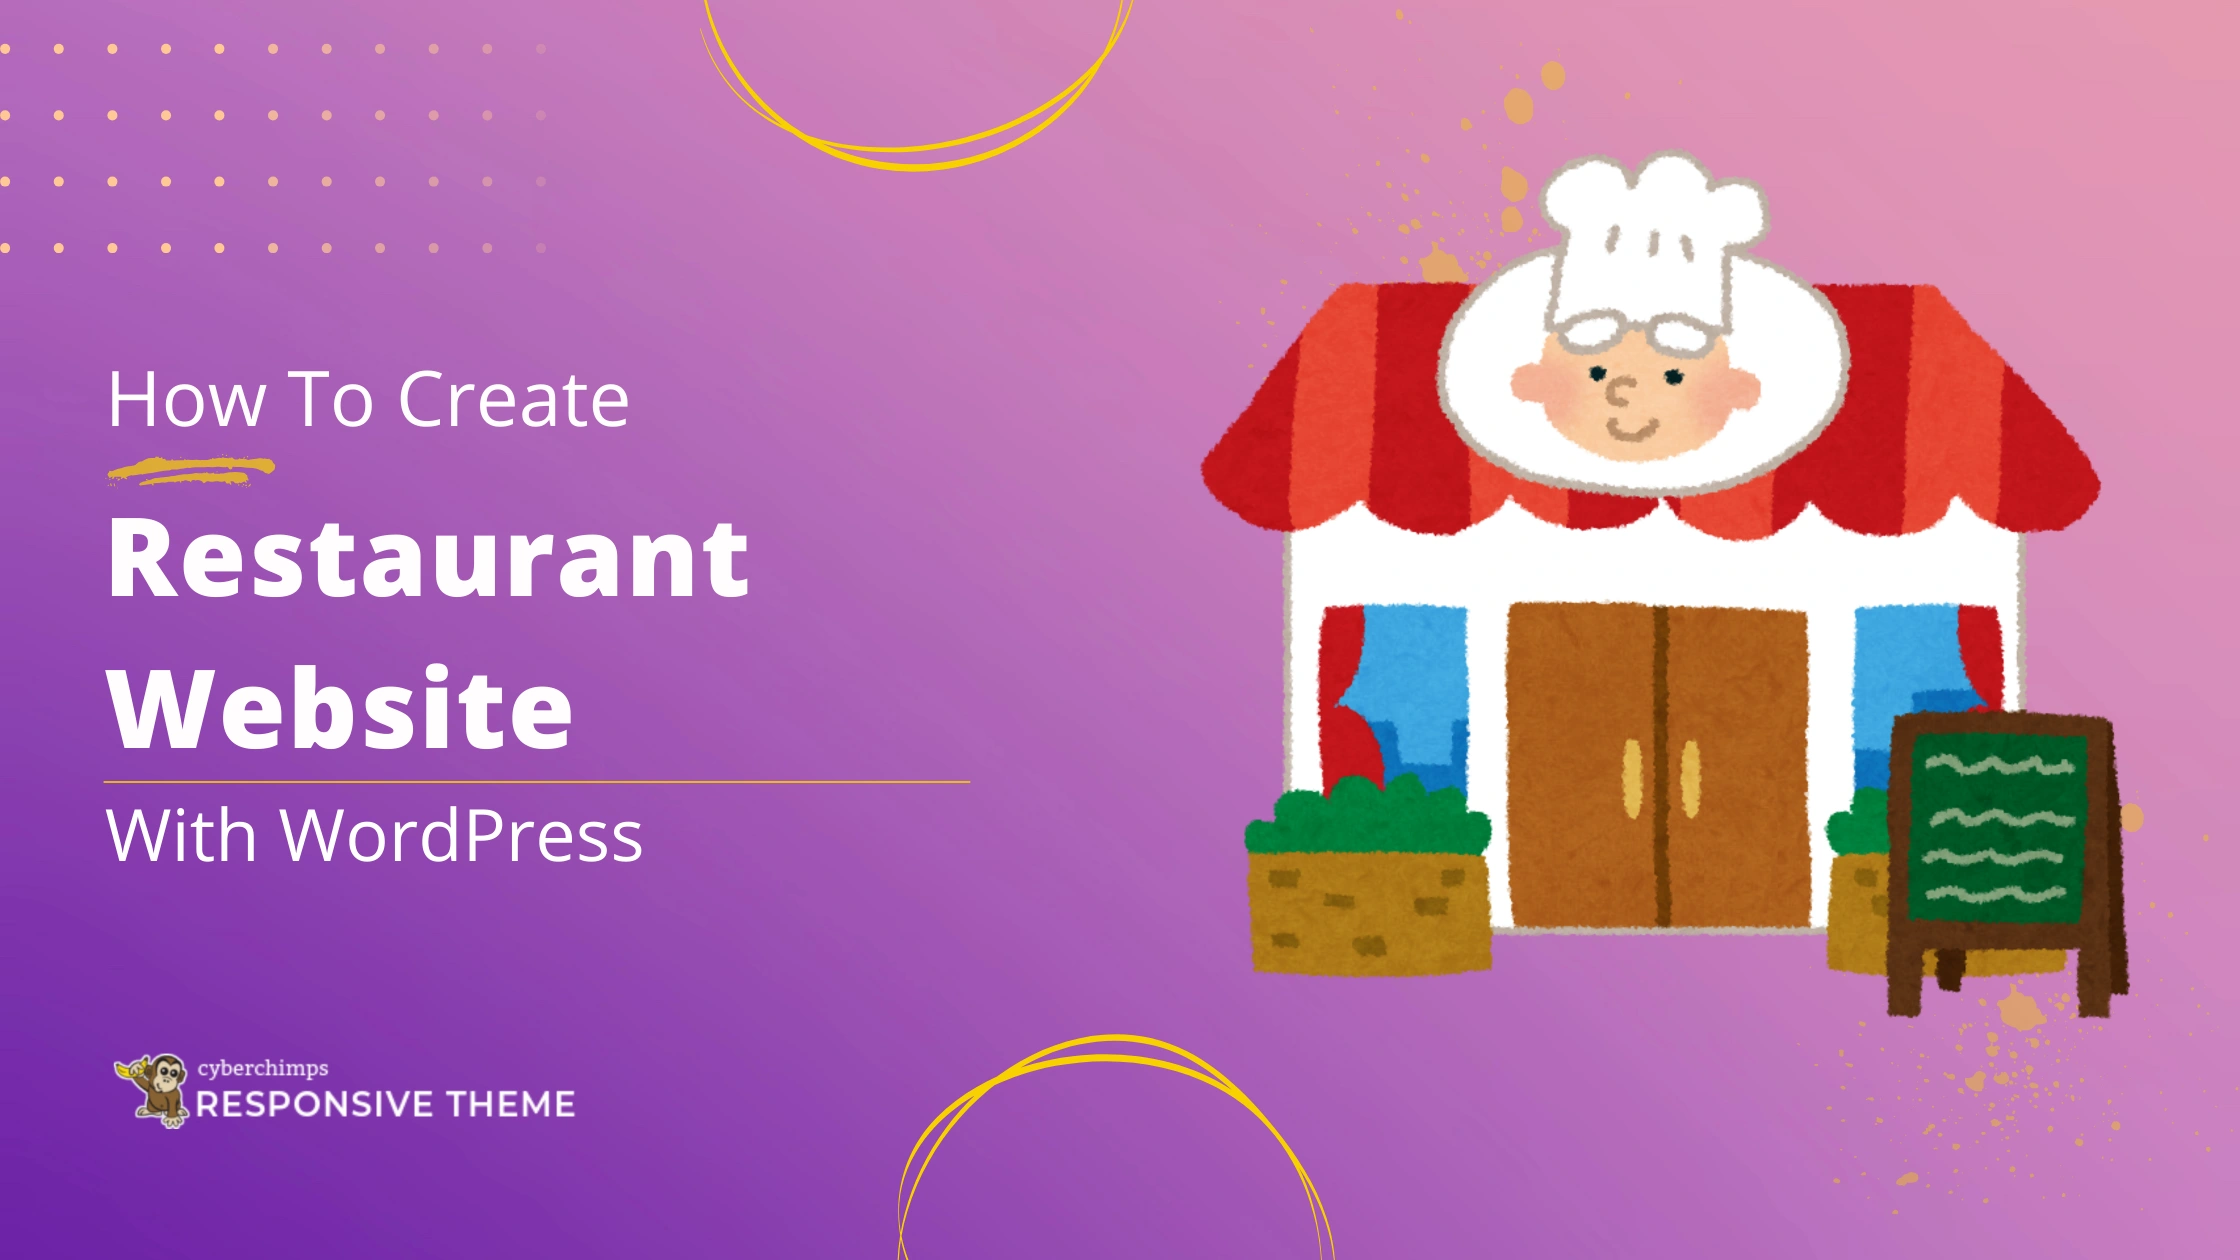
The article explains how to create a restaurant website with WordPress. It defines steps like choosing hosting and a domain, installing WordPress, and selecting a restaurant-friendly theme.
It also highlights adding menus, reservation features, contact info, and design tips. Helping readers build an attractive, functional site for their restaurant business.
Running a restaurant today means more than serving great food. Customers first search online before deciding where to eat.
Without a professional website, restaurants can easily lose potential diners to competitors with a stronger online presence.
Many restaurant owners assume building a website is expensive or requires coding skills. But the truth is, you can create a beautiful restaurant website quickly using a free WordPress restaurant theme no technical experience needed.
In this guide, you’ll learn how to build a free restaurant website step by step and create an elegant online presence that attracts more customers.
Here’s a step-by-step guide to launching your free restaurant website!
Essential Features Your Restaurant Website Should Include
Before you start creating your restaurant website with WordPress, it’s important to understand what makes a restaurant site truly effective. A well-designed website doesn’t just look good, it helps visitors quickly decide whether they want to dine at your restaurant.
Most customers visit a restaurant website with a clear purpose. They want to explore the menu, check the location, view photos, or make a reservation.
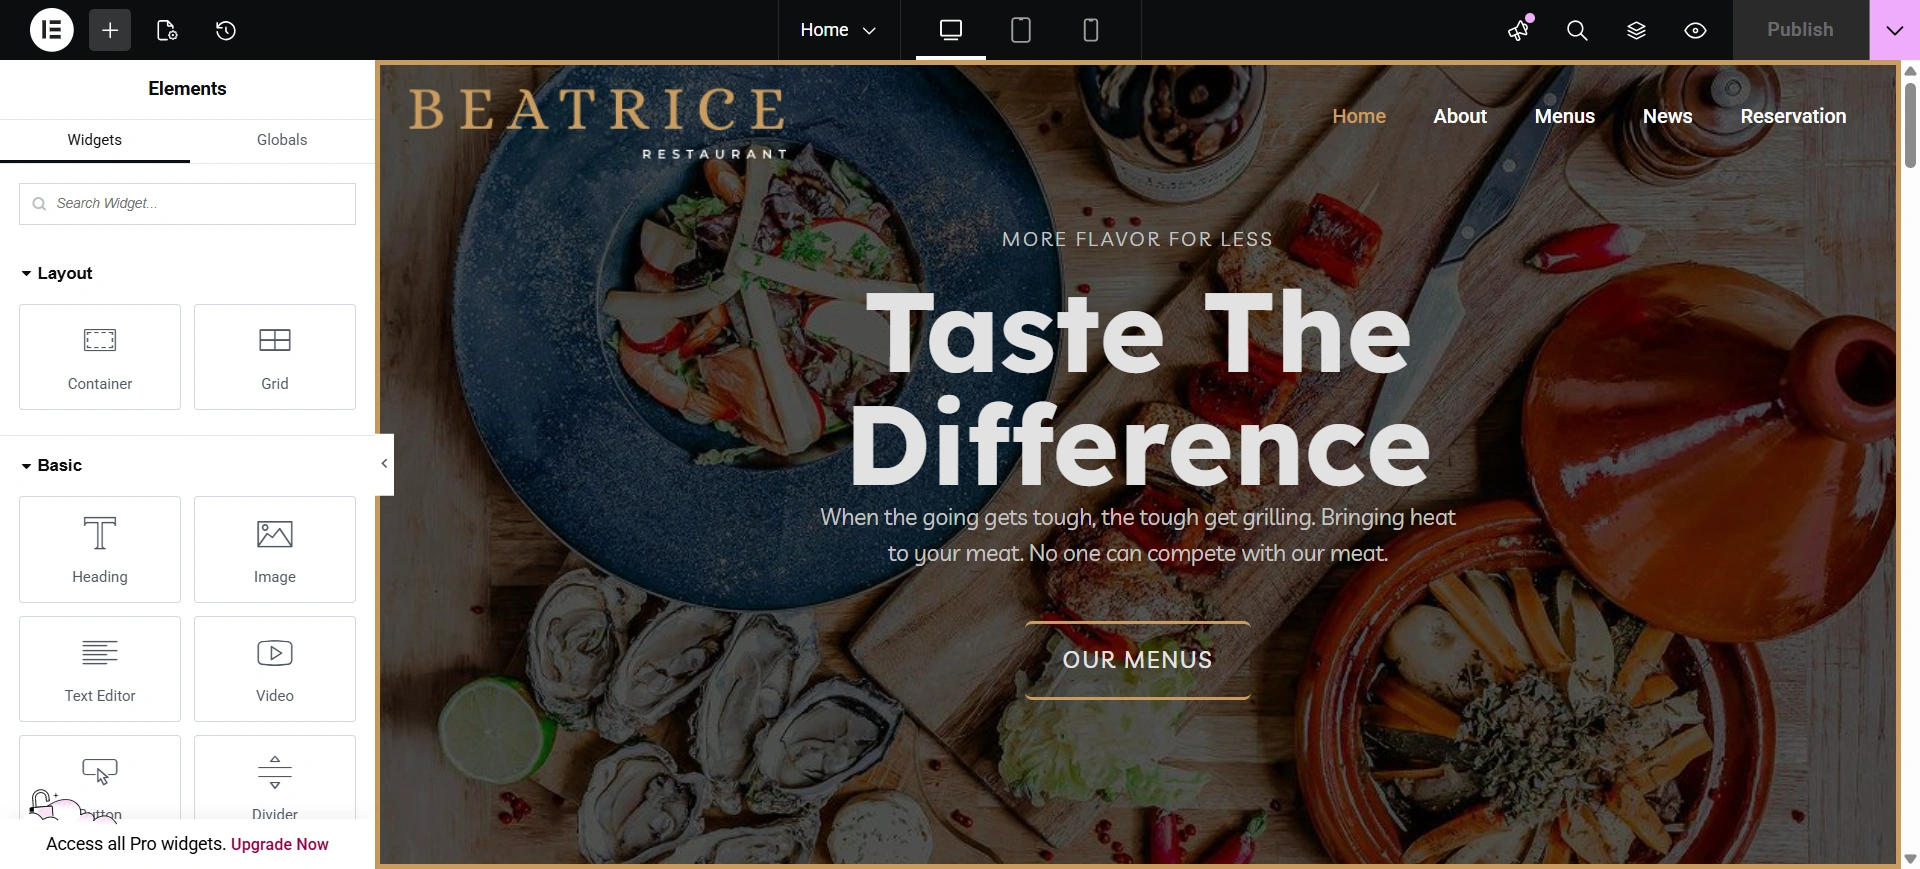
The Cyberchimps Restaurant Starter Template is designed around these exact user expectations, helping you launch a professional website without building everything from scratch.
Let’s look at the essential features every restaurant website should include.
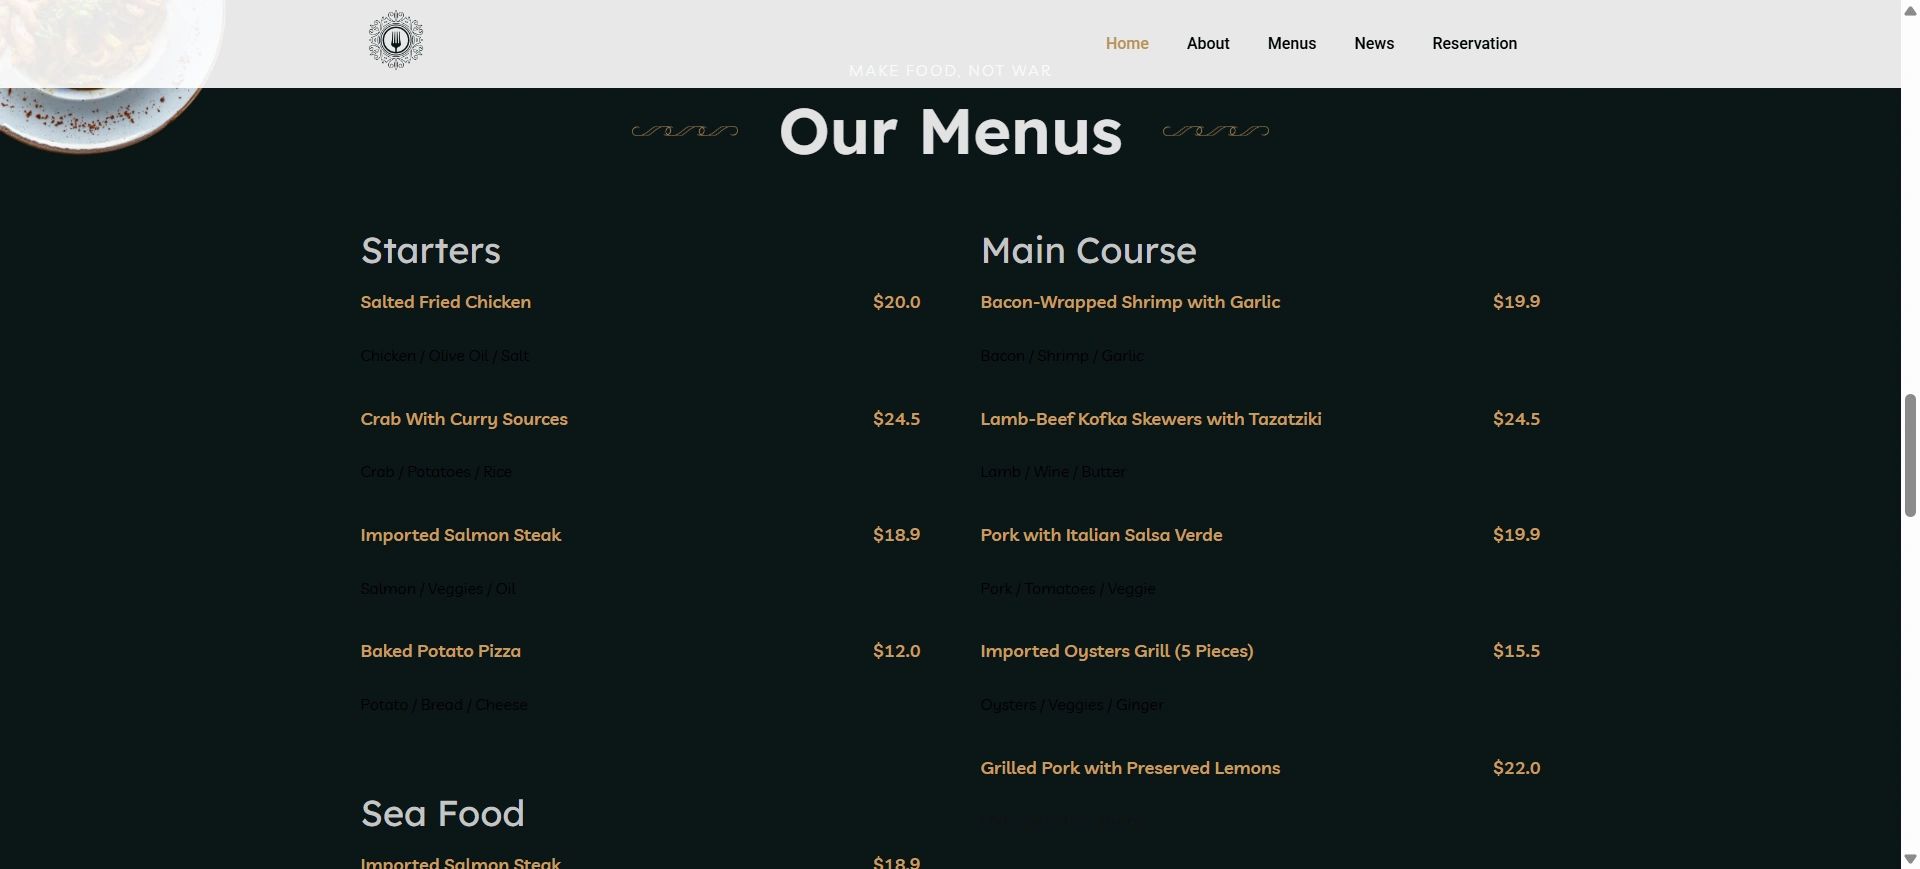
1. A Well-Structured Online Menu
The purpose of a restaurant’s website menu is the primary way for customers to get a preview of what is on offer at that establishment before making the decision to dine in or order takeout.
Ideally, rather than uploading the menu as a PDF file or image, it would be better if you display all the items directly on the web page, making it easier for people to see and read.
Displaying them directly on your page also allows search engines to better understand the type and amount of content you provide.
As part of the Cyberchimps Restaurant Starter Template, they have made it easy to present an organized menu into sections that allow your customers to easily browse through the dishes and their descriptions, as well as pricing, with a streamlined and easy-to-read layout – allowing them to view your options without even having to think about it.
2. Online Reservations and Ordering Options
After seeing something attractive, booking a table or ordering becomes an easy next step for visitors.
By allowing online reservations and removing barriers in the customer journey, guests choose from available time slots, conveniently schedule their visit, and receive confirmation automatically without ever having to call your restaurant.
With WordPress (and its supporting reservation/ordering plugins), you can easily use the Restaurant Starter Template to turn your website into a complete booking platform while reducing your employees’ manual work efforts.
3. Complete Contact and Location Information
Do not allow your Clients to have difficulty locating your establishment or contacting you. Having clear contact information goes a long way toward assisting your Customers in planning their visit.
Your website should include the following contact information:
- Site address and map location
- Operating hours
- Telephone number and email address
- Payment methods accepted
The template already includes contact information, a map, and other relevant sections, making it easy for visitors to find information quickly.
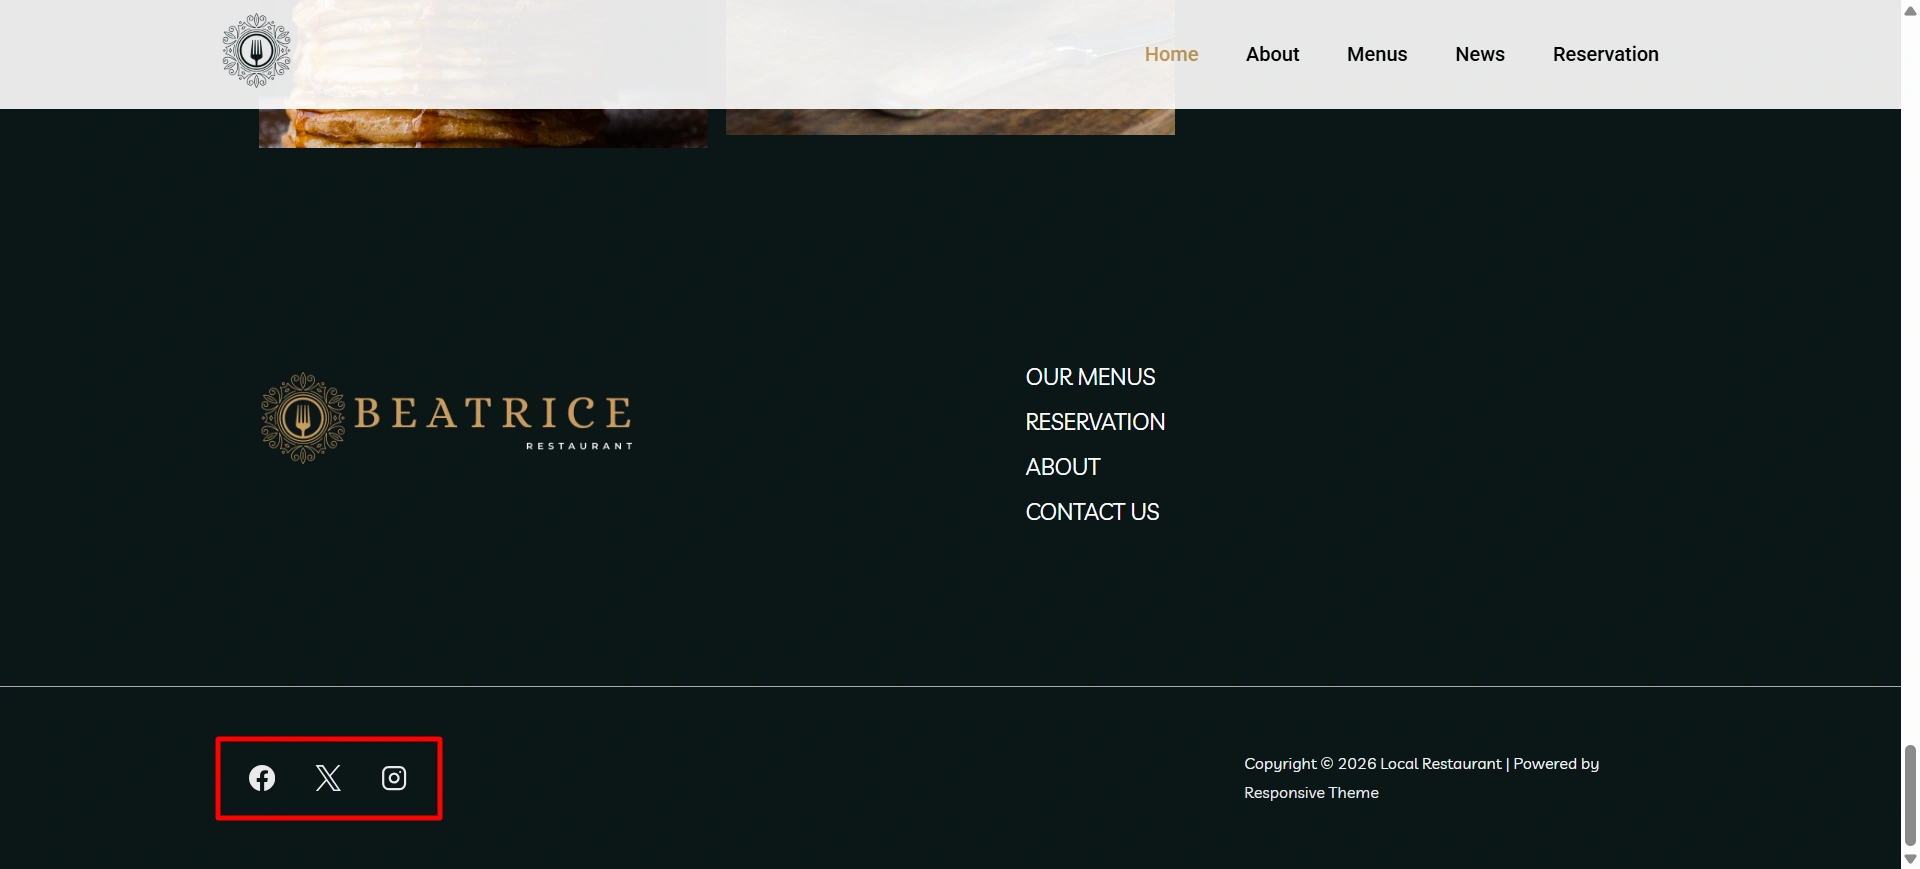
4. Social Media Integration
Food pairs perfectly with social media. Customers love sharing their experience eating out.
When you include social media links and feeds on your website, customers can learn more about the real-life experiences of other customers and stay connected to your brand. You can show Instagram posts, consumer photos, promotions, and more on your website to create ongoing engagement beyond your site.
The Restaurant Starter template makes it easy to put social icons on your website and seamlessly integrate your social presence.
5. Reviews and Social Proof
Positive reviews help people decide where to eat. Many customers trust online reviews just as much as recommendations from friends.
Showing customer testimonials, ratings, and feedback helps build trust in your restaurant and gives new visitors confidence that they will have a great experience.
6. High-Quality Images and Visual Storytelling
People see food before they eat it! We all know how powerful imagery is when creating desire for food and interest in the restaurant.
The Cyberchimps Restaurant Starter Template was designed with an image emphasis in mind, so you can show off your food and/or restaurant through image galleries and hero images, which will grab your customers’ attention when they visit.
7. Mobile-Friendly Design
A large number of individuals rely on their mobile devices to find places to go out to eat. As such, if your restaurant’s website is not designed with mobile users in mind, you could potentially lose the opportunity of a visitor within seconds.
When designing your restaurant website, you will want to ensure that all menu items, photos, and reservation capabilities function seamlessly across all mobile devices.
The Restaurant Starter website template was built to be fully responsive, allowing for all elements of your restaurant’s website to adjust automatically to any size of screen, with no need for further customization.
How to Import Restaurant Starter Template
Before you begin, make sure you have a domain name and a reliable WordPress hosting plan set up. Once your WordPress site is ready, follow these steps.
Step 1: Install the theme and Plugin
To start with the site, we first need to install the Responsive theme for its functionalities. It is free to use.
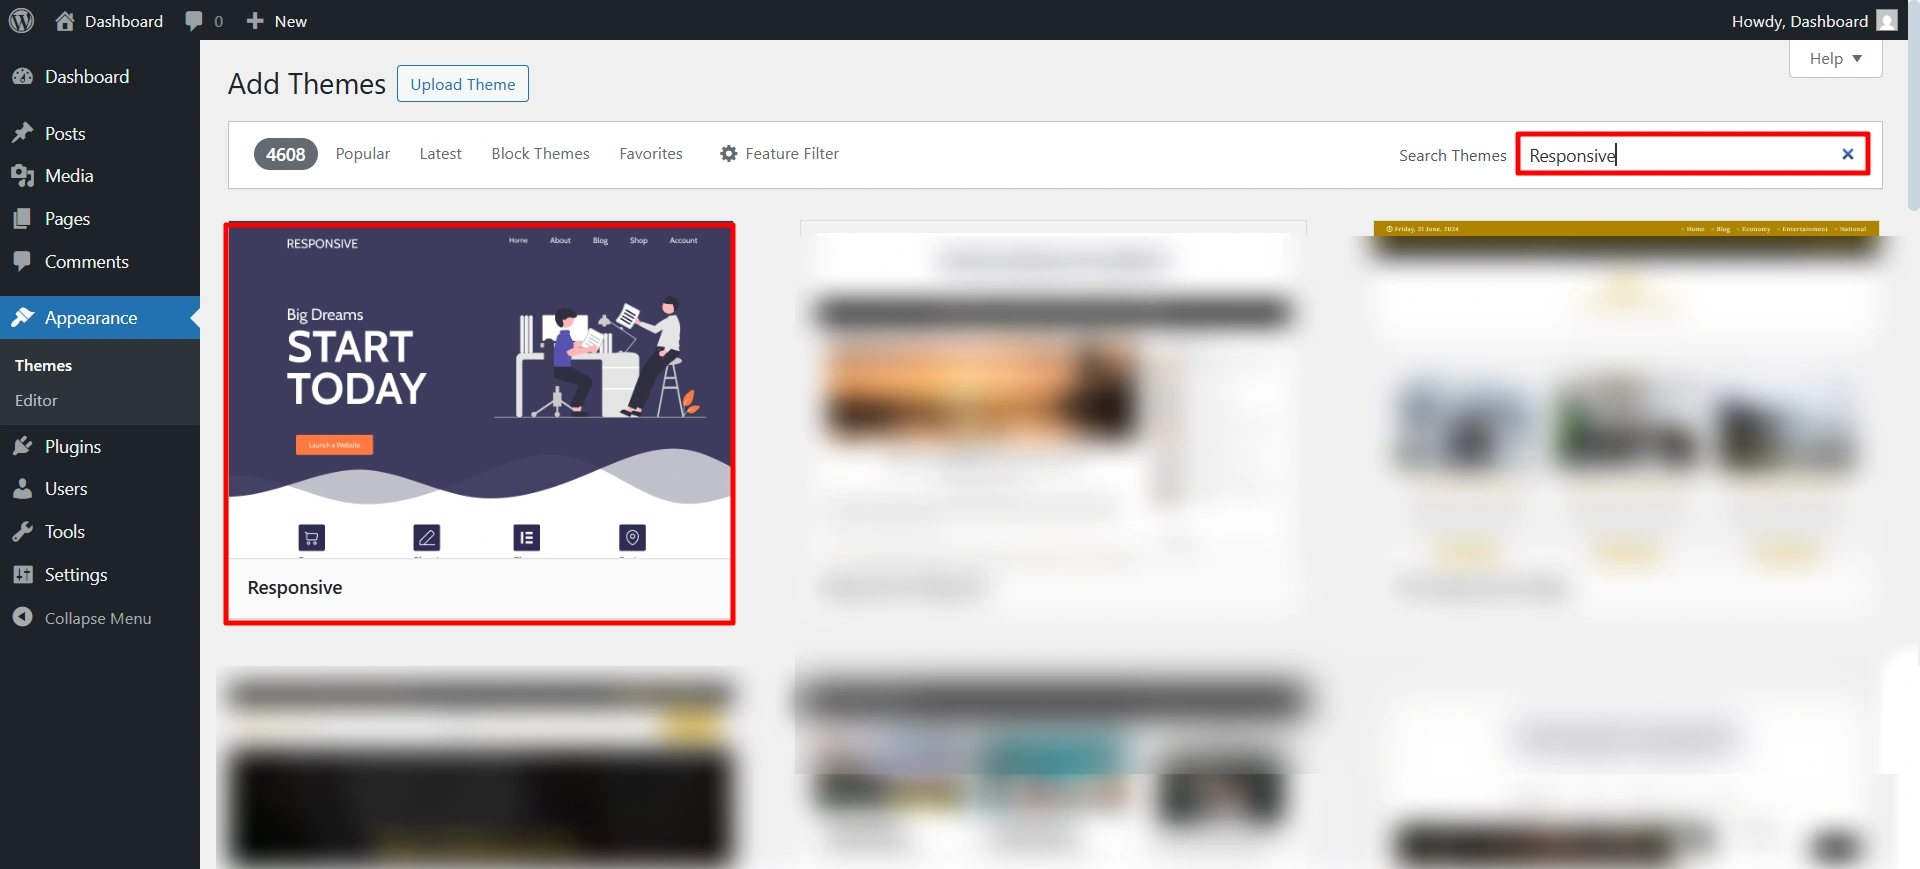
Navigate to your WordPress dashboard > Appearance > Add theme.
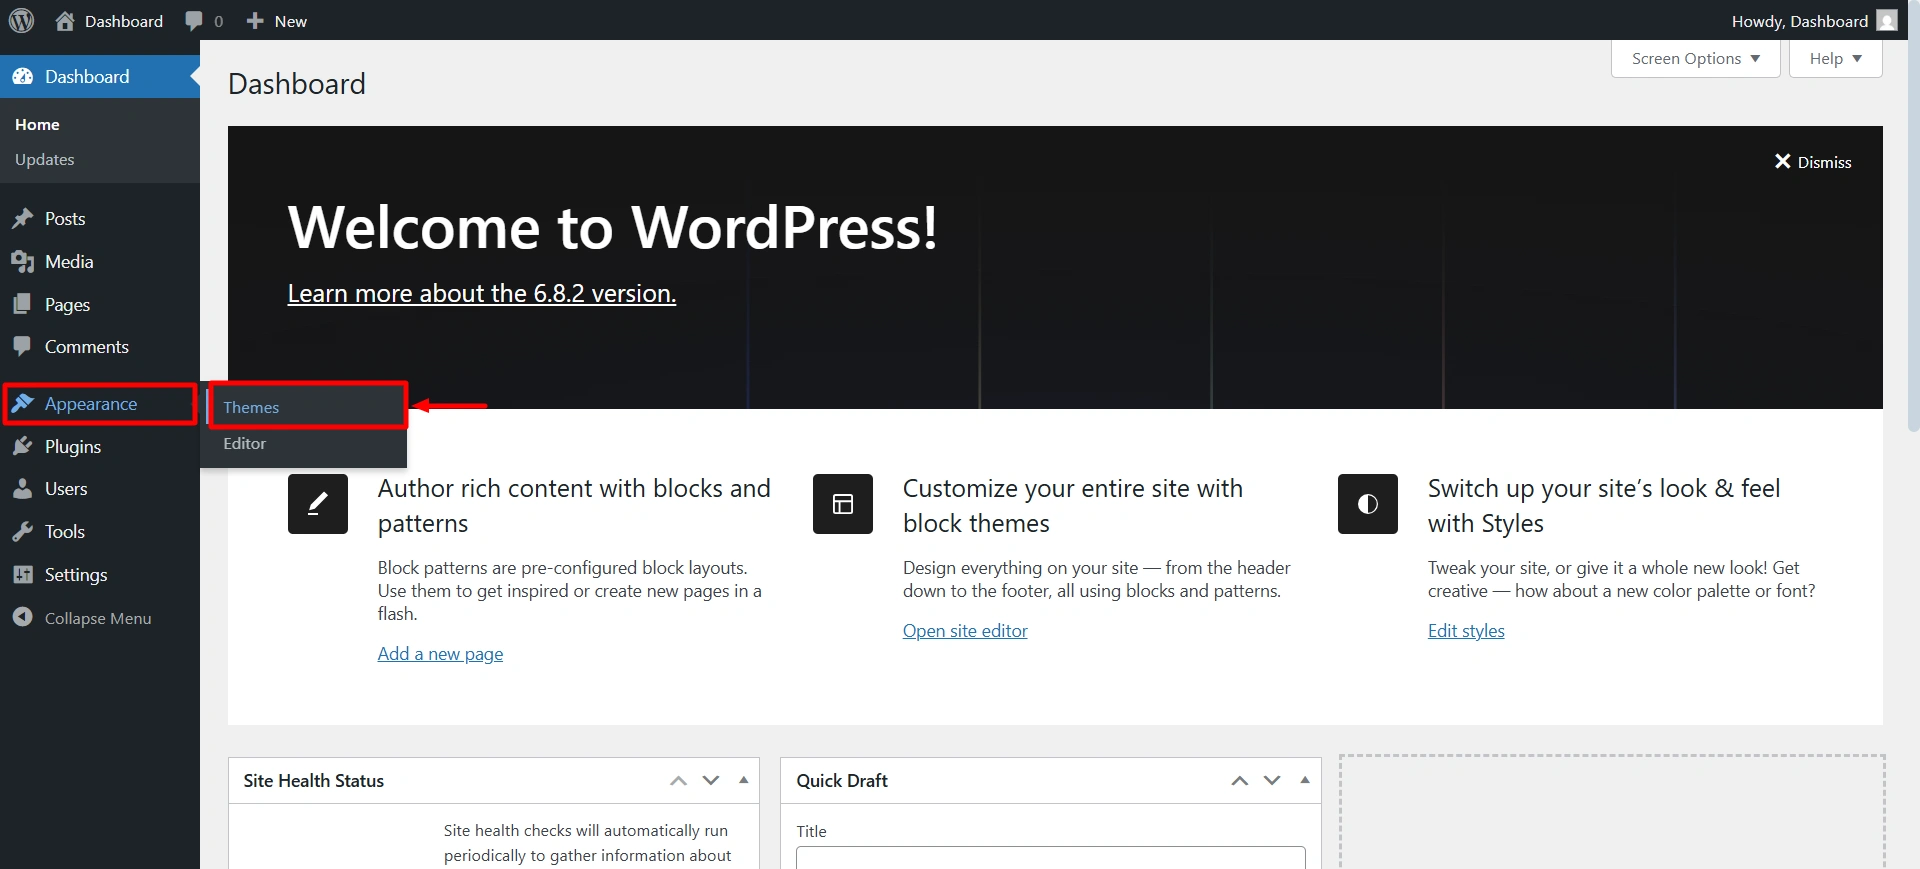
Search for the Responsive theme, and then click on install and activate.
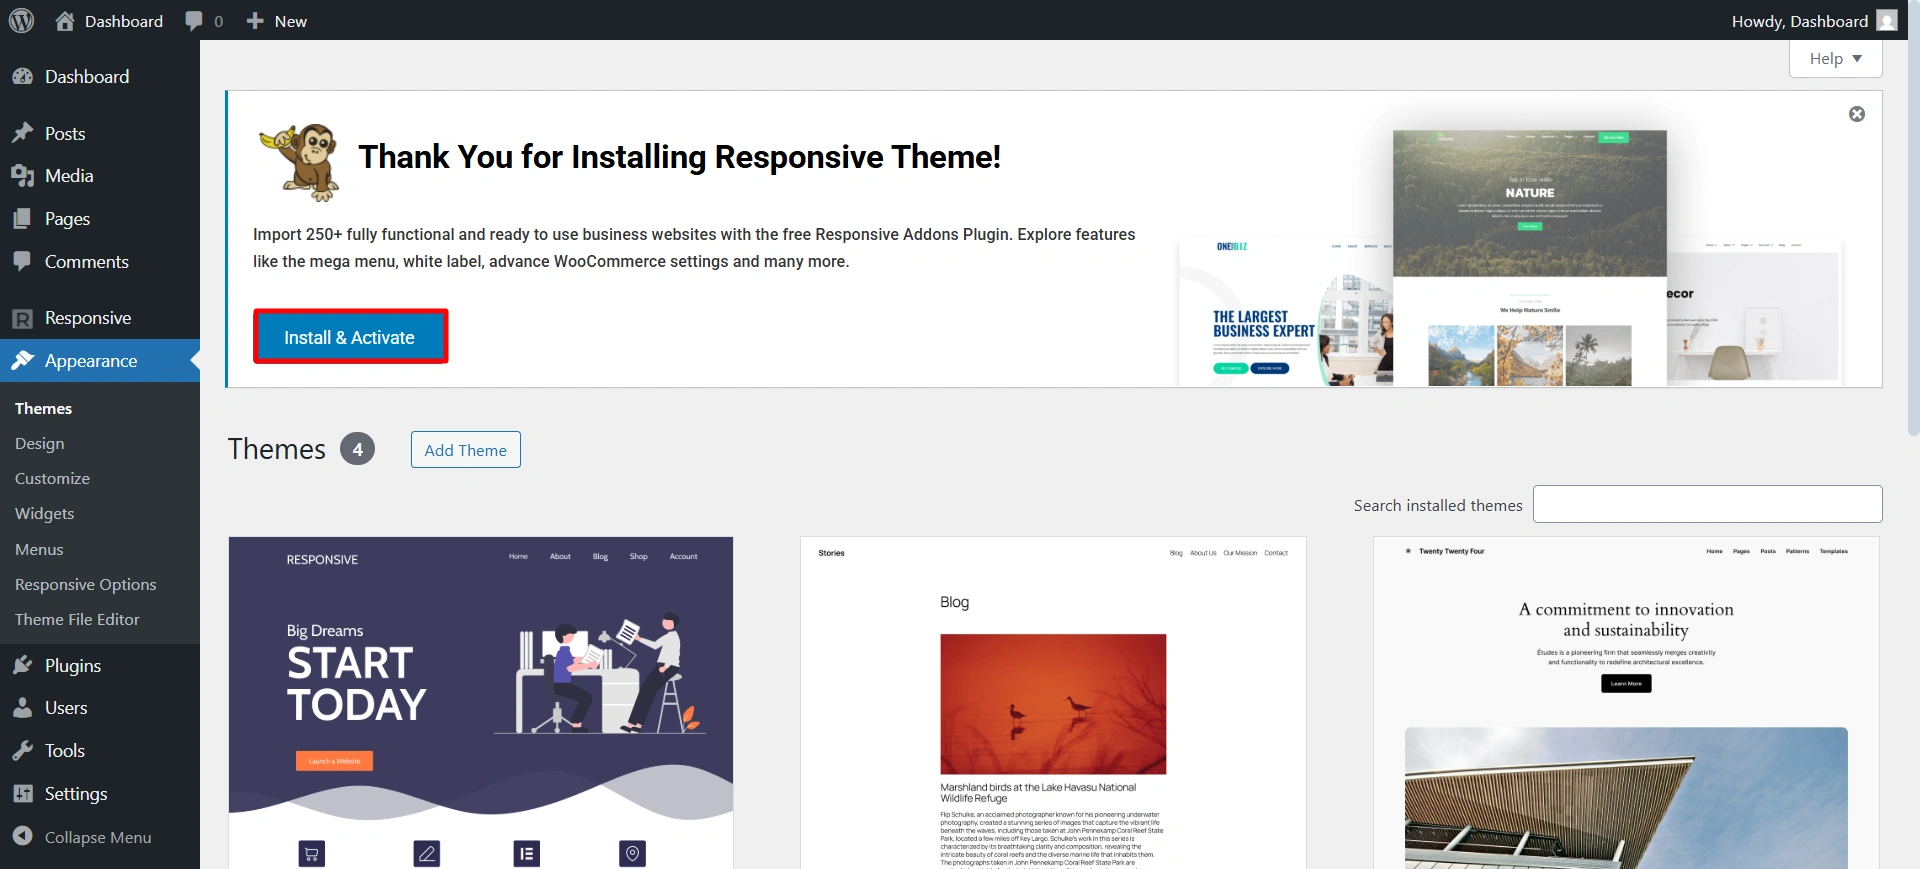
Once you install the theme, you will receive a notice at the top to install the Responsive Plus plugin. Click on install and activate.
Now you are all ready to install the restaurant template.
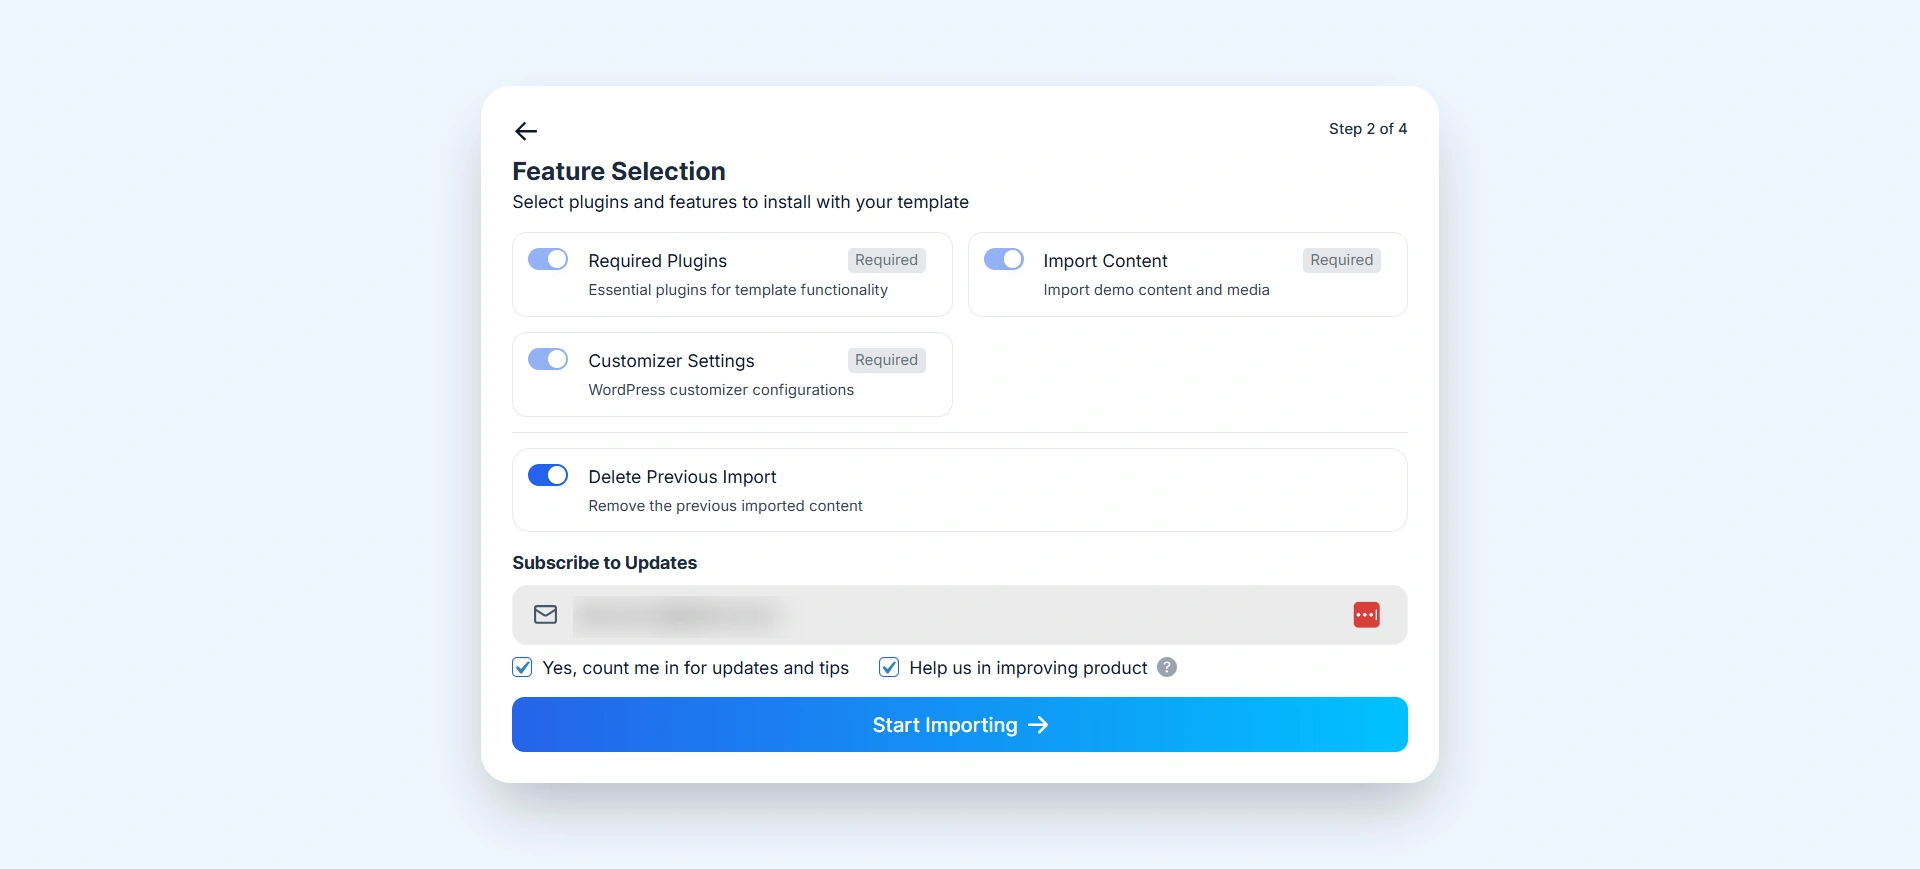
Step 2: Import the Restaurant starter template
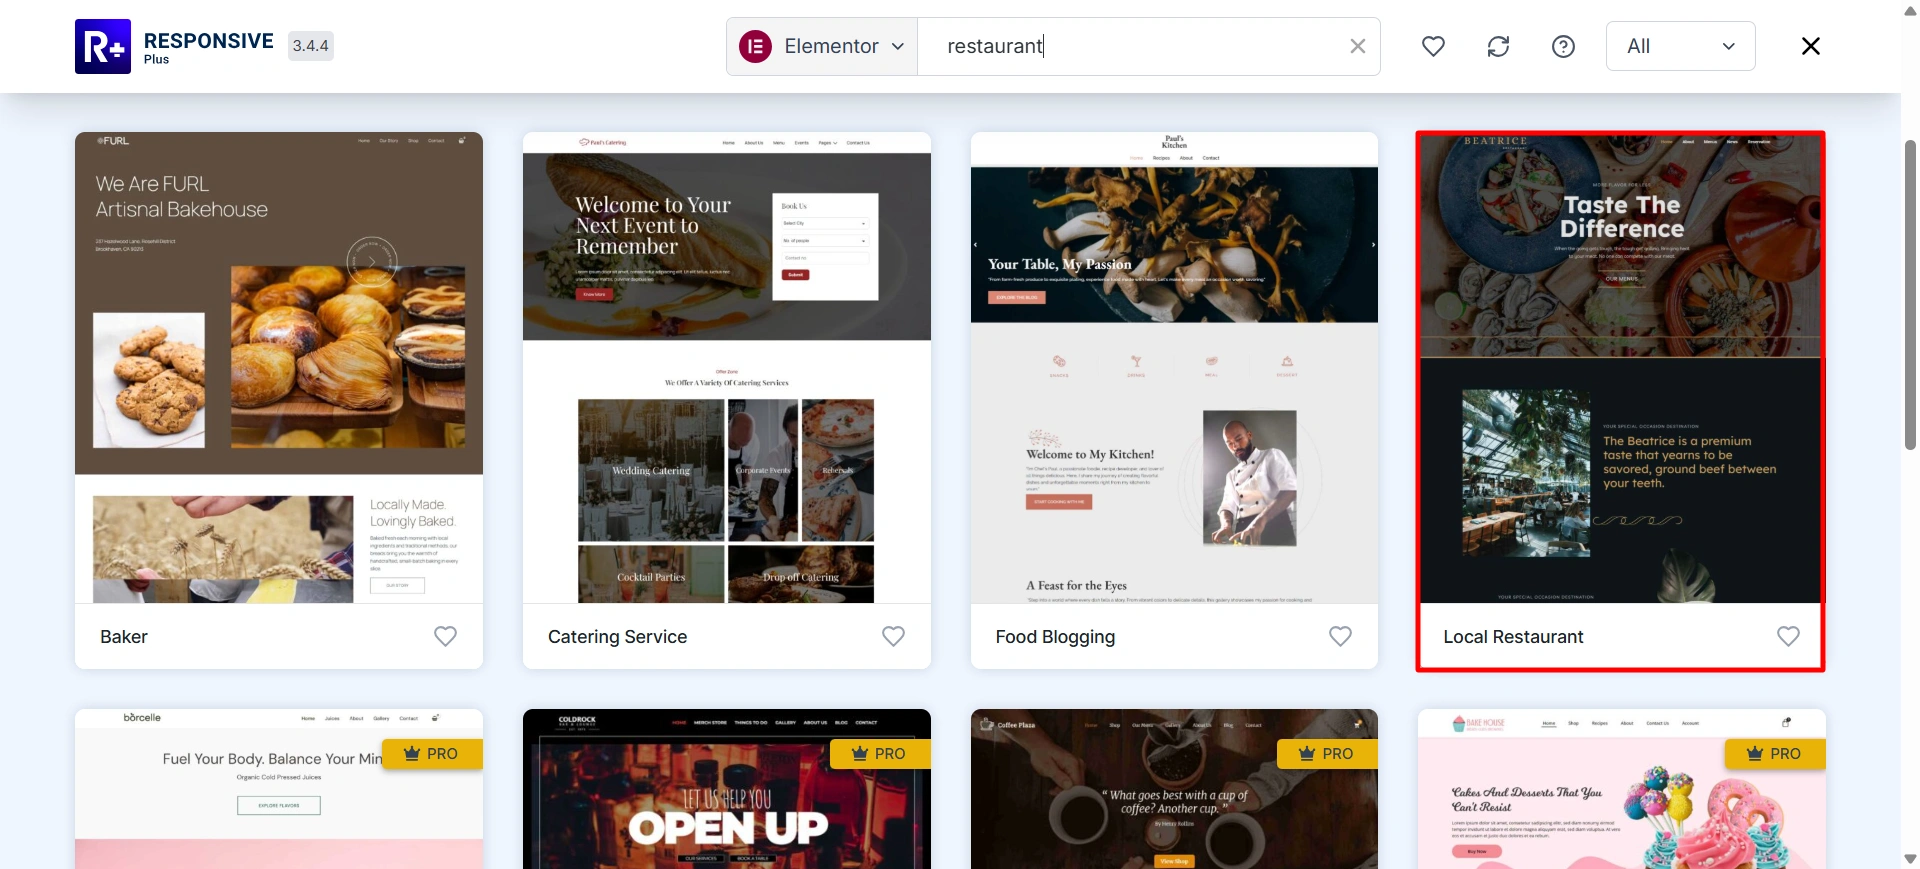
Use the search bar to find the restaurant.
After selecting the template.
On the preview page, you’ll find two options. You can import a single template or import the whole site.
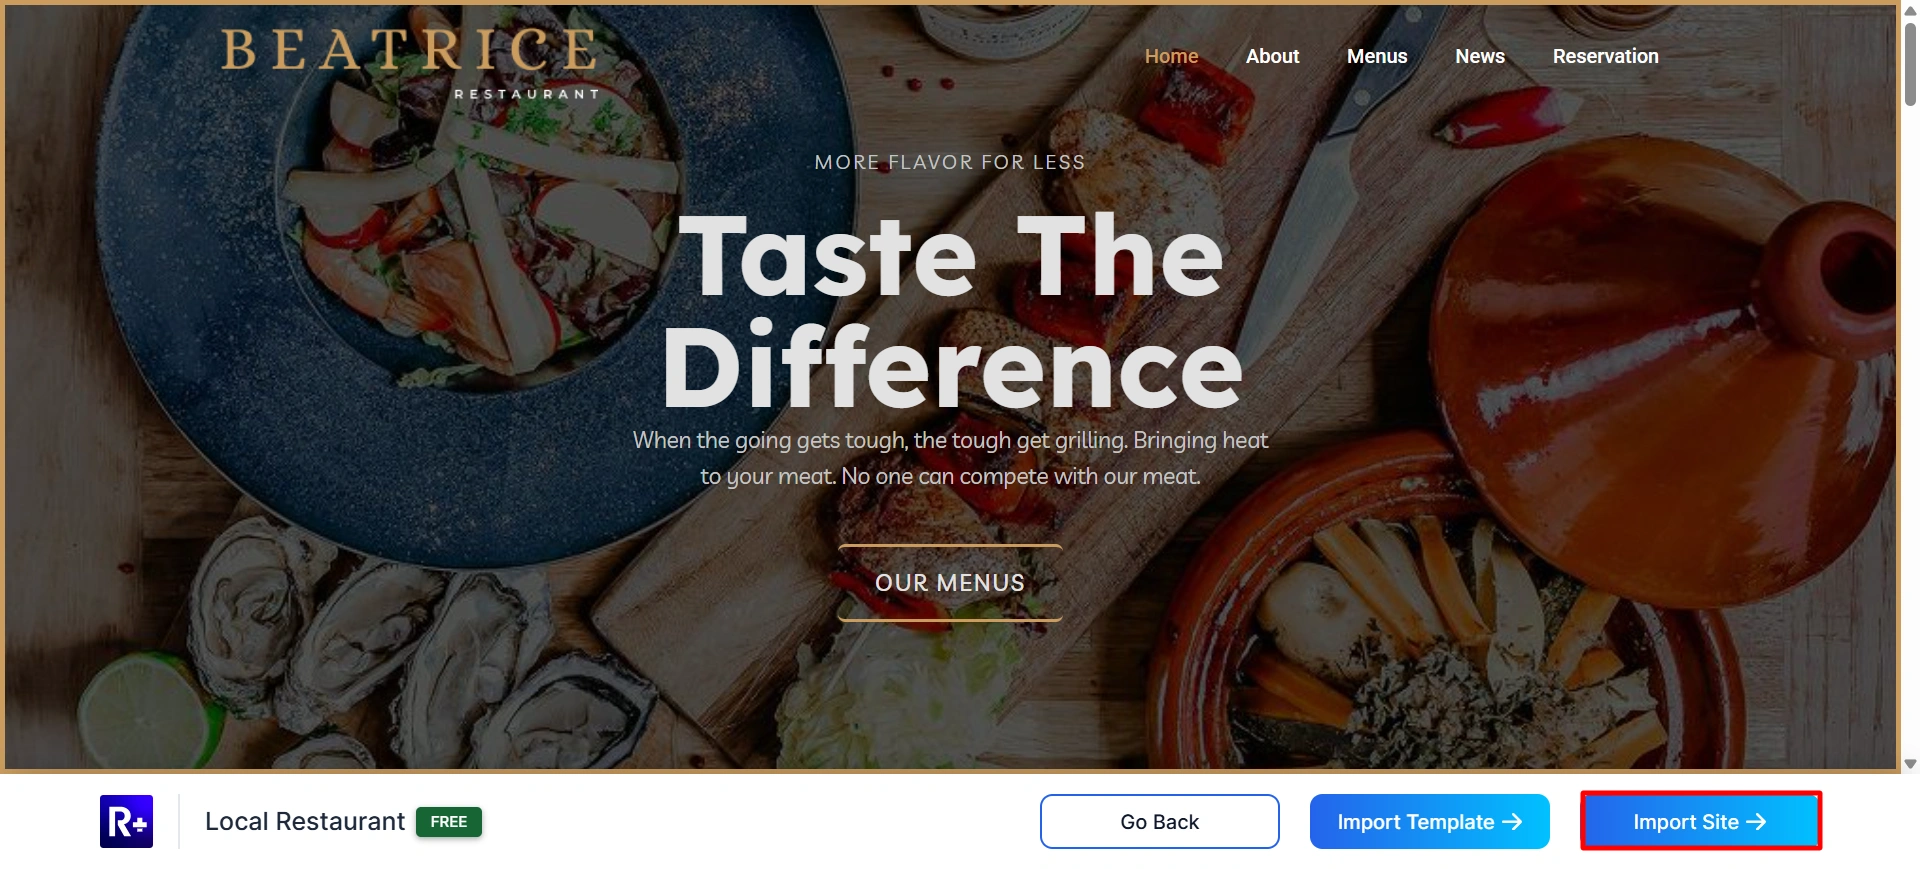
Click on Start importing to start importing the restaurant template.
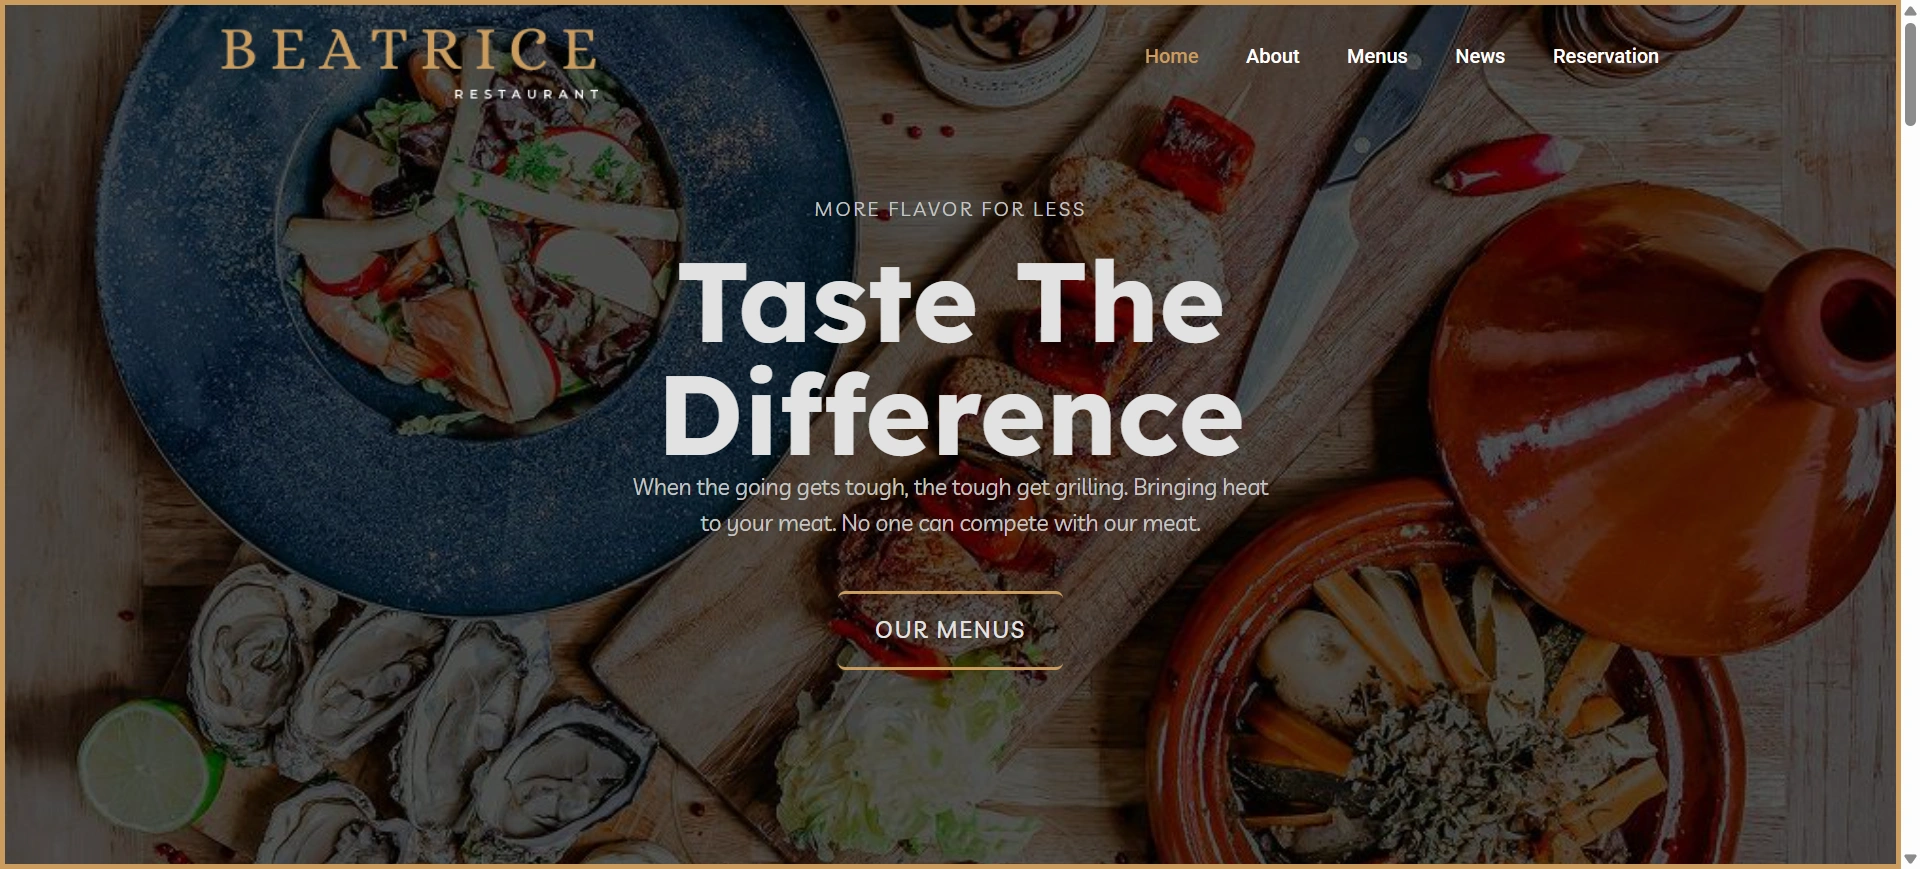
When the import is complete, click the Launch Site button to open the newly created website.
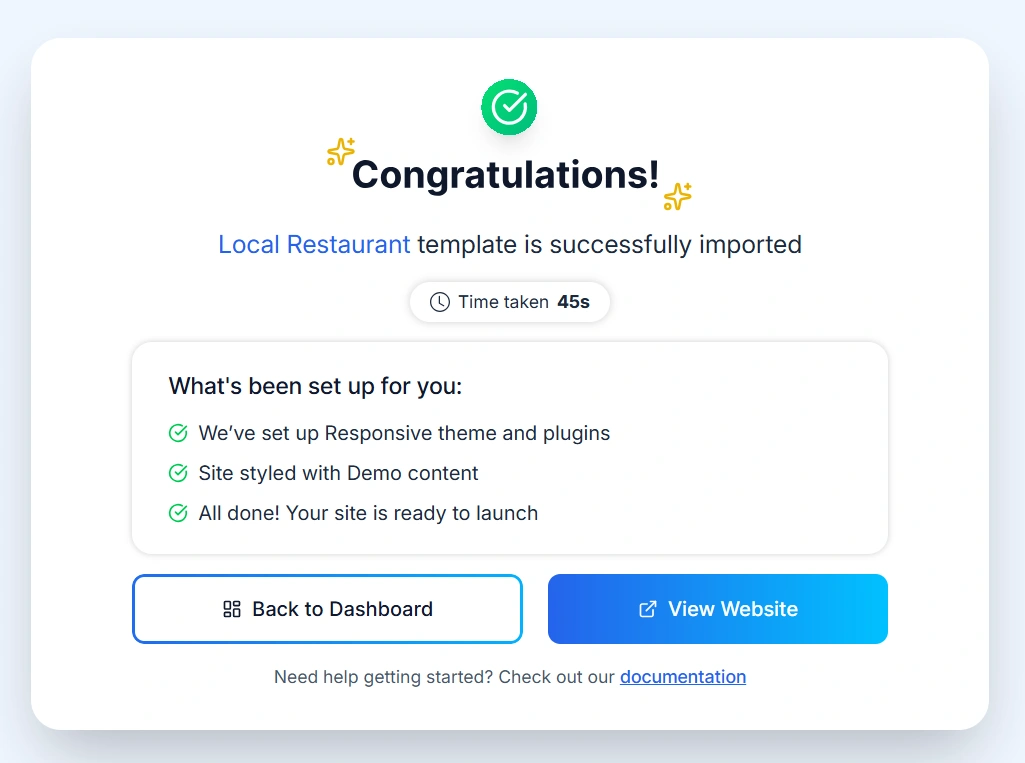
Now that you have imported the Restaurant website, it’s time to customize it.
Step 3: Customize with Your Content
You can change your website title and tagline from WordPress Dashboard > Settings > General.
Here, update the Site Title (your restaurant name) and Tagline (a short description of your restaurant). After making the changes, click Save Changes to apply them to your website.

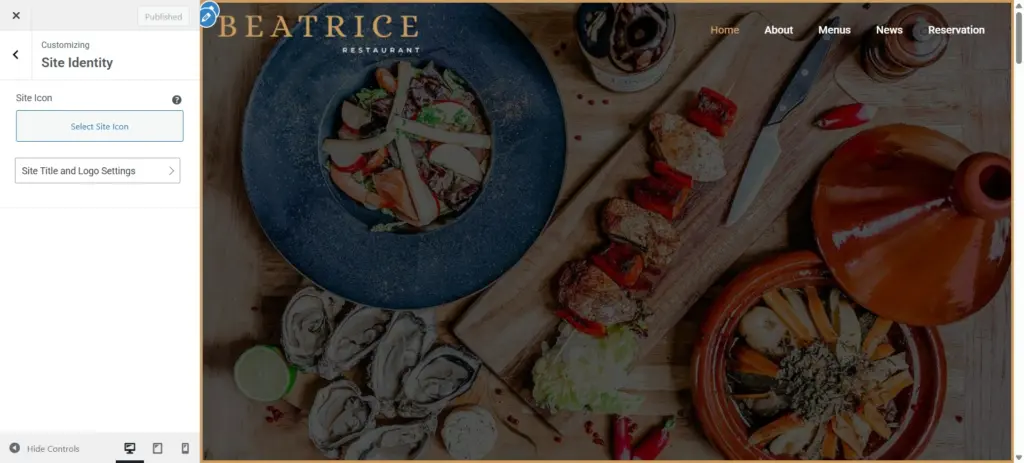
You can change the restaurant name and logo from Customize > Site Identity. From there, update your site title and upload your restaurant logo to match your brand.
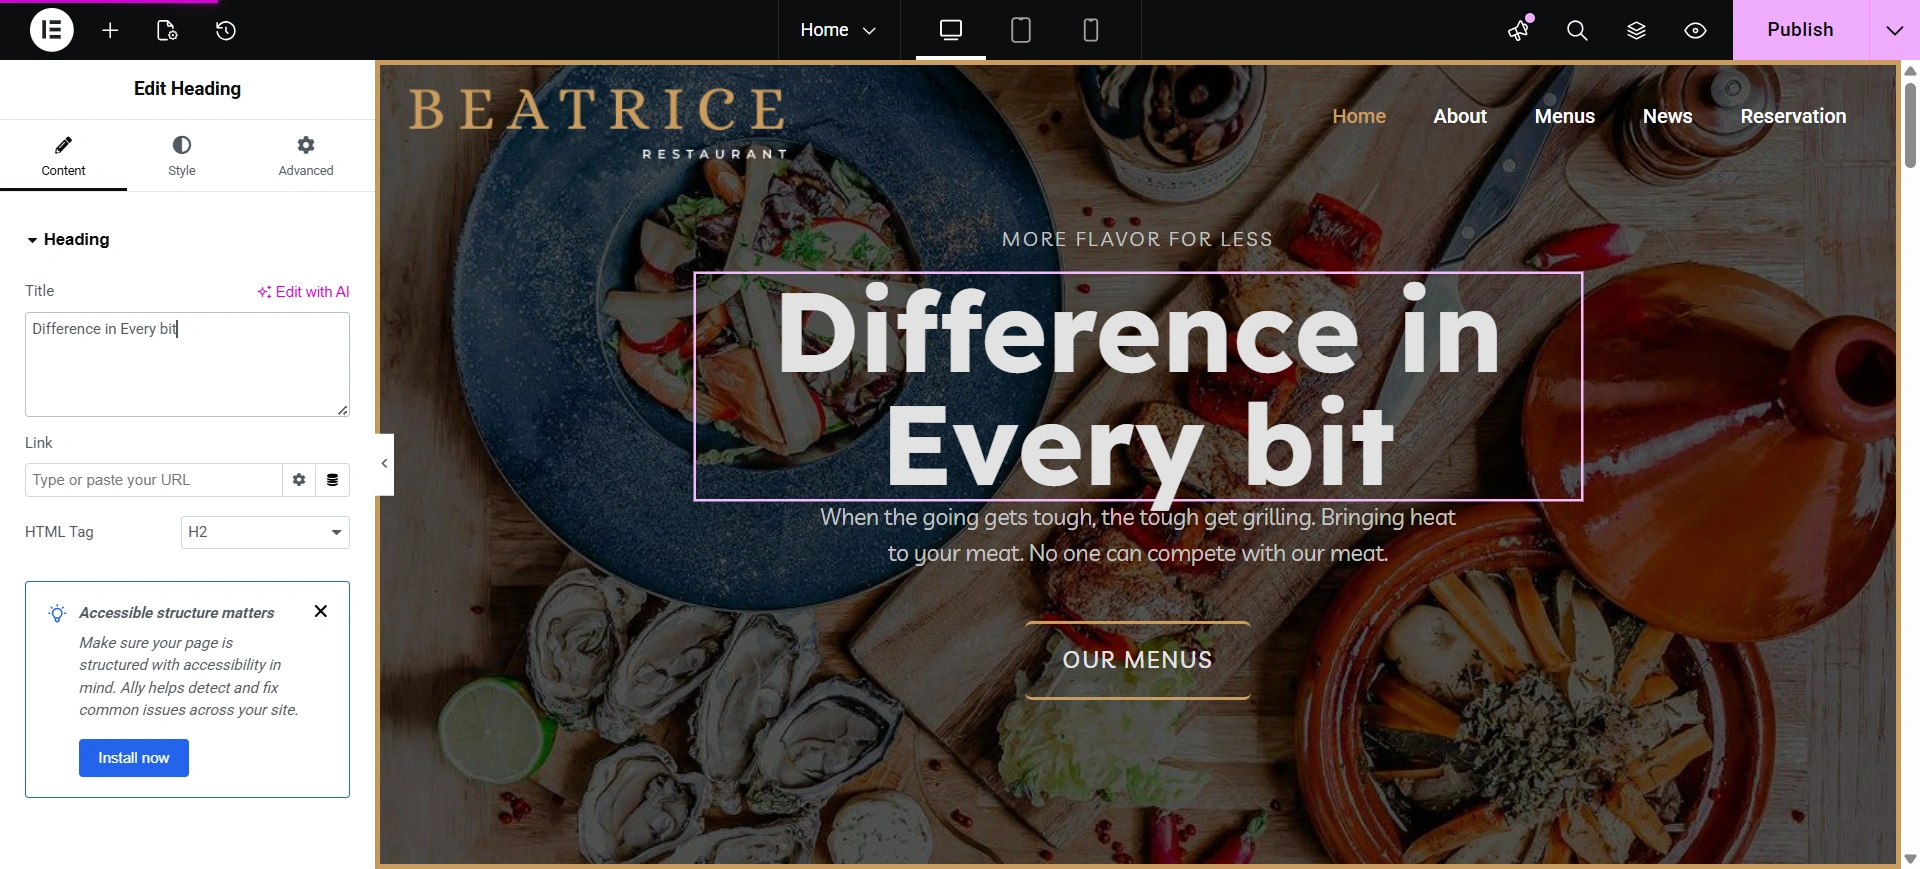
Click on edit with elementor.
And start by editing the basic information across the website.
- Add your address, phone number, and email
- Update opening hours
- Edit the About section to tell your restaurant’s story
Select the section you want to edit and change the text, color, and style.
FAQ
WordPress is flexible, beginner-friendly, and highly customizable. It allows restaurant owners to build professional websites without coding while supporting features like online reservations, menus, galleries, and ordering systems. Using the Cyberchimps Responsive Theme with Starter Templates makes the setup even faster.
You can integrate reservation plugins with WordPress to allow customers to book tables online.
Using a starter template, you can set up the basic website in under an hour. Customizing content, images, and menus may take a few additional hours depending on your requirements.
Costs typically include:
1. Domain name
2. Web hosting
3. WordPress theme or plugins (optional premium features)
Using the Cyberchimps Responsive Theme and Starter Templates keeps costs low compared to hiring a developer or agency.
Conclusion
It’s easy to create a restaurant website. Include important items such as an online menu, online reservations/booking, online contact details, customer reviews, high-quality food photos, and a design that works well on mobile devices.
Using a combination of WordPress and the Cyberchimps Restaurant Starter Template will allow you to get your restaurant website up and running quickly and easily because you will not have to create something from scratch.
All you need to do is customize your content with your menus, images, and other details to establish a professional online presence and increase the number of diners that come into your restaurant.
If you liked reading this article, don’t forget to check our other popular article:
- Top WordPress Security Plugins
- How To Start A Blog Using WordPress
- How Much Does It Cost to Build a WordPress Website?
Want to build a website? Grab the Responsive theme now!