Summary
The article explains how to add an Elementor timeline to your website. It defines a timeline and why it’s useful.
Guiding you to insert the timeline widget, add events or milestones, and choose layout options. It also covers style settings like icons, colors, and spacing.
Are you wondering how to add an Elementor timeline to your website?
Adding a timeline to your WordPress website can be the most suitable way to showcase your business milestones or tell a story in a visually appealing manner.
It enhances the user experience and provides a chronological perspective that can effectively engage and inform your visitors.
An easy way to add a timeline to your WordPress website is by using an Elementor timeline widget.
This article will cover all the technicalities you’ll need to add and customize the Timeline Elementor widget on your WordPress website.
Let’s get started.
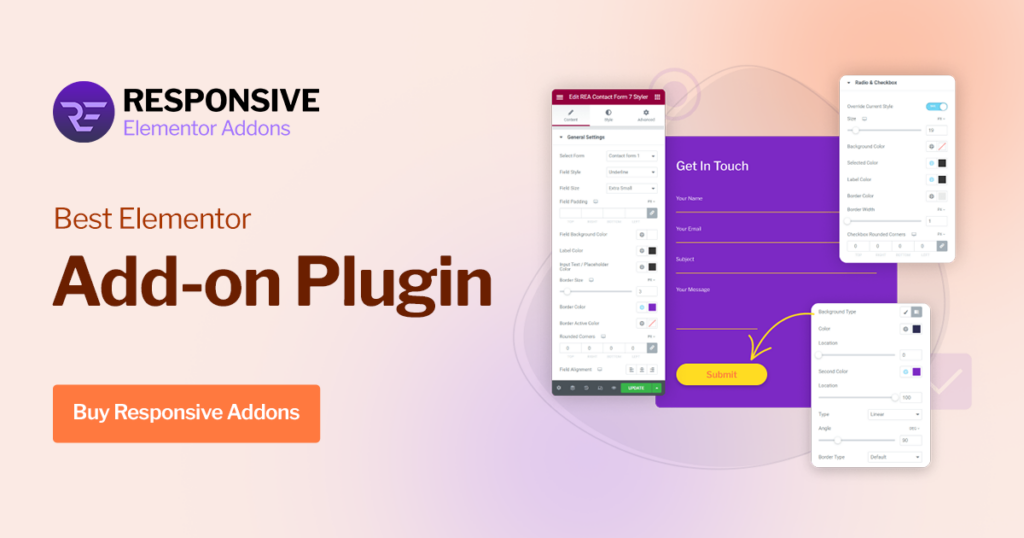
Responsive Addons for Elementor is the Best Elementor Addons plugin – Get it for free!
What is Elementor Timeline Widget?
Elementor Timeline Widget is a powerful and versatile tool that allows you to create timeline within your WordPress website using the Elementor page builder.
It enables you to arrange your content in chronological order, making it easy for your visitors to follow and understand the progression of events, milestones, or any other information you want to showcase.
Moreover, the customization settings allow you to tailor the timeline to match your website’s branding and design, ensuring seamless integration with the look and feel of your WordPress site.
Pre-requisites for Creating a Timeline in WordPress
Creating a timeline for your WordPress website can be a complicated task, as it requires extensive coding.
However, there are various tools and plugins available that simplify the process and remove the hassle of any coding.
First, you’ll need the Elementor Page Builder for customizing and editing various elements. Next, you’ll need a third-party Elementor Addons plugin that offer a free timeline widget.
One such plugin which we recommend you to use is Responsive Addons for Elementor.
???? My Real-World Test Results:
- Number of widgets: 80+
- GTmetrix Performance Score: 100%
- Includes Cross-site Copy-paste feature
- 5+ Extensions like Scroll animations, Sticky Section, Page Duplicator, & more.
- Save design time with 100+ Premium-grade Starter templates
Responsive Addons for Elementor is a free and powerful WordPress plugin that enhances the functionality of Elementor page builder.
The plugin offers more than 80 drag-and-drop widgets, including the free Timeline Elementor widget, which helps you to make your website more interactive and functional. Additionally, you get a free theme builder that allows you to easily customize your website.
Now, let’s move into understanding how we can add the timeline widget using the Responsive Addons for Elementor.
To add a free Timeline Elementor widget to your WordPress website, follow these steps:
How to Add an Elementor Timeline To Your WordPress Website

[Note: To use the timeline widget, you must have a website template built with the Elementor page builder].
Cyberchimps offers 150+ Elementor templates that you might consider using to build your website instantly.
To add the timeline, follow these simple steps.
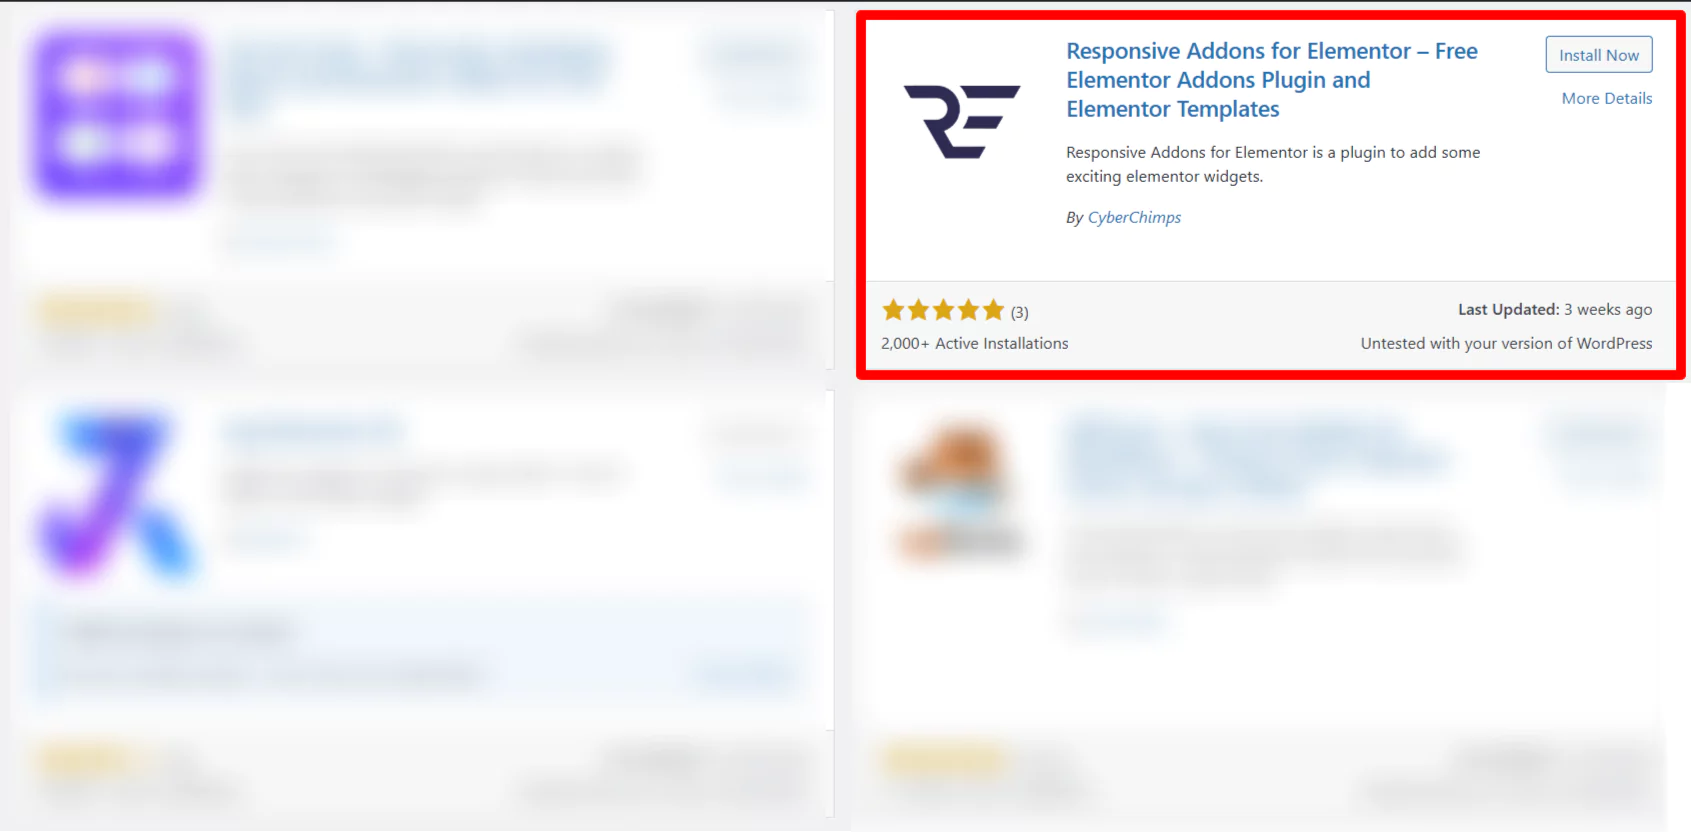
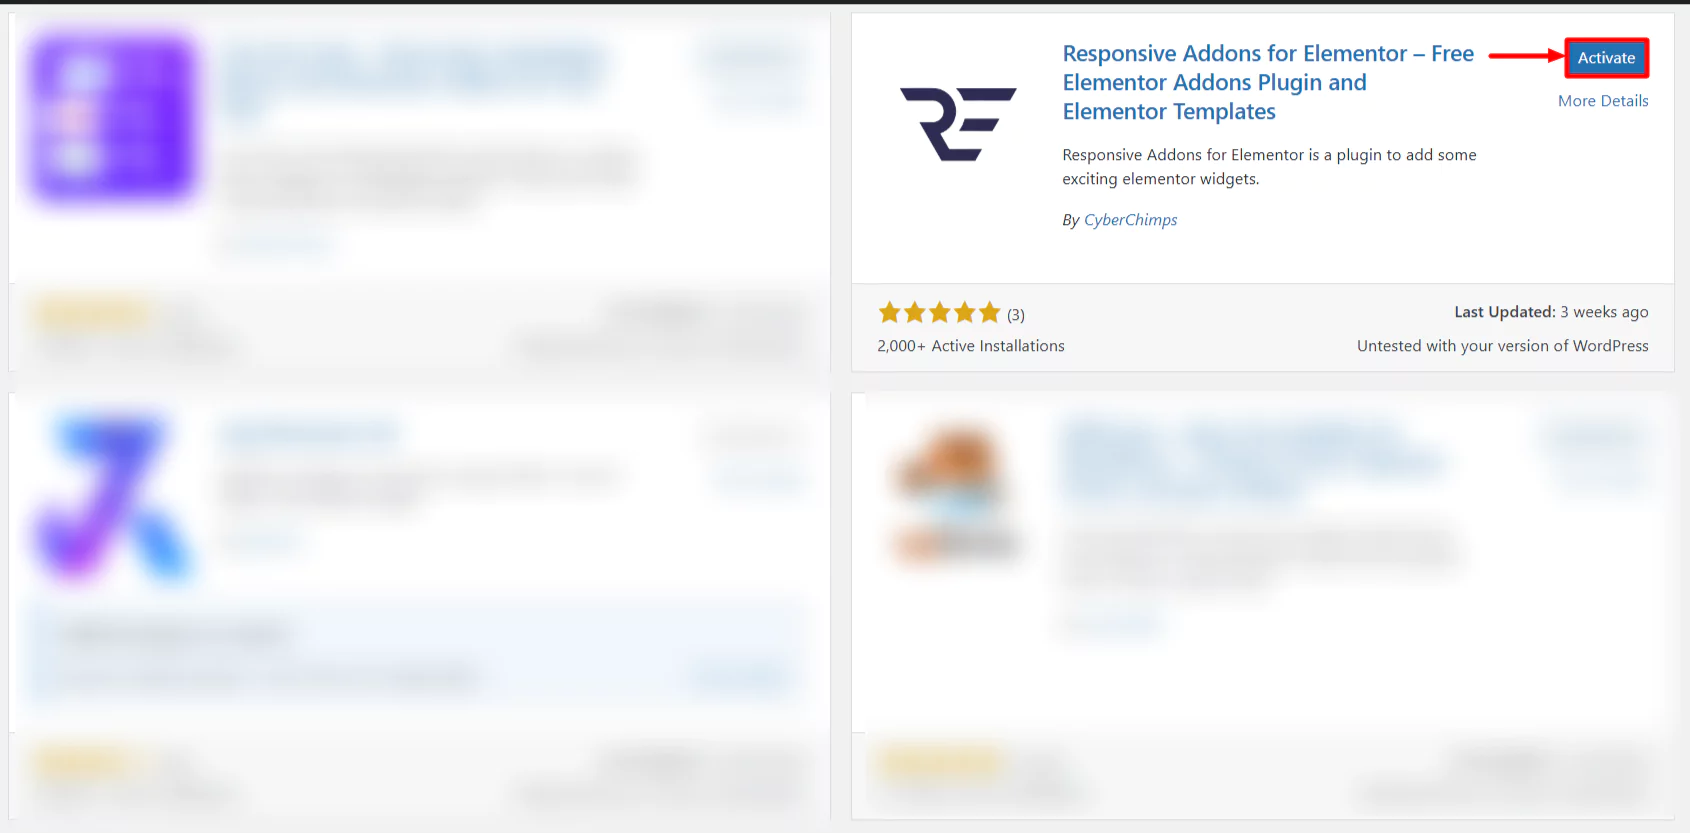
Step 1: Install and Activate Responsive Addons for Elementor
Navigate through your WordPress Admin dashboard and go to Plugins > Add New Plugin.
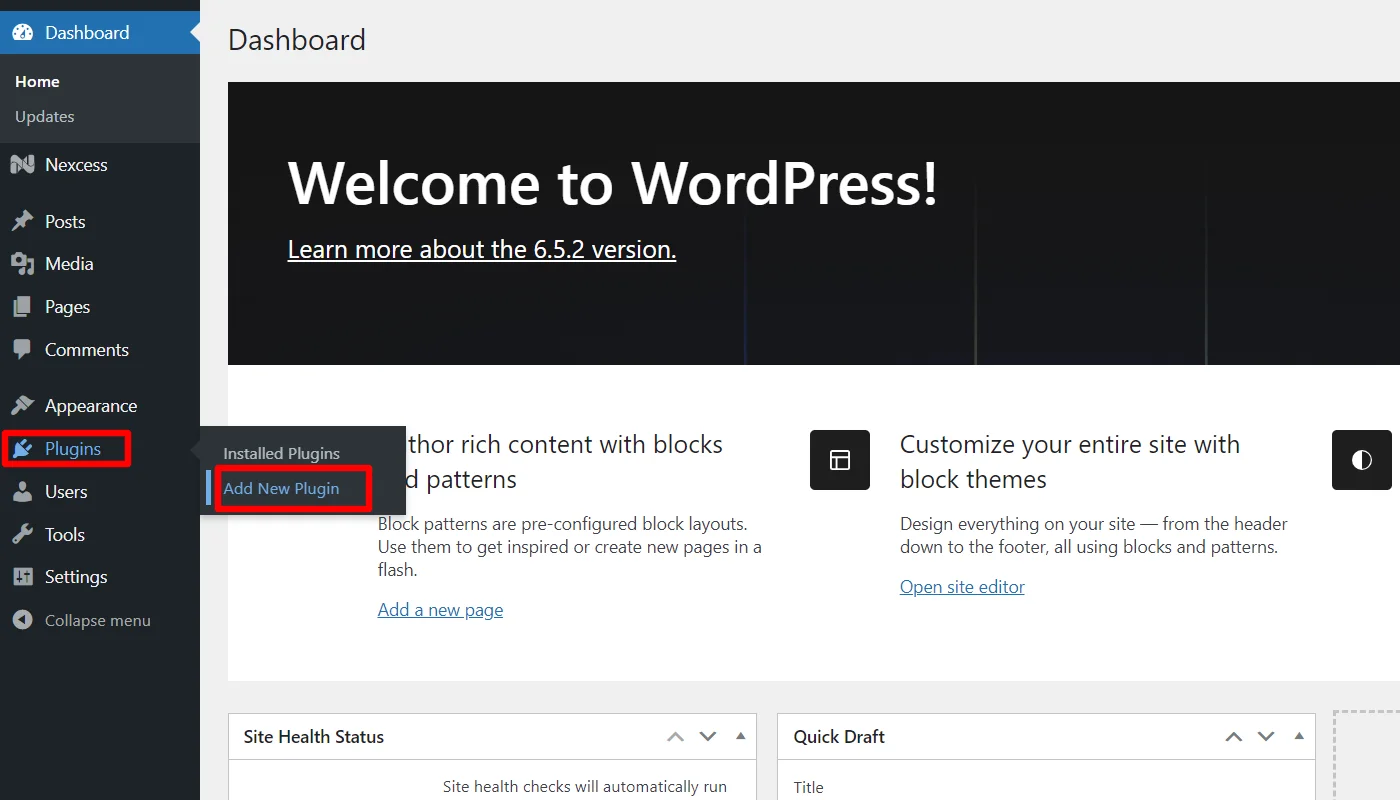
Go to the search bar above and search for Responsive Addons for Elementor.
Next, click on the Install Now button.
After installing, click on the Activate button to activate the plugin.
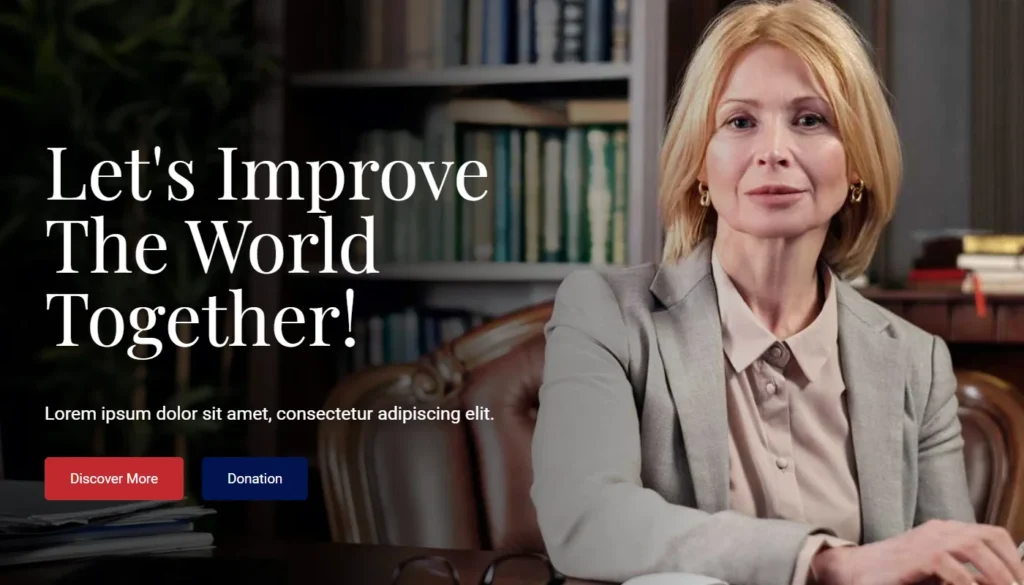
Once you’ve activated the plugin, open the page where you want to add the timeline. For tutorial purposes, we’ll be using the Leader WordPress Website Template.
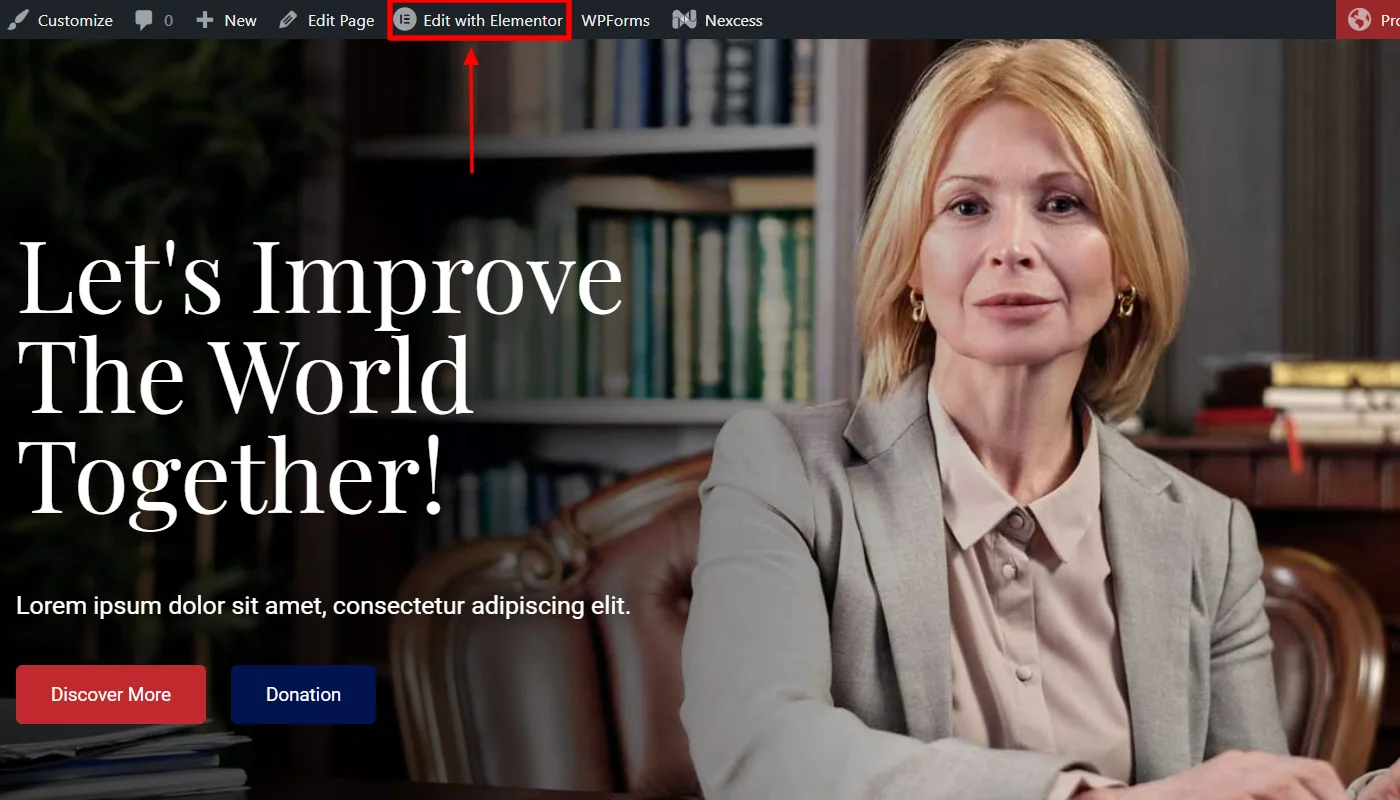
Step 2: Adding The Timeline Widget
Click on Edit With Elementor on the page you want to edit.
Next, on the left sidebar, search for Timeline.
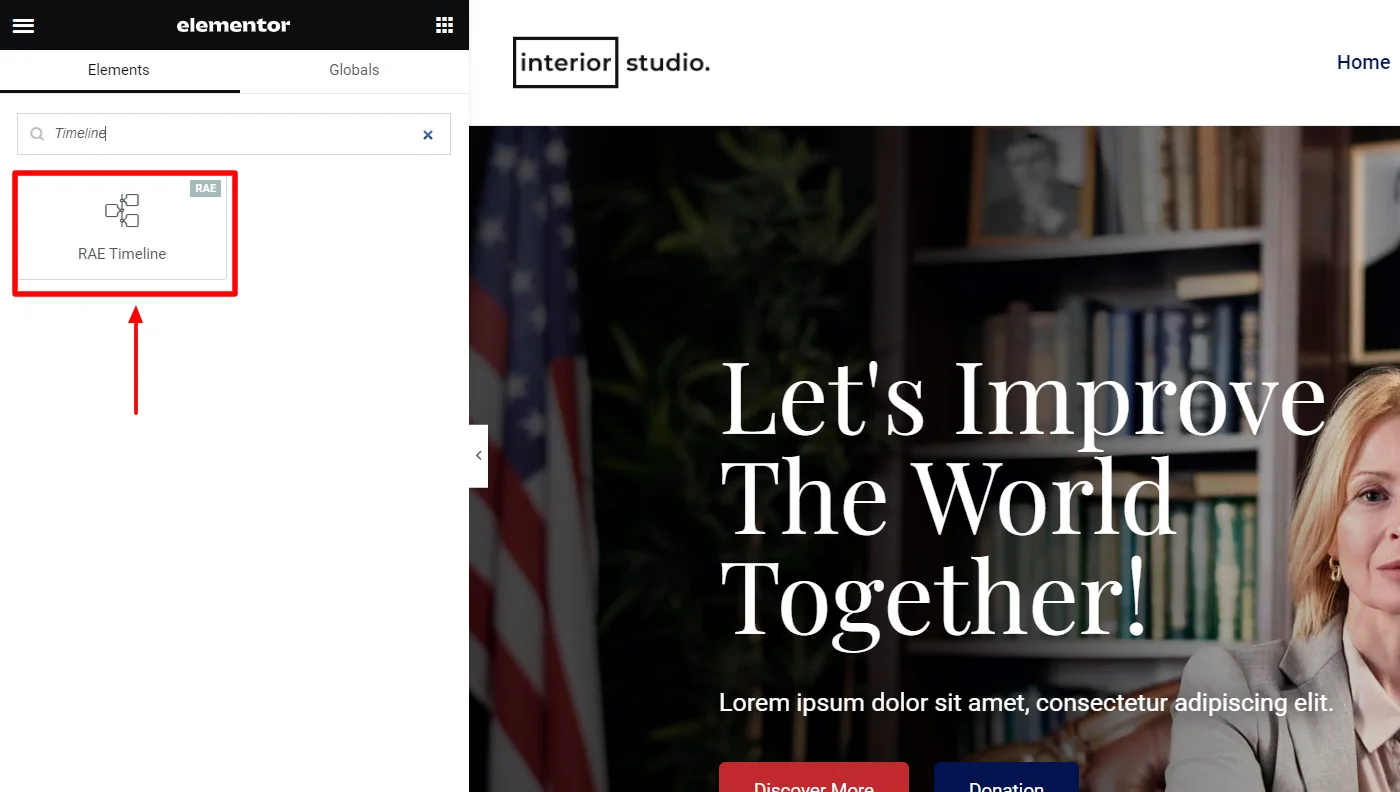
Drag and drop the RAE Timeline Widget in the section where you want to add it.
With this, you have successfully added the timeline widget; now, let’s understand how to customize it.
Step 3: Customizing The Timeline Widget
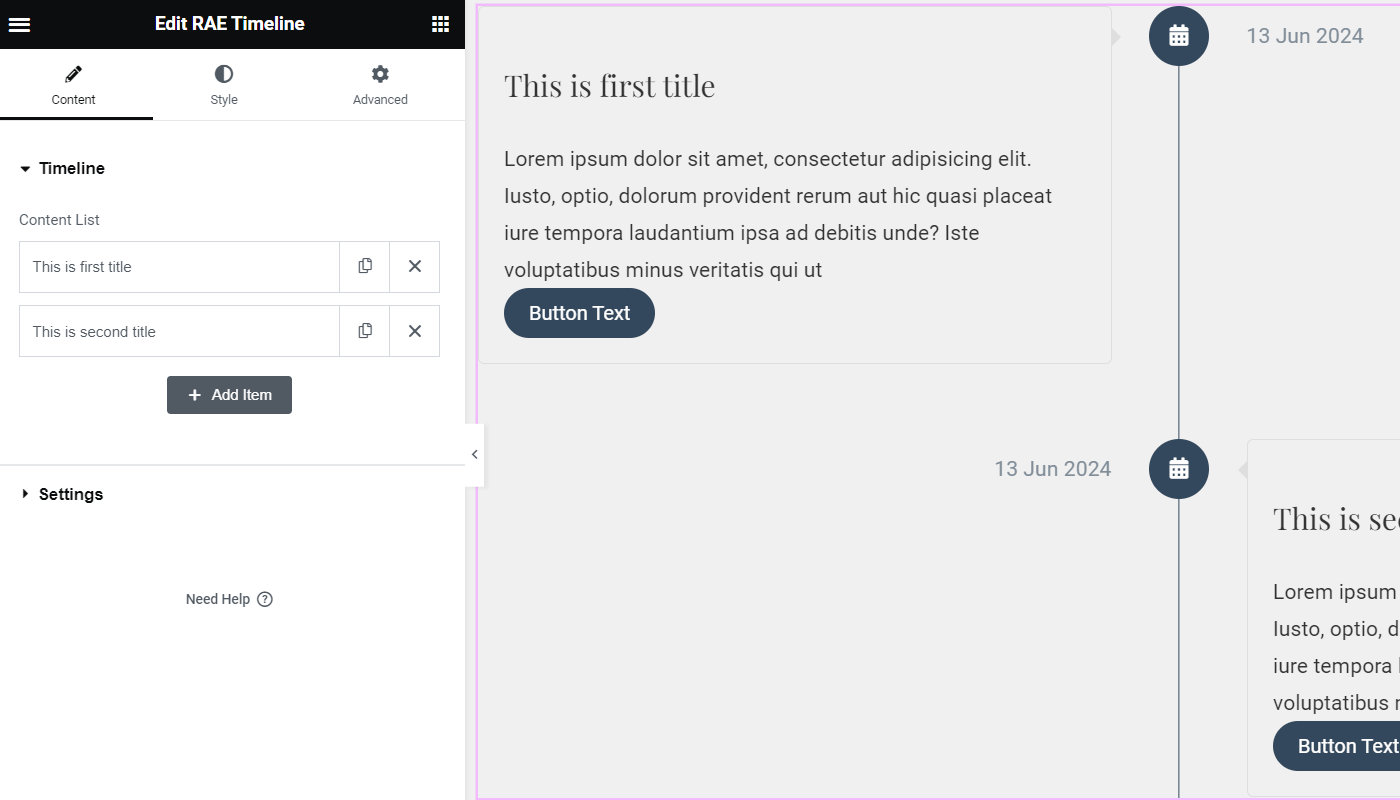
The timeline widget offers various customization options to enhance the appearance of your timeline. Here are the various elements you can edit:
Click on the title you want to edit. The controls in this section allow the user to add new items to the timeline. Each item has the following controls:
Timeline Content Settings
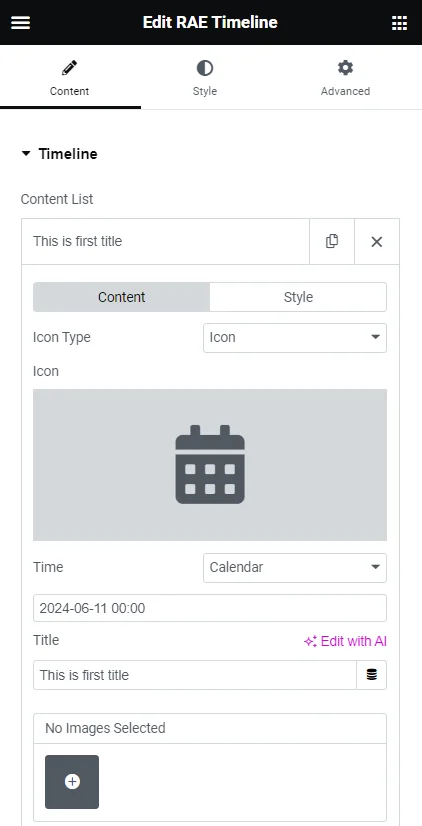
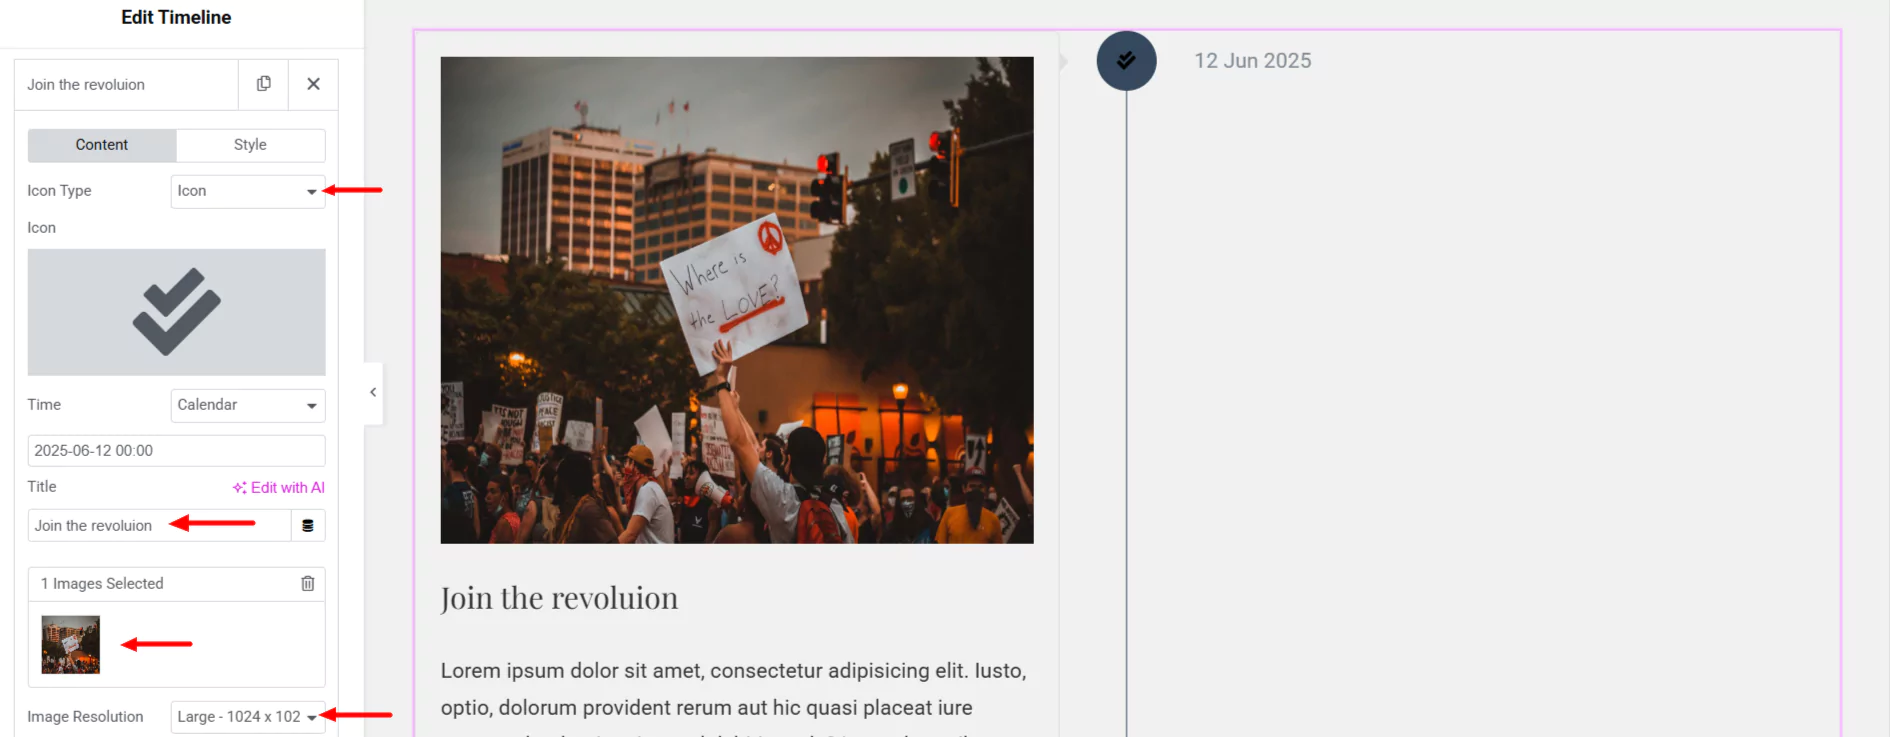
- Icon Type – Select whether to display an icon or image on the timeline tree for that item.
- Image/Icon – You can add an icon or image for that item to display on the timeline tree.
- Time – select the input method(calendar or text) for the time. The field below could be a calendar to set the date and time, or it could be a text field to manually enter the date and time.
- Title – Add the title for the item.
- Gallery – Allows you to add images to the gallery to showcase them on the item’s content body.
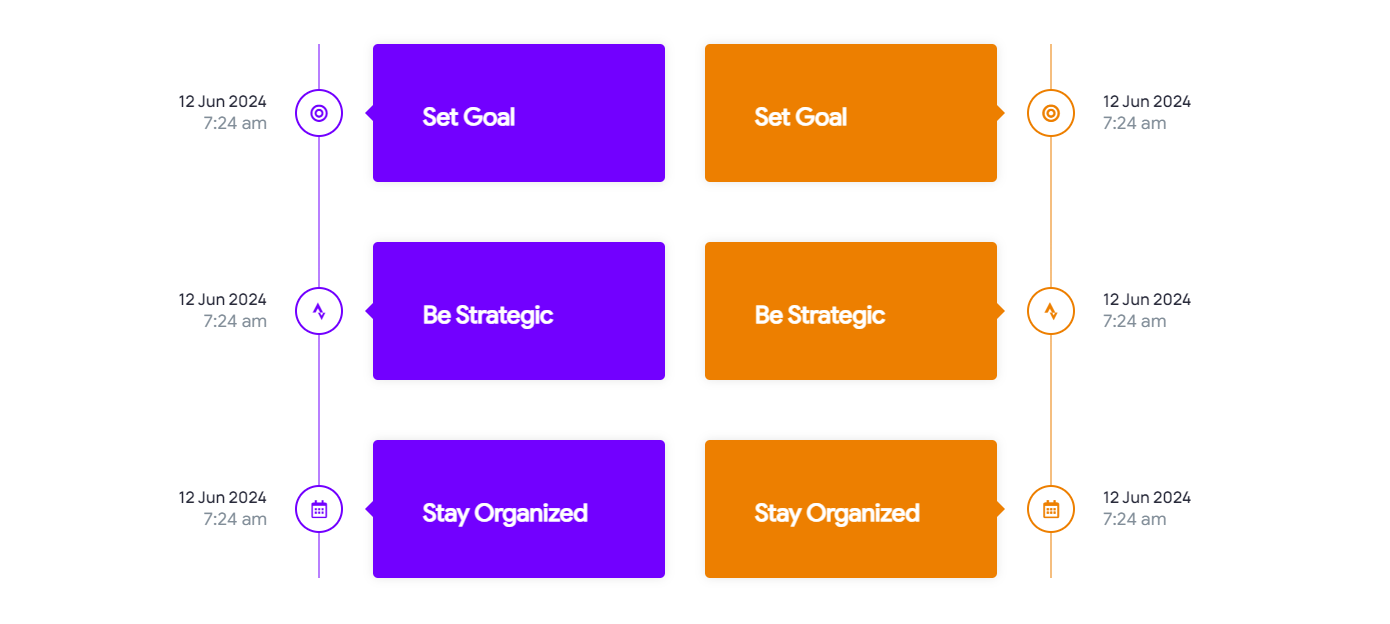
You can use these settings to make your timeline look like this.
Here are more options under the timeline settings.

- Image Size – Select the image size for images in the gallery.
- Image Position – Set the gallery images’ position within the item’s content body. The images’ position could be set before the title or after the main content.
- Content – You can add the item content through a WYSIWYG editor.
- Button Text – Allows you to add the text for the item’ button. If the field is left empty then the button will not be displayed.
- Button Link – Easily add the link for the button.
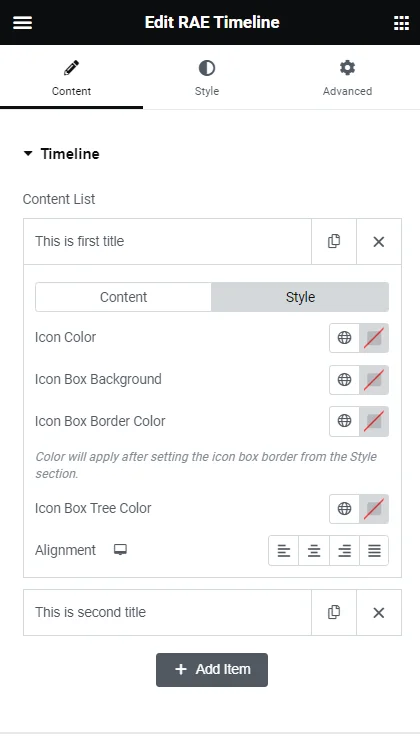
Timeline Style
- Icon Box Background – Set the background color for that particular item’s icon.
- Icon Box Border Color – Set the border color for that particular item’s icon. Border color will be applied after setting the border from Style > Icon Box > Border Type and Border Width.
- Icon Box Tree Color –Select the color for the timeline tree of that particular item.
- Alignment – Edit the alignment of the overall content within the item box.
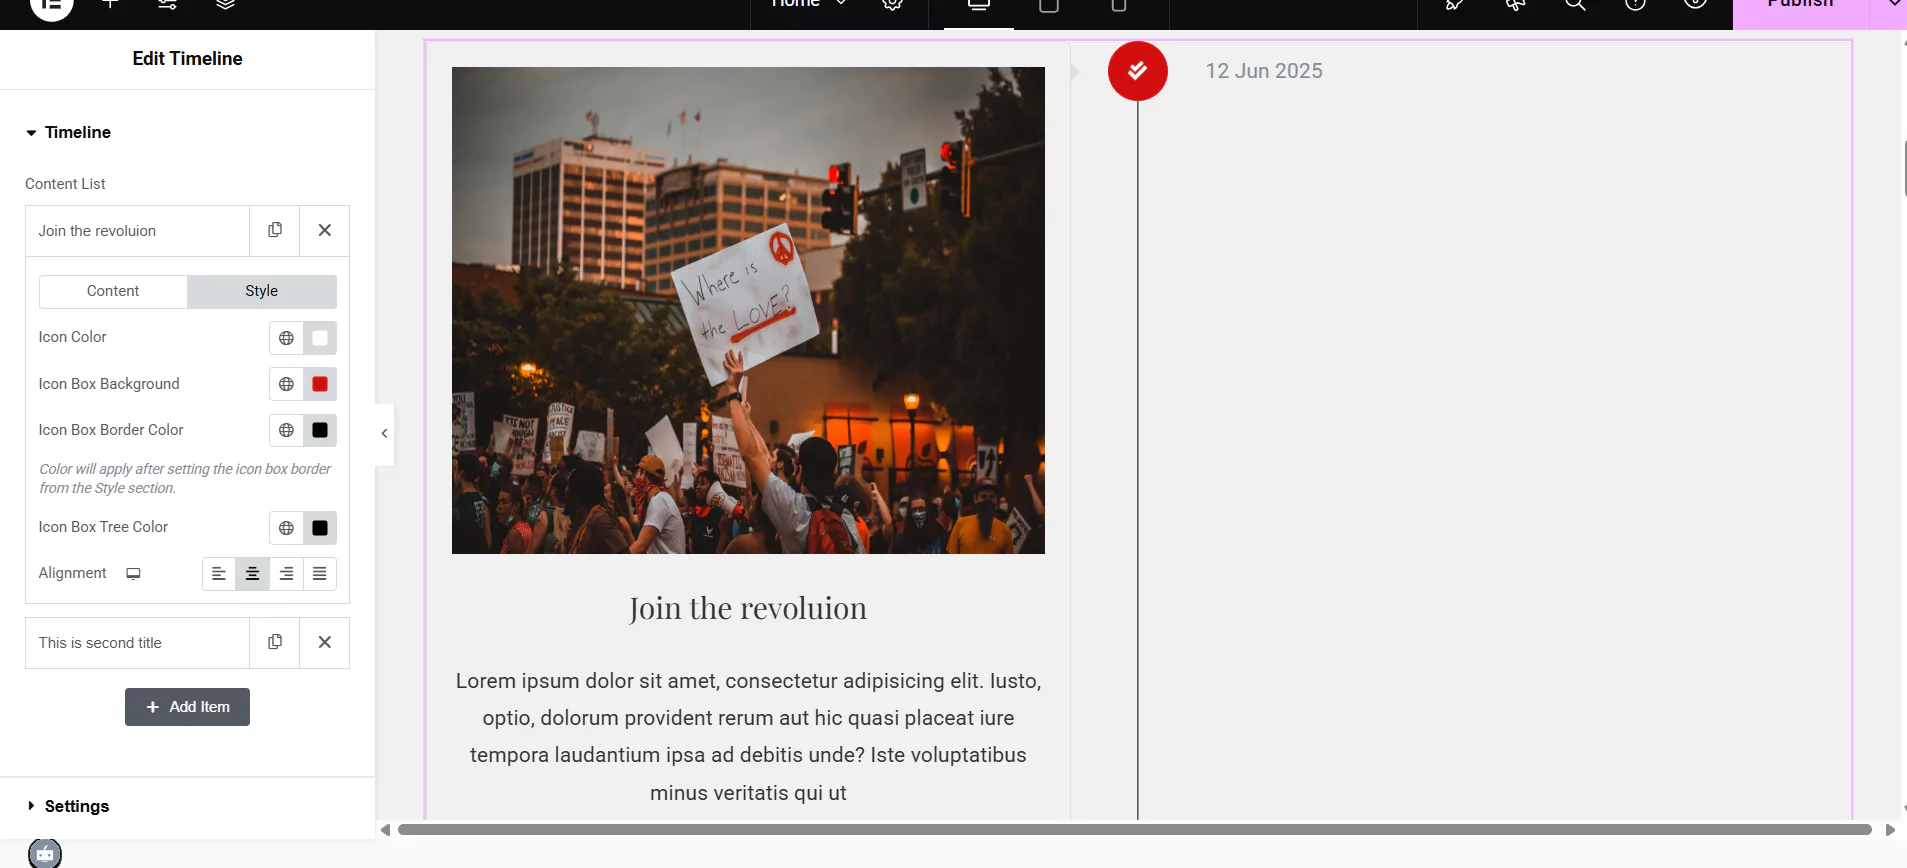
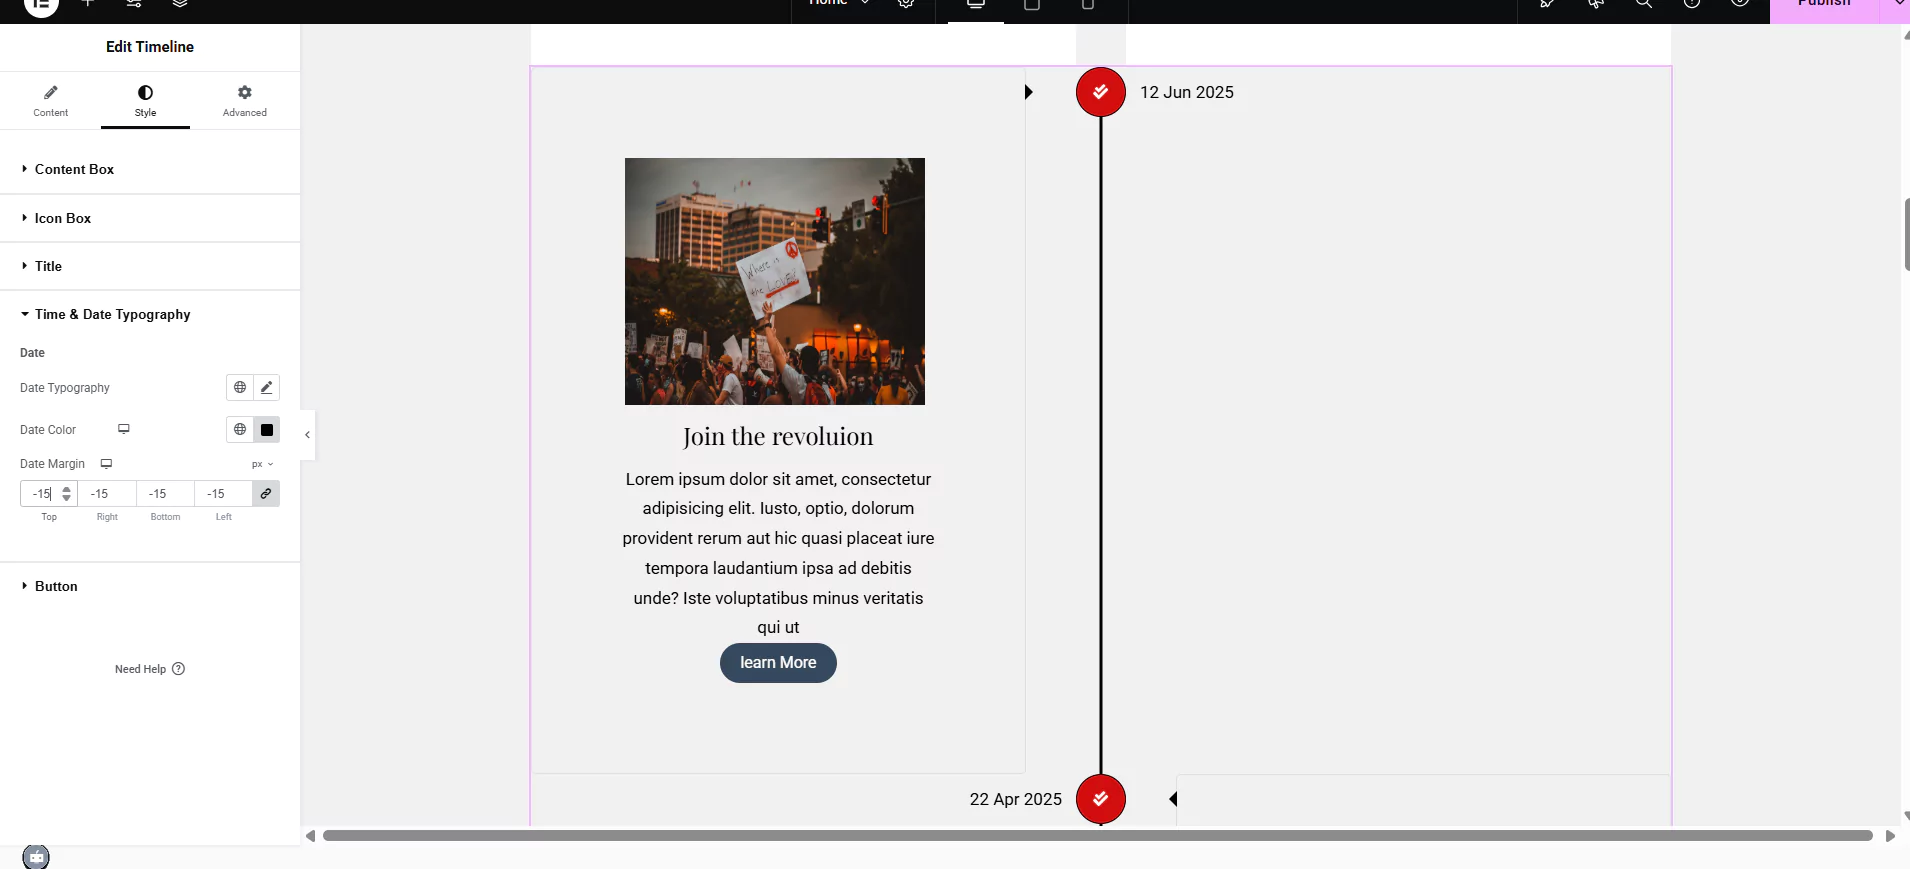
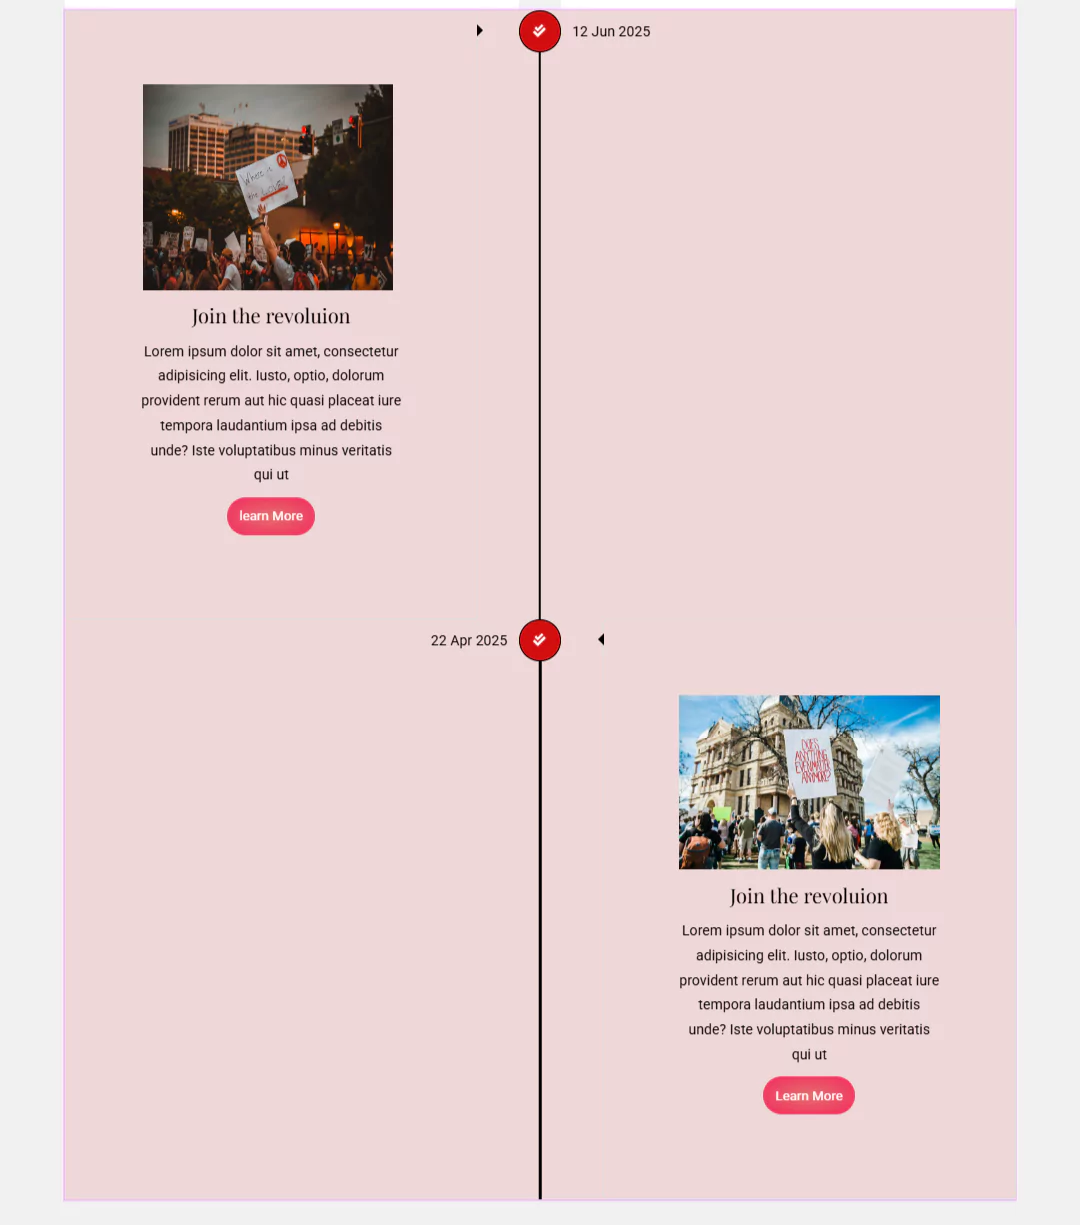
I have updated the timeline with a new title, image, and description. The icon box has a red background, a light grey icon, and a black border and line.
The content is center-aligned, and the dates are formatted using the Content and Style tabs in Elementor.
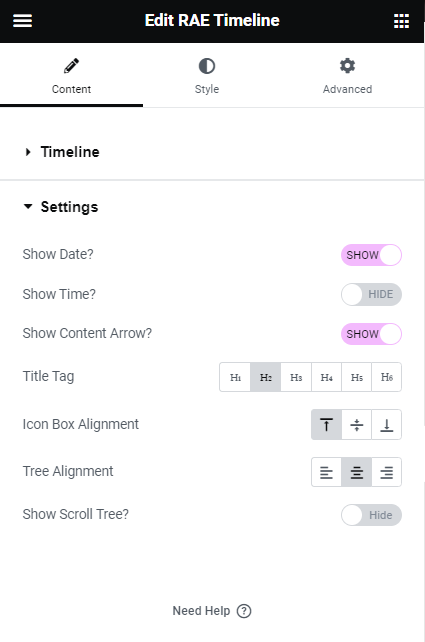
Content Settings
- Show Date? – You can to show/hide the date of the timeline items.
- Show Time? – It allows you to show/hide the time of the timeline items.
- Show Content Arrow? – Show/hide the arrow of the item boxes.
- Title Tag – Choose a particular tag for the title of the timeline items.
- Icon Box Alignment – Set the vertical alignment for the icon box of the timeline items.
- Tree Alignment – This allows you to set the horizontal alignment for the timeline tree.
- Show Scroll Tree? – Show/hide the scroll tree animation effect.
- Background Type – Allows you to set the background type of the scroll tree, available types are classic and gradient.
Step 4: Styling The Timeline Widget
Under timeline styling options, here are the various elements you can edit:
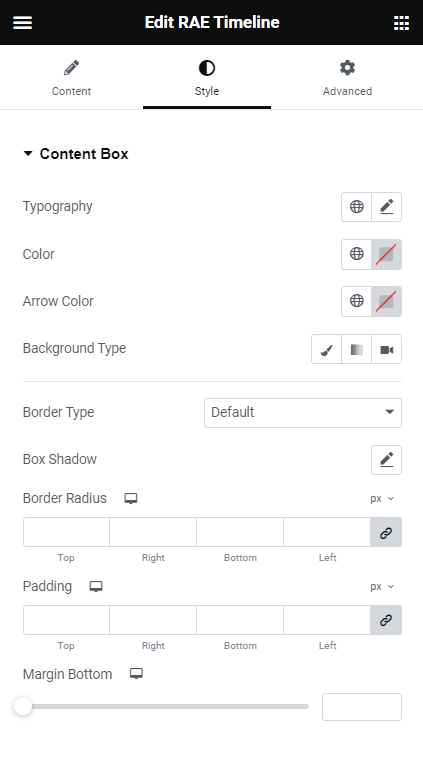
Content Box
- Typography – Allows the user to set the typography for the Content Box.
- Color – Allows the user to set the color for Content Box text.
- Arrow Color – Allows the user to set the color for the Content Box arrow.
- Background Type – Allows the user to set the background styles for the Content Box using background type controls.
- Border Type – Allows the user to set the border styles for the Content Box.
- Box Shadow – Allows the user to set the box shadow for the Content Box.
- Border Radius – Allows the user to set the border radius for the Content Box.
- Padding – Allows the user to set the padding for the Content Box.
- Margin Bottom – Allows the user to set the margin bottom for the Content Box.
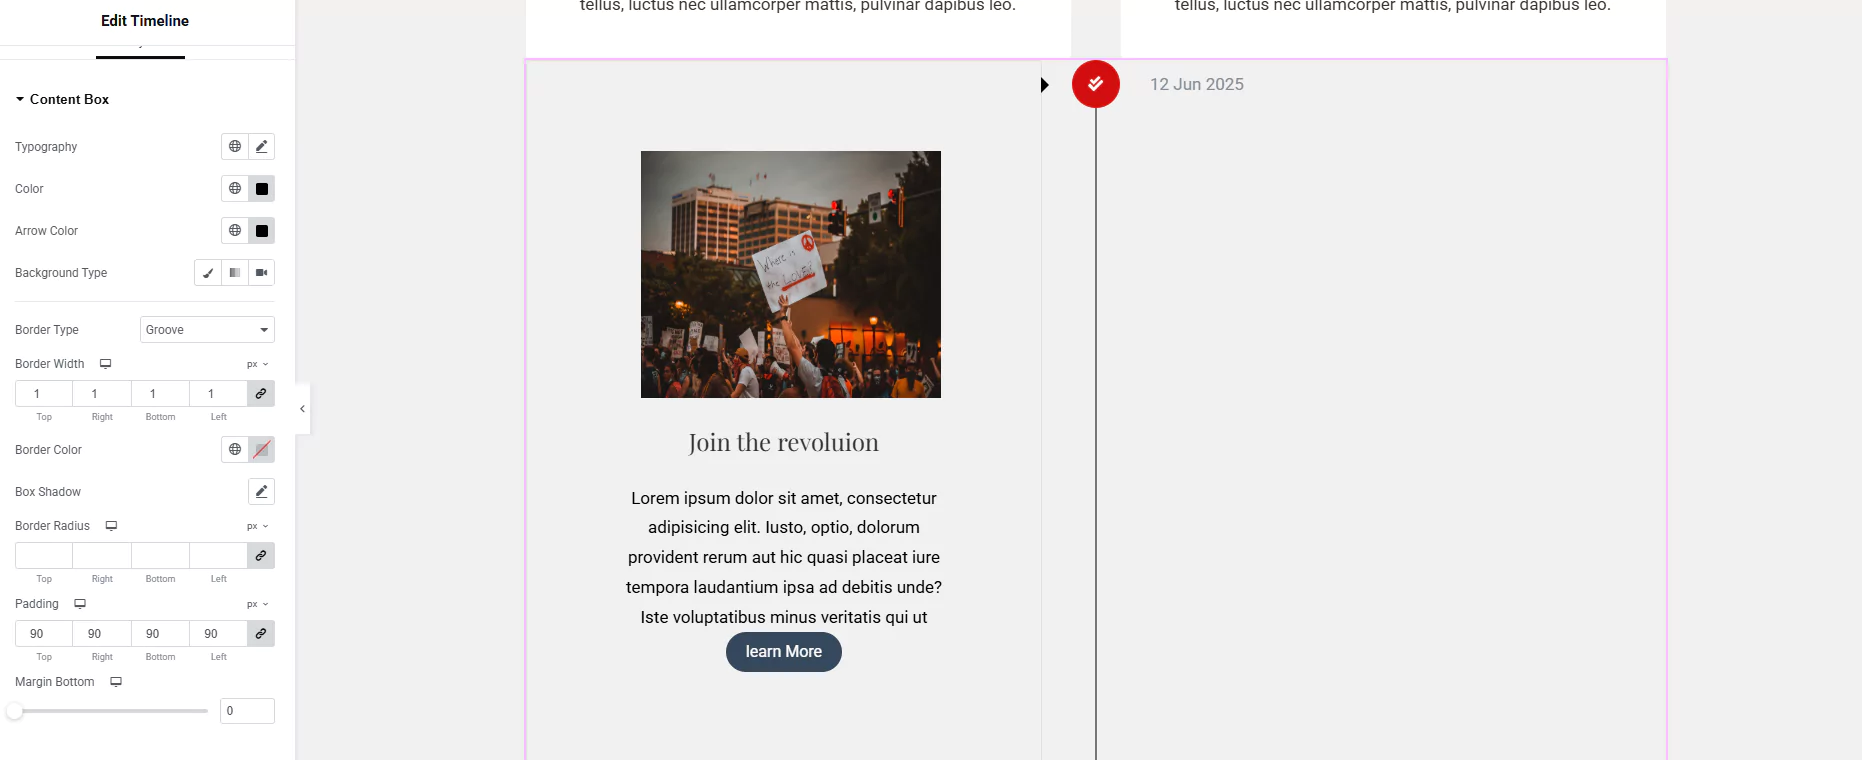
Updated the timeline content box with a groove border, 90px padding, black text, and arrow color, and added a Learn More button from the Style tab in Elementor.
Icon Box
- Width – Allows the user to set the width of the icon box for all items.
- Height – Allows the user to set the height of the icon box for all items.
- Box Space – Allows the user to set the spacing between the timeline tree and the content box.
- Tree Space – Allows the user to set the spacing between the timeline tree and the widget’s edge. This setting will be available if Tree Alignment is set to either Left or Right.
- Background – Allows the user to set the background color of the icon for all the items.
- Border Radius – Allows the user to set the border radius of the icon for all items.
- Border Type – Allows the user to set the border styles for the Icon Box for all items.
- Icon Color – Allows the user to set the icon color for all the items.
- Tree Width – Allows the user to set the timeline tree width.
- Tree Color – Allows the user to set the timeline tree color.
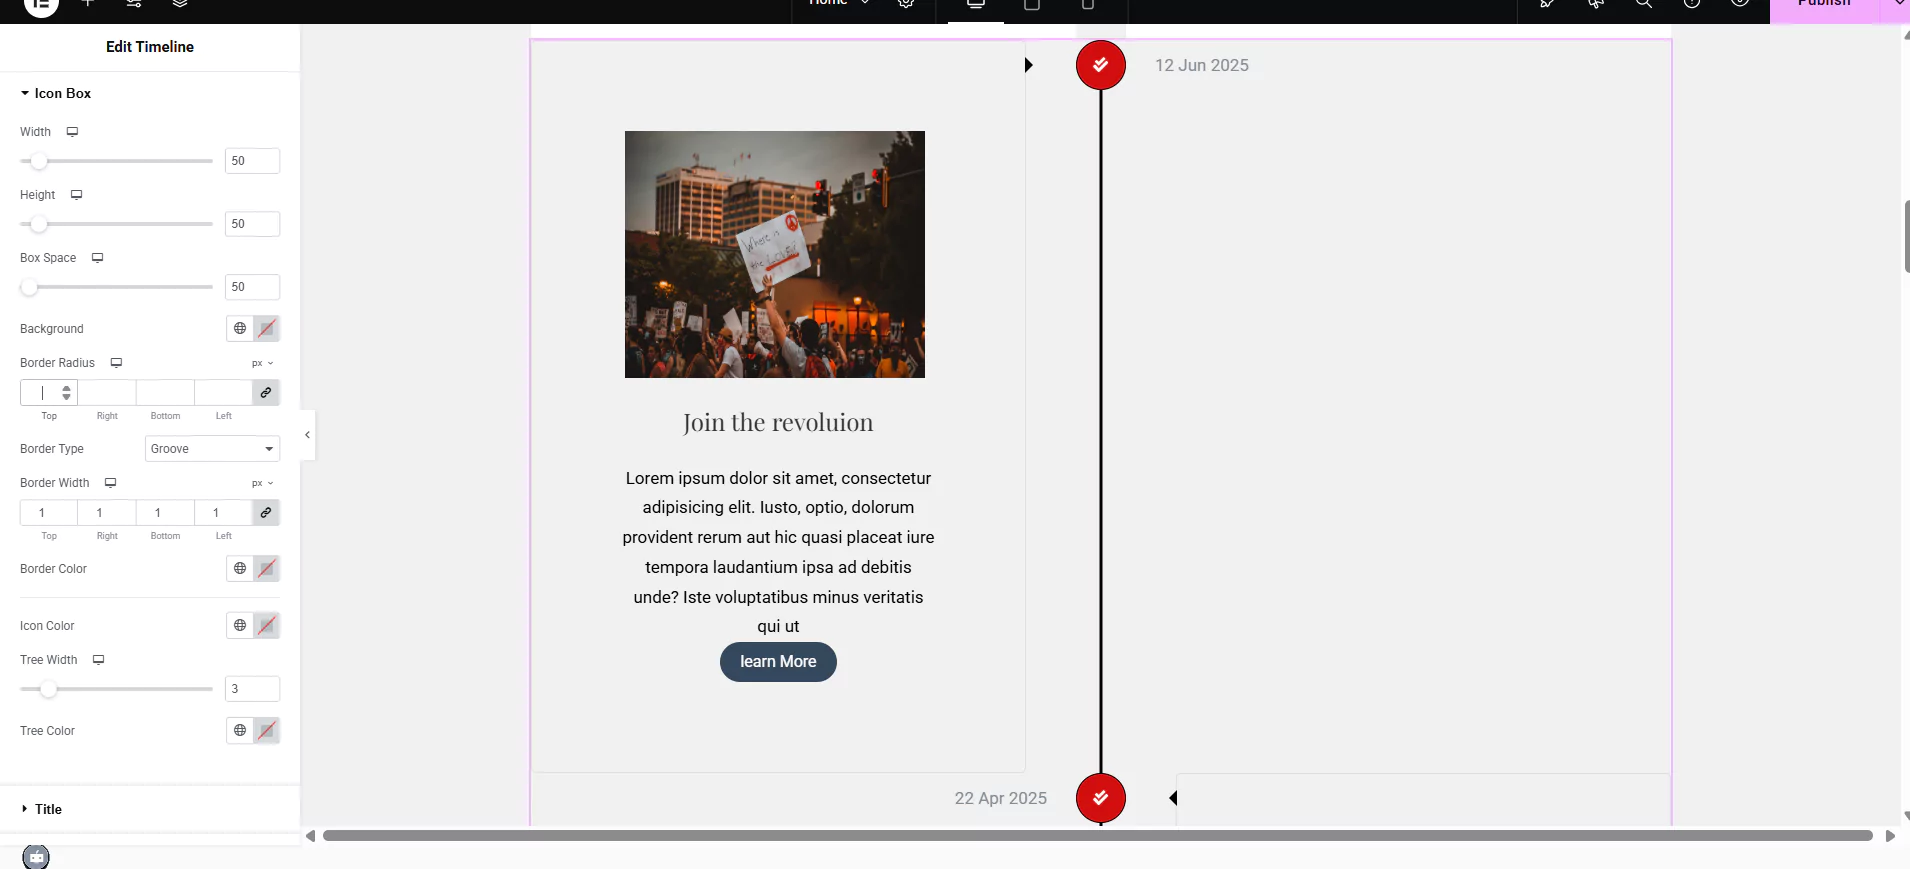
I customized the timeline widget by adjusting the icon size and spacing for a cleaner layout.
I applied a groove border style and set custom colors for the icon, border, and timeline line to match the design. These changes enhanced the visual appeal and made the timeline more engaging.
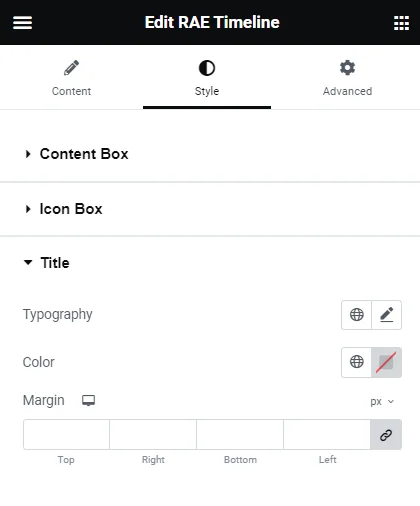
Title
- Typography – Allows you to set the typography of the title.
- Color – Allows you to set the color of the title.
- Margin – Allows you to adjust the margin and spacing around the title.
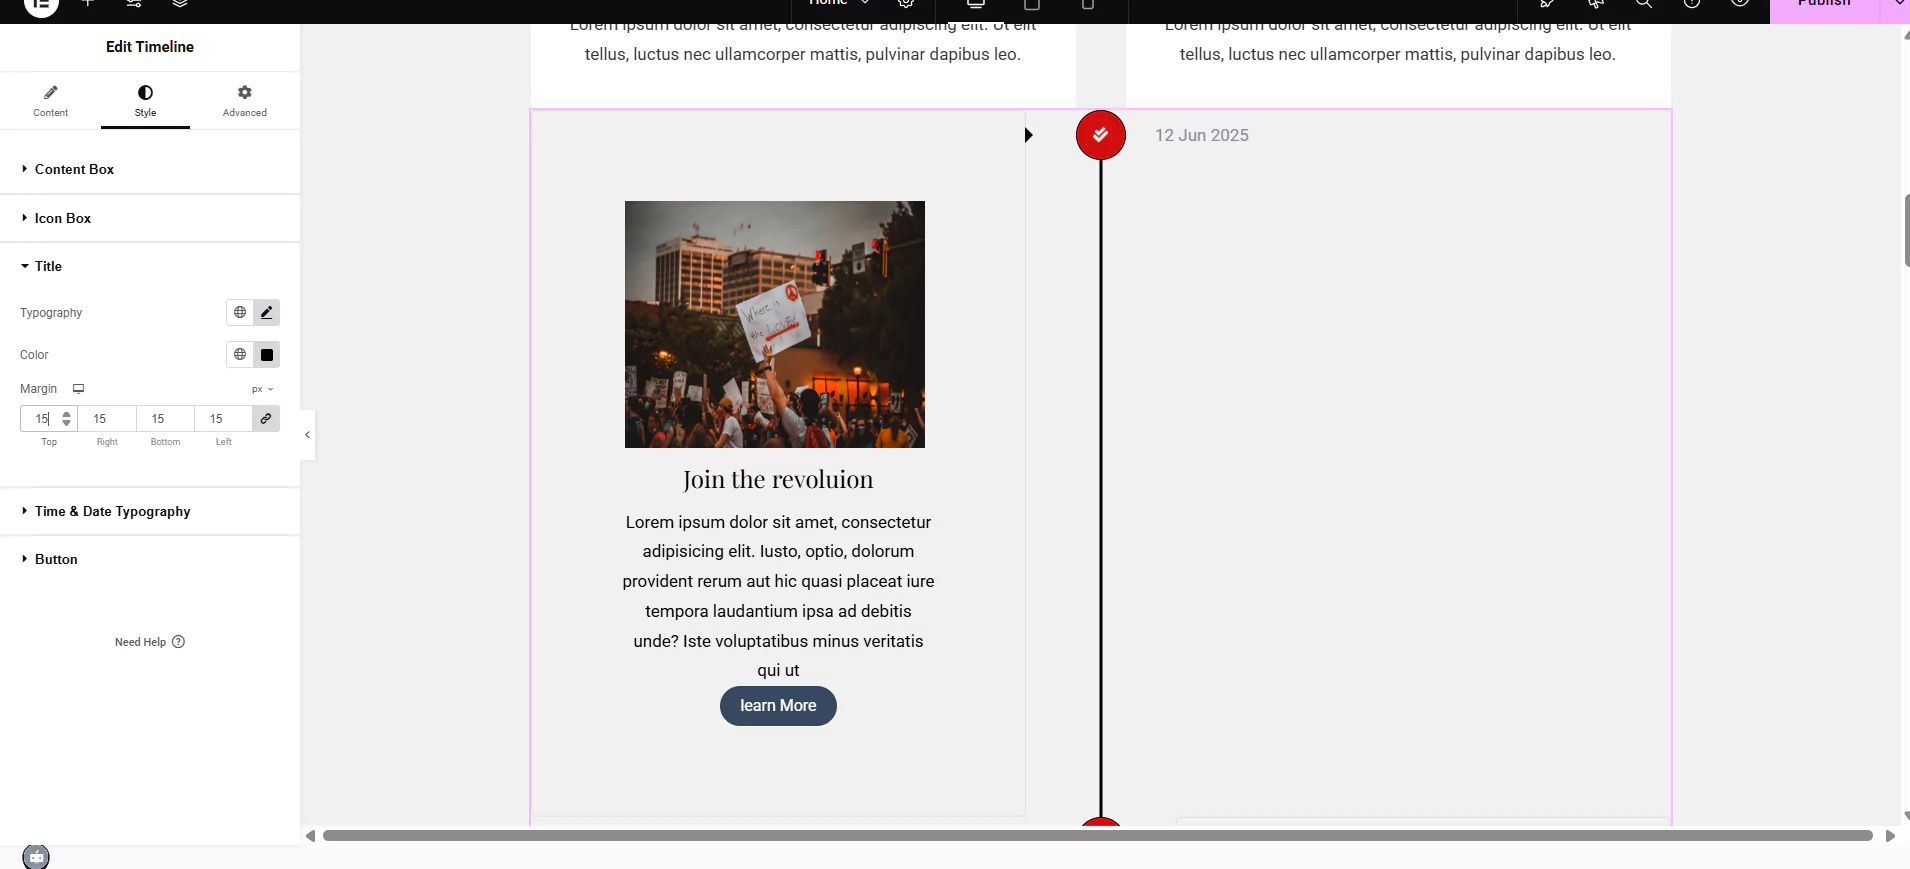
The title in this timeline widget has been styled to enhance its visual impact and readability.
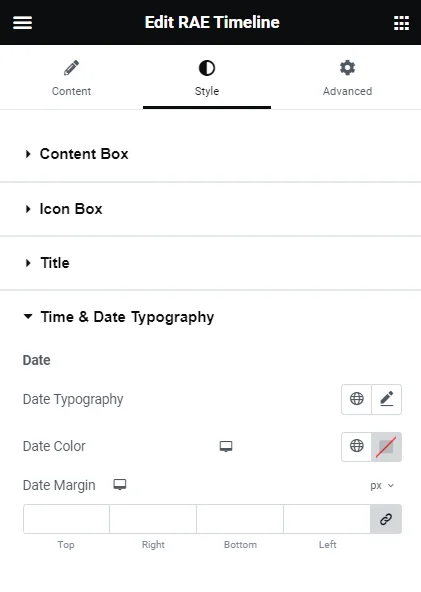
Time and Date Typography
- Time Typography – Allows you to set the typography of the time text.
- Time Color – Allows you to set the color of the time text.
- Time Margin – Allows you to adjust the margin and spacing around the time.
- Date Typography – Allows you to set the typography of the date text.
- Date Color – Allows you to set the color of the date text.
- Date Margin – Allows you to adjust the margin and spacing around the date.
Making your timeline title pop doesn’t have to be complicated. By simply adjusting the typography and color, you can significantly enhance the readability and overall design consistency.
Adding a bit of spacing, like a 15px margin around the title, also works wonders in making it stand out and feel less crowded.
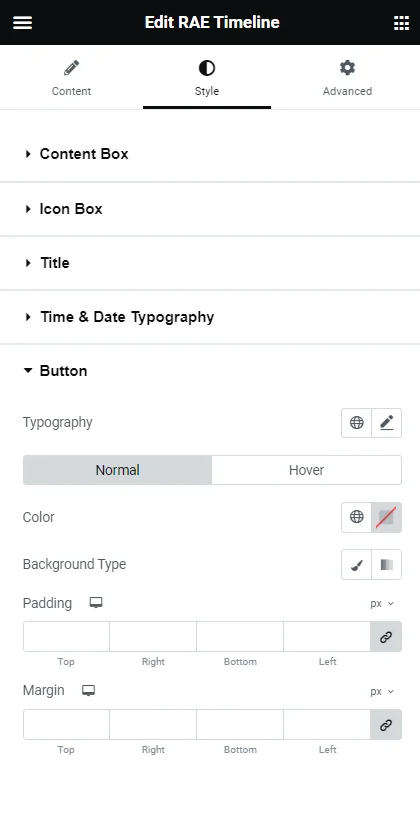
Button
- Typography – Allows the user to set the typography for the button text.
The following two controls will be displayed for both the Normal state and Hover state:
- Color – Allows the user to set the color of the button text.
- Background Type – Allows the user to set the background styles for the button.
- Padding – Allows the user to set the padding for the button.
- Margin – Allows the user to set the margin for the button.
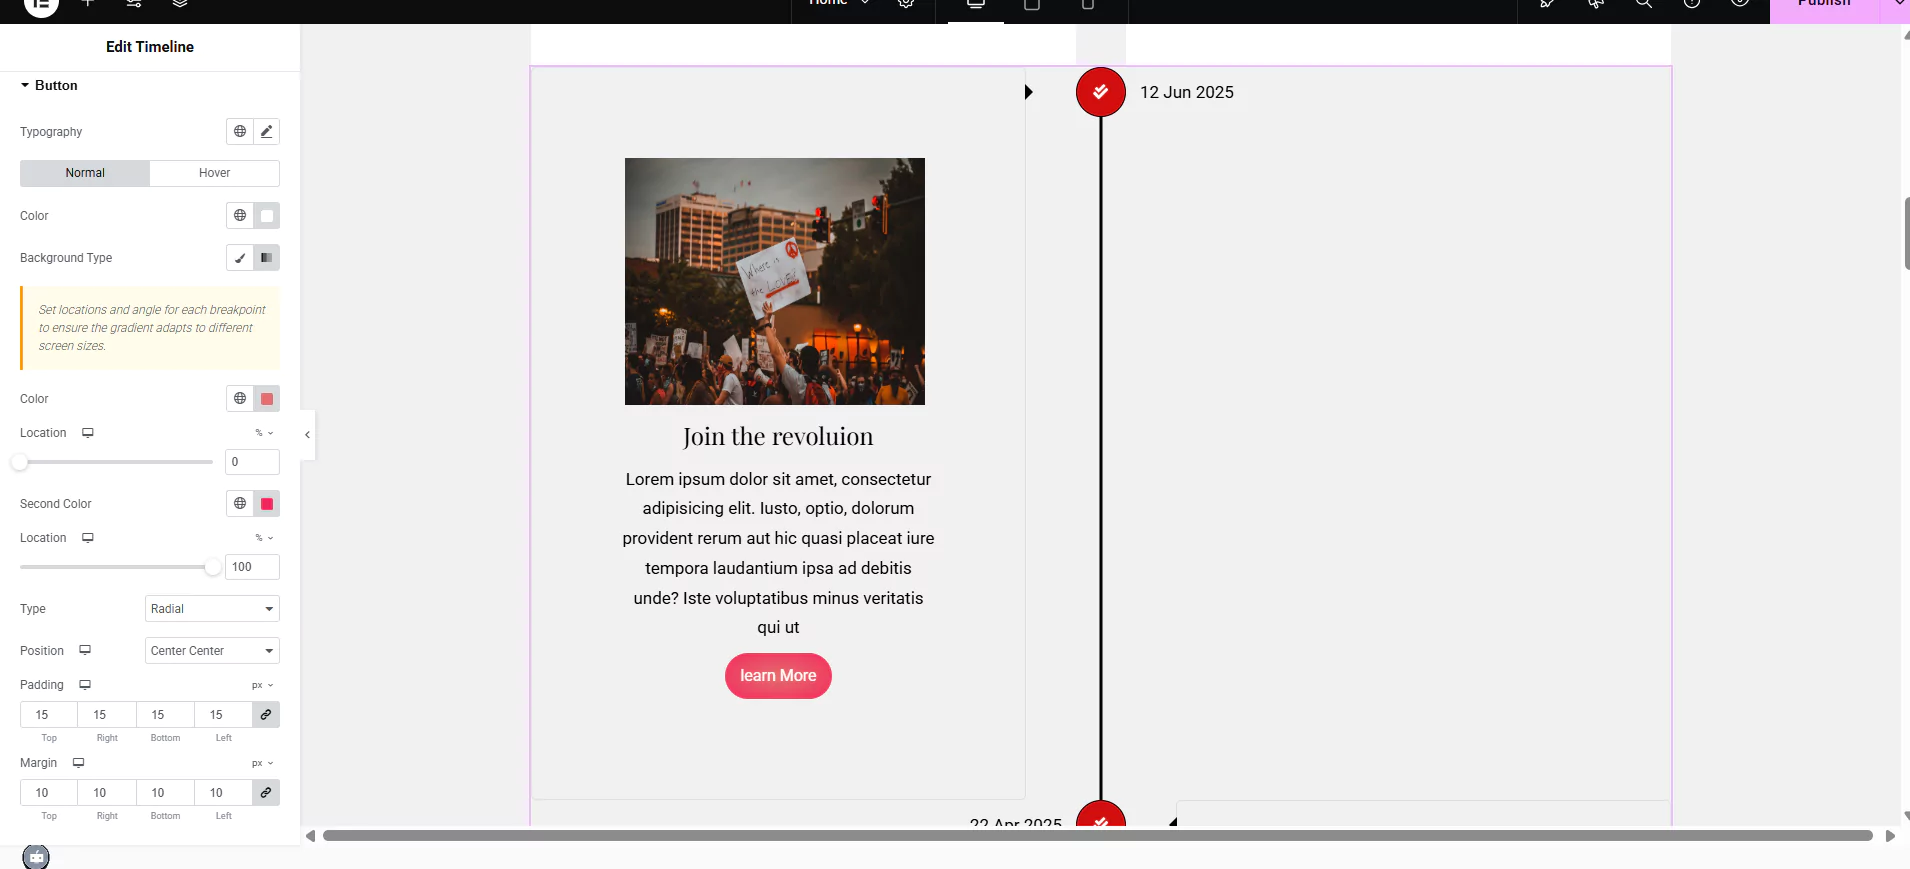
Button settings in your timeline widget allow you to customize their appearance and interactivity.
You can adjust the location, type, position, padding, and margin. Experimenting with these options lets you create visually appealing and user-friendly buttons that enhance engagement with your timeline.
So there you have it – a clear pathway to effortlessly add, uniquely customize, and creatively style timelines within your WordPress environment.
Start experimenting and discover the perfect visual narrative for your website’s story.
FAQ
You can easily add the timeline widget to your website using the Responsive Addons for Elementor plugin. Install the plugin and activate it. Next, drag and drop the widget to the editor and customize it according to your needs.
The WordPress timeline is an interactive element you can consider adding to your website. It allows you to add a timeline to showcase your business milestones or other information in a chronological order.
Yes, can add a timeline to your WordPress website for free using the Timeline widget offered by Responsive Addons for Elementor.
Conclusion
Adding a timeline on your website is an interactive way to keep your customers engaged with your website.
Responsive Addons for Elementor is a powerful and free WordPress plugin that allows you to add and customize a timeline to your website.
If you’ve liked reading this article, you can also consider reading:
- How to Create a Portfolio On Your Elementor Website
- How to Create a Countdown Timer For Your WordPress Website
- How To Create Flip Box Overlays And Hovers In WordPress
Want to add timeline to your site, grab the Responsive Addons for Elementor now! Additionally, you can install Responsive theme, a multipurpose website theme that will help enhance your website building process.