![How to Add a Before After Slider in Elementor [Free]](https://atlas.cyberchimps.com/wp-content/uploads/2025/09/Cyberchimps-Feature-Img-blog-13-2.webp)
Summary
To create a before-after image slider in Elementor install the Responsive Addons for Elementor. Create a new page, add the Before After Slider widget, and customize images, layout, and style it step by step.
By following these steps, you can quickly build an interactive comparison section that helps you showcase transformations in a clean and engaging way.
Want to show off your before and after work on a WordPress site? Now you can do it easily.
If you’re a photographer, a web designer, or a home renovation company, a “Before After Slider” is a powerful way to showcase your work to others visually.
The widget lets you compare two different images side by side simply by dragging a slider.
This guide will show you how to add a Before After Slider in Elementor for free, using the popular Responsive Addons for Elementor (RAE) plugin.
Responsive Addons for Elementor is the Best Elementor Addons plugin – Get it for free!
What is an Elementor Before After Slider?
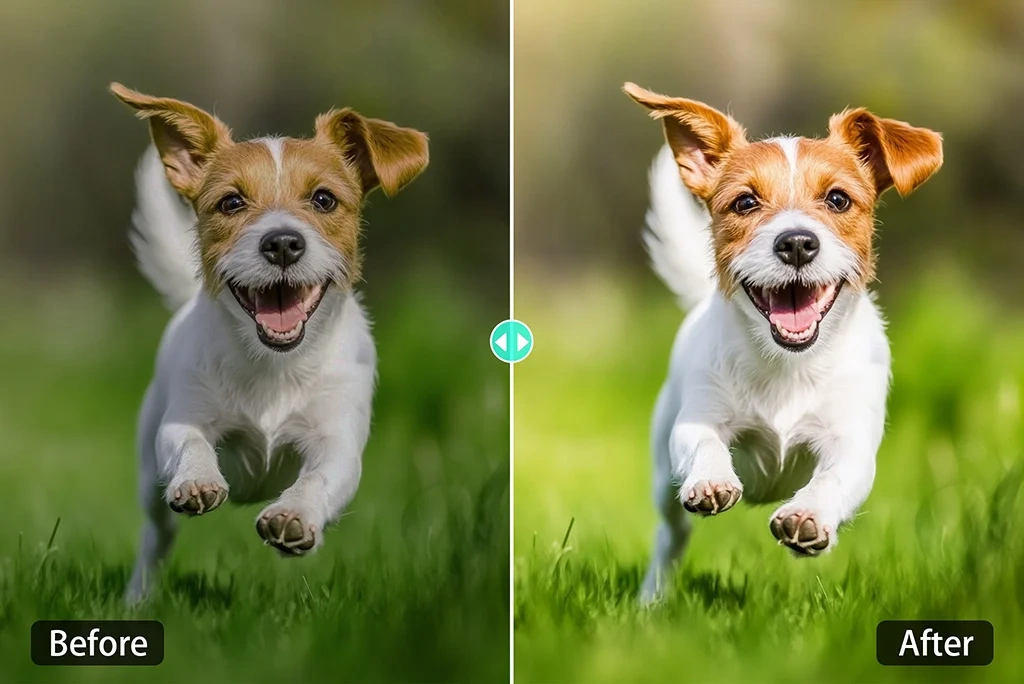
An Elementor Before After Slider is a new-age widget that allows side-by-side display of two images, each occupying one half of the screen.
It has a movable handle that enables the user to reveal the image by moving the slider handle from left to right or from top to bottom. It is easy, fun, and engaging to compare pictures visually.
The Before After Slider widget is particularly well-suited for providing images to:
- Photography: Before and after photo editing
- Web Design: Old vs. New Website Layouts
- Home Renovation: Room transformations
- Beauty & Fitness: Haircuts, makeup, or weight loss progress
- Art & Illustration: Sketch vs. final product
Using a WordPress Before After Elementor widget can significantly boost user engagement and make your portfolio stand out.
By following this guide, you will learn how to create Before After Slider in Elementor without any cost.
Things You’ll Need for Adding a Before After Slider in Elementor
To get started, you’ll need two essential plugins to add a free Before After slider widget.
1. Elementor Plugin
To use the widget for free, you will need to install and activate the Elementor page builder plugin. The Elementor free version would be sufficient for the widget. If you don’t have that plugin, install it from the WordPress plugin repository.
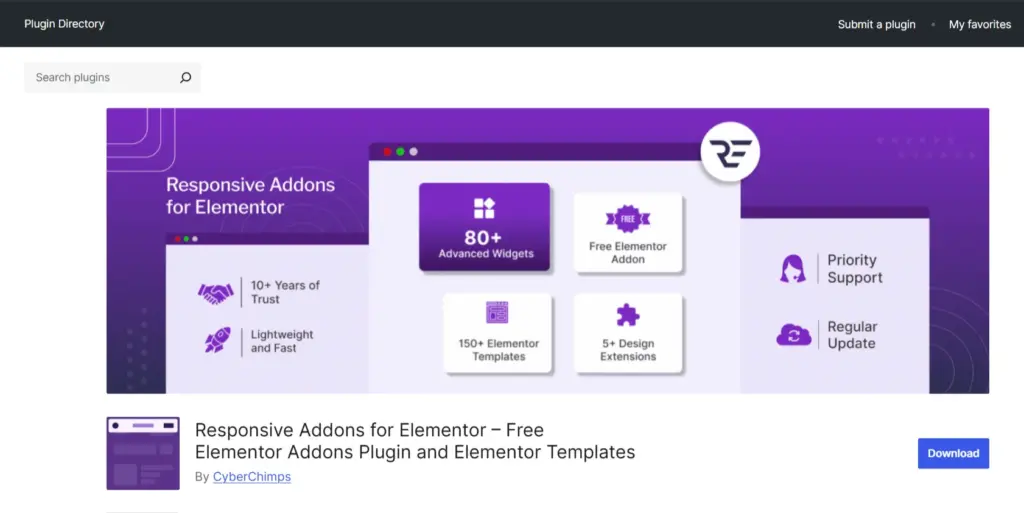
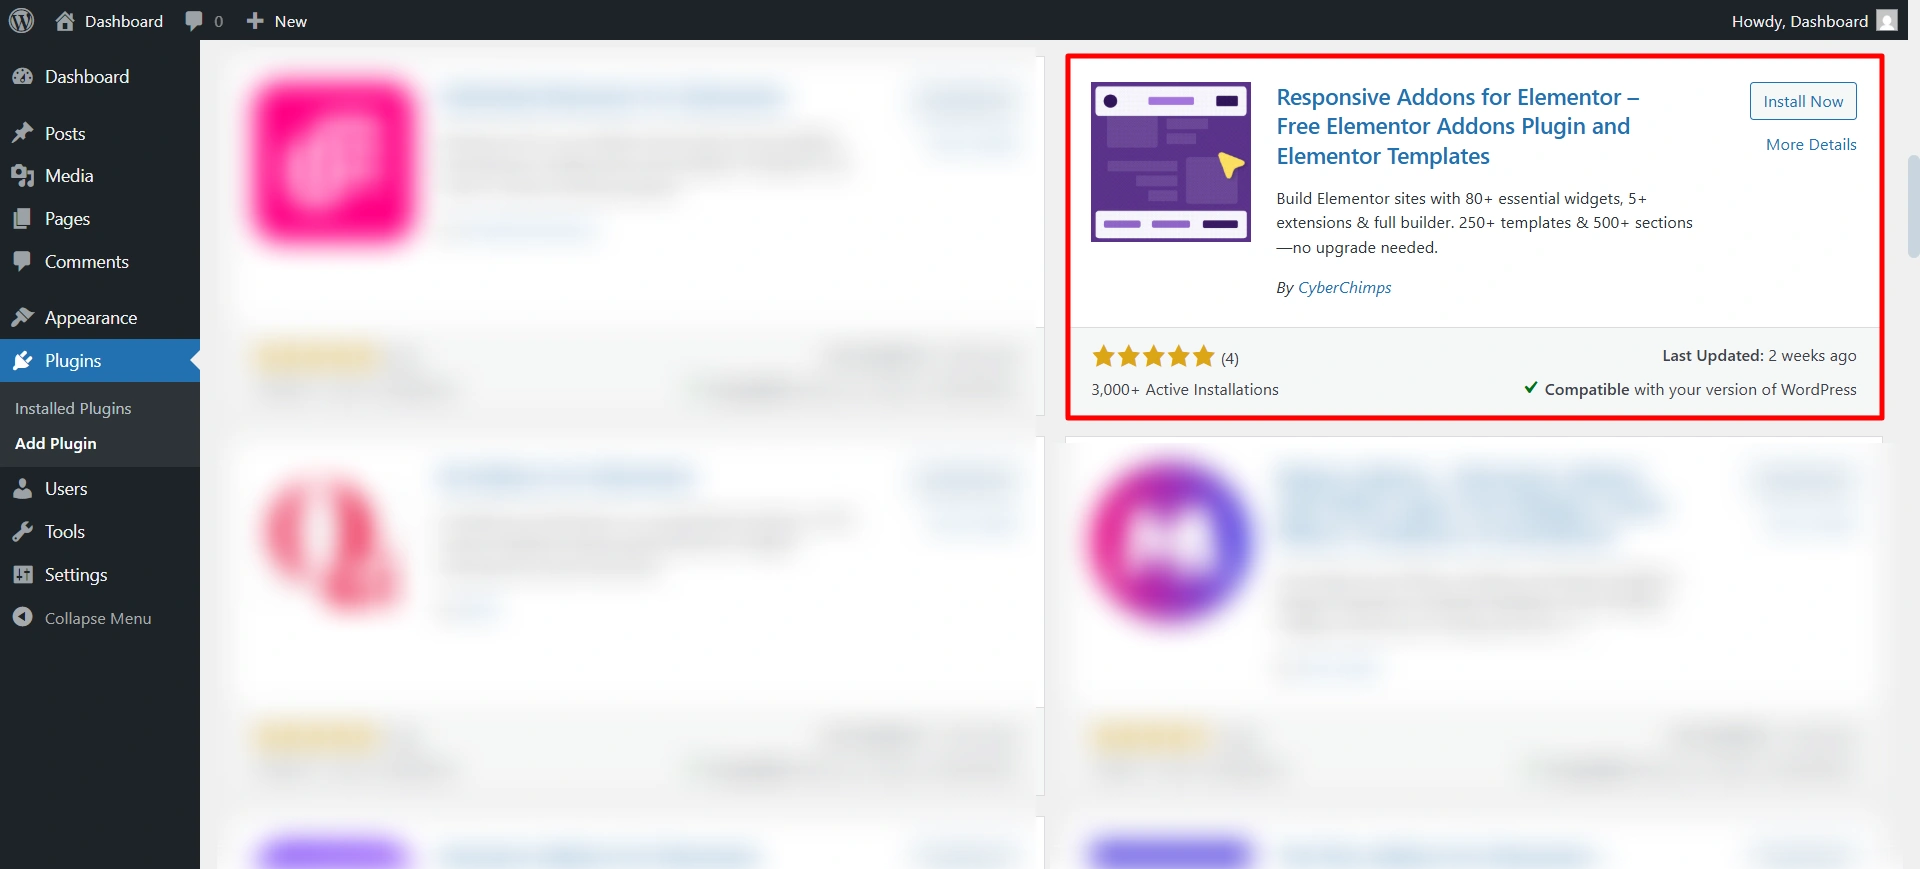
2. Responsive Addons for Elementor (RAE) Plugin
???? My Real-World Test Results:
- Number of widgets: 80+
- GTmetrix Performance Score: 100%
- Includes Cross-site Copy-paste feature
- 5+ Extensions like Scroll animations, Sticky Section, Page Duplicator, & more.
- Save design time with 100+ Premium-grade Starter templates
Cyberchimps, the same team behind the popular Responsive Theme, developed Responsive Addons for Elementor (RAE). It is a free WordPress plugin that adds additional functionality and widgets to Elementor.
With RAE, you get 80+ free widgets and three extensions that help you design professional websites without needing custom code. Some of the most useful free widgets include:
It also includes the dedicated Before After Slider widget that we will be using.
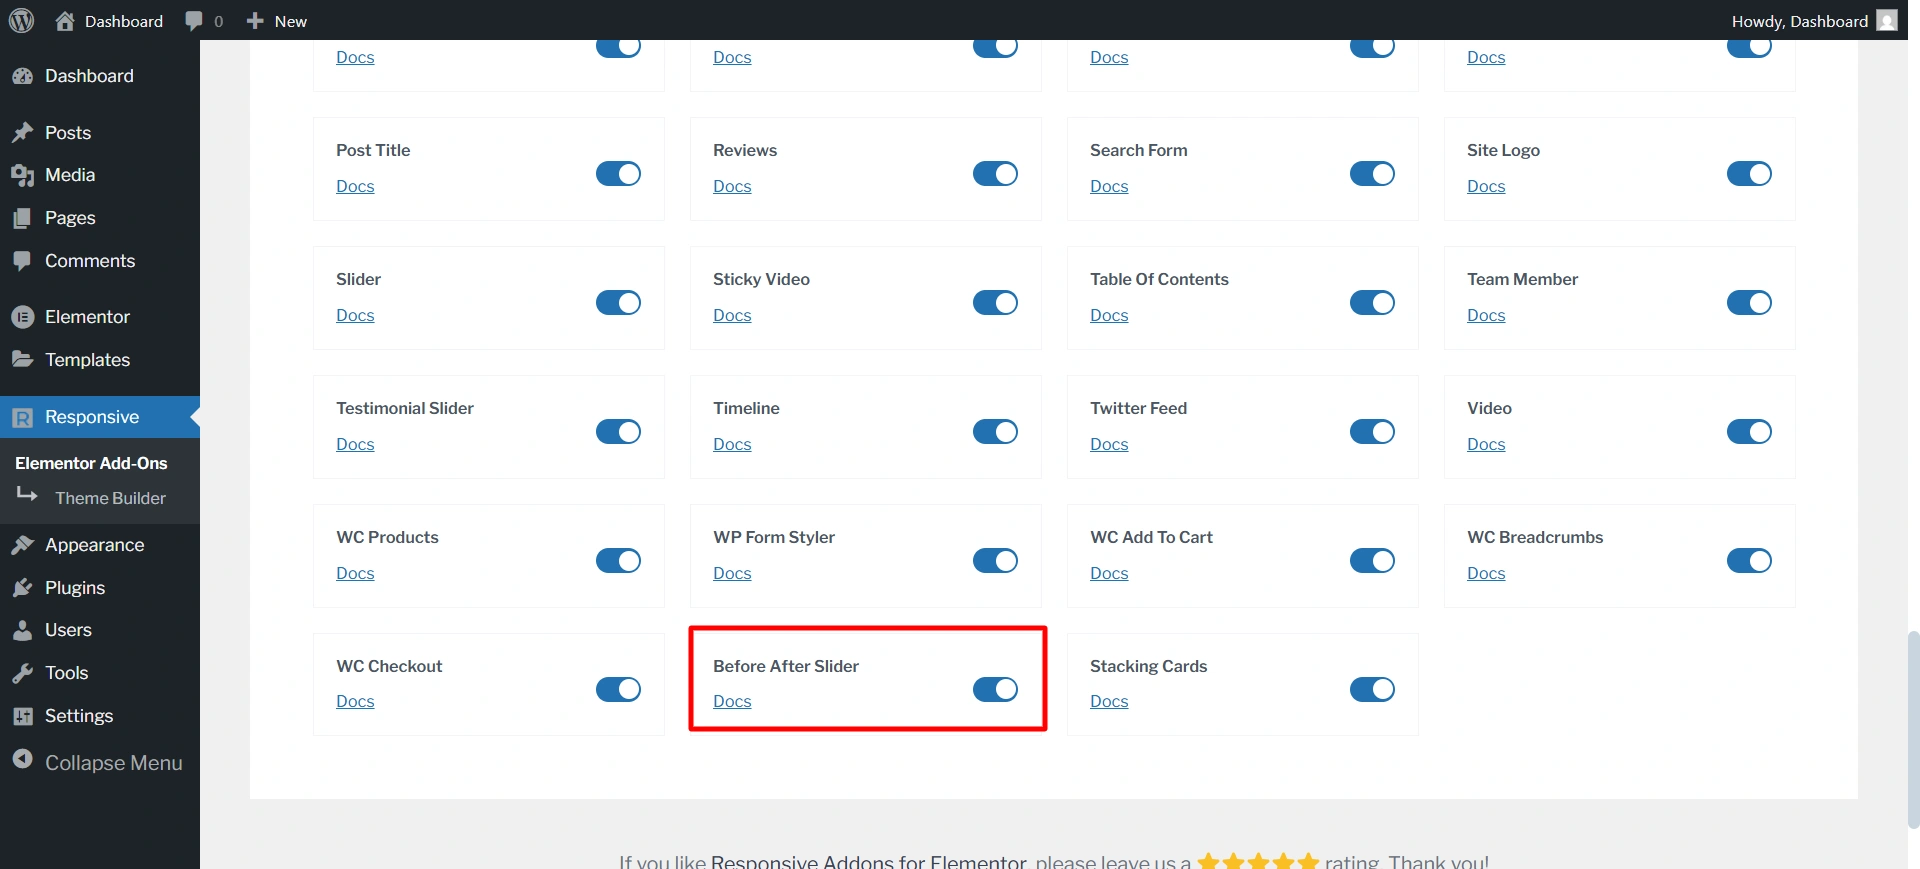
3. Enable Before After slider from all widgets
After installing RAE, ensure the Before and After Slider widget is enabled. Most addon plugins allow you to activate or deactivate individual widgets to maintain site performance.
Simply navigate to the RAE settings and confirm the widget is turned on.
Now let’s move toward customization.
How to Add a Before After Slider in Elementor for Free

Ready to create Before After Slider in Elementor? Follow these simple steps:
Step 1: Install and Activate Responsive Addons for Elementor
From your WordPress dashboard, navigate to plugins > add plugin.
Search for Responsive Addons for Elementor and click on install and activate it.
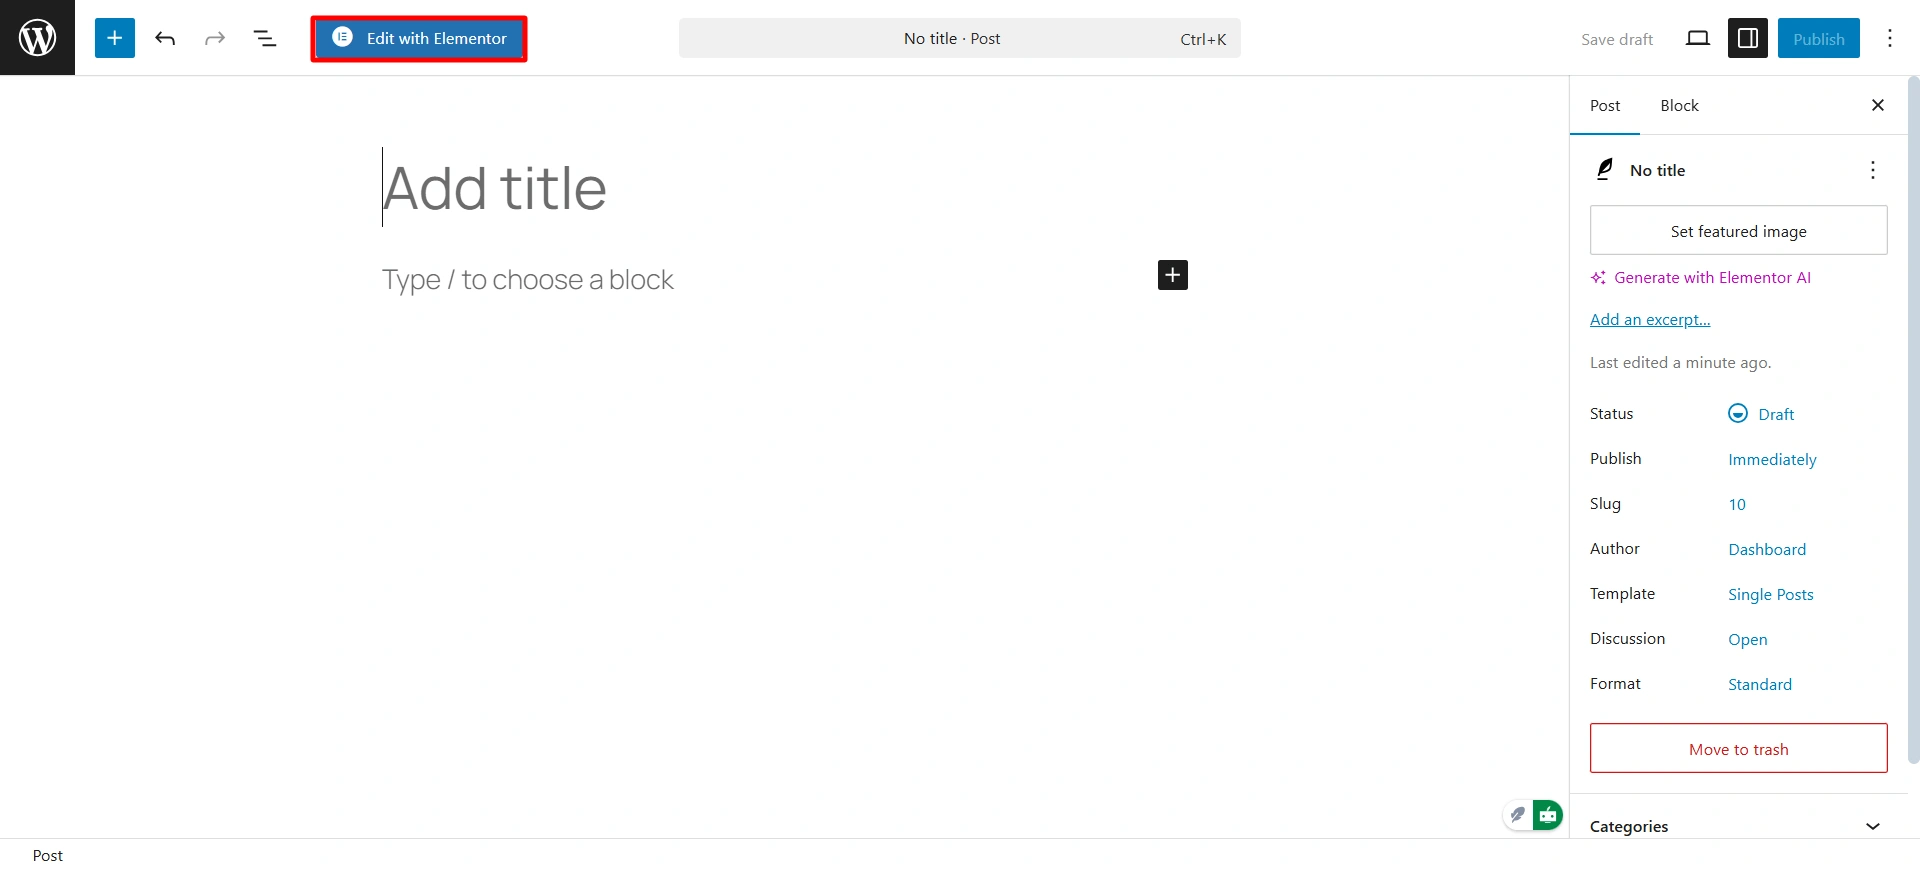
Step 2: Create New Post
Create a new post from the dashboard. Click on Post > Add post > Edit with Elementor.
Now search for the Before After Slider.
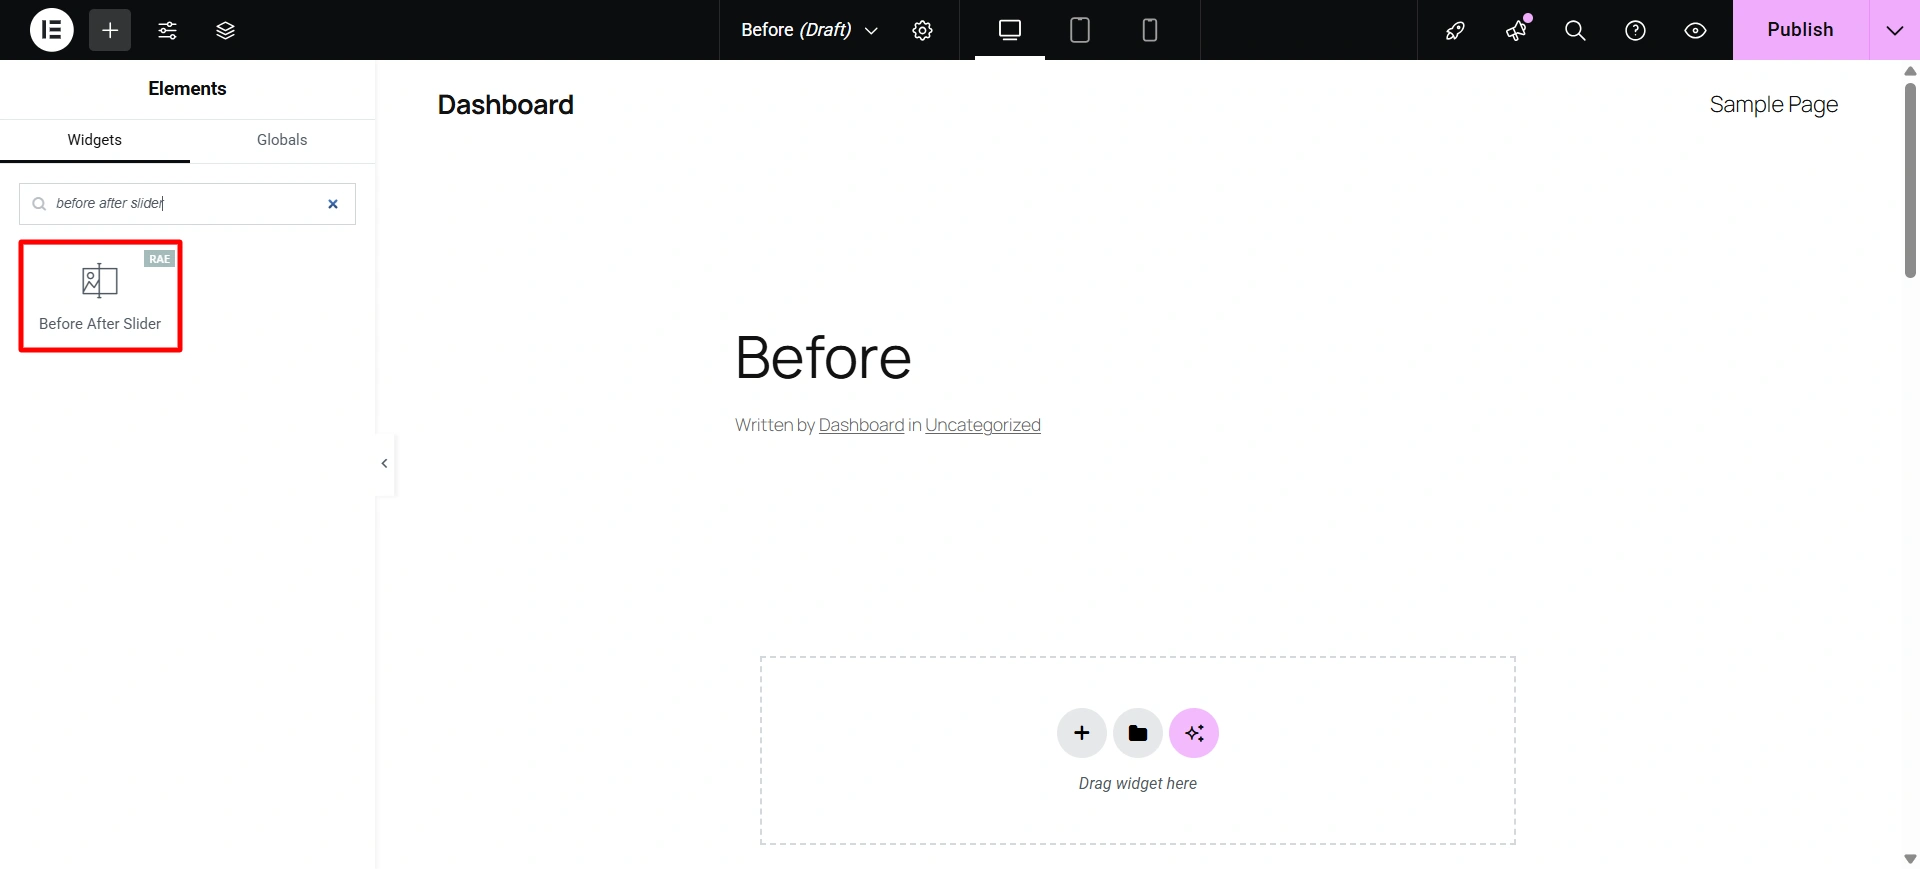
Drag and drop the widget.
Step 3: Customize the Widget
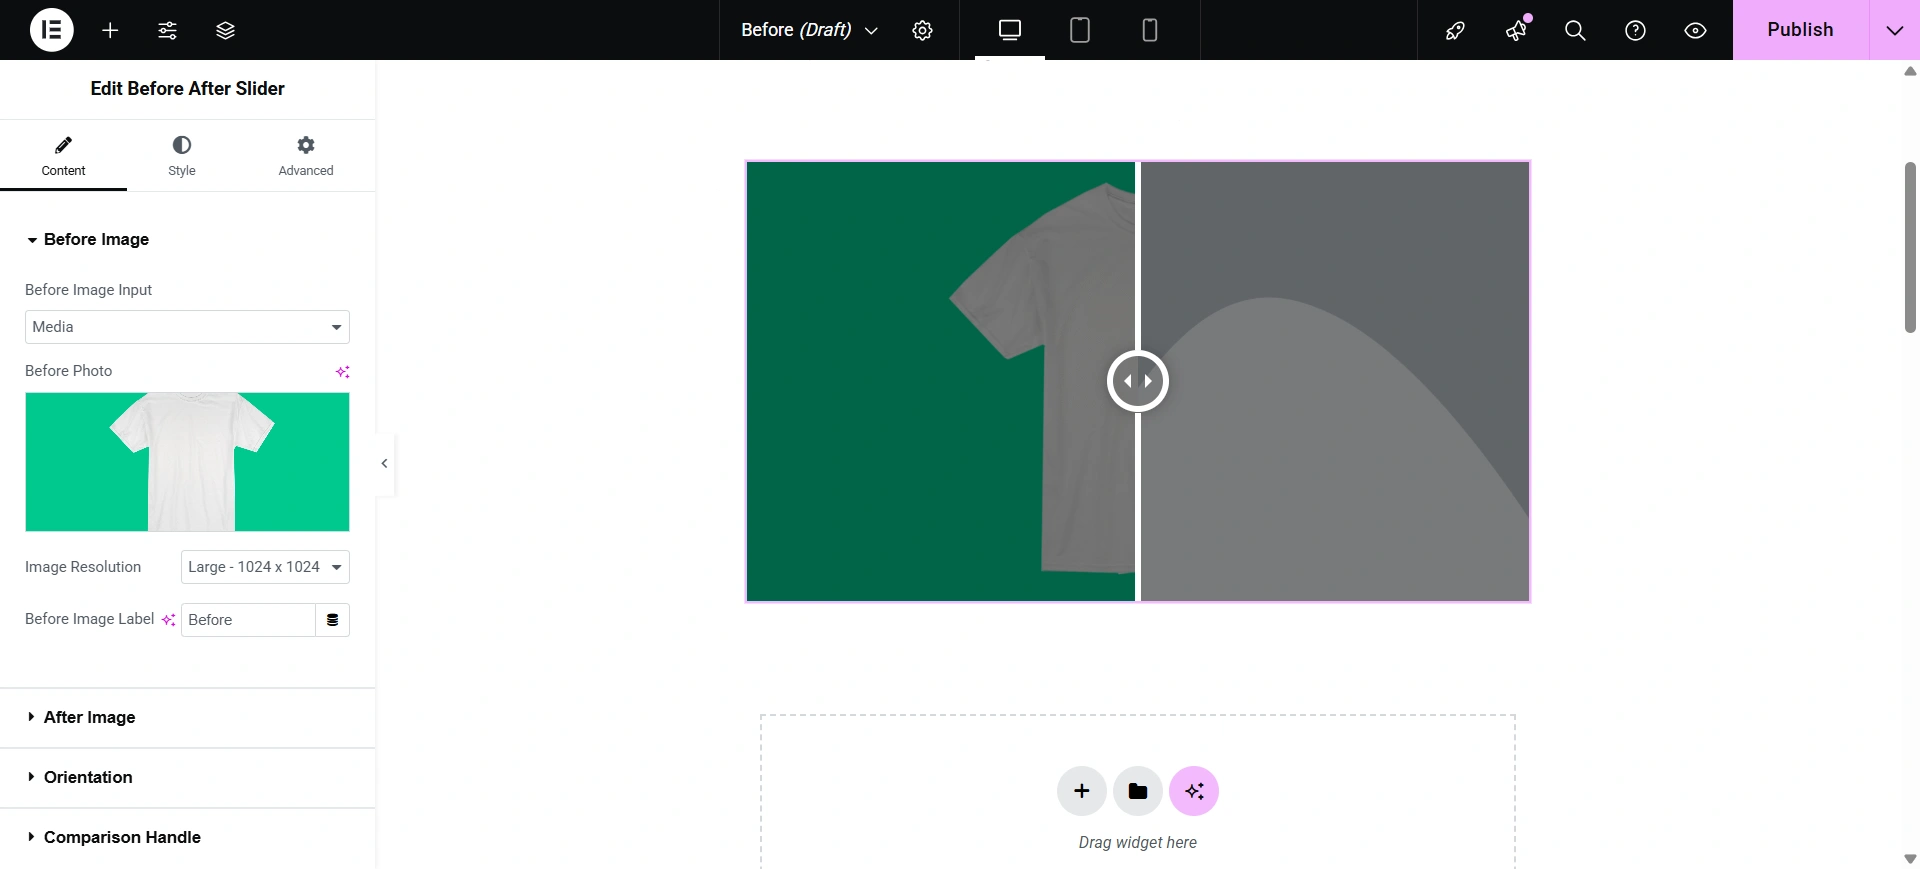
Select how you want to upload the image, either from media or a URL. Upload the photo in the box.
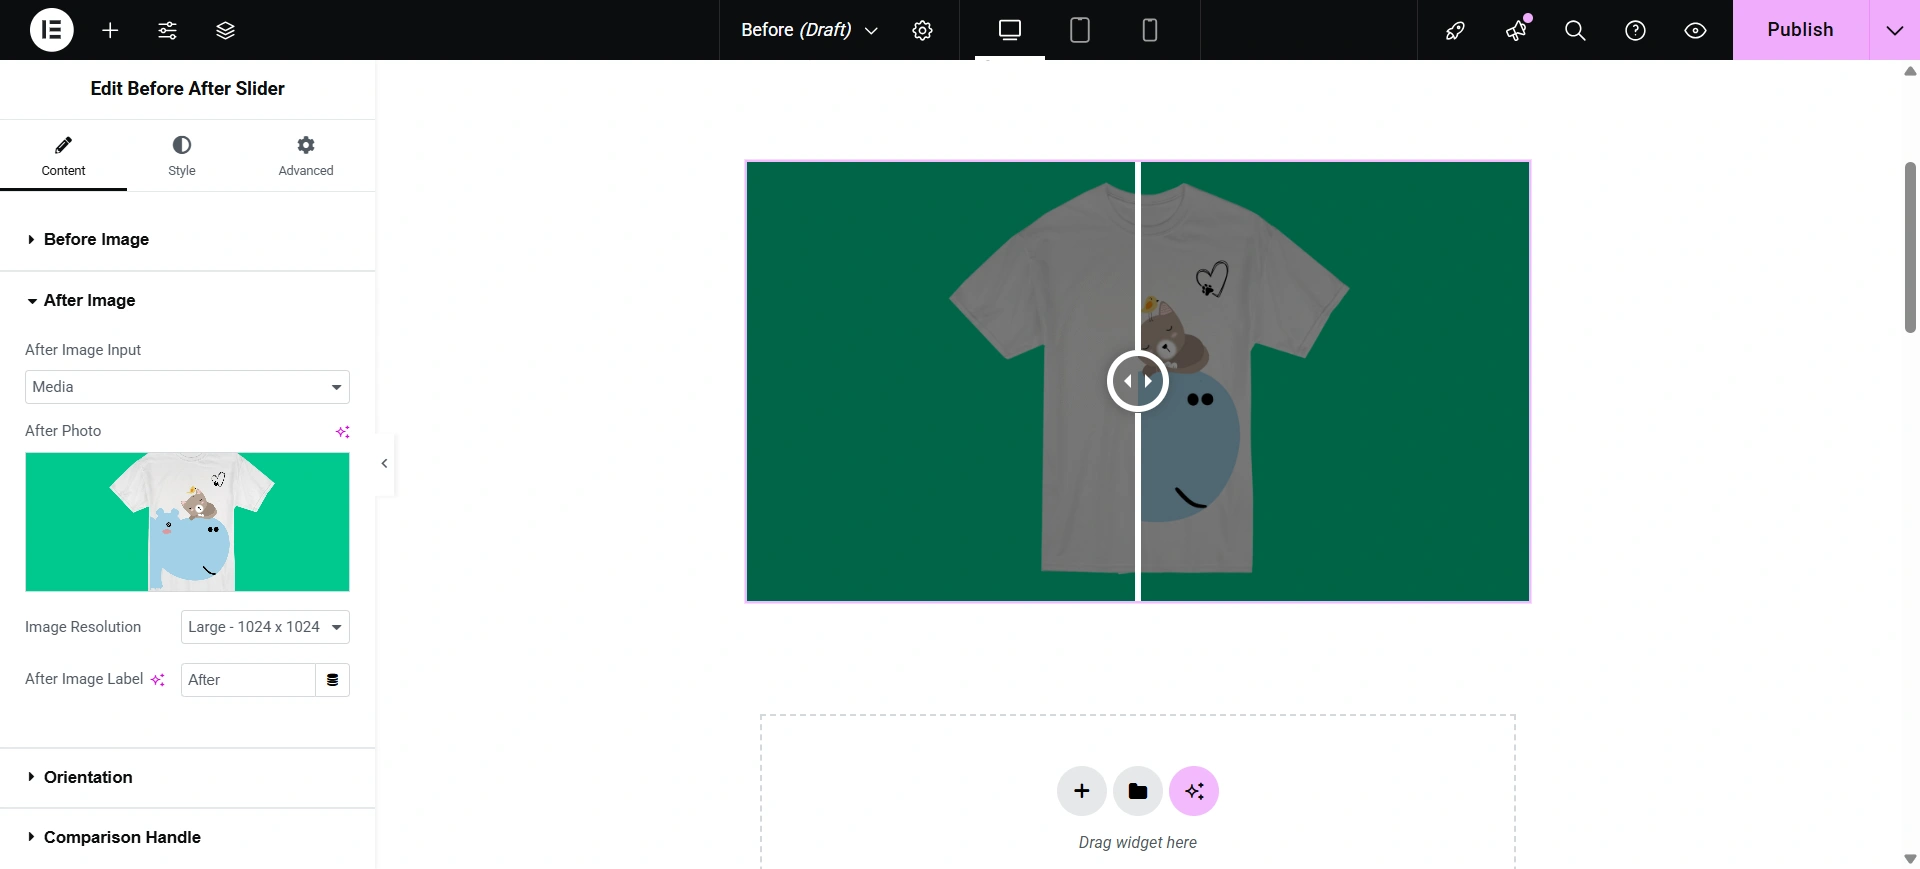
Do the same with the after image. Upload an image to it.
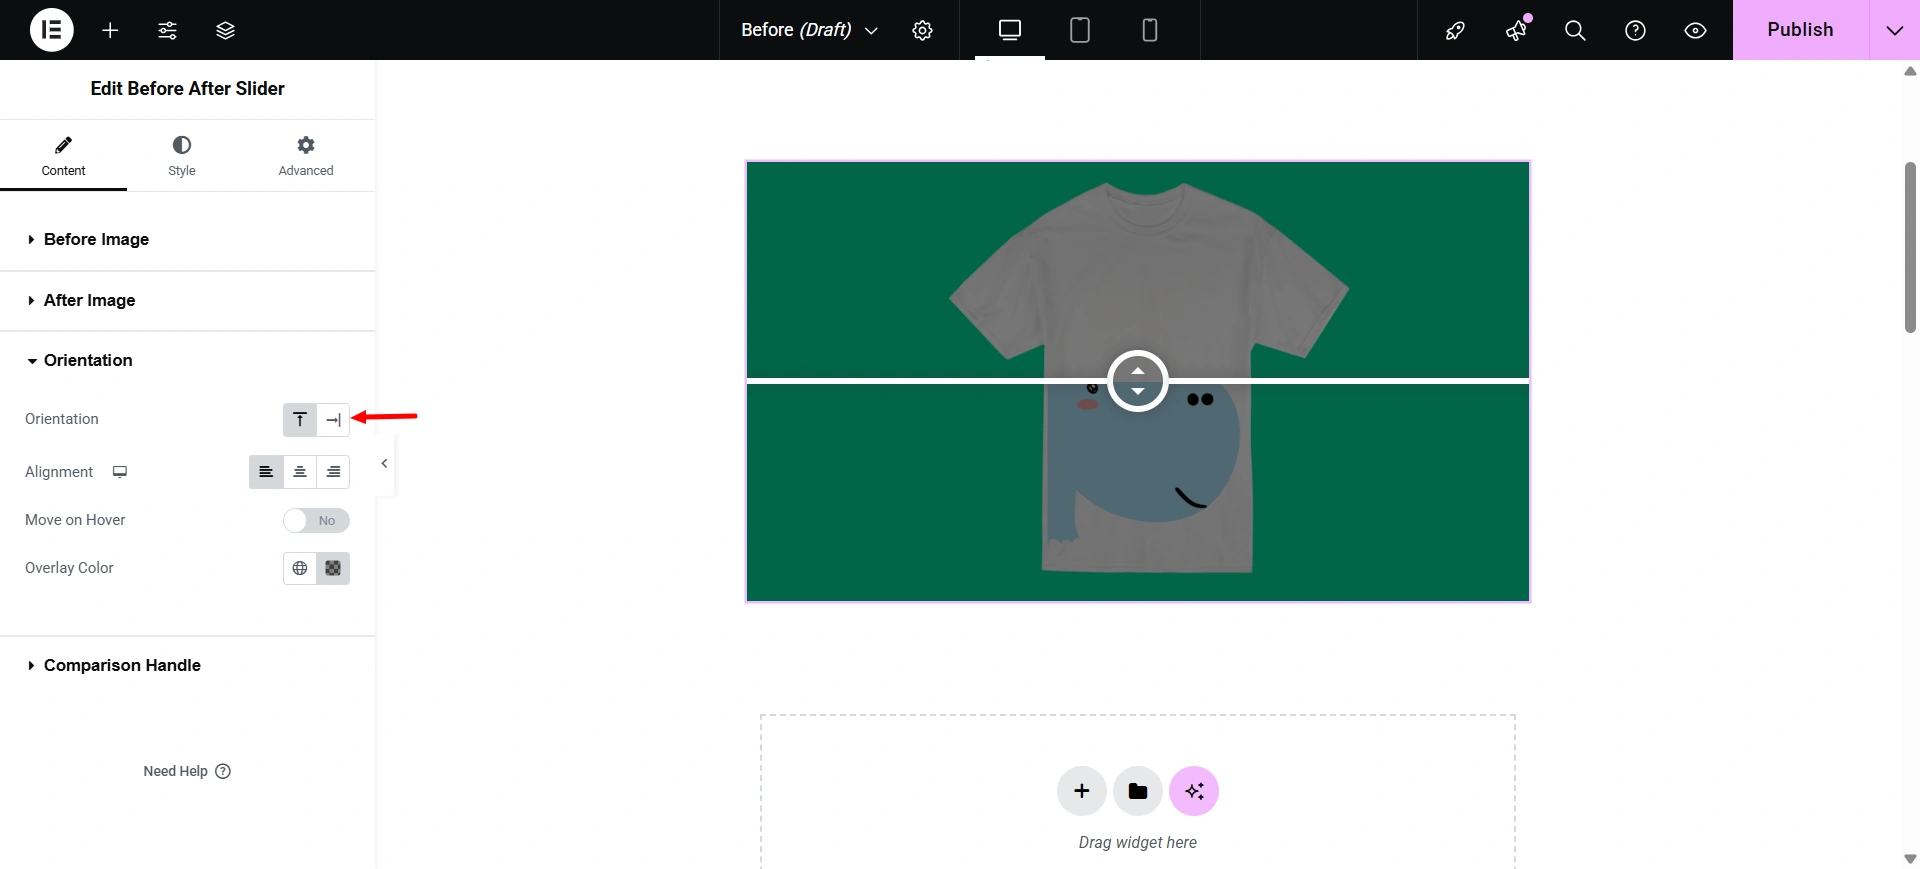
In orientation, you can set the position of the Before After Image Slider. Choose how the slider appears. You can even add a colour overlay to your images by choosing the color from the color palette.
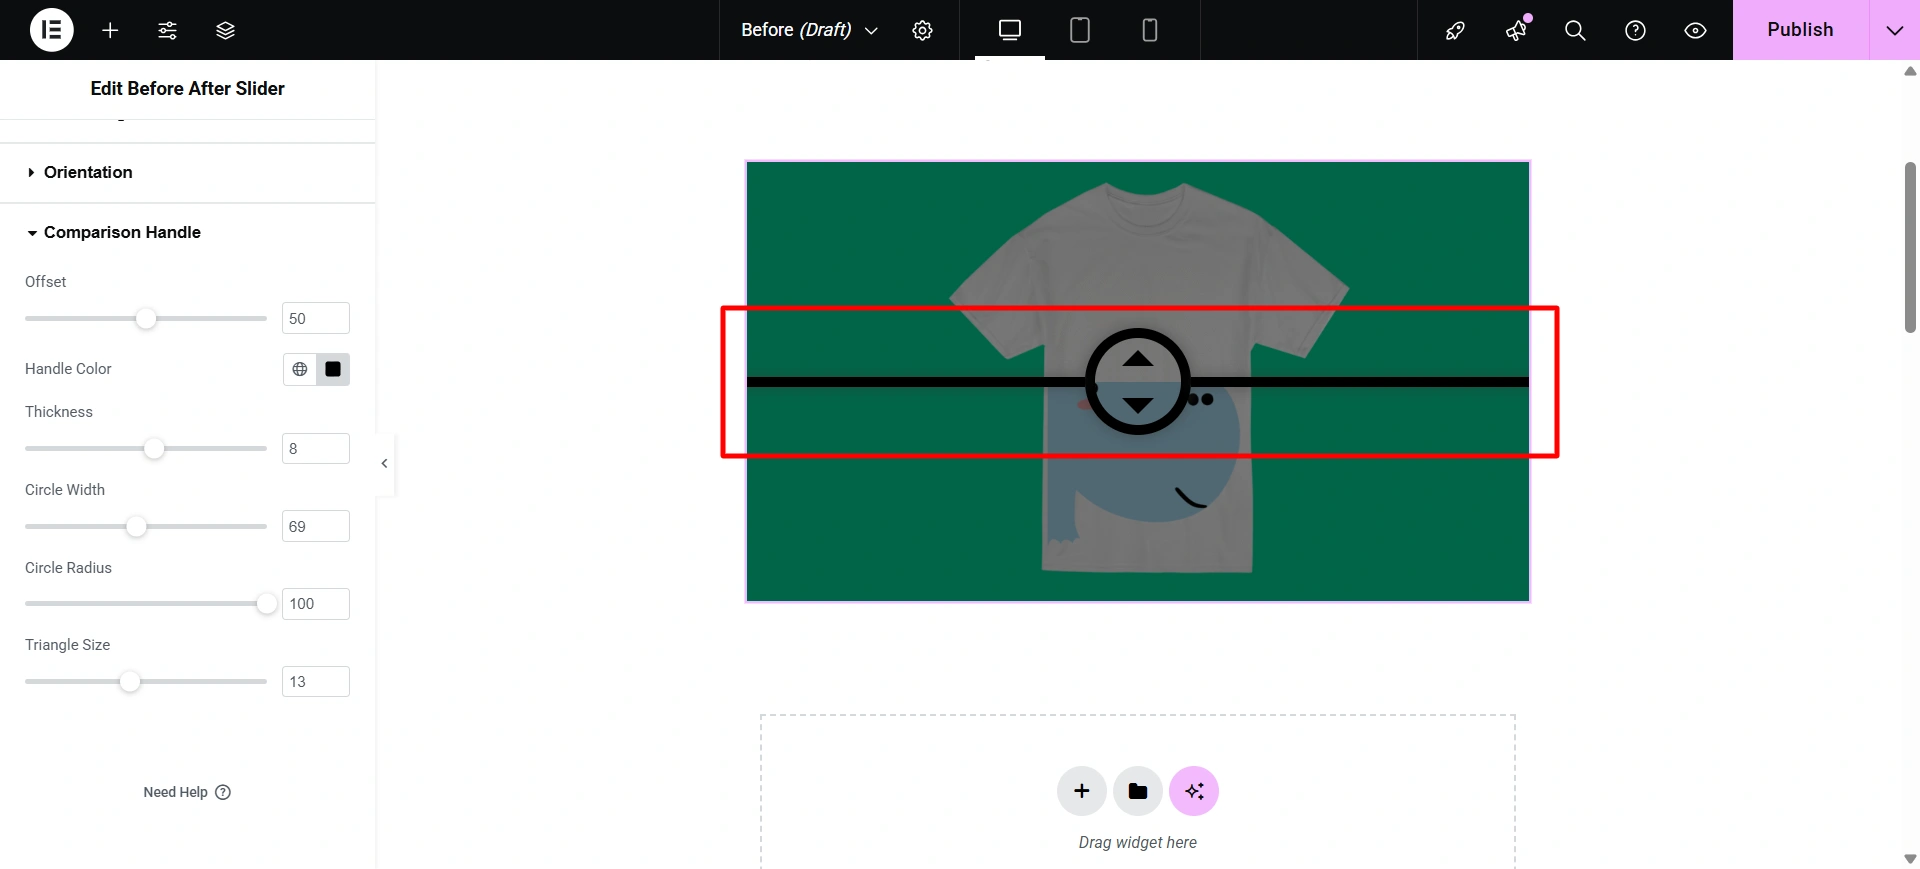
In the comparison handle, you can choose a color for your slider, adjust its thickness, circle width, and even the triangle size.
In style, you can choose where you want to show the before/after label. Select the typography for the label. And choose the color that you want on your labels.
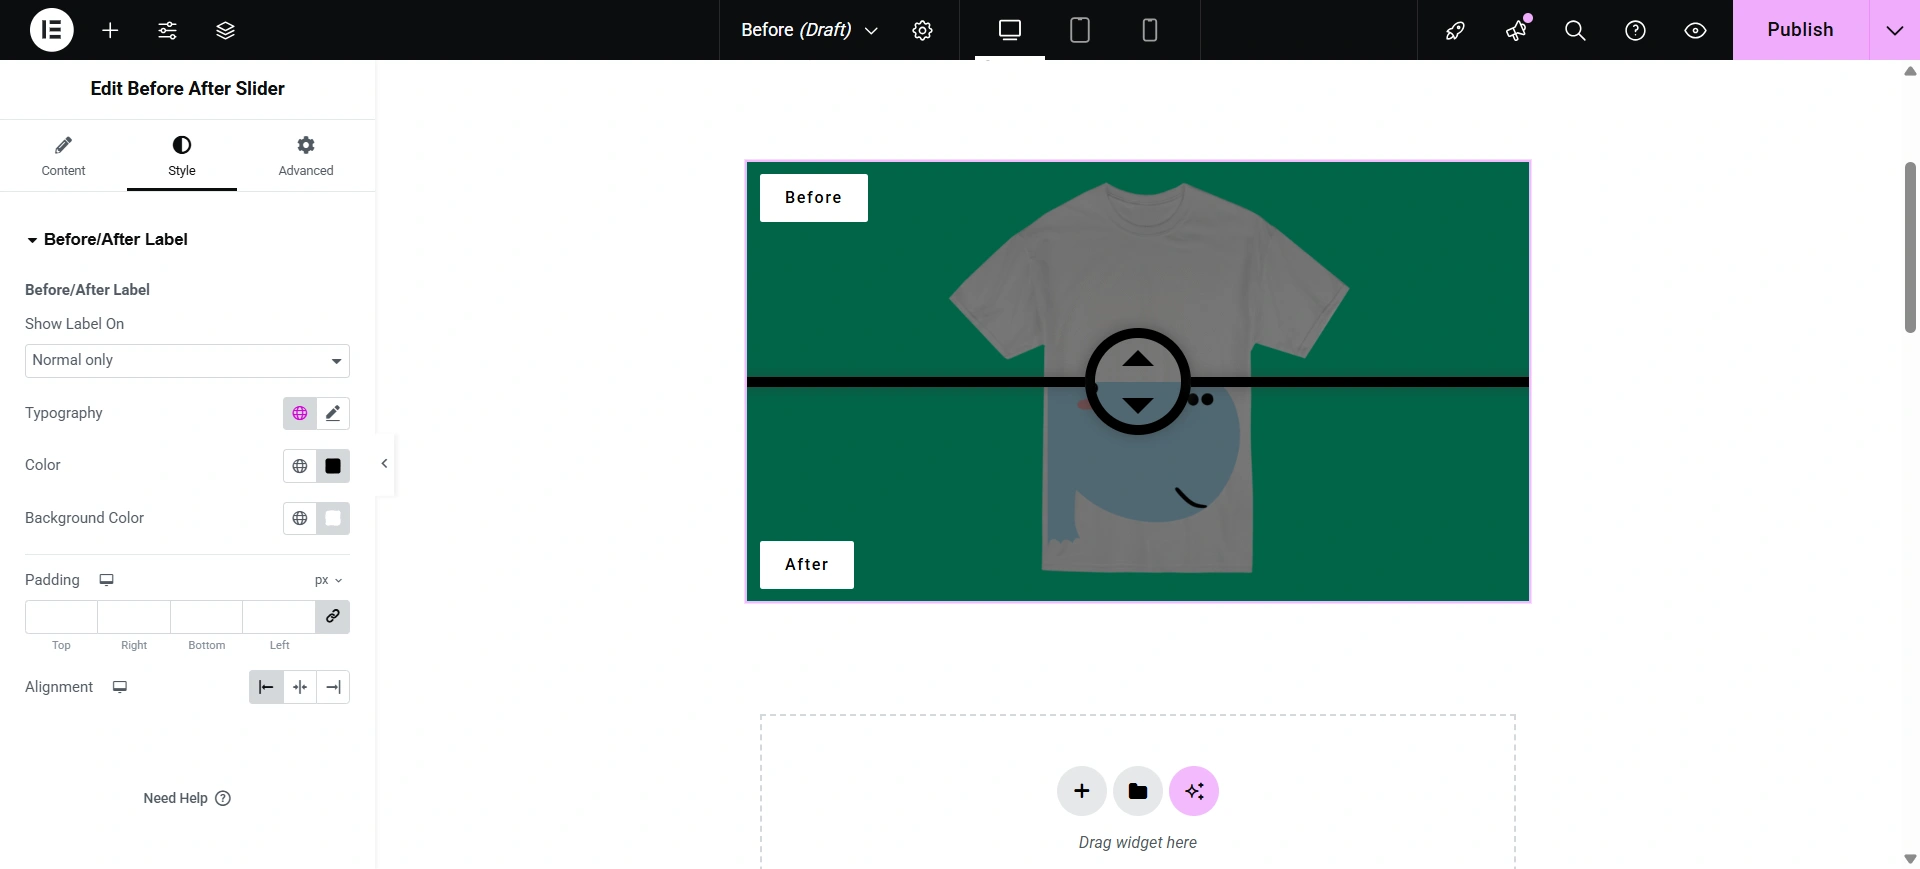
Once you have customized, don’t forget to publish it.
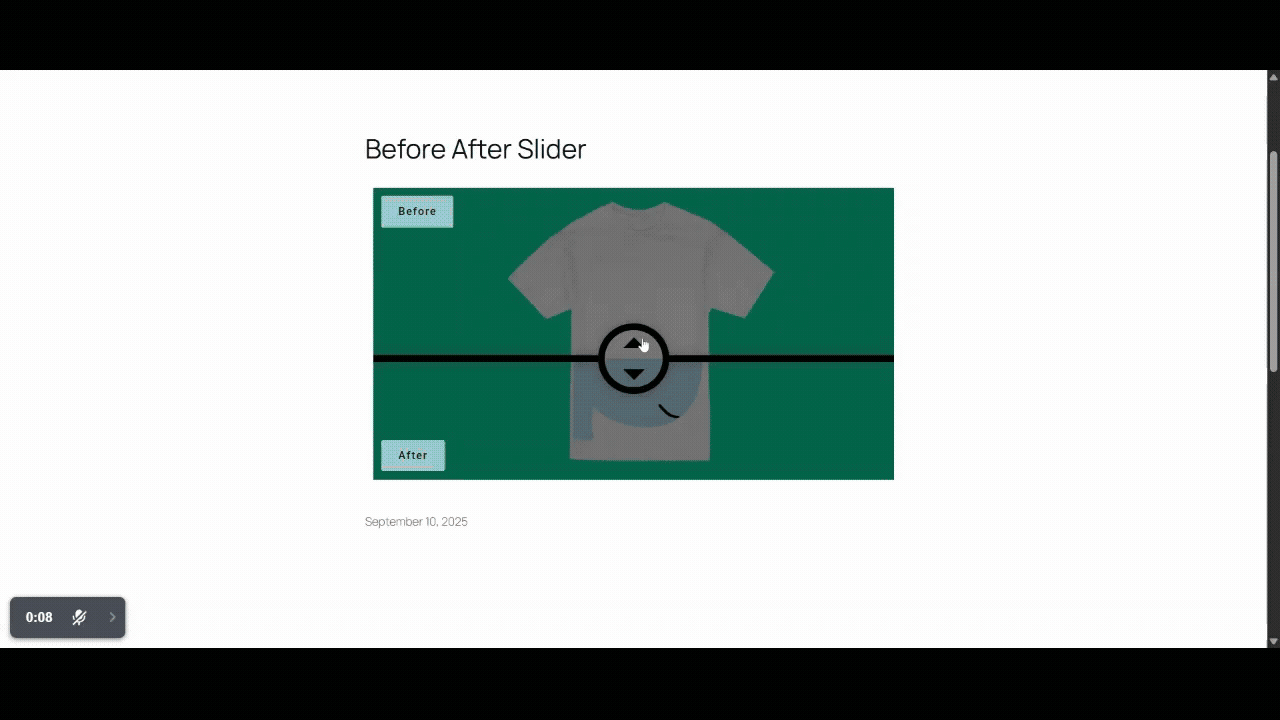
The result will be a professional, interactive widget that captivates your audience and effectively communicates your work’s value.
And that’s it!
Your Before After Slider is all set up and ready to go. With just a few quick steps, you’ve built an engaging way to showcase image comparisons right on your website.
Pretty easy, right? Now your visitors can interact with the slider, drag the handle, and instantly see the transformation you wanted to highlight.
FAQ
A before after slider in Elementor is used to visually compare two images by allowing users to drag a slider and see the differences interactively.
No, you can create a before after slider in Elementor without coding by using the Responsive Addons for Elementor plugin and its drag-and-drop widget.
Yes, you can. The widget provides both options for display. You can use whichever way you like.
Yes, the Before After Slider works on mobile devices. It is fully responsive, meaning the slider automatically adjusts to fit smaller screens. Visitors can easily drag the handle with their finger to compare the before and after images on smartphones and tablets.
Conclusion
Adding a Before After Slider is a great way to enhance your portfolio and draw the attention of your audience. With free plugins, such as Responsive Addons for Elementor, you do not need to be a code master.
By following this guide, you can easily create Before After Slider in Elementor and showcase your work in a fun and attention-grabbing way. So go ahead, start transforming your website and impressing your visitors with stunning visual comparisons.
If you like this guide, consider reading.
- Elementor AI Image Generator – An Ultimate Guide
- How To Add Free Dual Color Header To Your Elementor Website
- How to Add free Price List To Your Elementor Website
Want to add a functionality to your website? Grab the Responsive theme today!