Summary
The article explains how to change font size in WordPress.
To adjust the font size, go to a post or page in the block editor. Next click on the text block to be changed, and then modify the typography via the settings in the right-hand sidebar.
If you wish to change the font size of a webpage entirely, you can use either a tool such as Elementor, the Responsive Theme customizer, or CSS to achieve more control.
Styling and formatting pages and posts are important in WordPress to create engaging content for website visitors.
Optimized content that is easy to read can decrease your bounce rate and increase page views, which can ultimately benefit your business.
In WordPress, formatting makes your pages and posts visually appealing. One of the simplest and most effective ways to format your content is by changing the font size.
In this article, we will show you how to easily change font size in WordPress posts and pages.
Cyberchimps Responsive is the Best WordPress Theme – Get it for free!
Why Change Font Size in WordPress?
It’s important to keep in mind that the way you structure your content can have an impact on both your visitors and your search engine rankings.
Using clear and concise headings throughout your posts can help search engines better understand the main topics of your content.
This can ultimately lead to a higher ranking in the search engine results pages.
Method 1: Change Font Size Using WordPress Theme Customizer
WordPress themes often provide options for customizing fonts through the WordPress Customizer.
However, it is important to note that each theme has its own way of implementing the WordPress Customizer and font options, which can vary from theme to theme.
In this section, we will provide you with step-by-step instructions on how to use the built-in font options of the Responsive theme by Cyberchimps effectively.

Responsive theme is designed to be highly flexible and customizable, making it an excellent choice for enhancing the appearance of your website.
With a range of font options available, you can easily modify and tailor the typography on your website to meet your specific needs and preferences.
Responsive theme has got you covered whether you want a modern or classic look for your website.
Change Font Size Using Cyberchimps Responsive Theme
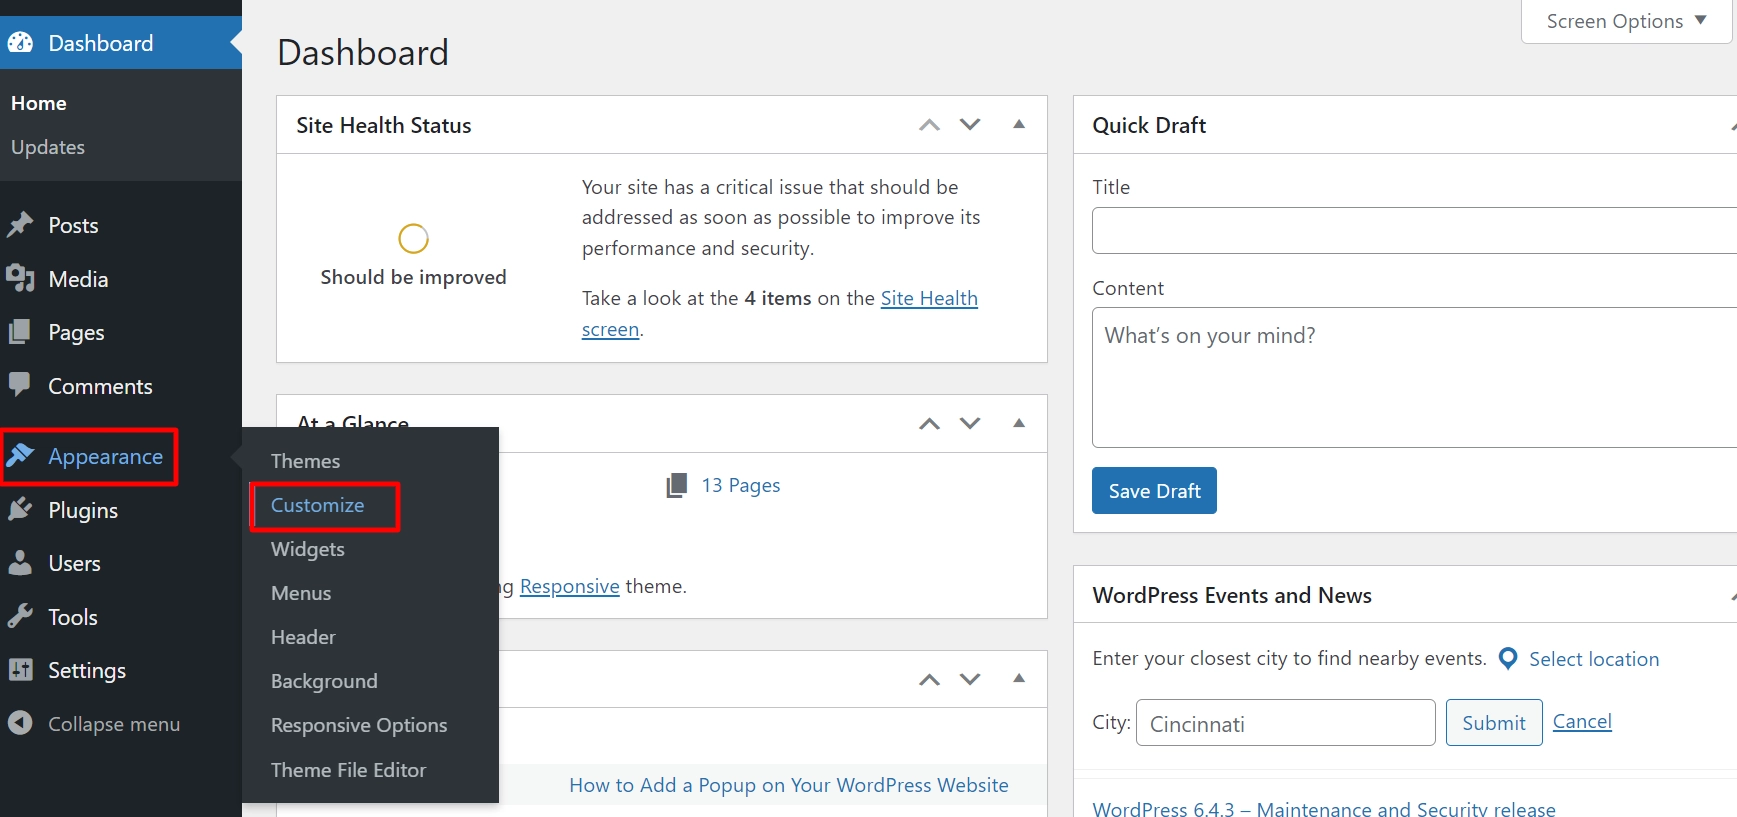
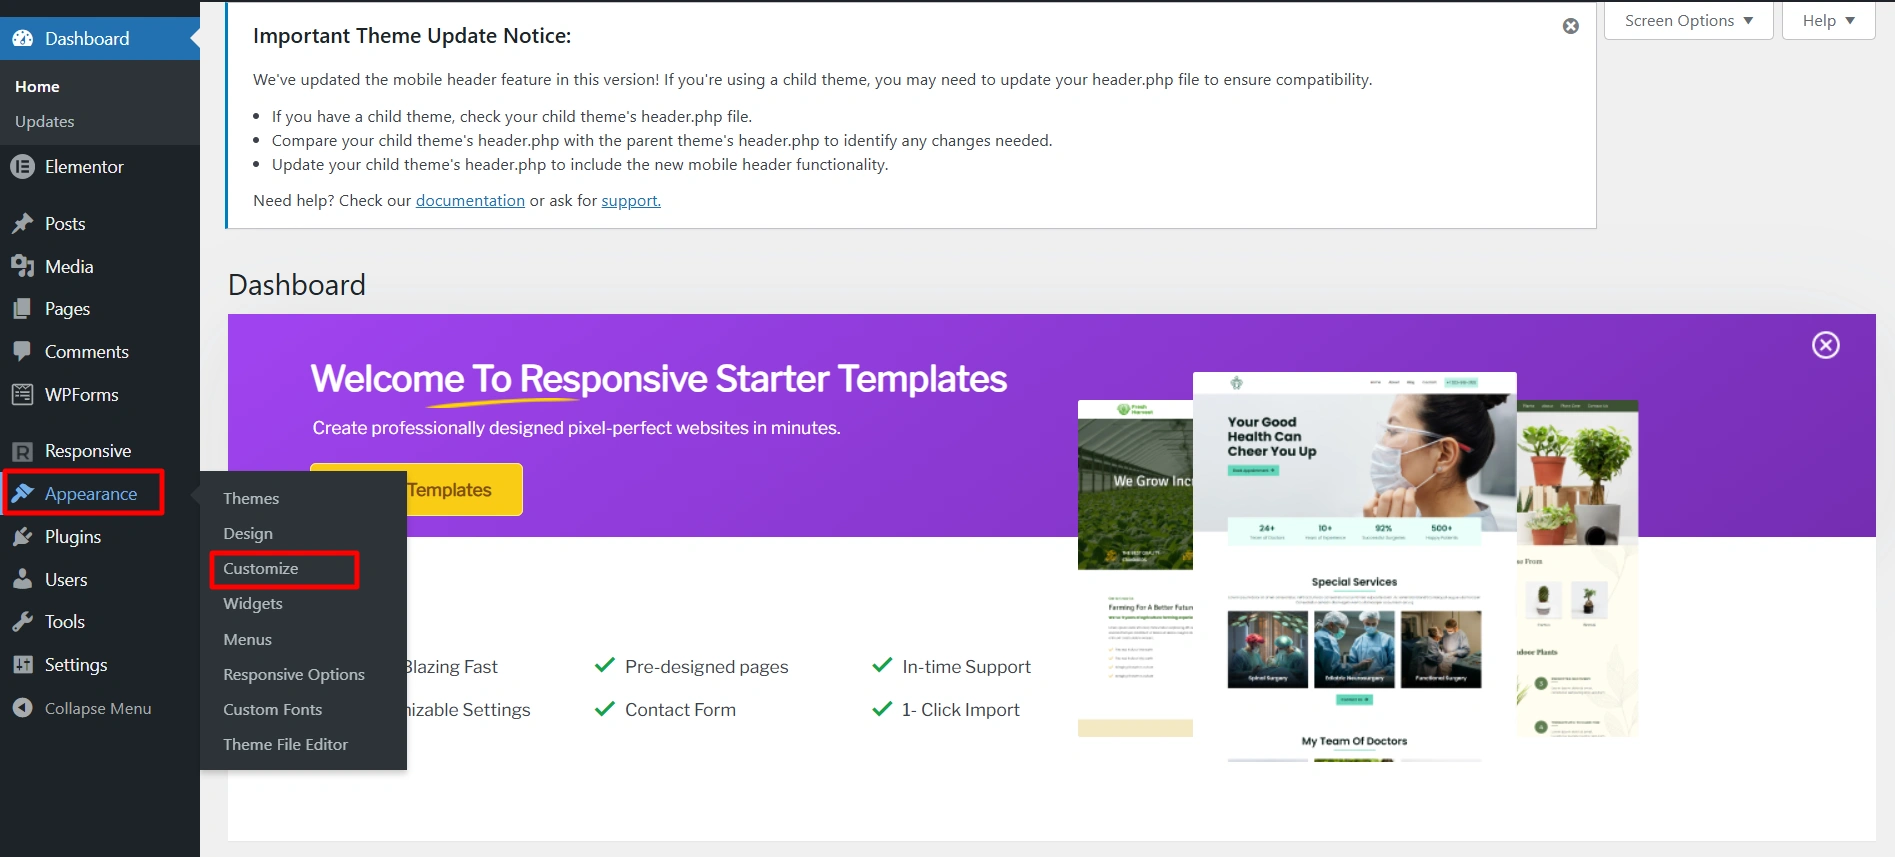
To get started, login to your WordPress admin dashboard and navigate to Appearance > Customize to open the WordPress Customizer.
To customize your website’s font and typography, you’ll need to locate the relevant settings in your theme.
Keep in mind that these settings can be located in different places for each theme, so you may need to do some exploring to find them.
If you’re using the Responsive theme, you can access the font and typography settings by selecting the Global Settings option.
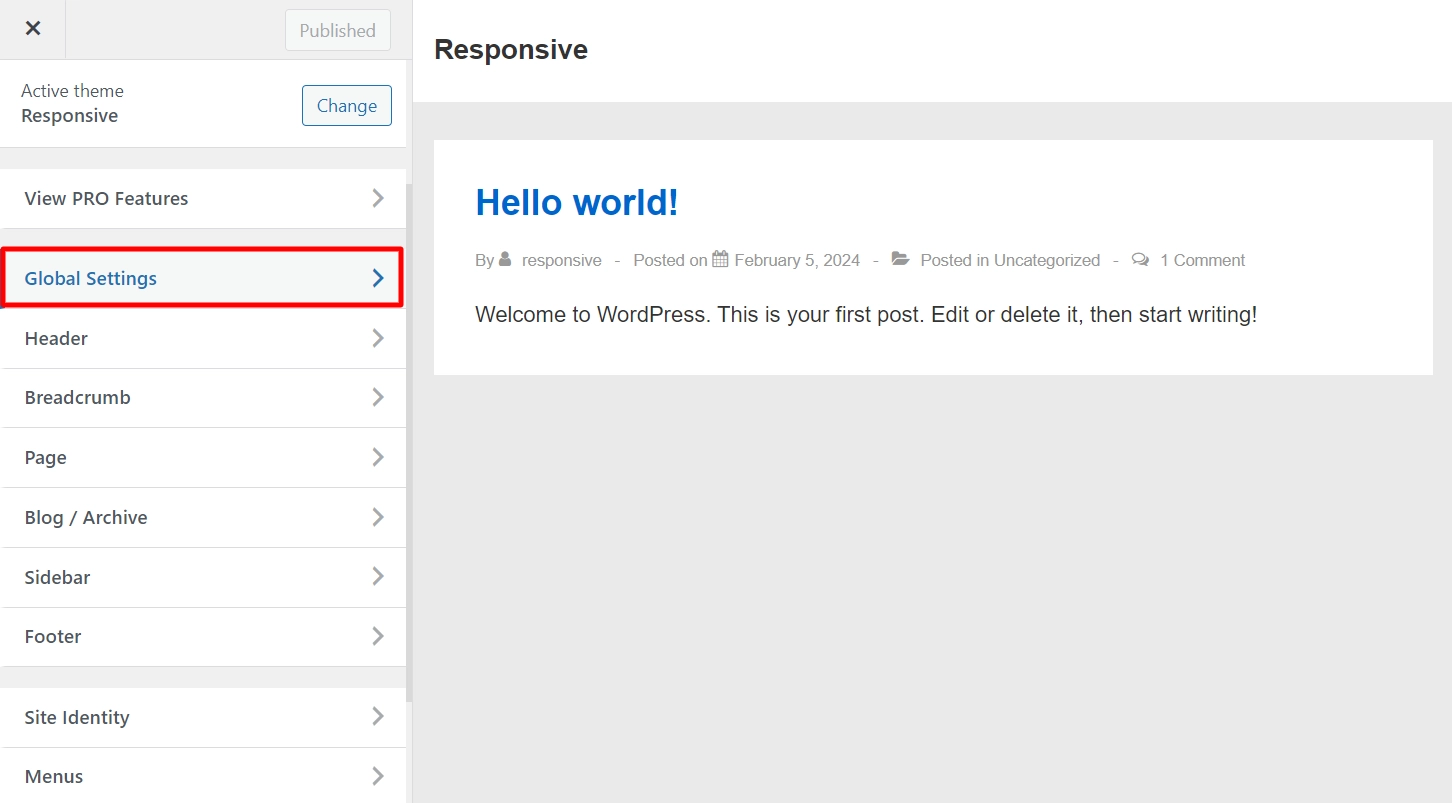
Next, navigate to Typography.
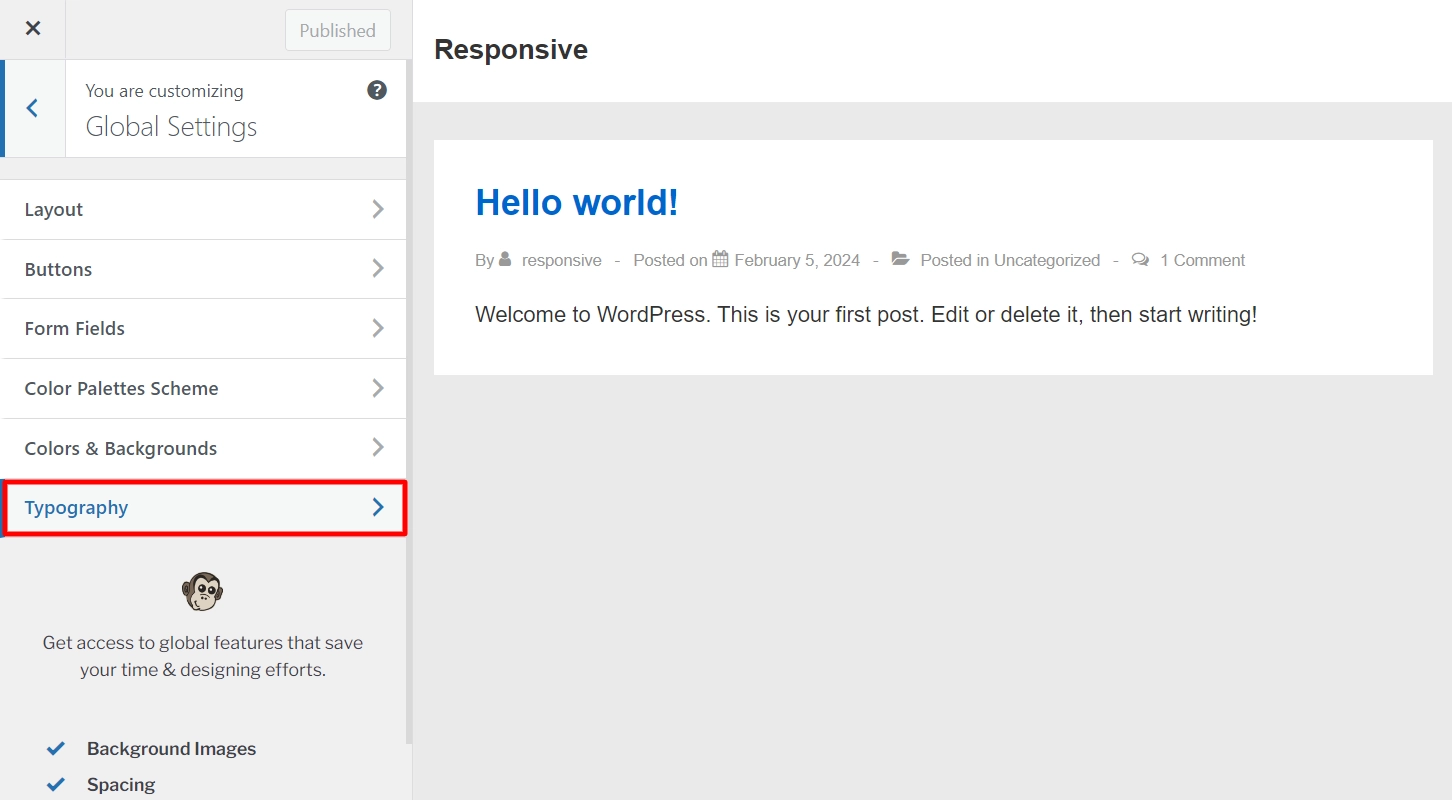
Depending on the theme, you may find more detailed typography settings based on the content type.
For instance, the Responsive theme has categorized settings under:
- Body,
- All Headings,
- Meta
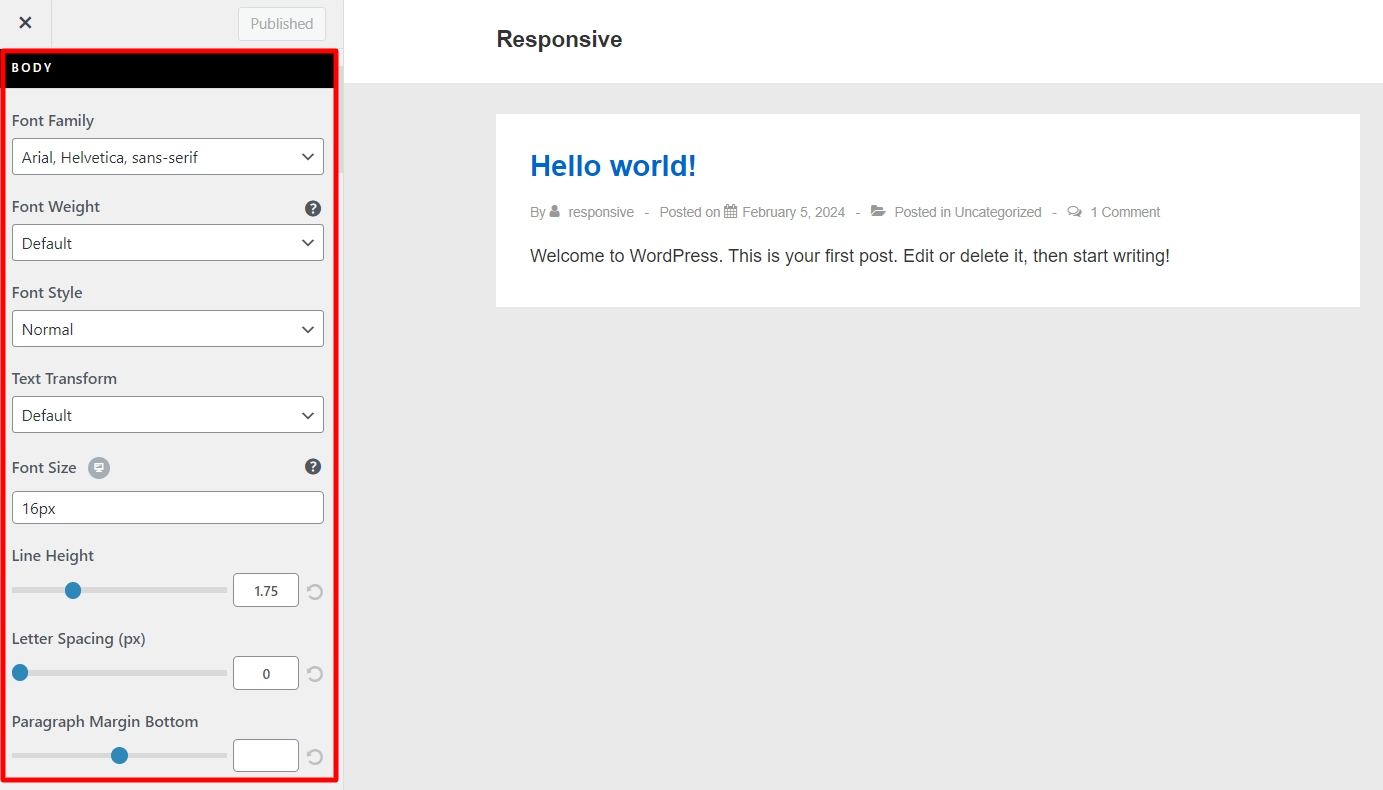
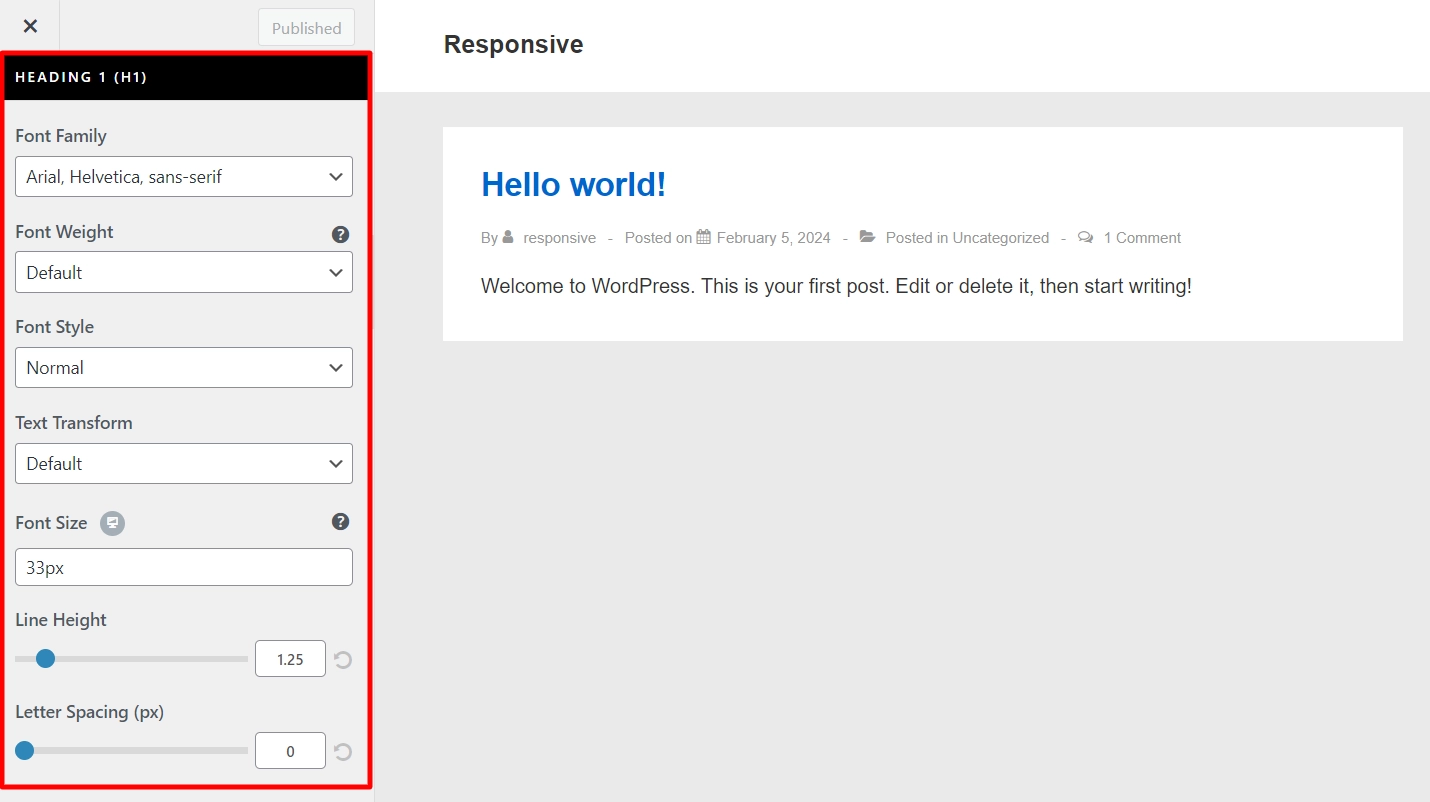
You can adjust the font settings if you wish to modify the font of your WordPress website headings, such as the post or page title. The Responsive theme offers various font options that you can choose from.
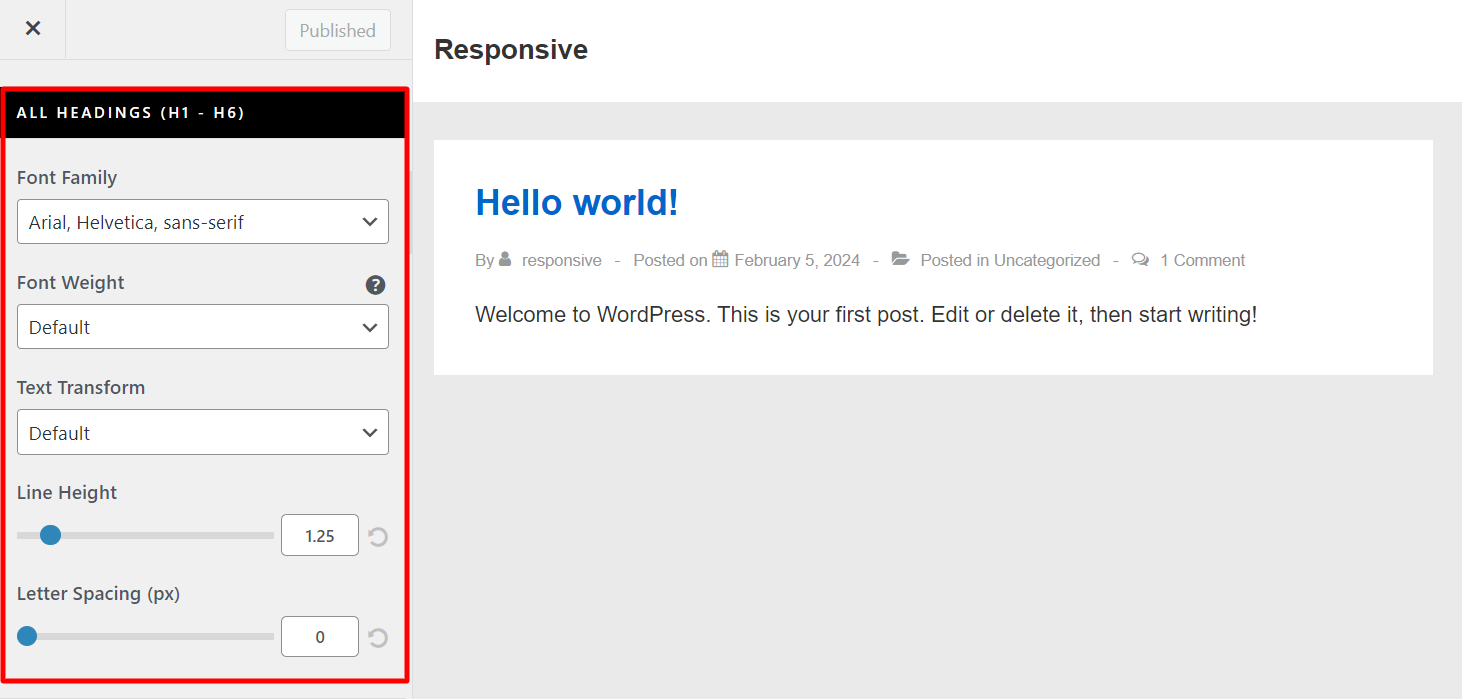
You can customize each heading separately using:
- Heading 1,
- Heading 2,
- Heading 3,
- Heading 4,
- Heading 5,
- Heading 6.
Under Meta settings you get these options:
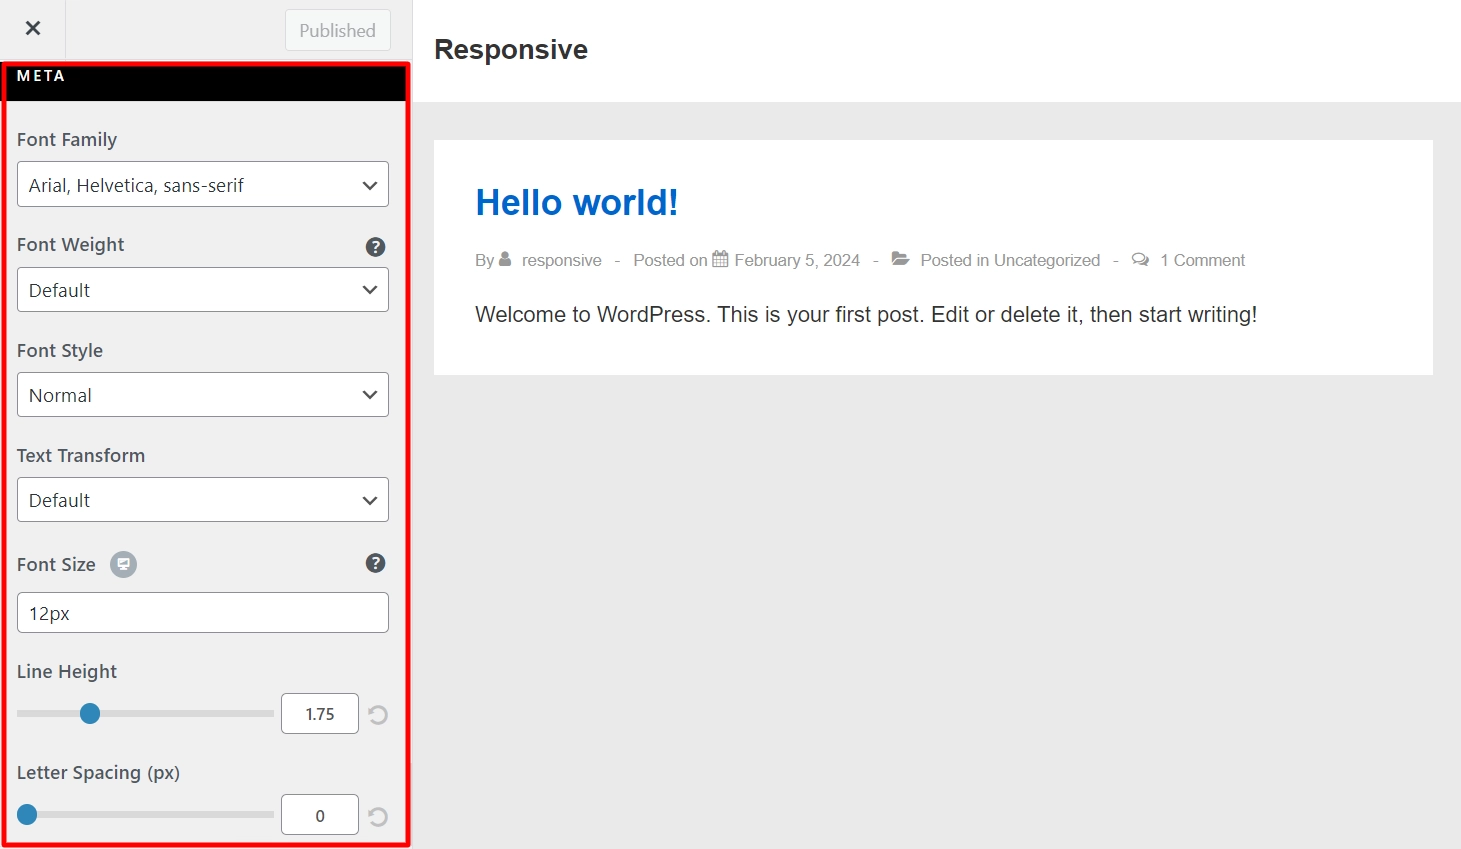
As you make choices, the fonts will update automatically in the live preview of your theme.
After making all the necessary changes, click the Publish button to apply your new font choices.
Method 2: Change Font Size Using WordPress Block Editor
If you don’t want to change the font sizes of your entire website, but only for specific posts or pages, you can refer to this method:
Change Font Size of the Headings
To adjust the font size of a Heading block, follow these steps:
1. Log into the WordPress Dashboard.
2. Add new Post/Page or edit an existing Post/Page.
3. Click the + sign within the Gutenberg editor, located in the upper left corner or on the page.
4. Once the block library appears, click Heading to add a headings block.
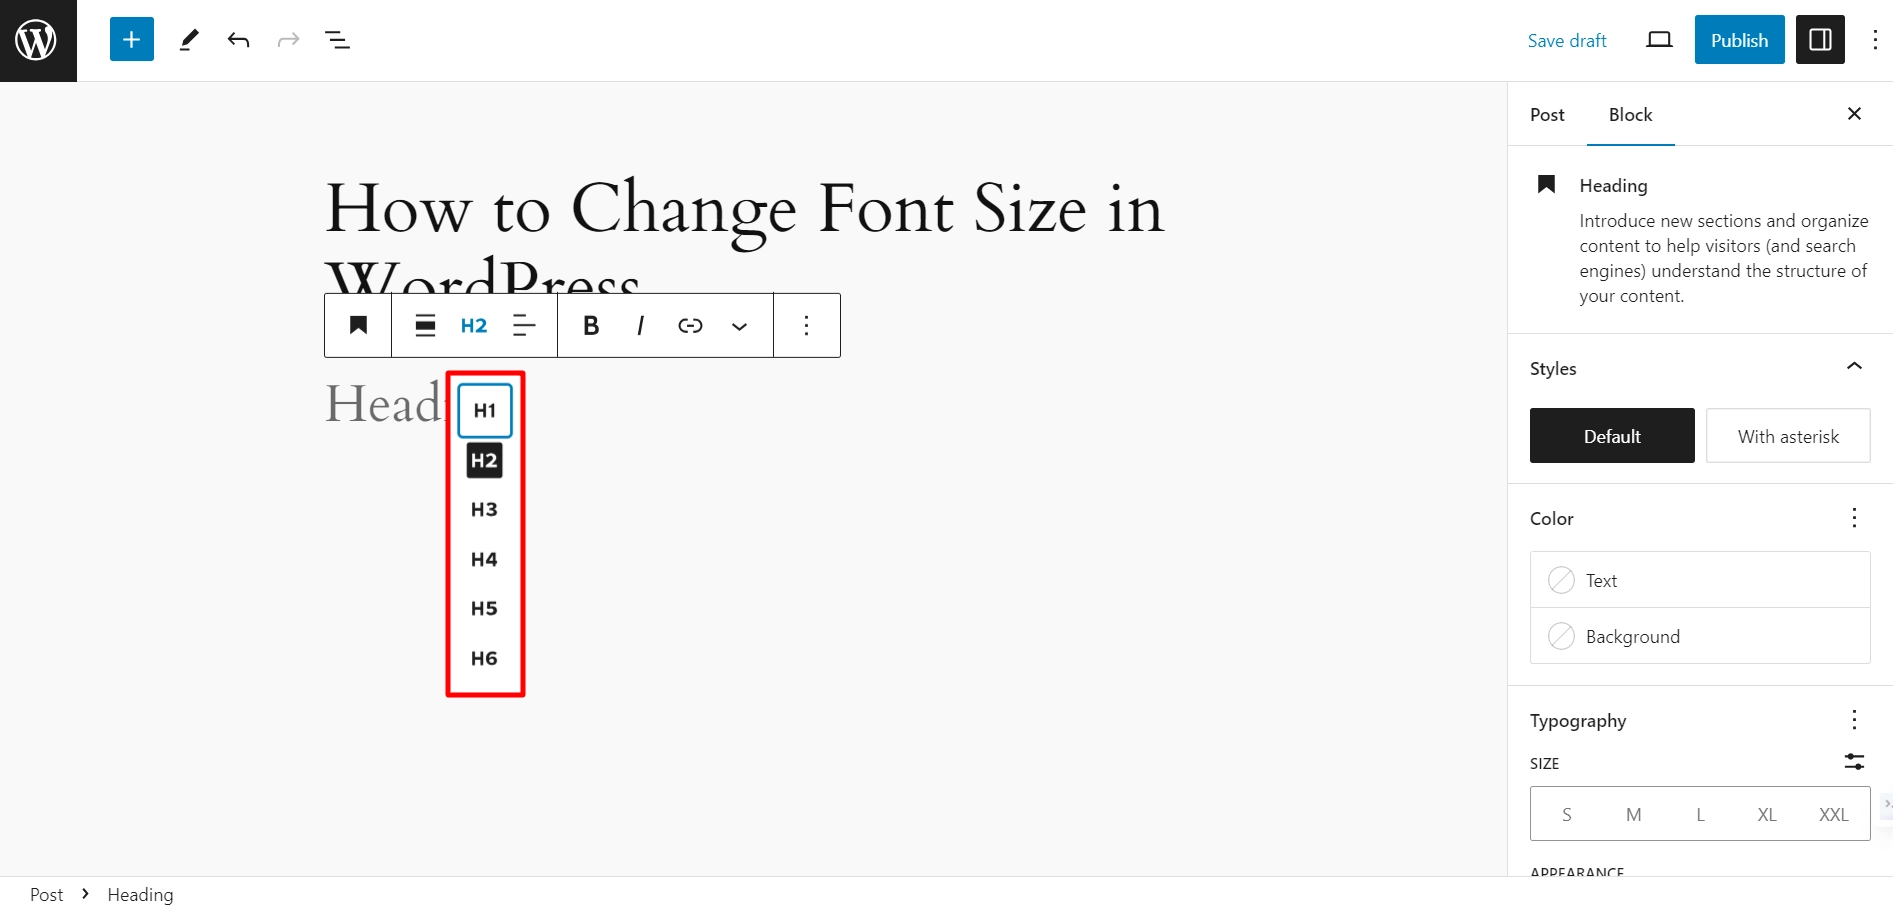
The default setting for the block is H2.
However, if you wish to change it, you can click on the ‘H2’ drop-down menu and select a different heading tag.
Another way to change the heading size is to use the Heading Block settings on the right panel of the screen.
There are five preset sizes to choose from:
- Small,
- Medium,
- Large,
- Extra large, and
- Extra extra large.
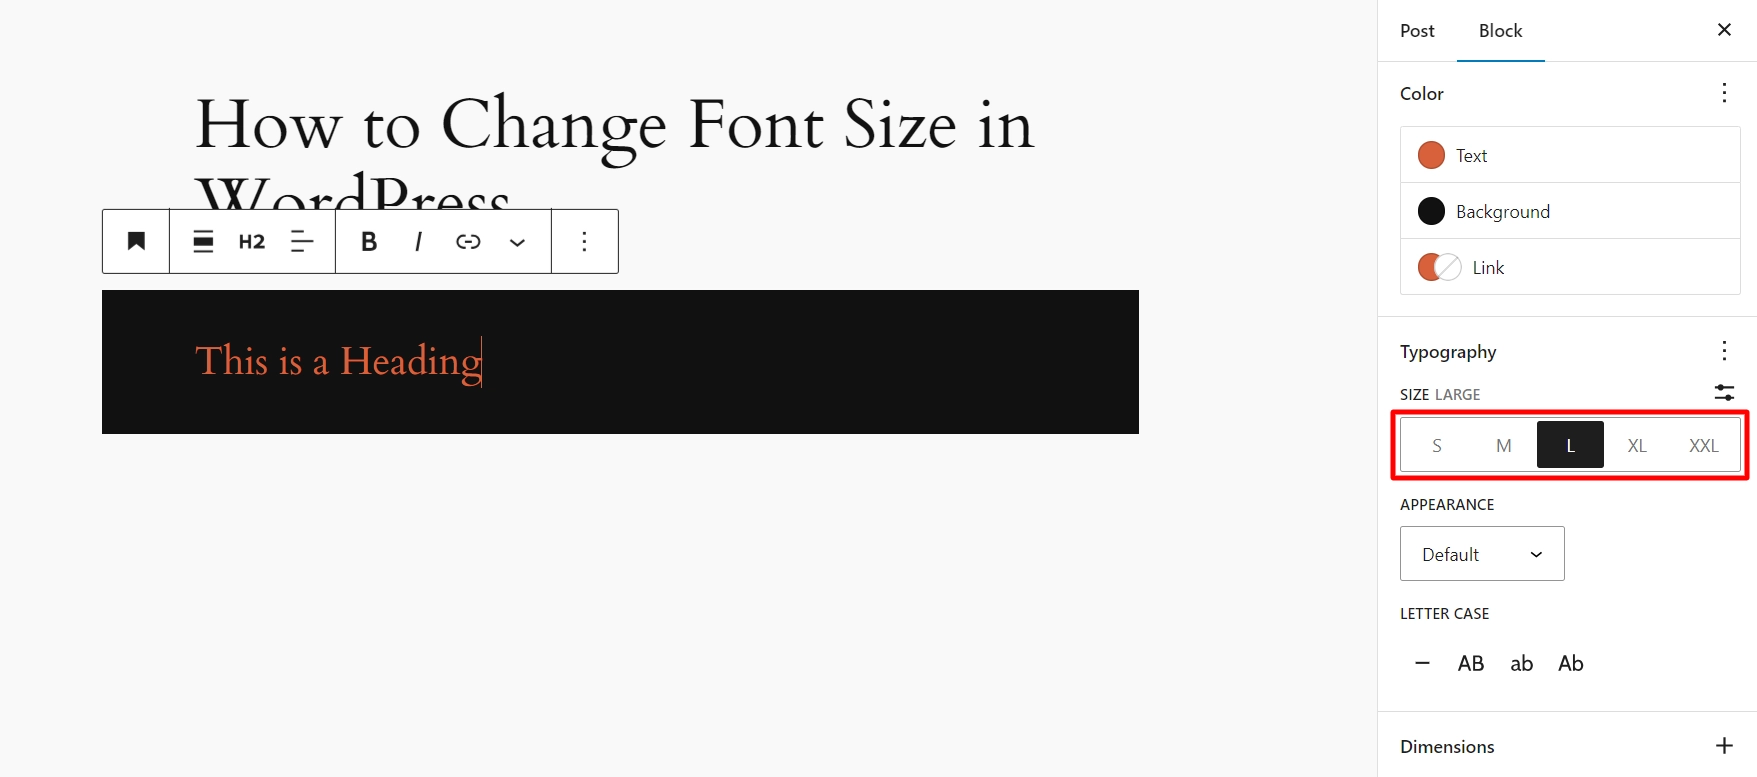
If you have a particular font size requirement, you can enter it in the Size Custom field using px, em, or rem.
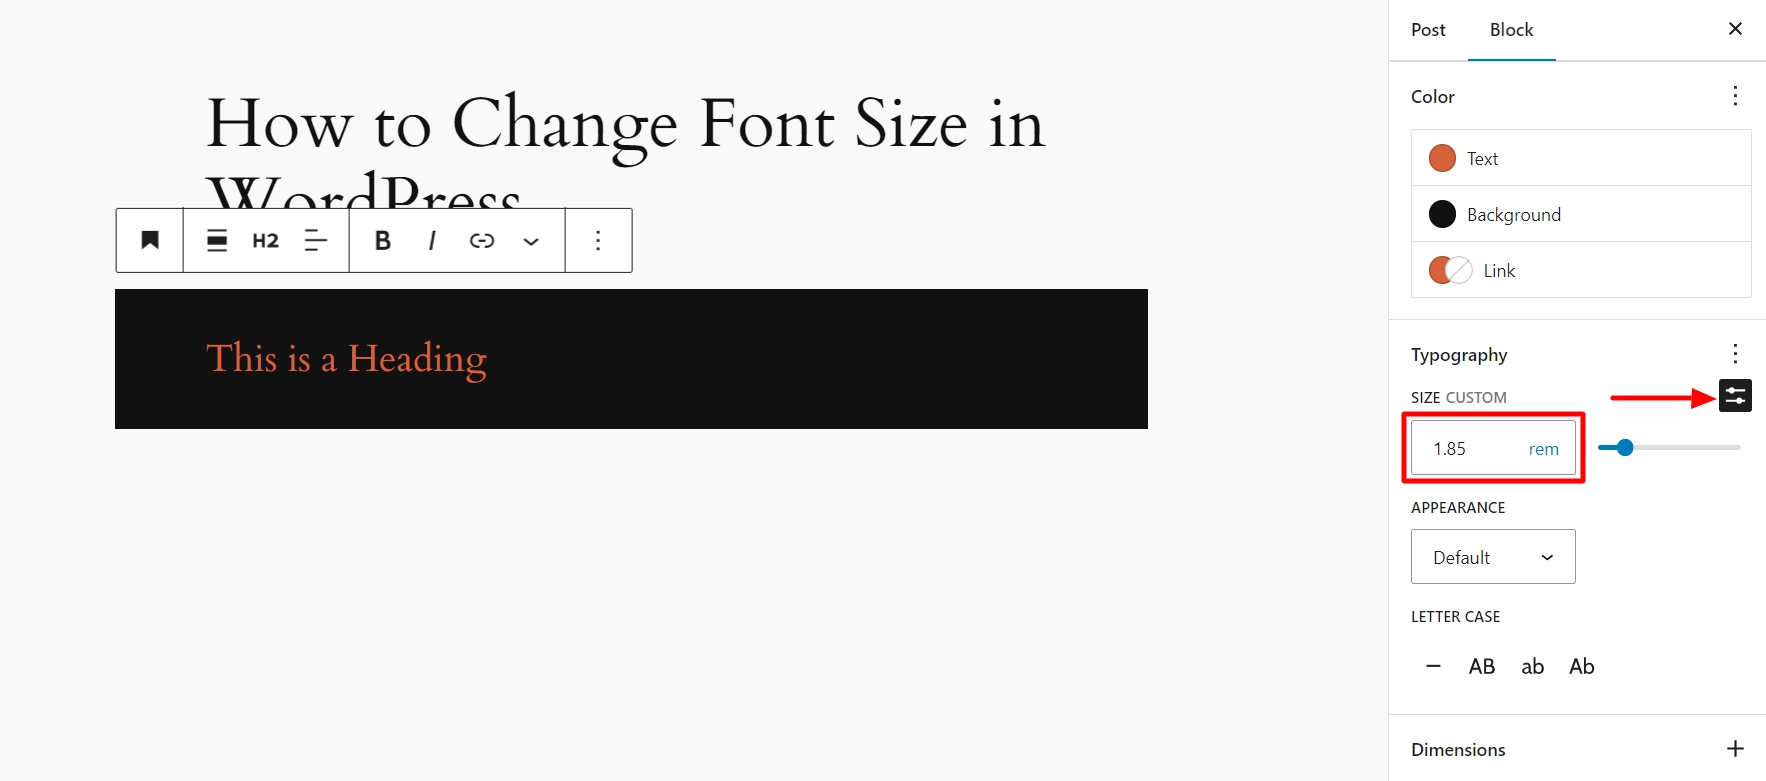
Alternatively, you can slide the font slider control to adjust the font size to your preferred setting.
You have the option to personalize the heading by changing its color, appearance, letter case, and other attributes to your liking.
After making changes, click the ‘Update‘ or ‘Publish‘ button to ensure that all the changes are saved.
Change the Font Size of Paragraph in the WordPress Block Editor
If you want to adjust the font size of the text in a Paragraph block, follow these steps:
1. Open an existing page or post in the Gutenberg block editor.
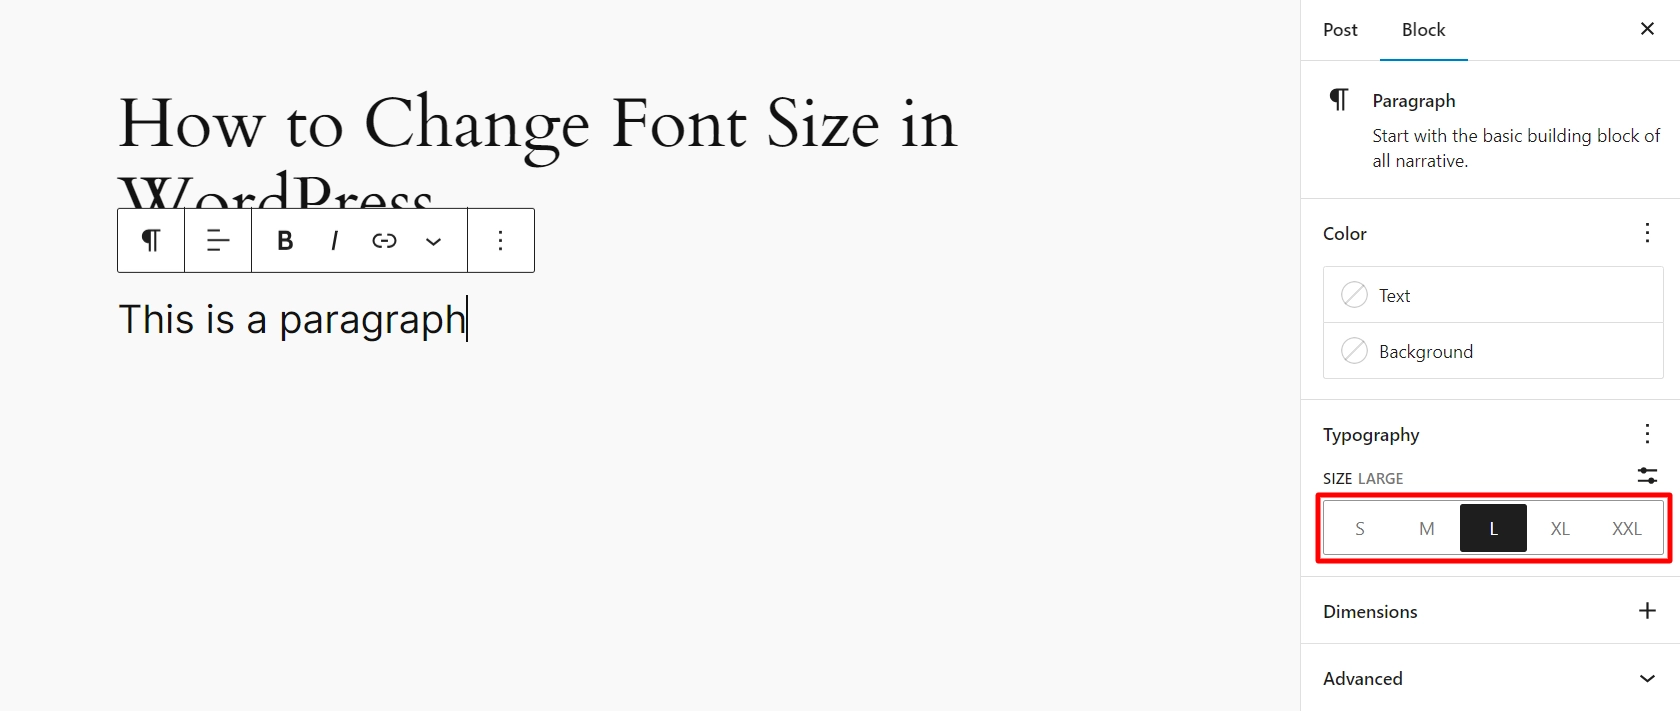
2. Click on any Paragraph block, then go to the Block tab on the right side of the screen.
3. Under the Typography section, select small, medium, large, or extra large to suit your needs.
If you want to revert the text to its original size, click the three-dot menu next to the Typography section, then select Reset.
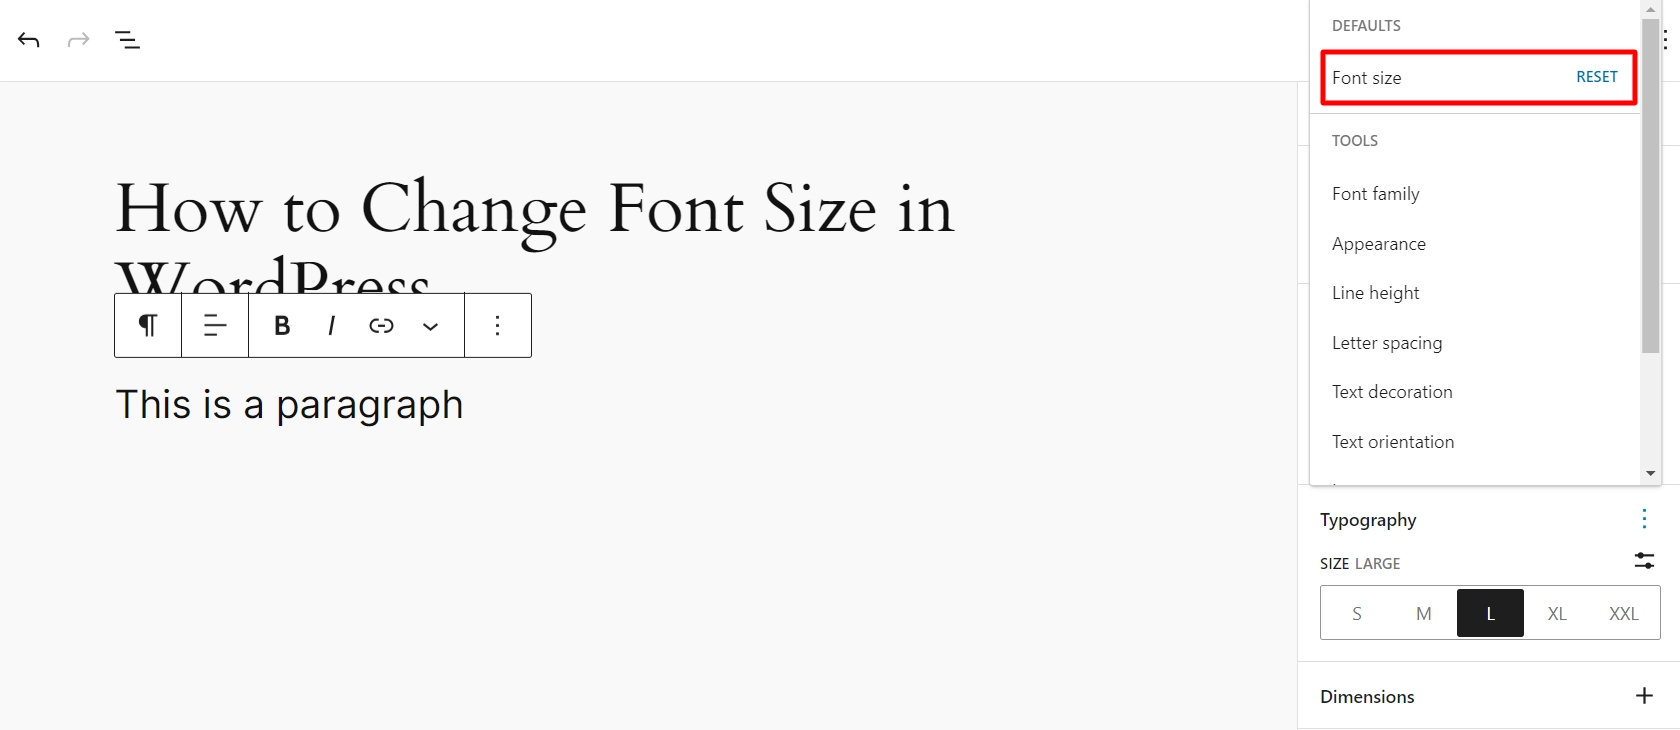
In addition, you can also customize other options like font family, appearance, line height, letter spacing, and much more by using the same dropdown menu.
Once you’ve made your desired changes, click the ‘Update‘ or ‘Publish‘ button to save them.
Please note that these features are not available in the older classic editor for WordPress. If you want to use them, consider switching to the Gutenberg block editor.
Method 3: Change Font Size Using Elementor
The drag-and-drop interface makes it relatively easy to modify the size of a font in Elementor. You can preview your changes to the typeface as you make them with real-time editing.
You also get advanced typography and responsive controls. With these features you can adjust your font sizes based on the specific device you are using, with no programming required.
The process to modify the size of a font in Elementor:
Open your page and select Edit with the Elementor.
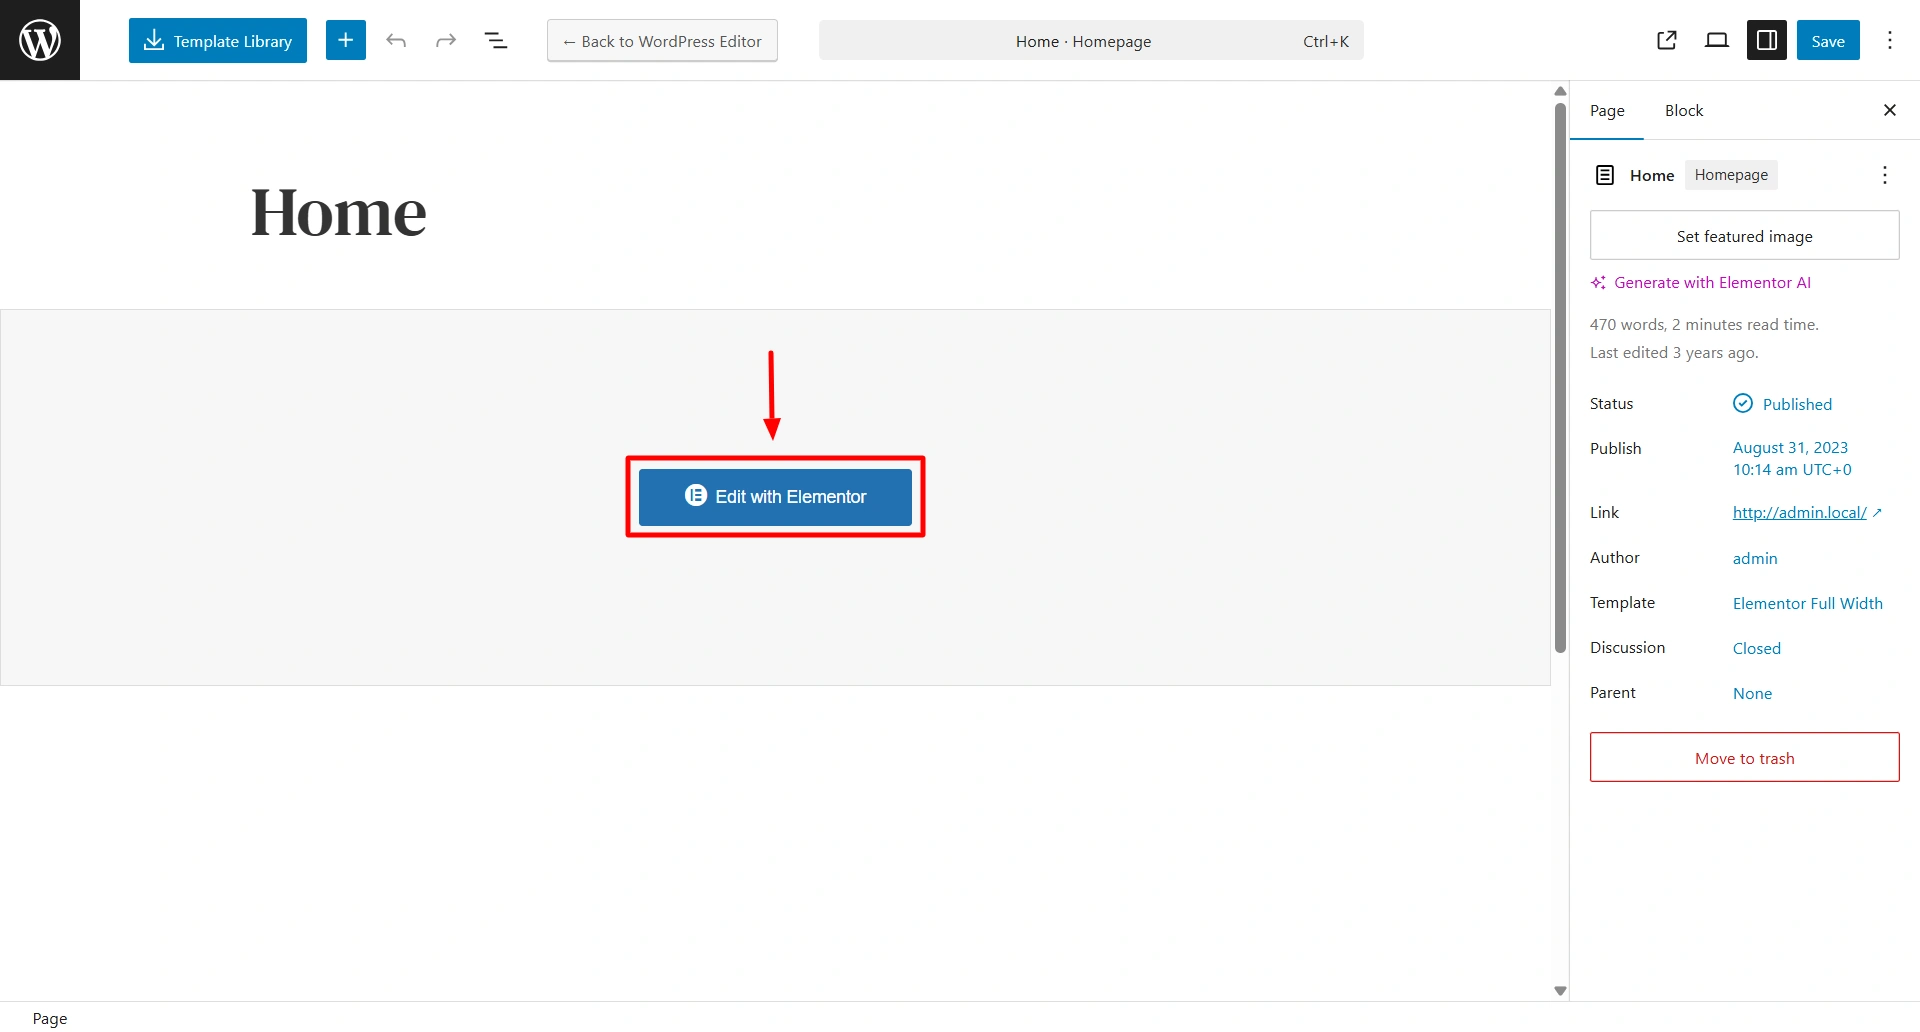
Choose the text widget you would like to edit for e.g. heading/paragraph.
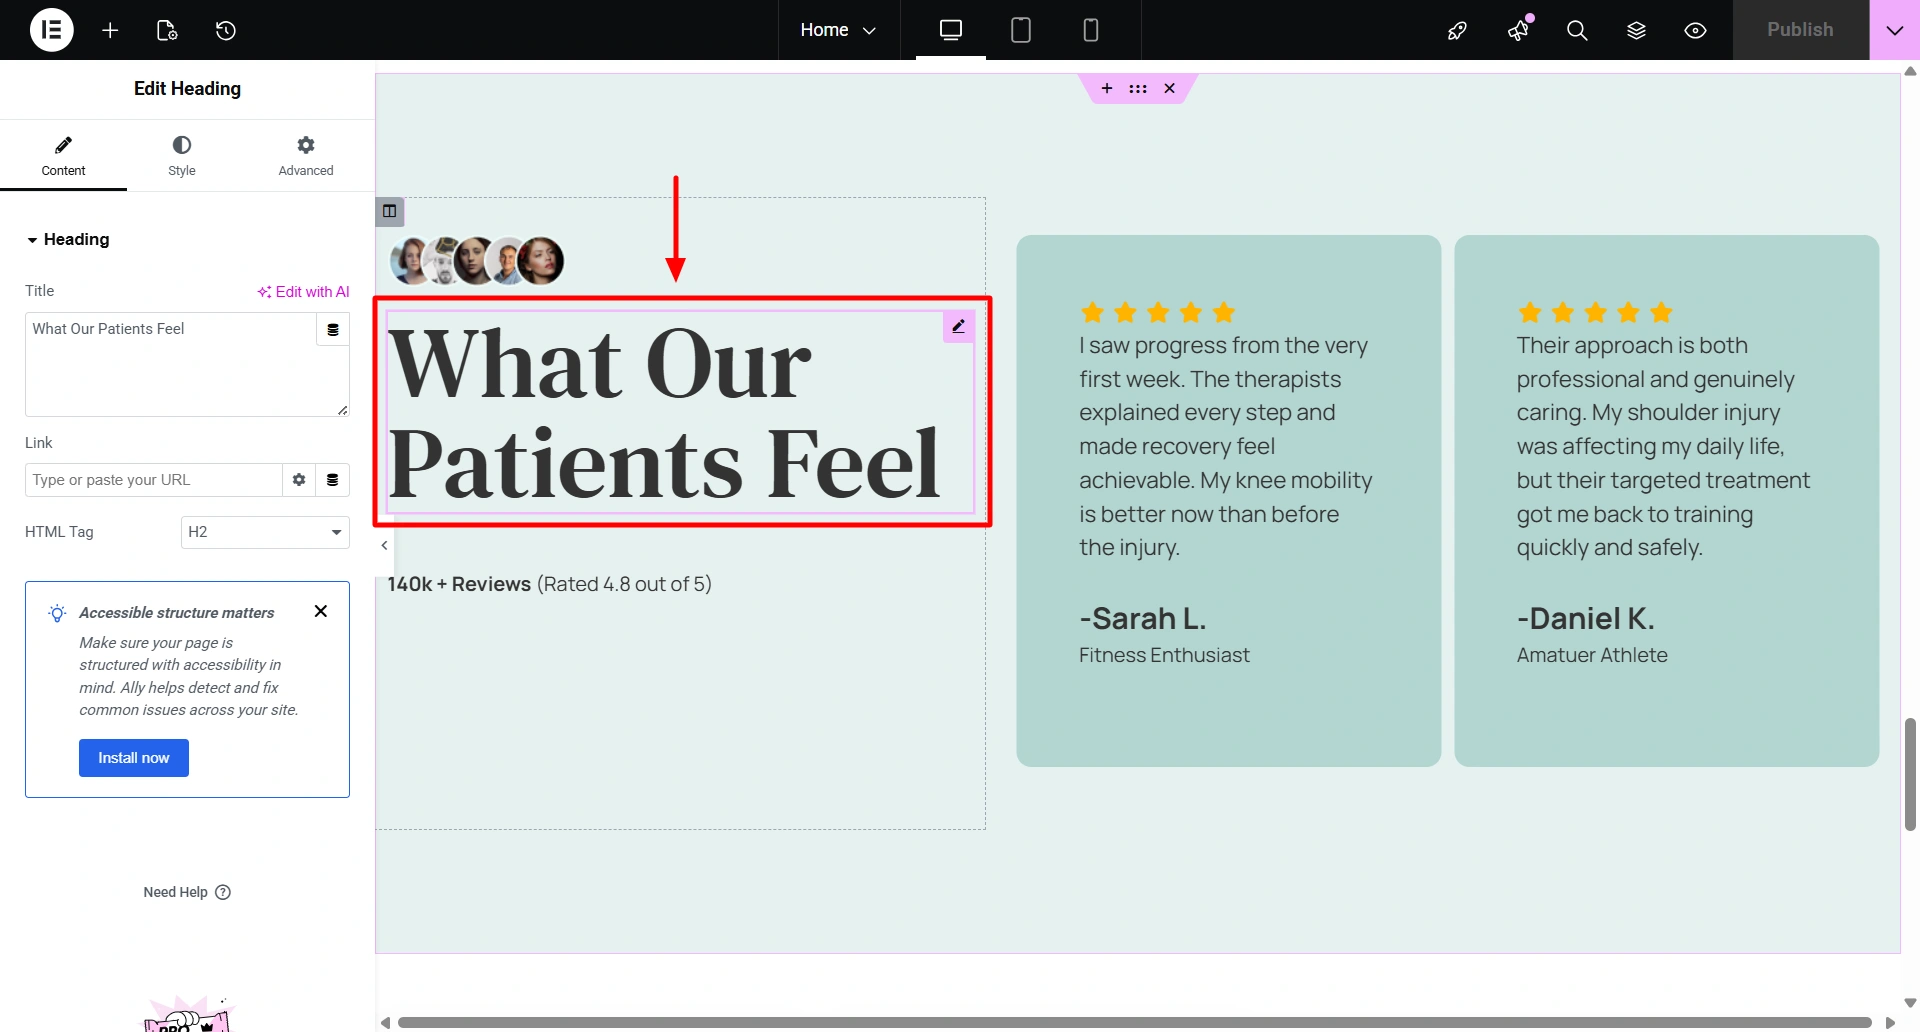
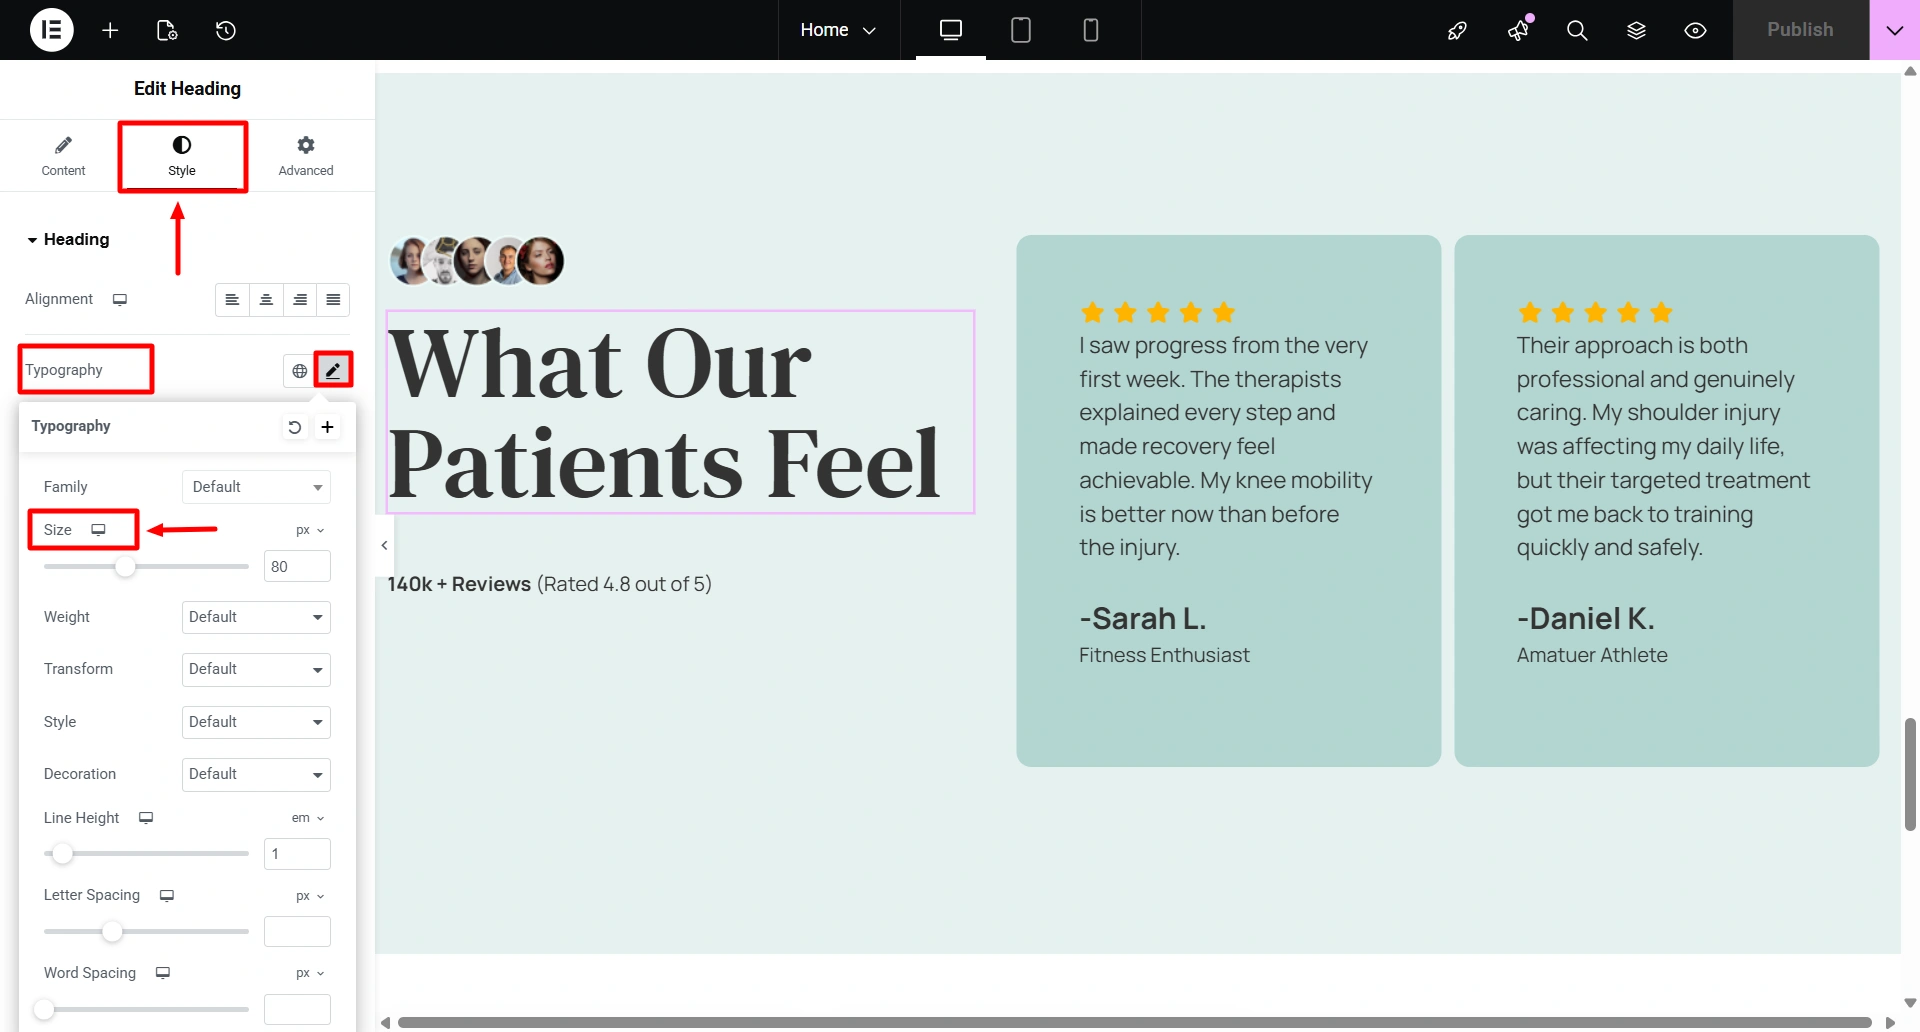
Choose the Style tab.
Click on the Pencil icon next to the Typography setting to expand the settings.
Move the Size slider to the right or left to adjust the size of the font.
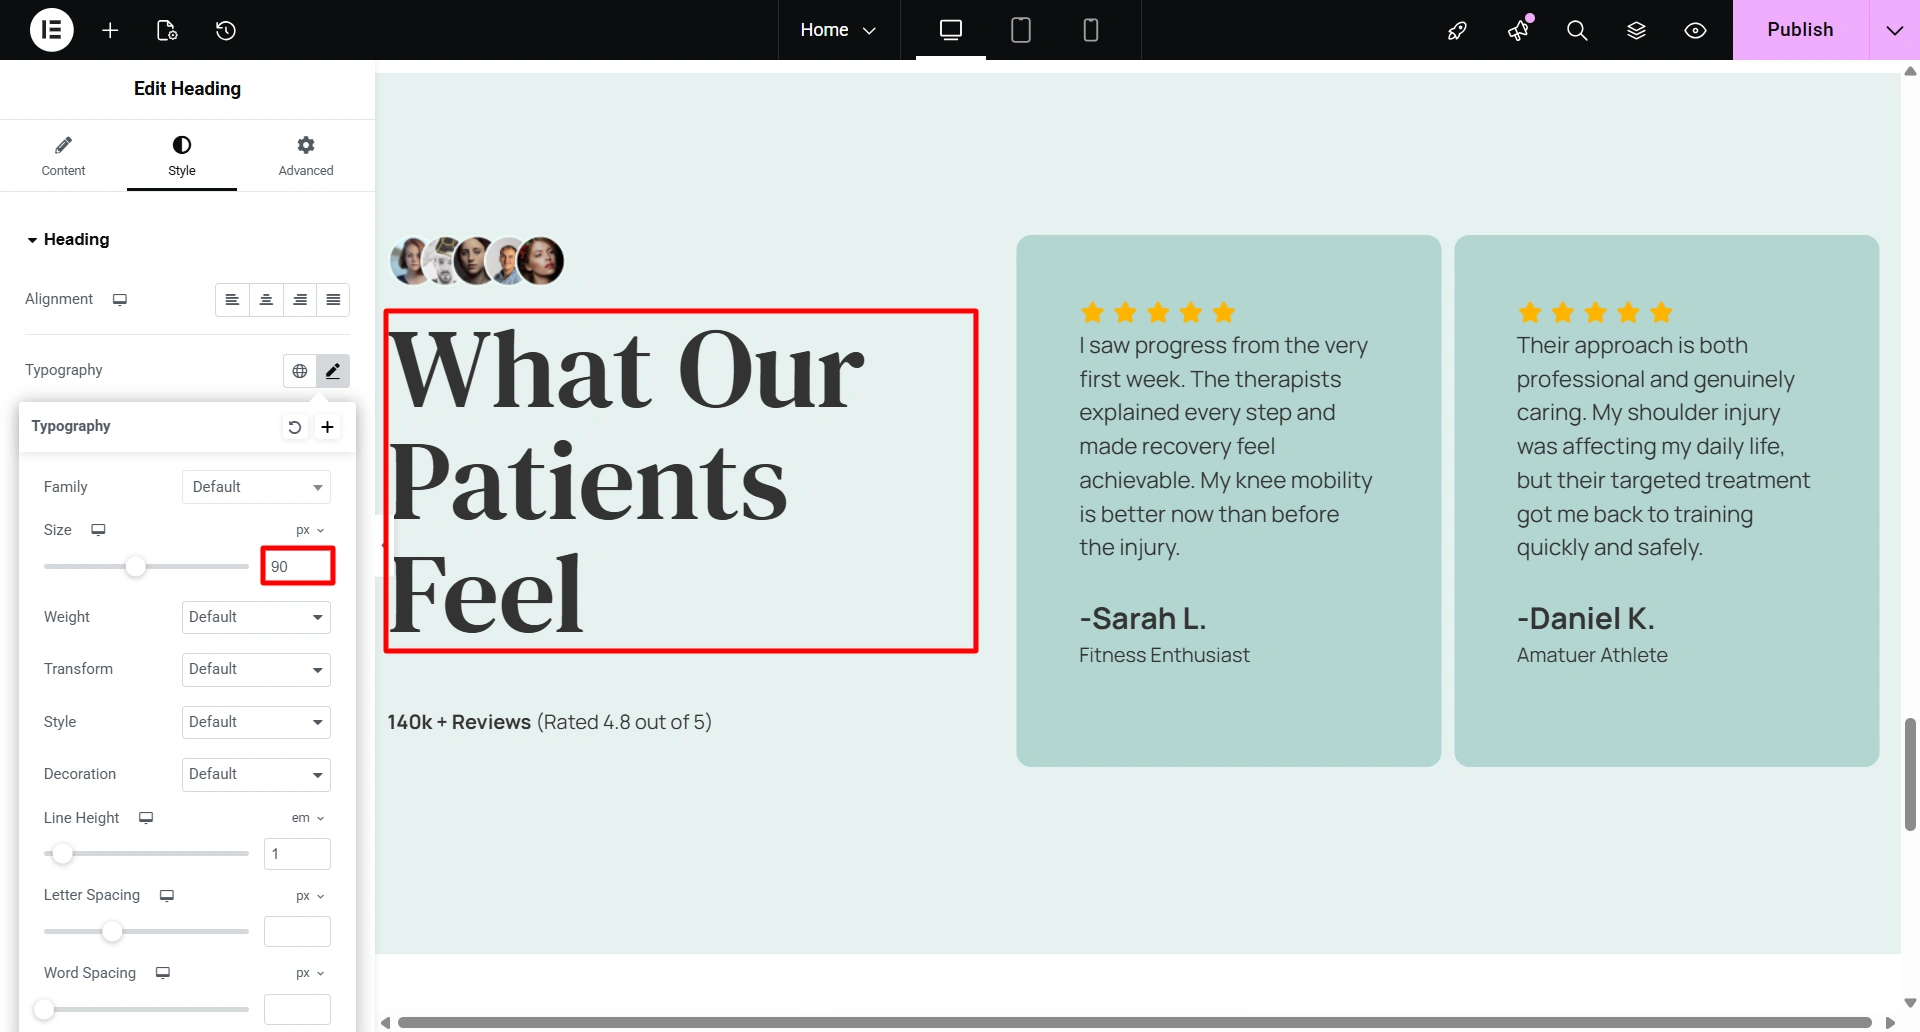
Finally, you will see how Elementor allows you to modify the size of a font for better responsiveness. These features can help you create visually interesting, well-organized content that looks great no matter what type of device you are using.
Method 4: Change Font Size Using a Plugin
You can also change the font size of your text by using a Advanced Editor Tools plugin.
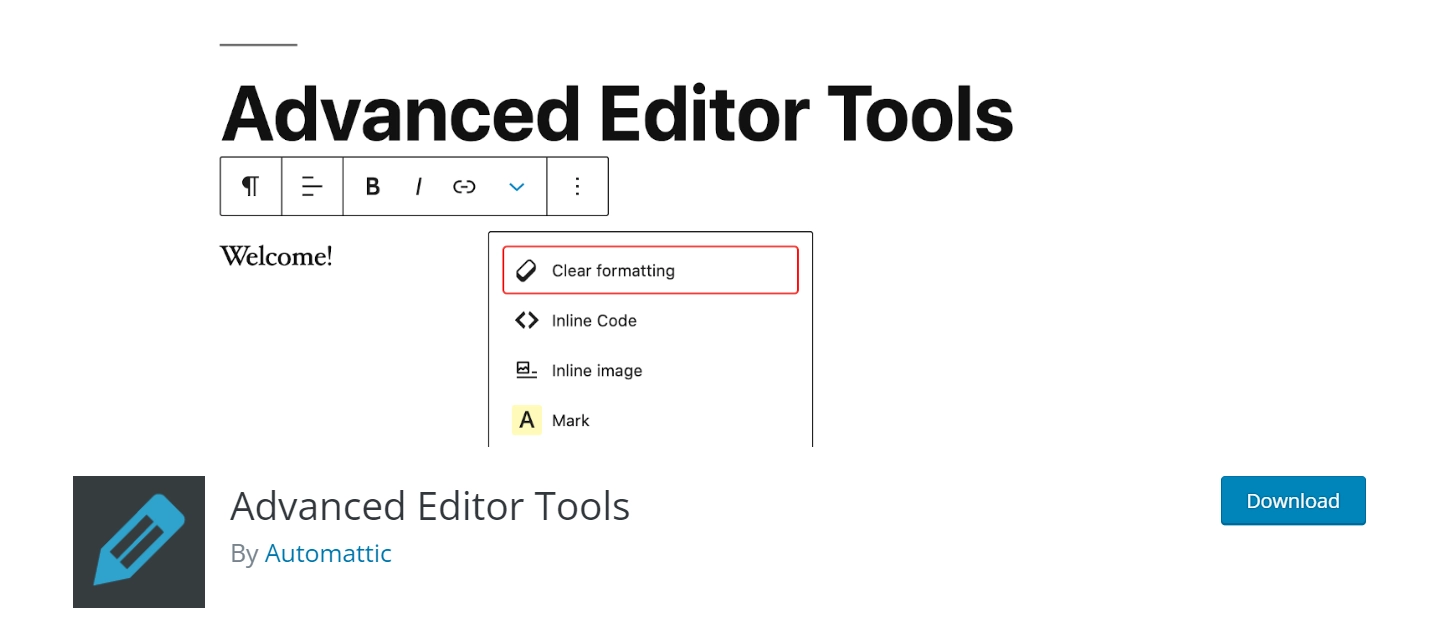
Begin by installing and activating the Advanced Editor Tools plugin. For detailed instructions, refer to our beginner’s guide on how to install a WordPress plugin.
After activating, navigate to the Settings > Advanced Editor Tools page in the WordPress admin sidebar.
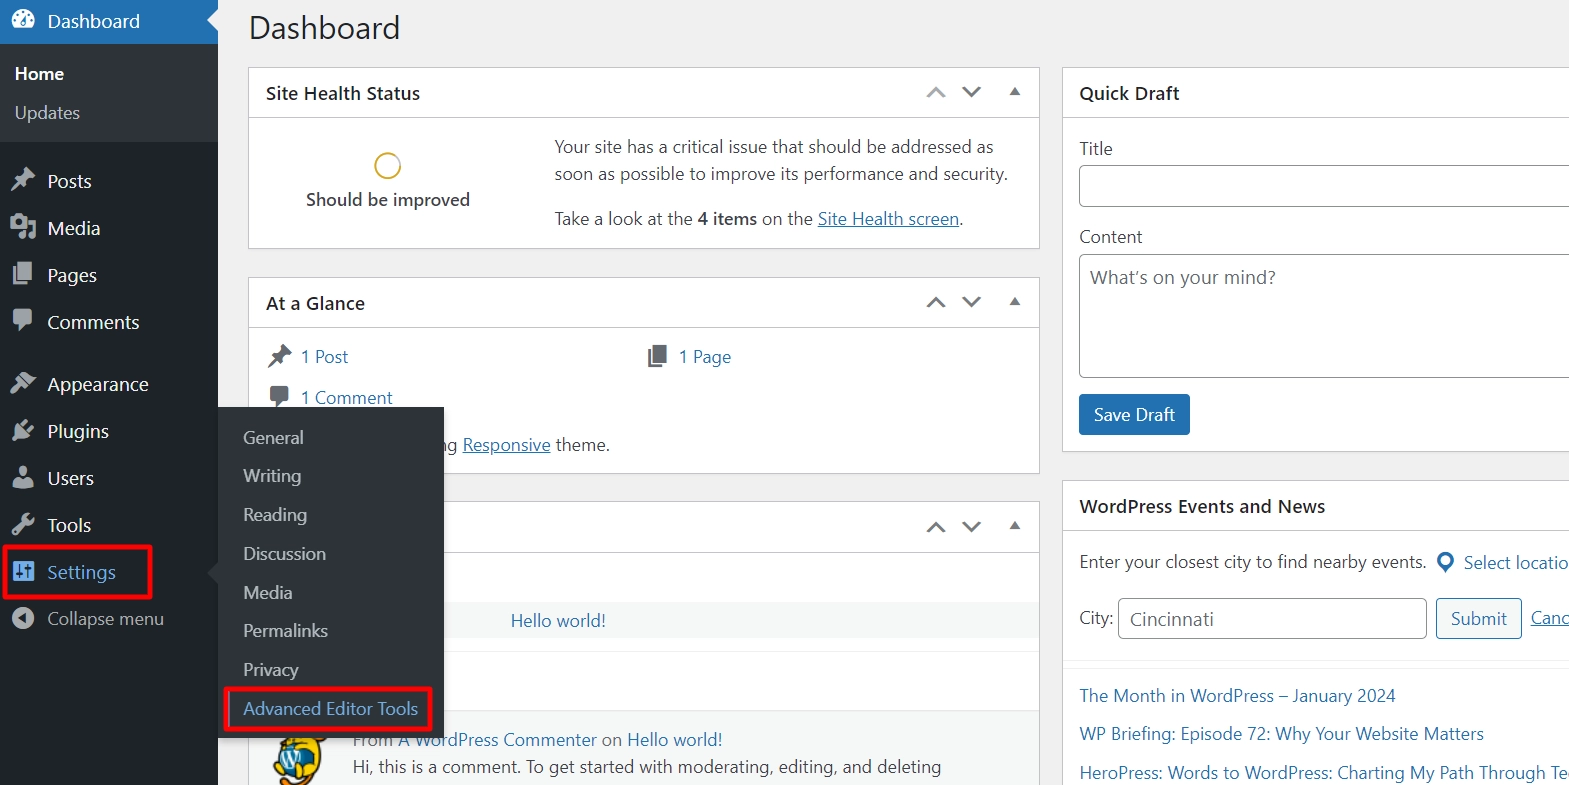
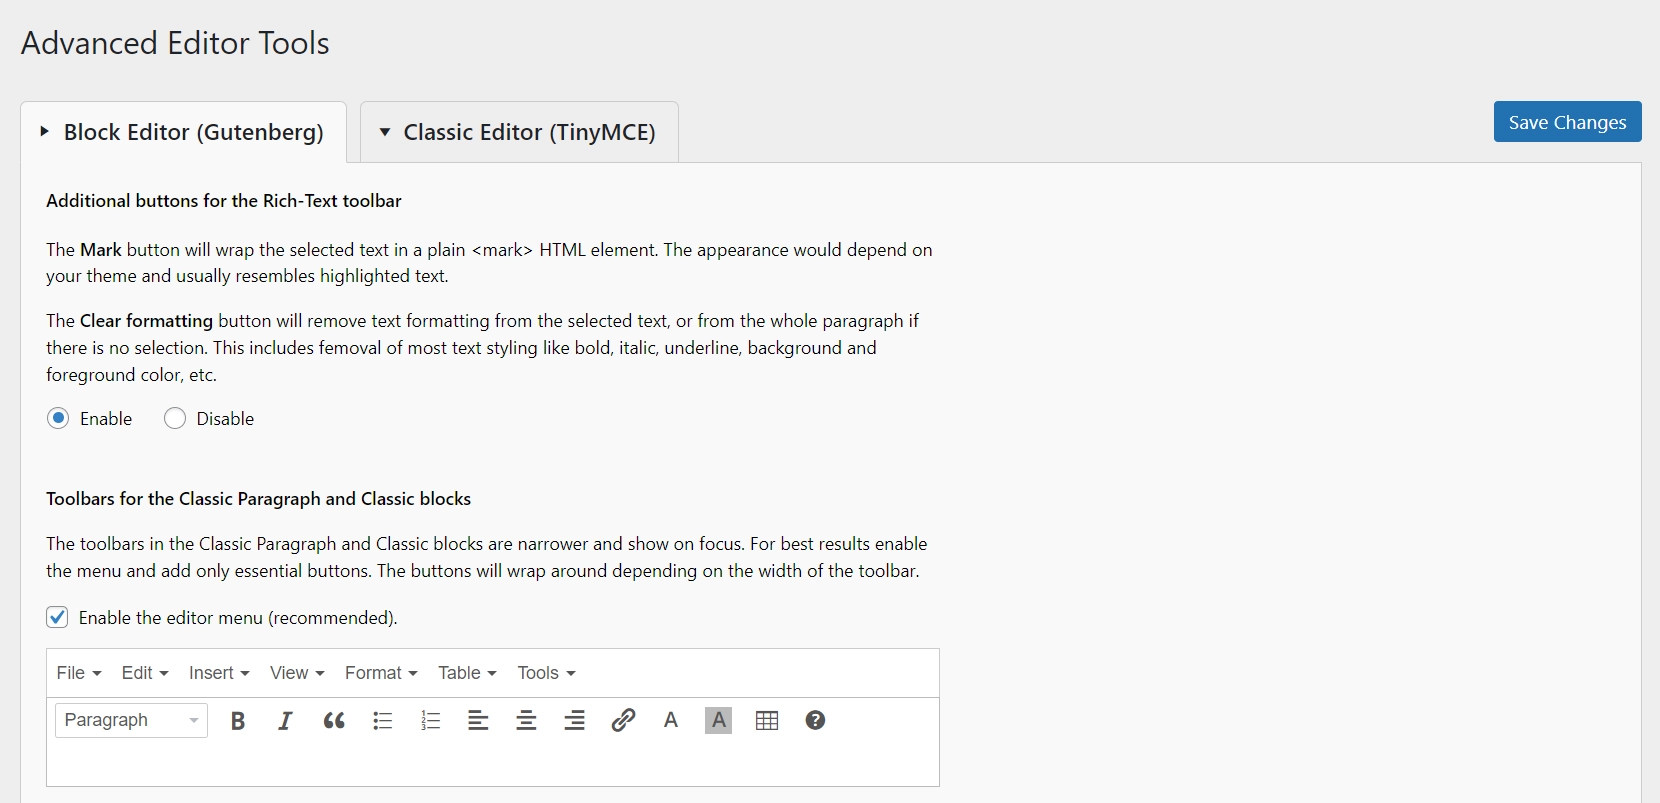
Two tabs are available – Block Editor (Gutenberg) and Classic Editor (TinyMCE).
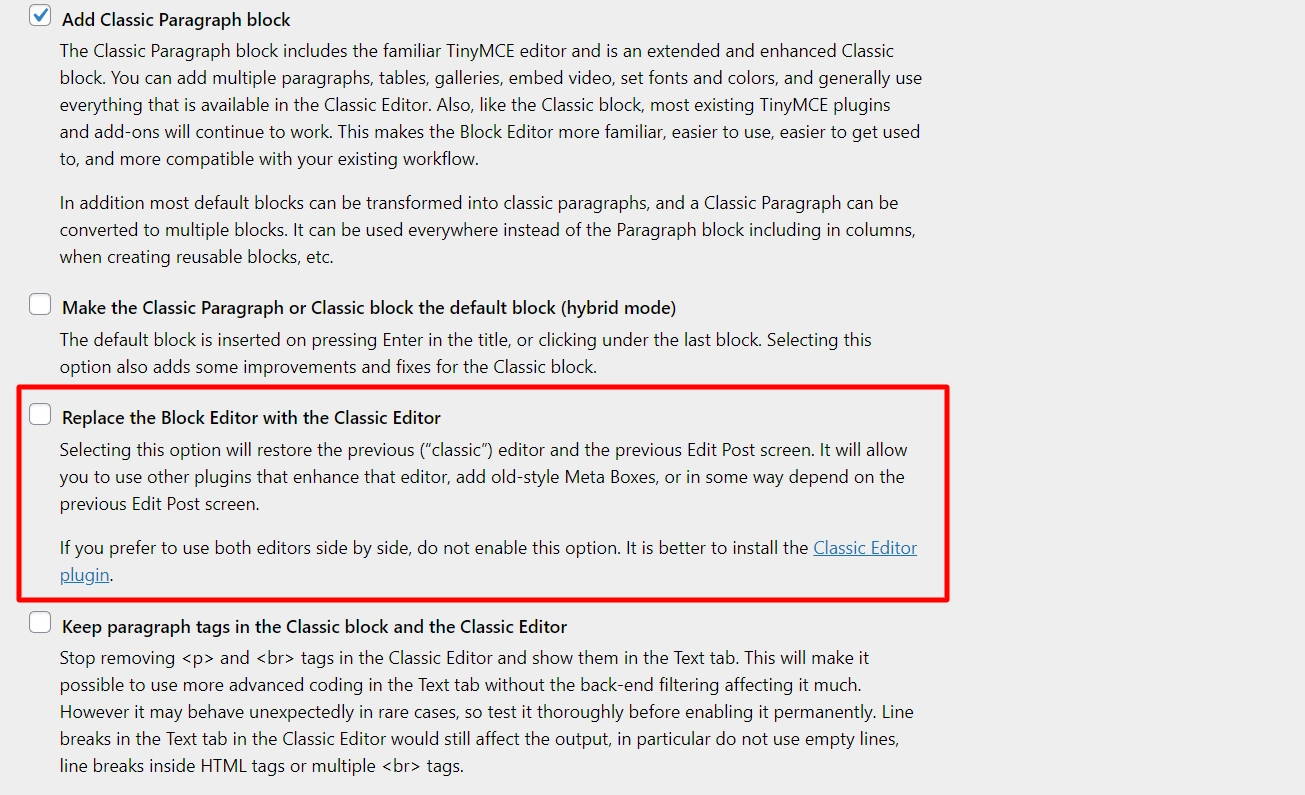
If you prefer to use only the classic editor, you can enable the ‘Replace the Block Editor with the Classic Editor‘ option under Advanced Settings. However, you can also leave it unticked to use both editors.
You can easily drag and drop formatting options from the Unused Buttons section into the Classic Paragraph block.

The available features include font size, font family, copy, subscript, emoticons, source code, etc.
To change the font using this plugin, follow these steps:
First, create a new post/page or edit an existing one. You’ll see a classic paragraph editor.
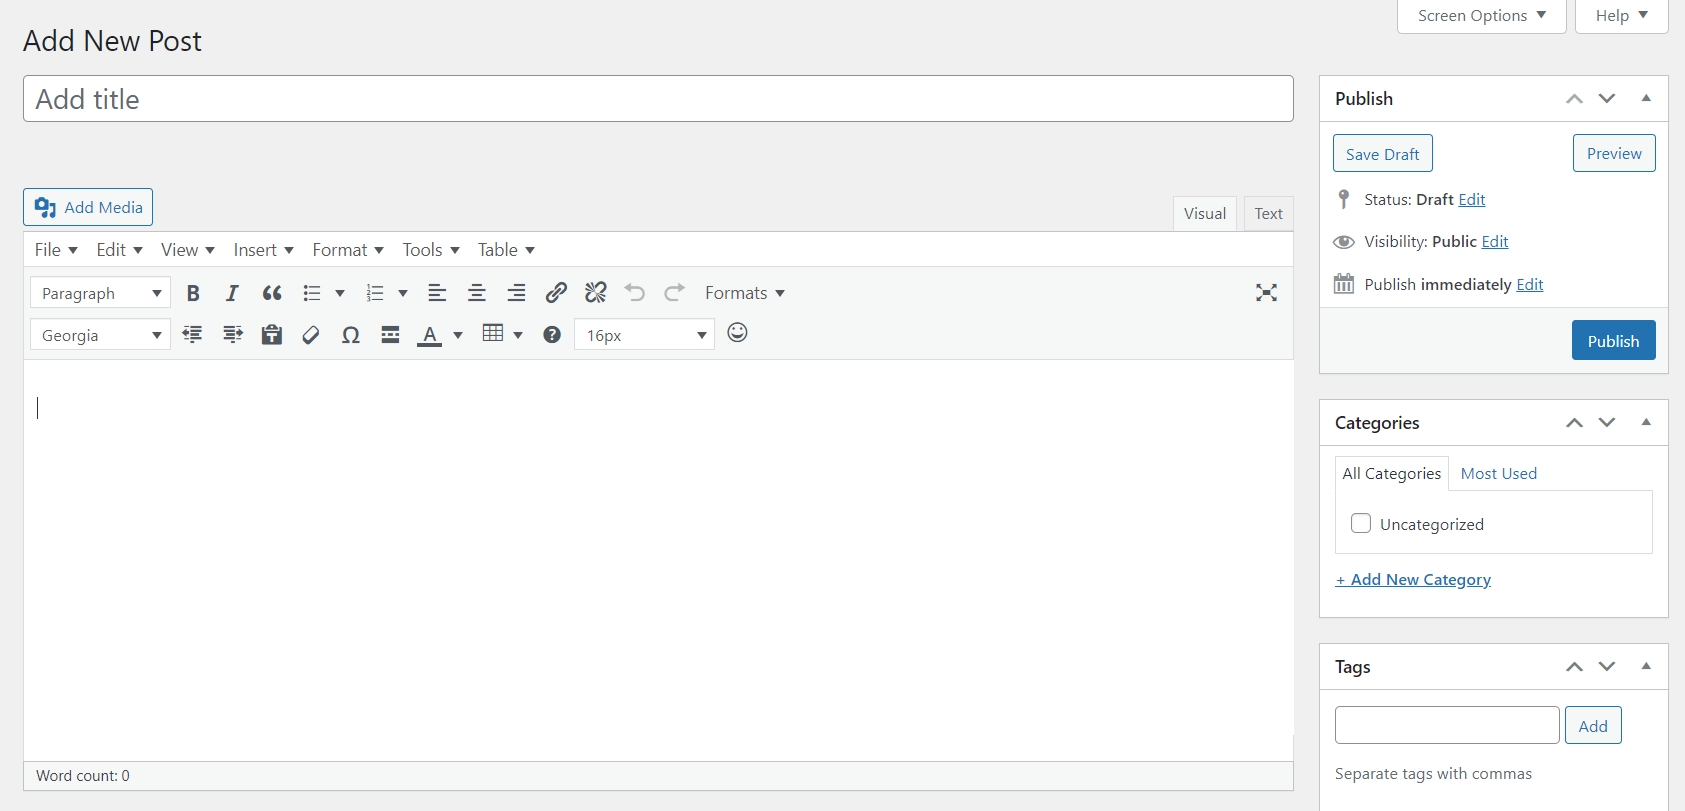
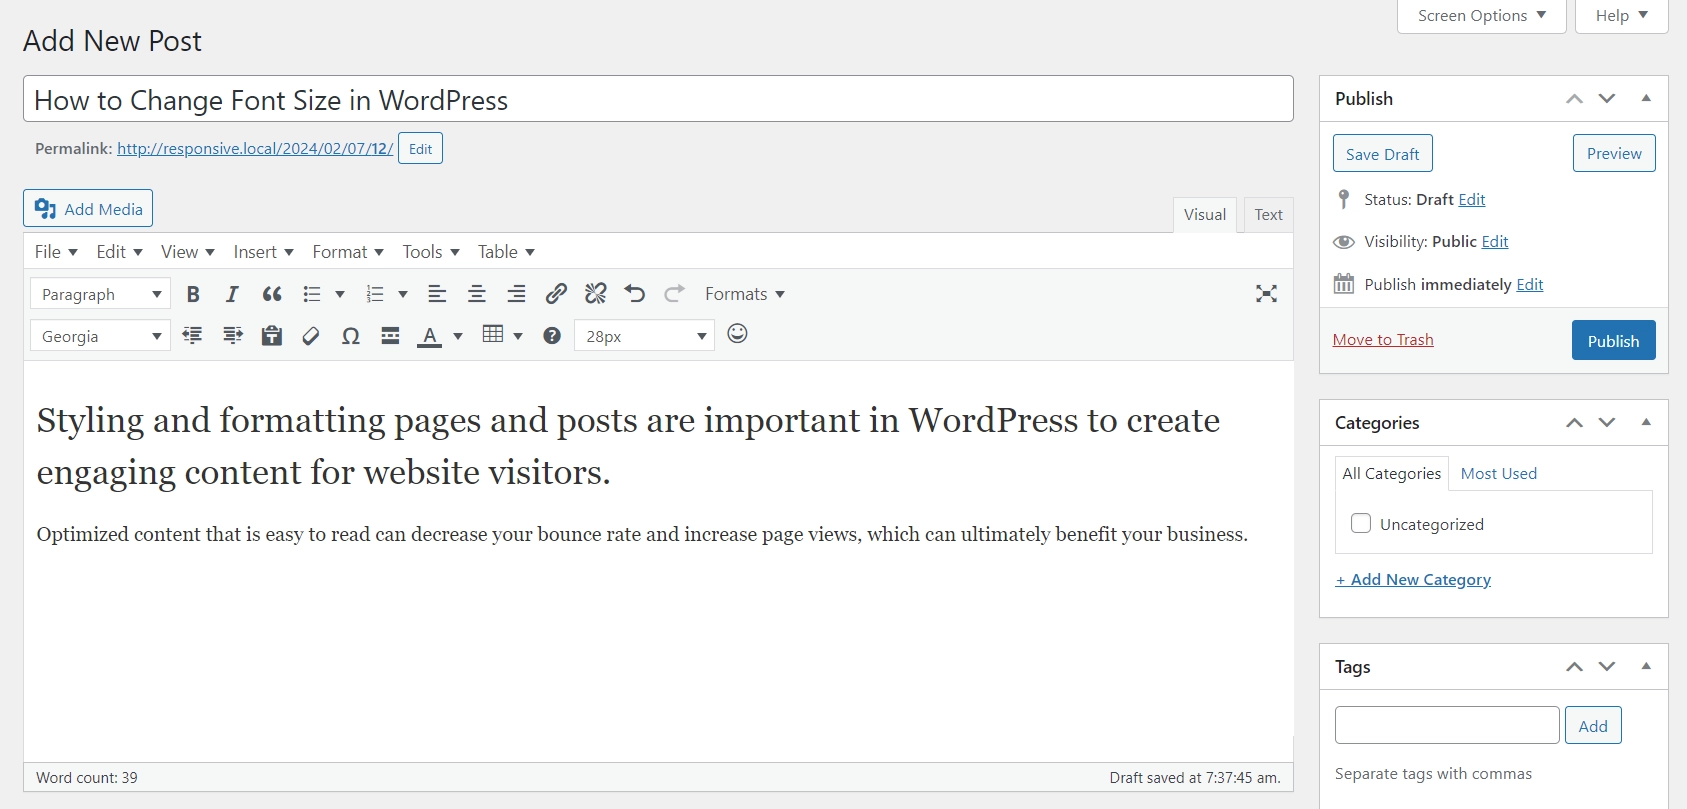
To change the font size of specific lines of text, first select those lines and then choose the desired font size.
It will look like this:
And that’s how you can easily change the font size of your WordPress website.
Method 5: Change Font Size Using CSS
Using custom CSS is a powerful way to change font size in WordPress when you need full control over your website’s typography.
It allows you to target specific elements like paragraphs, headings, or even custom classes, making it ideal for precise design adjustments. While this method requires basic knowledge of CSS, it gives you flexibility beyond what default editor or theme settings offer.
Steps to change font size using CSS:
From your WordPress Dashboard go to Appearance > Customize
Click on Additional CSS

Add your custom CSS code
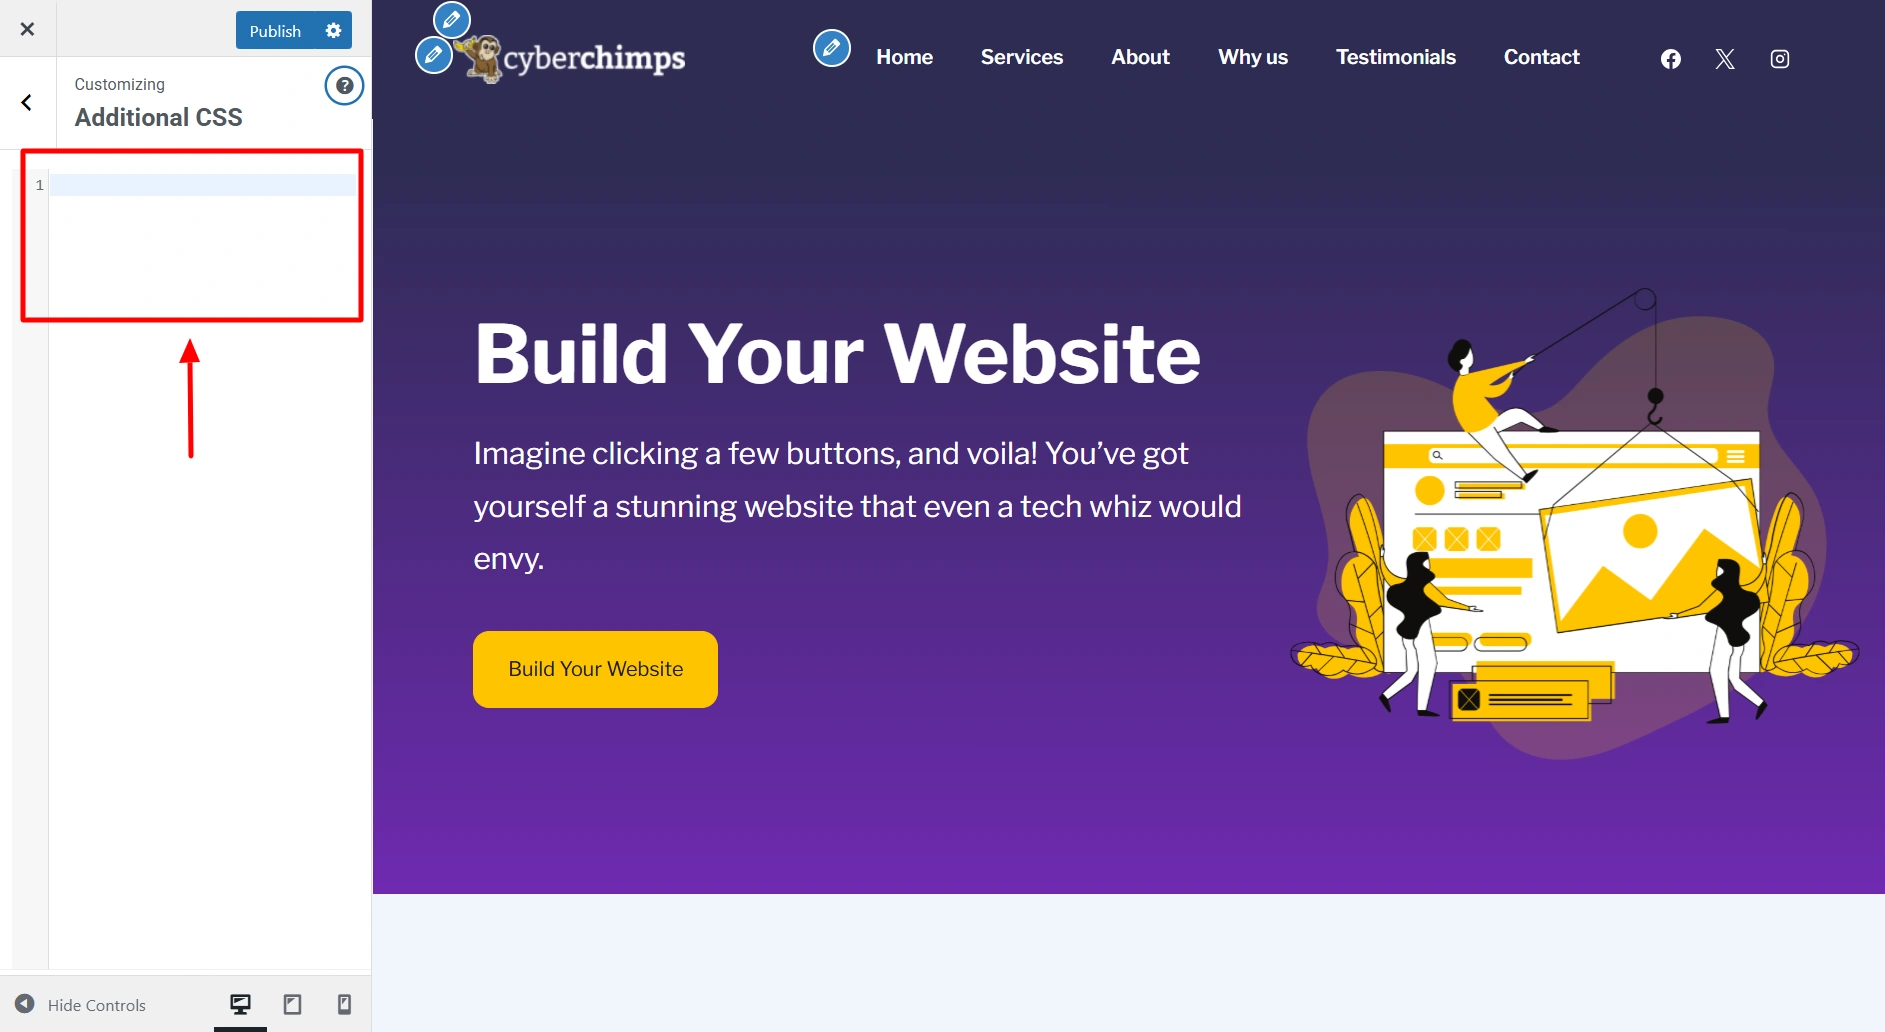
Example:
h1 {
font-size: 120px;
}
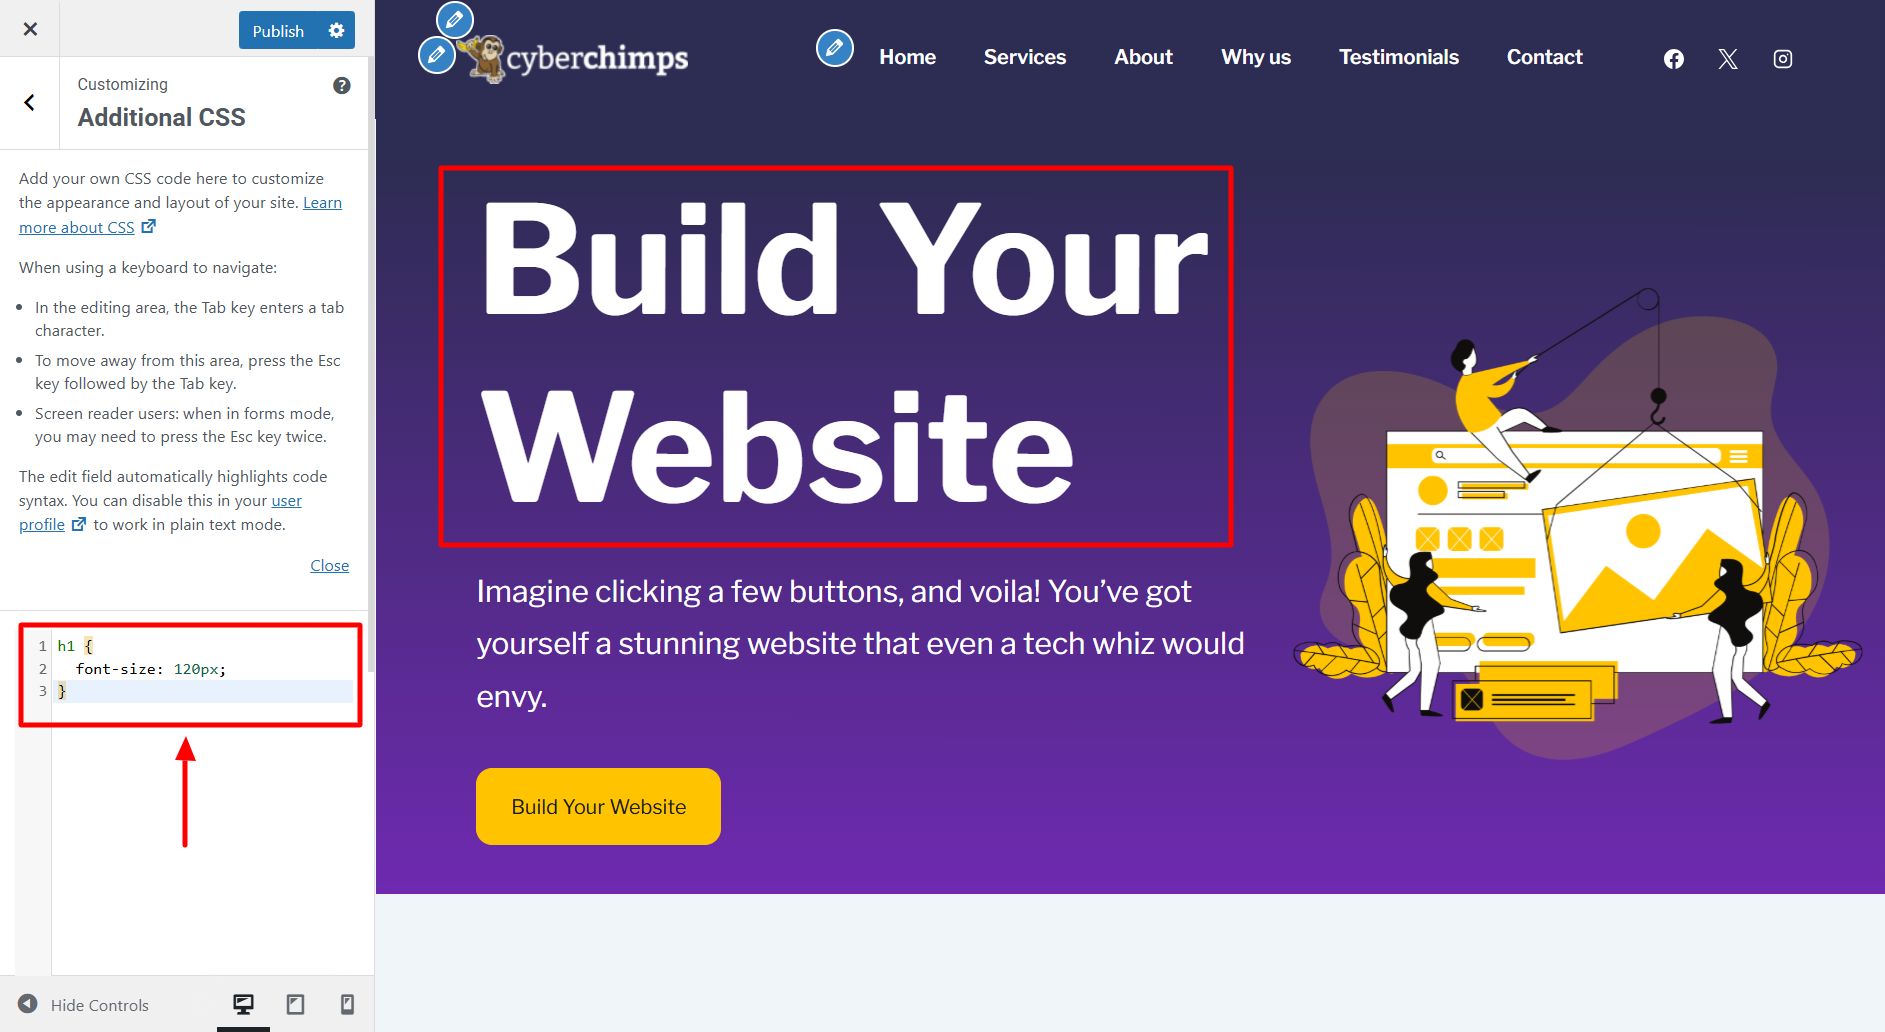
With custom CSS, you can fine-tune every aspect of your typography and create a consistent design across your site. This approach is especially useful when built-in options are limited, helping you achieve a more polished and professional look.
FAQ
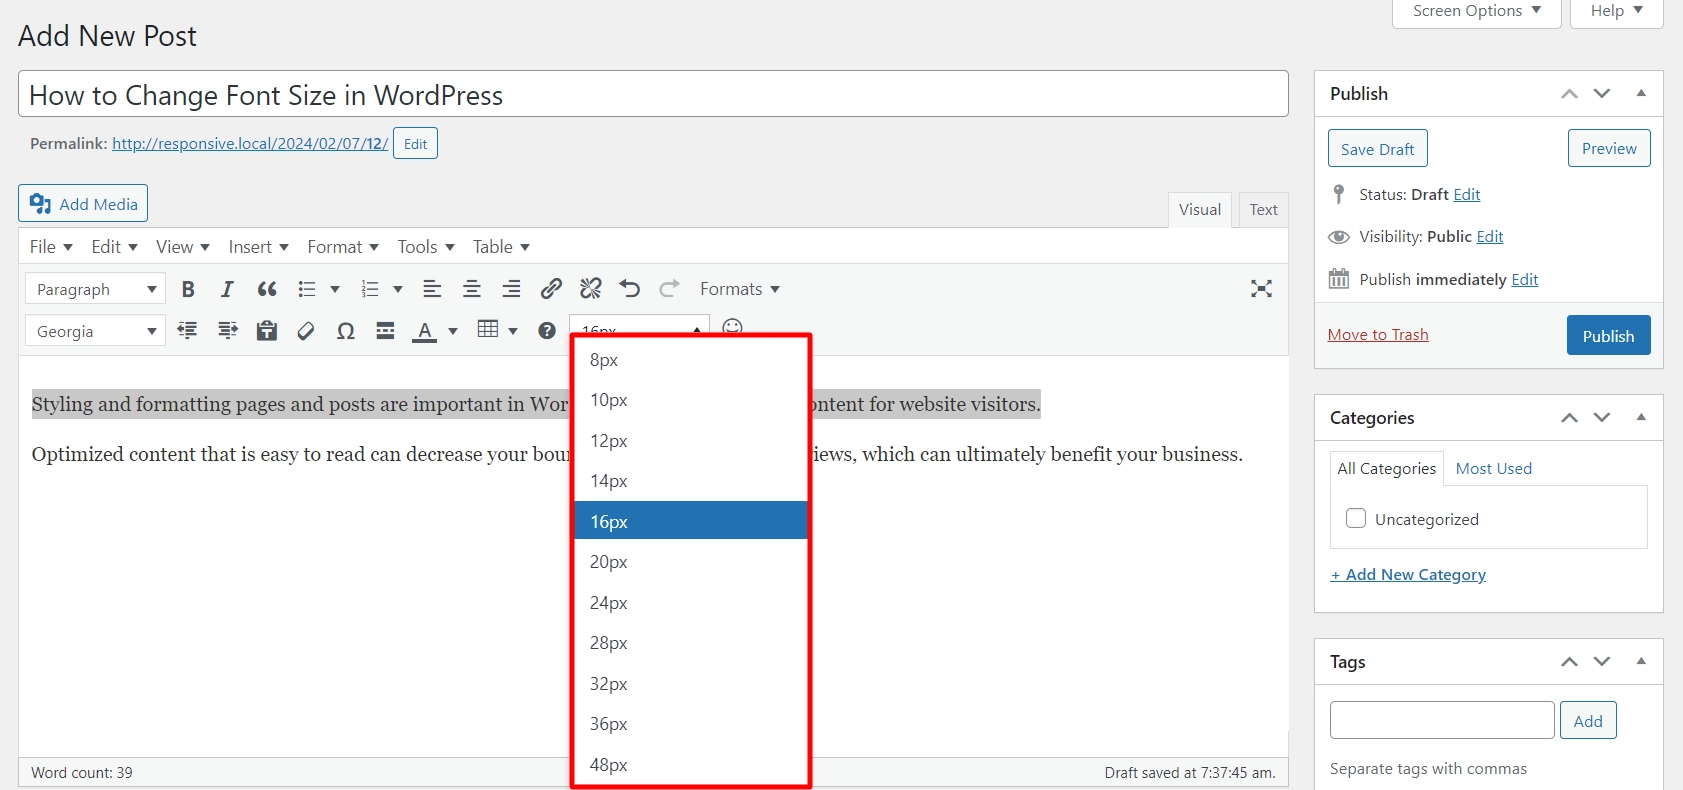
To change the font size in WordPress Classic Editor, you can use the drop-down menu in the editor toolbar. First, select the text you want to modify, and then choose the appropriate font size from the drop-down menu.
To modify your content’s header tag, go to the block menu that appears above the header and click on the H2 option. This will allow you to customize the style and format of your header to suit your needs better.
Font formatting in WordPress is used to improve user experience and make your content more visually appealing. There are different font styles, sizes, and weights that you can use to highlight important information or add emphasis to specific words or phrases.
Conclusion
Adjusting font size is a great way to make your content more engaging and readable.
The process is straightforward and can be accomplished either by using a plugin for beginners or if you’re using a flexible theme like Responsive, you can access its built-in typography options via the WordPress Customizer.
Whether you want to create a bold heading or a subtle paragraph, WordPress makes it easy to achieve your desired formatting with just a few clicks.
If you found this article useful, you can check out more articles:
- Choosing The Right Fonts For Your WordPress Website
- How To Style Contact Form 7 Forms In WordPress
- How To Add A Gutenberg Popup Block In WordPress
Are you looking to change fonts on your WordPress website? Grab Responsive Theme and make your dream website!