Summary
You can use flip box to showcase different pieces of information or images in a dynamic and interactive way.
The article explains how can you create flip box using Responsive Addons for Elementor plugin.
Flip Box adds an innovative and aesthetic look to your website. It is used to display content in a front and back flip format.
Flip boxes can be used to showcase services, coworkers, prices, or other key aspects of your company’s offerings.
By using Responsive Addons for Elementor (RAE), you can build interactive flip boxes without any coding. In this guide, we will walk through how to use RAE to build a flip box in Elementor.
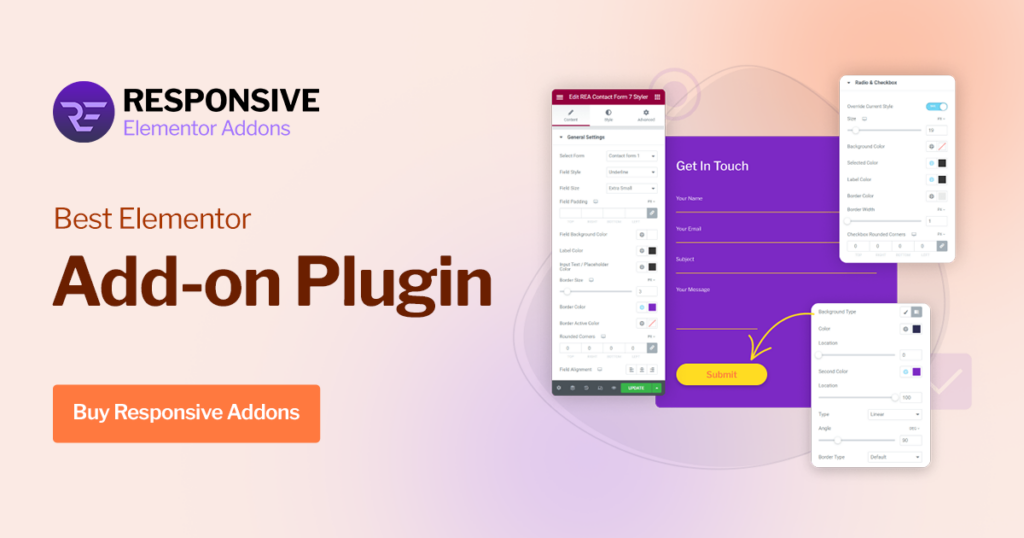
Responsive Addons for Elementor is the Best Elementor Addons plugin – Get it for free!
What Is A Flip Box?
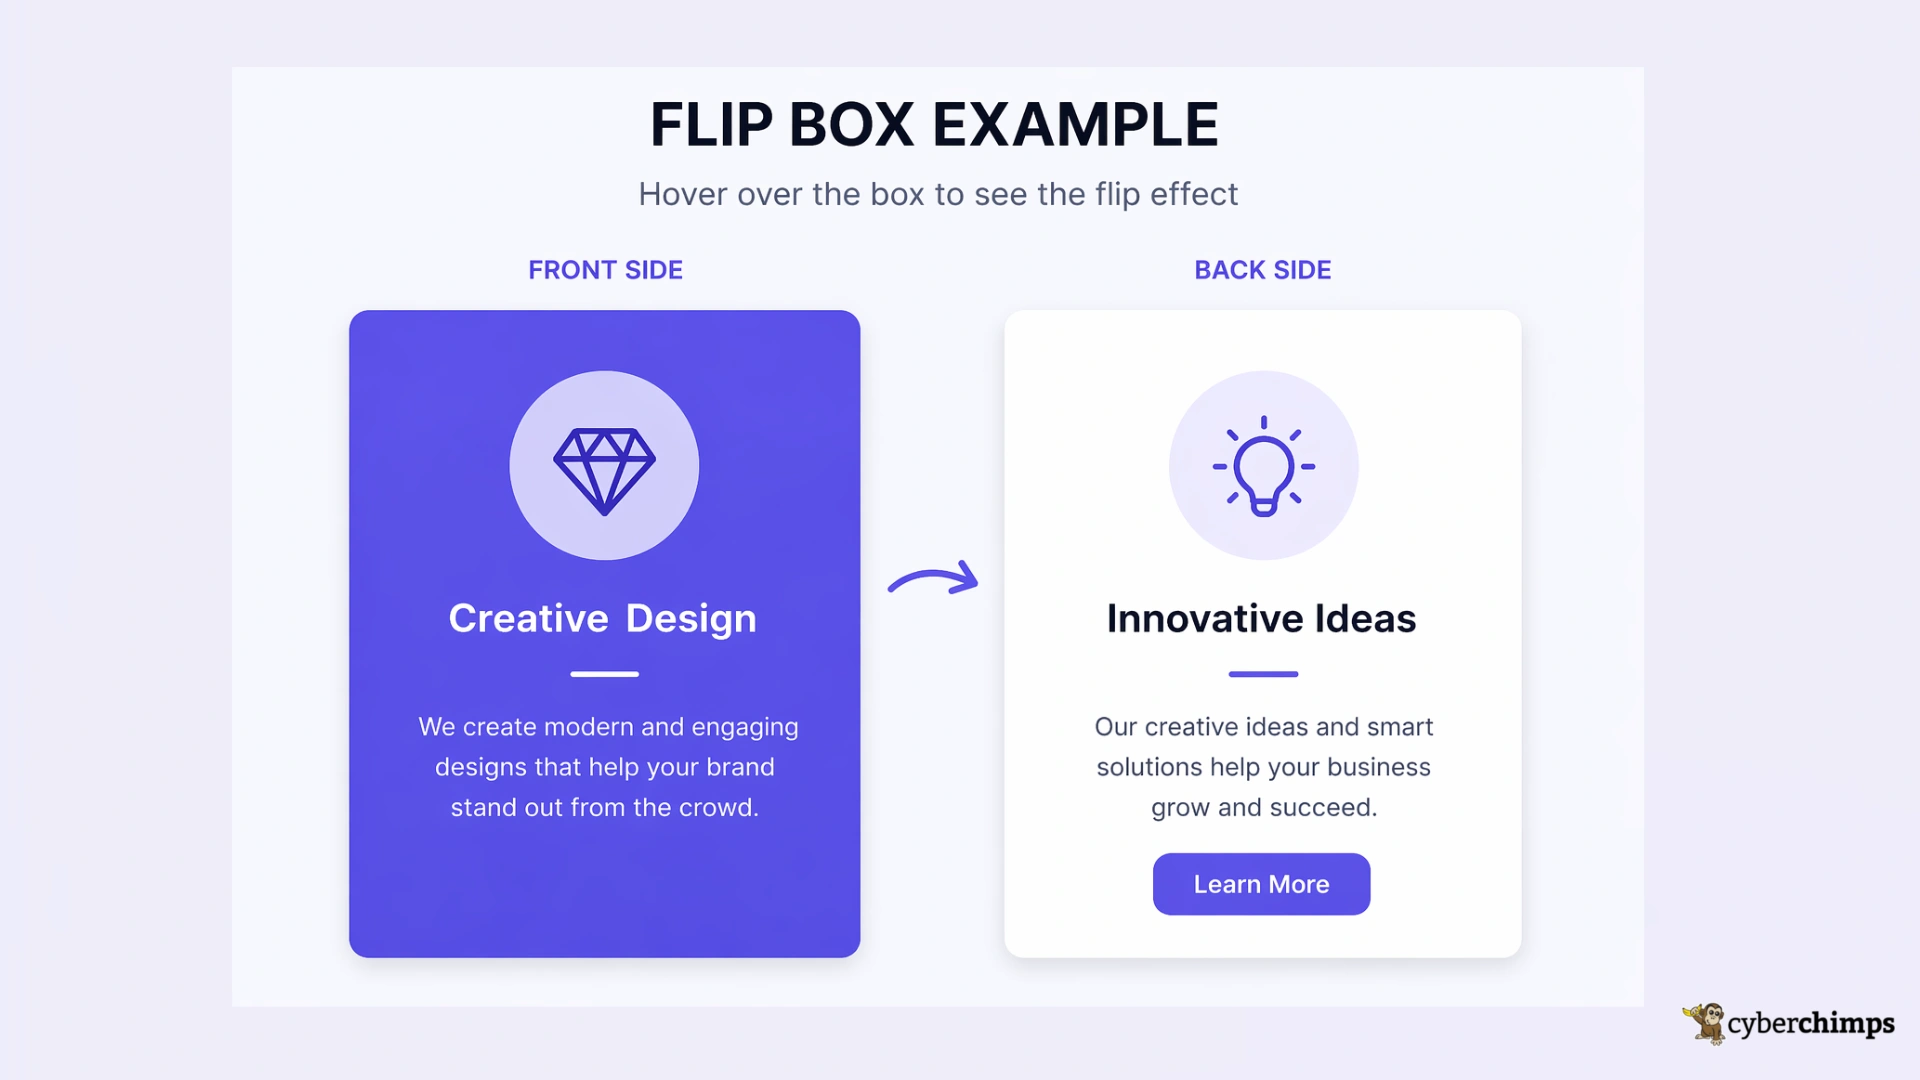
In simple terms, a flip box is a user interface element that allows you to create a box that can be flipped to reveal different content on each side. You can use it to showcase different pieces of information or images in a dynamic and interactive way.
This captivating feature allows you to present information in a visually engaging manner and helps you capture the user’s attention. Furthermore, flip box overlays also encourage deeper exploration of your content.
Necessary Tools to Create a Flipbox
Now that you know the basics of flip box overlays, let’s dive into the necessary tools to create one for your WordPress website.
The primary tool you’ll need is a WordPress plugin that specialises in building intuitive elements for websites, and that is easy to integrate with a page builder like Elementor.
One such popular plugin is the Responsive Addons for Elementor. This free plugin provides over 80 Elementor widgets that help you build interactive and stunning websites effortlessly. In addition, it seamlessly integrates with Elementor.
???? My Real-World Test Results:
- Number of widgets: 80+
- GTmetrix Performance Score: 100%
- Includes Cross-site Copy-paste feature
- 5+ Extensions like Scroll animations, Sticky Section, Page Duplicator, & more.
- Save design time with 100+ Premium-grade Starter templates
It offers a dedicated Elementor Flip Box widget, which you can simply drag and drop on your WordPress website using the Elementor page builder. Furthermore, it also allows you to configure both the front and back sides of the box, adjust its animation, color scheme, and other visual aspects to match your website’s branding and design.
Continue reading to learn how to create a Flip Box in WordPress.
Creating a Flip Box for Your Website In Elementor

To create a flip box overlay for your Wordpress website, follow the following steps:
[Note: To use the Elementor flip box widget, you must have a website template built with Elementor page builder]
Step 1: Install and Activate Responsive Addons for Elementor
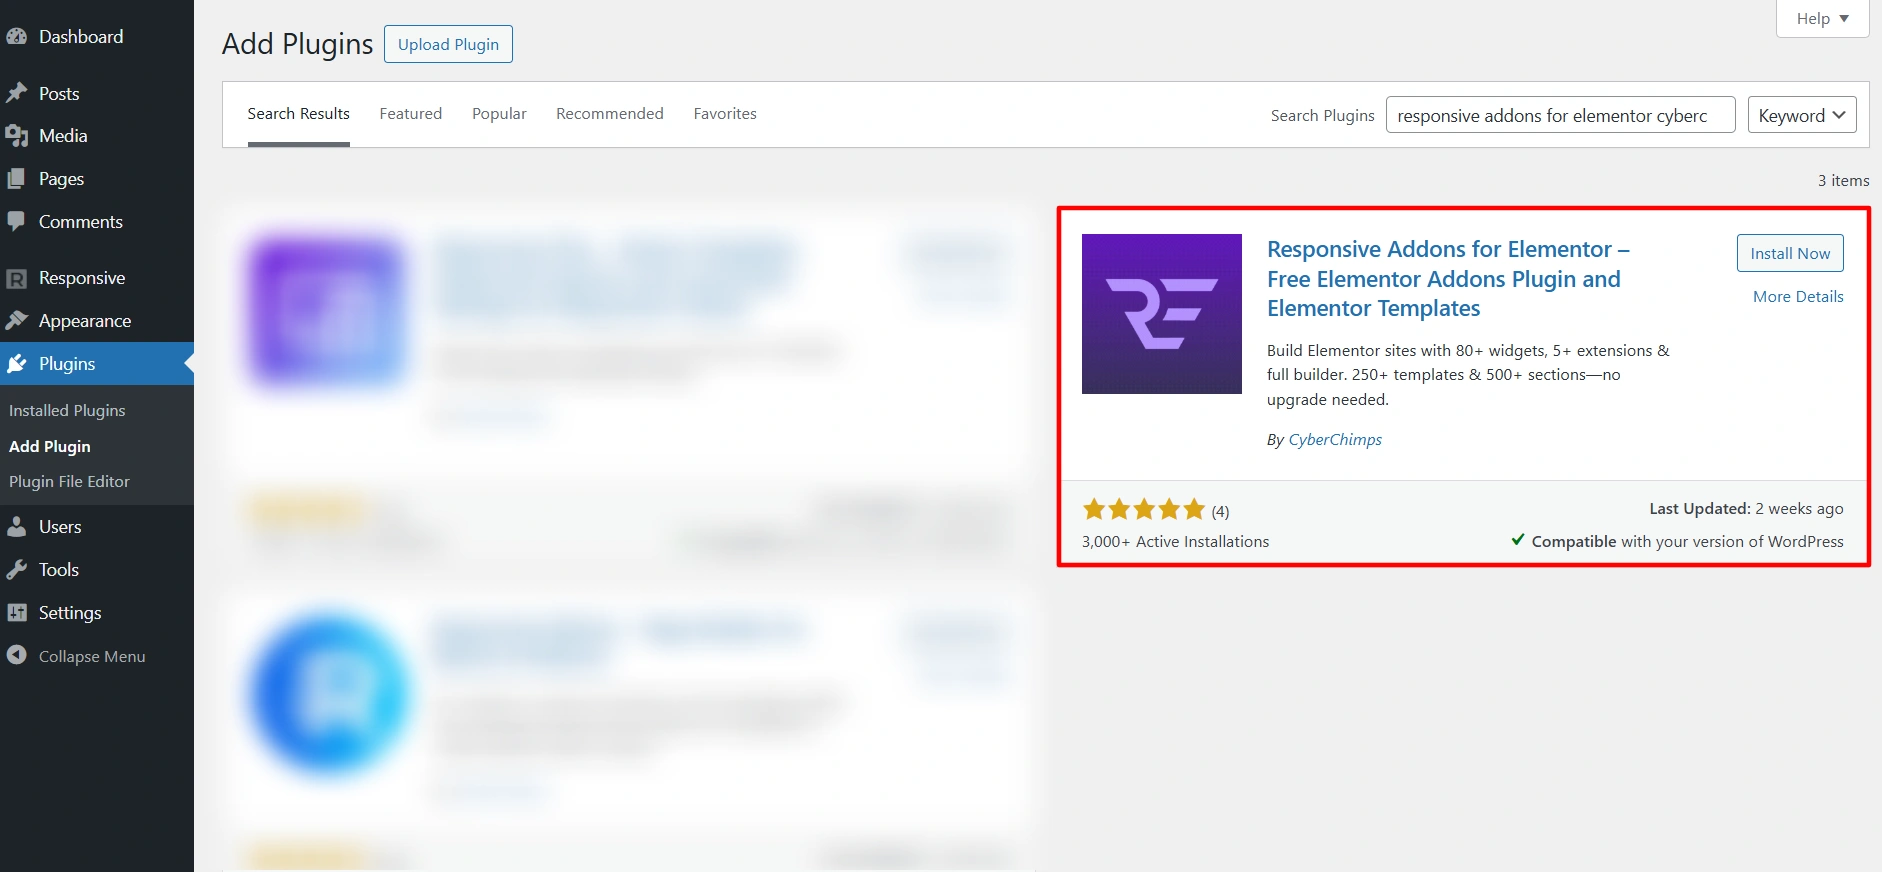
Navigate through your WordPress Admin dashboard and go to Plugins > Add New Plugin.
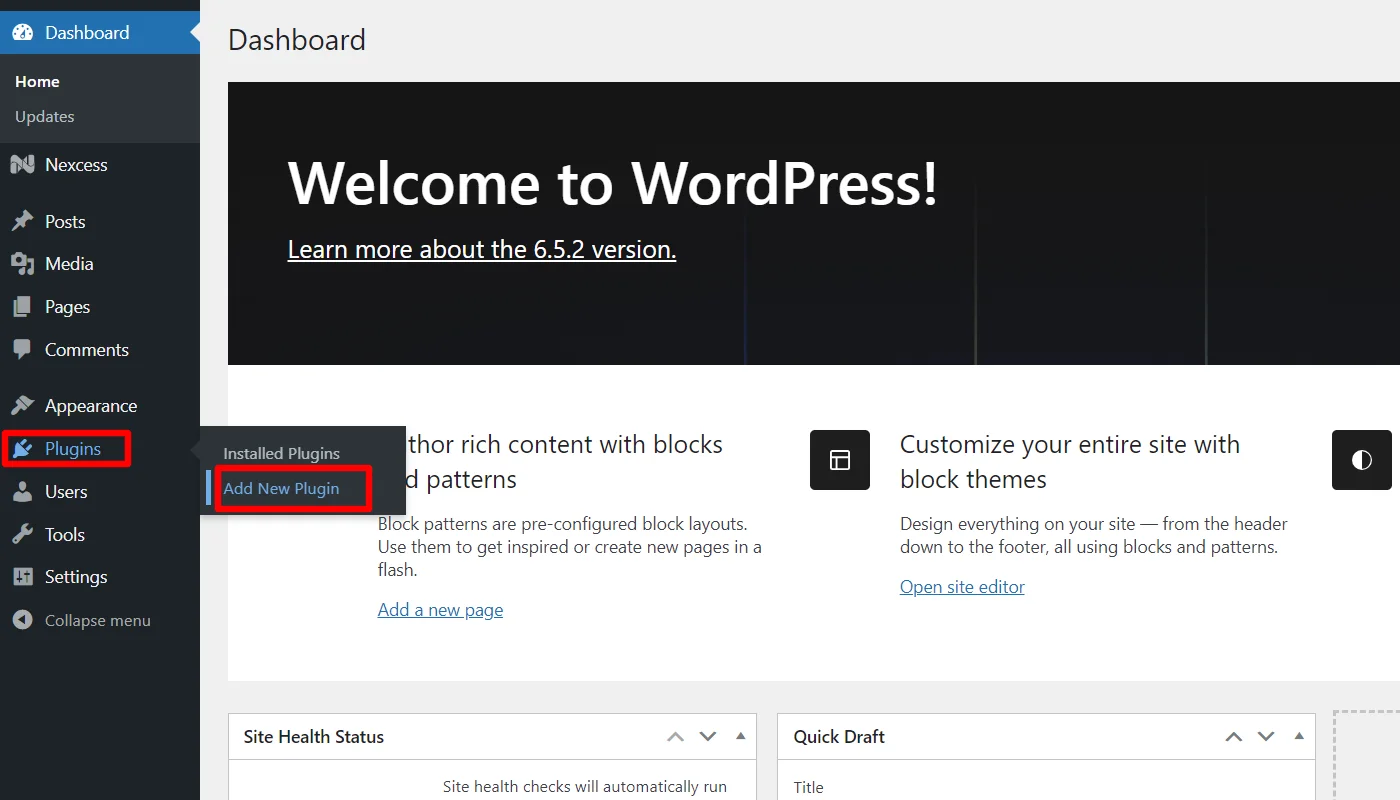
Go to the search plugin and search for Responsive Addons for Elementor. Next, click Install Now, then Activate the plugin.
Once the plugin is active, Open The Page Where You Want To Add The Flip Box
Step 2: Adding the Flip Box Widget
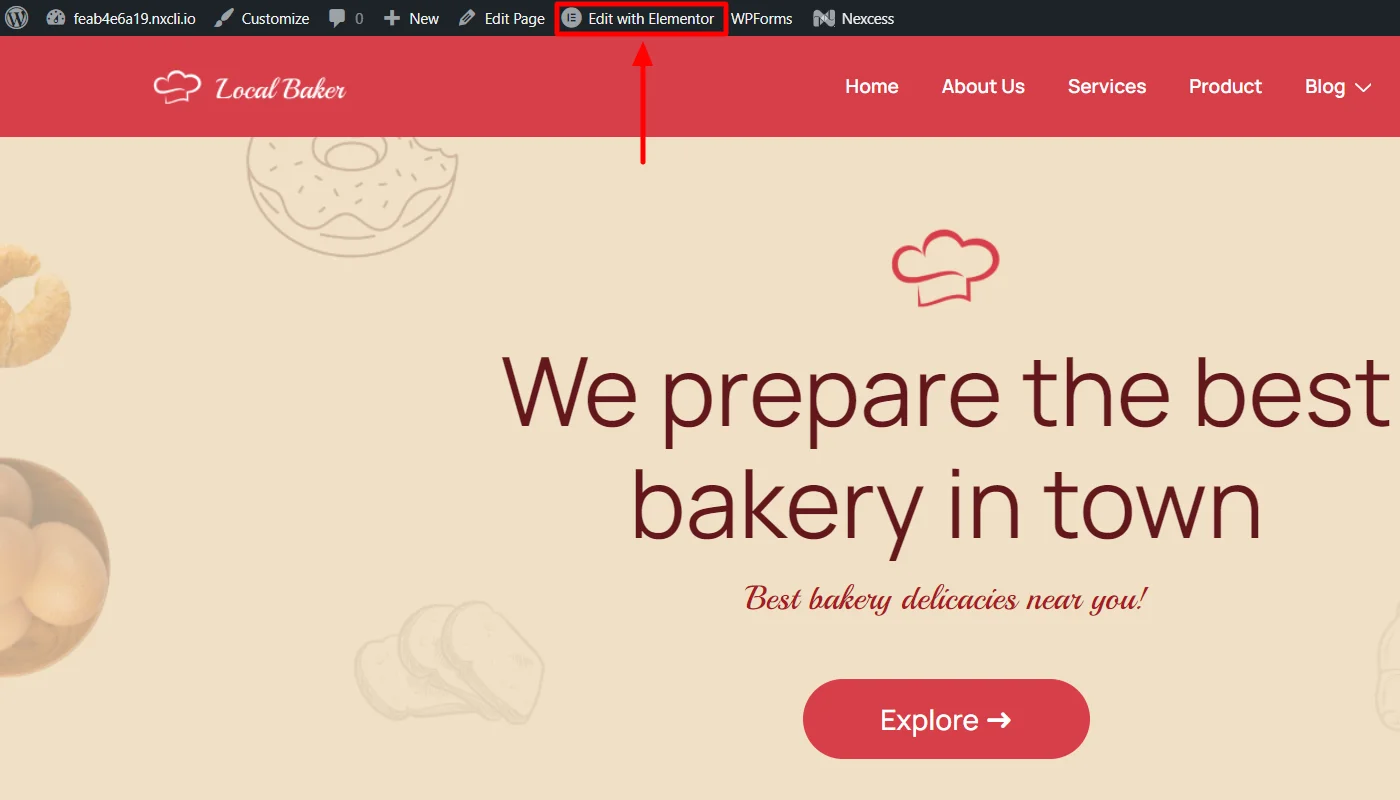
On the page you want to edit, click on Edit With Elementor.
Next, on the left sidebar in the search widget tab, search Flip Box.
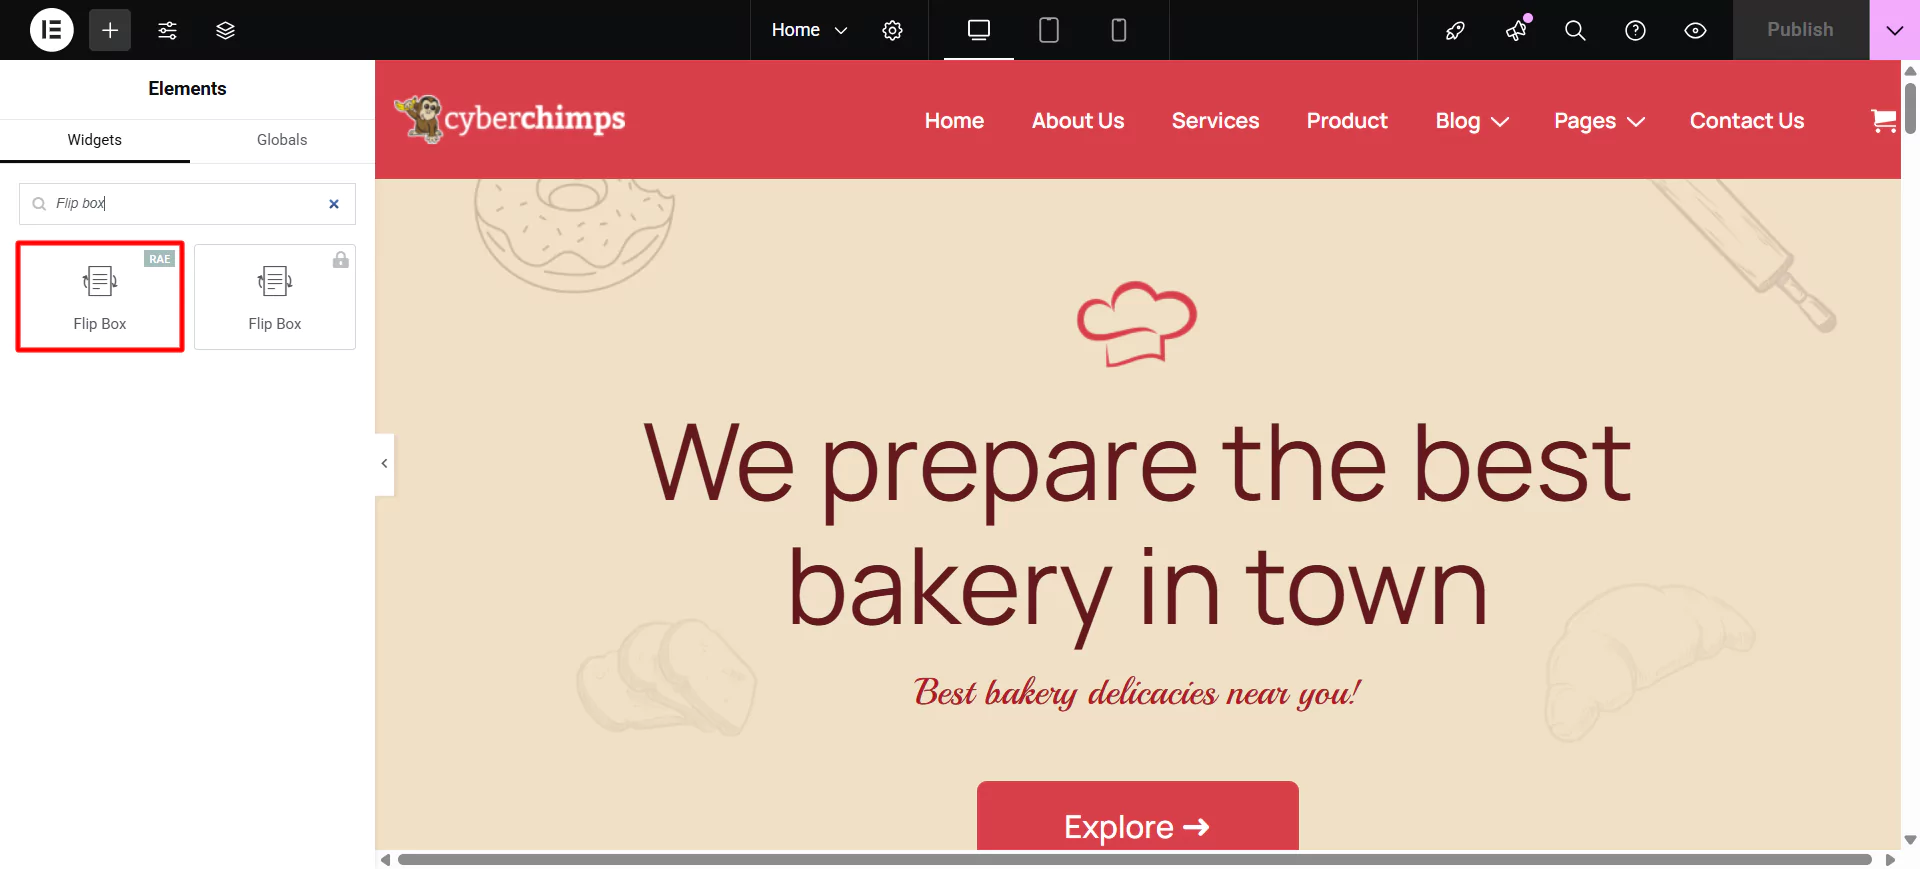
Drag and drop the RAE Flip Box Widget in the section where you want to add the flip box
This is how you can easily add a free flip box widget to your website.
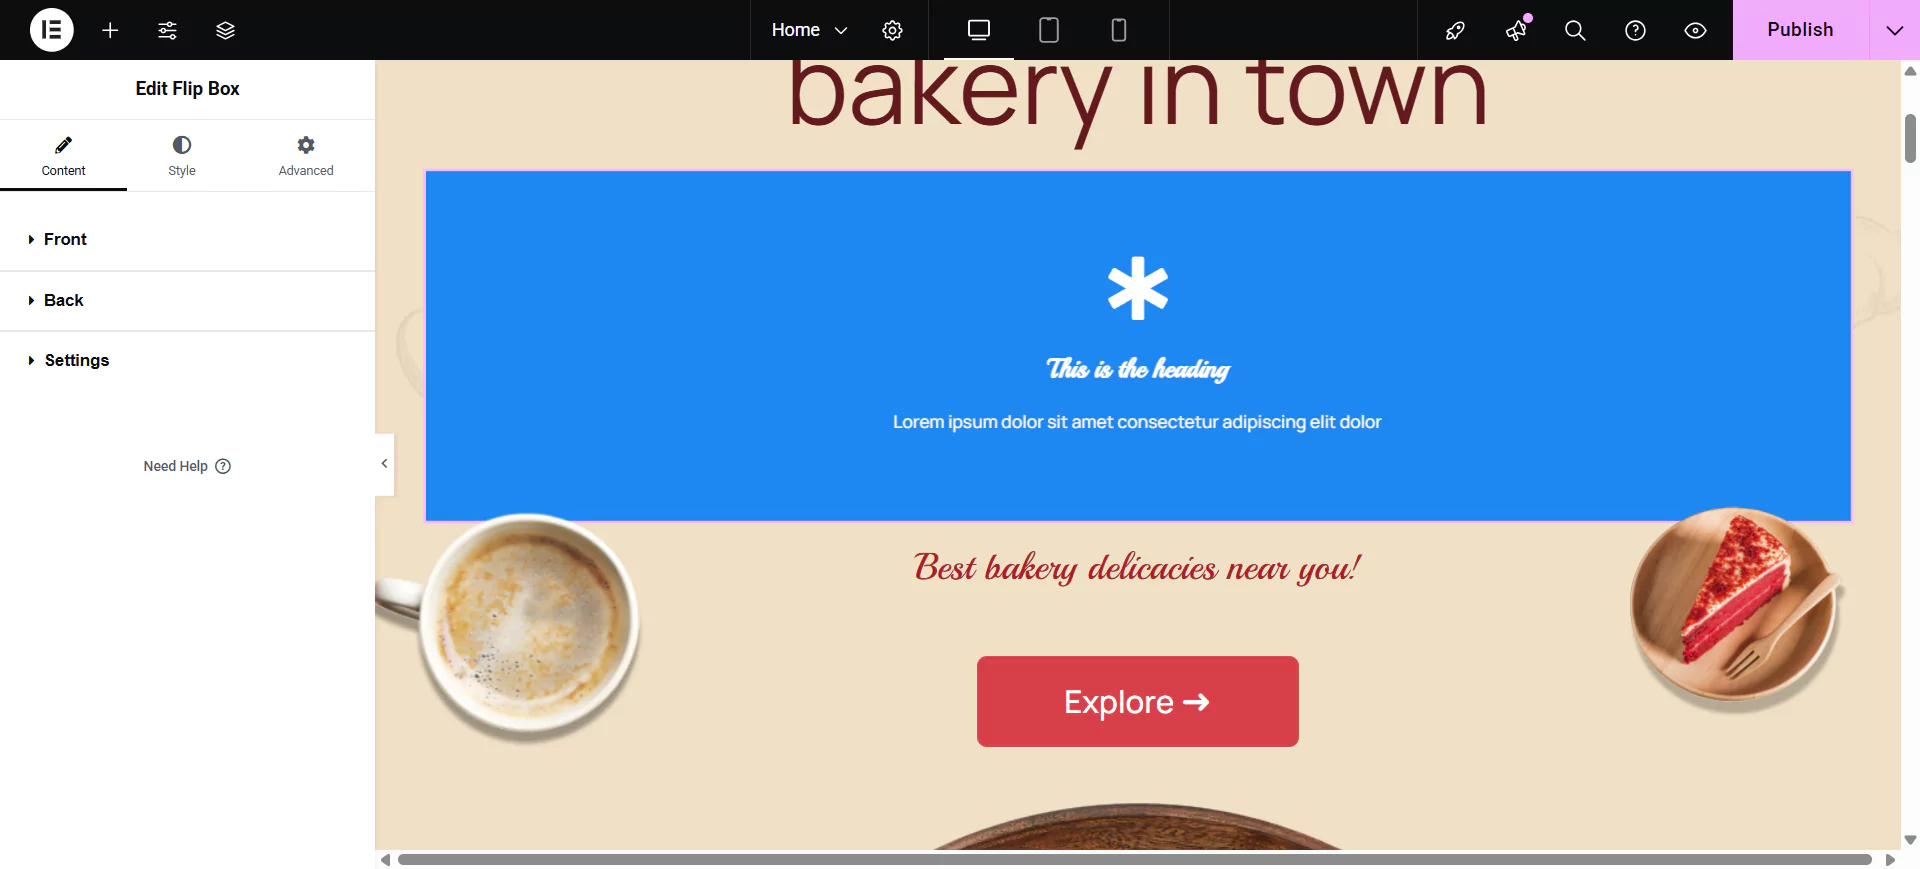
Step 3: Customizing The Flip Box Widget
There are various options available to customize the flip box widget:
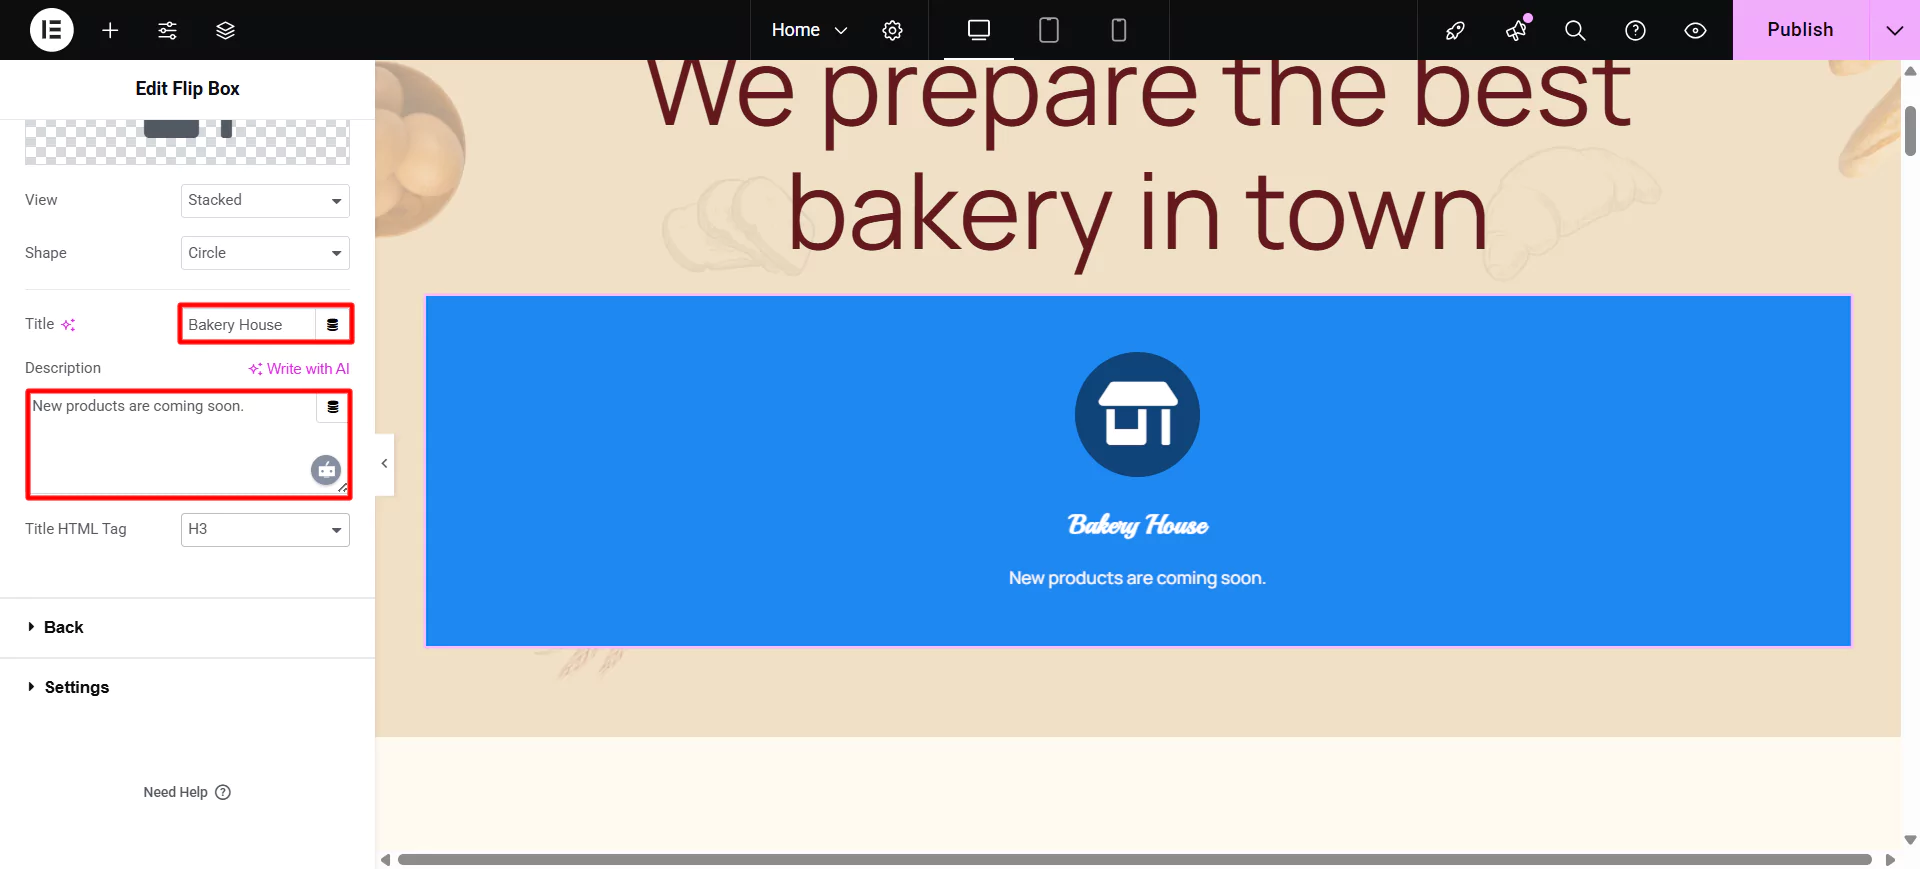
Editing the Front Side Content
To edit the Front Side of the Flip Box, click on Front in the sidebar.
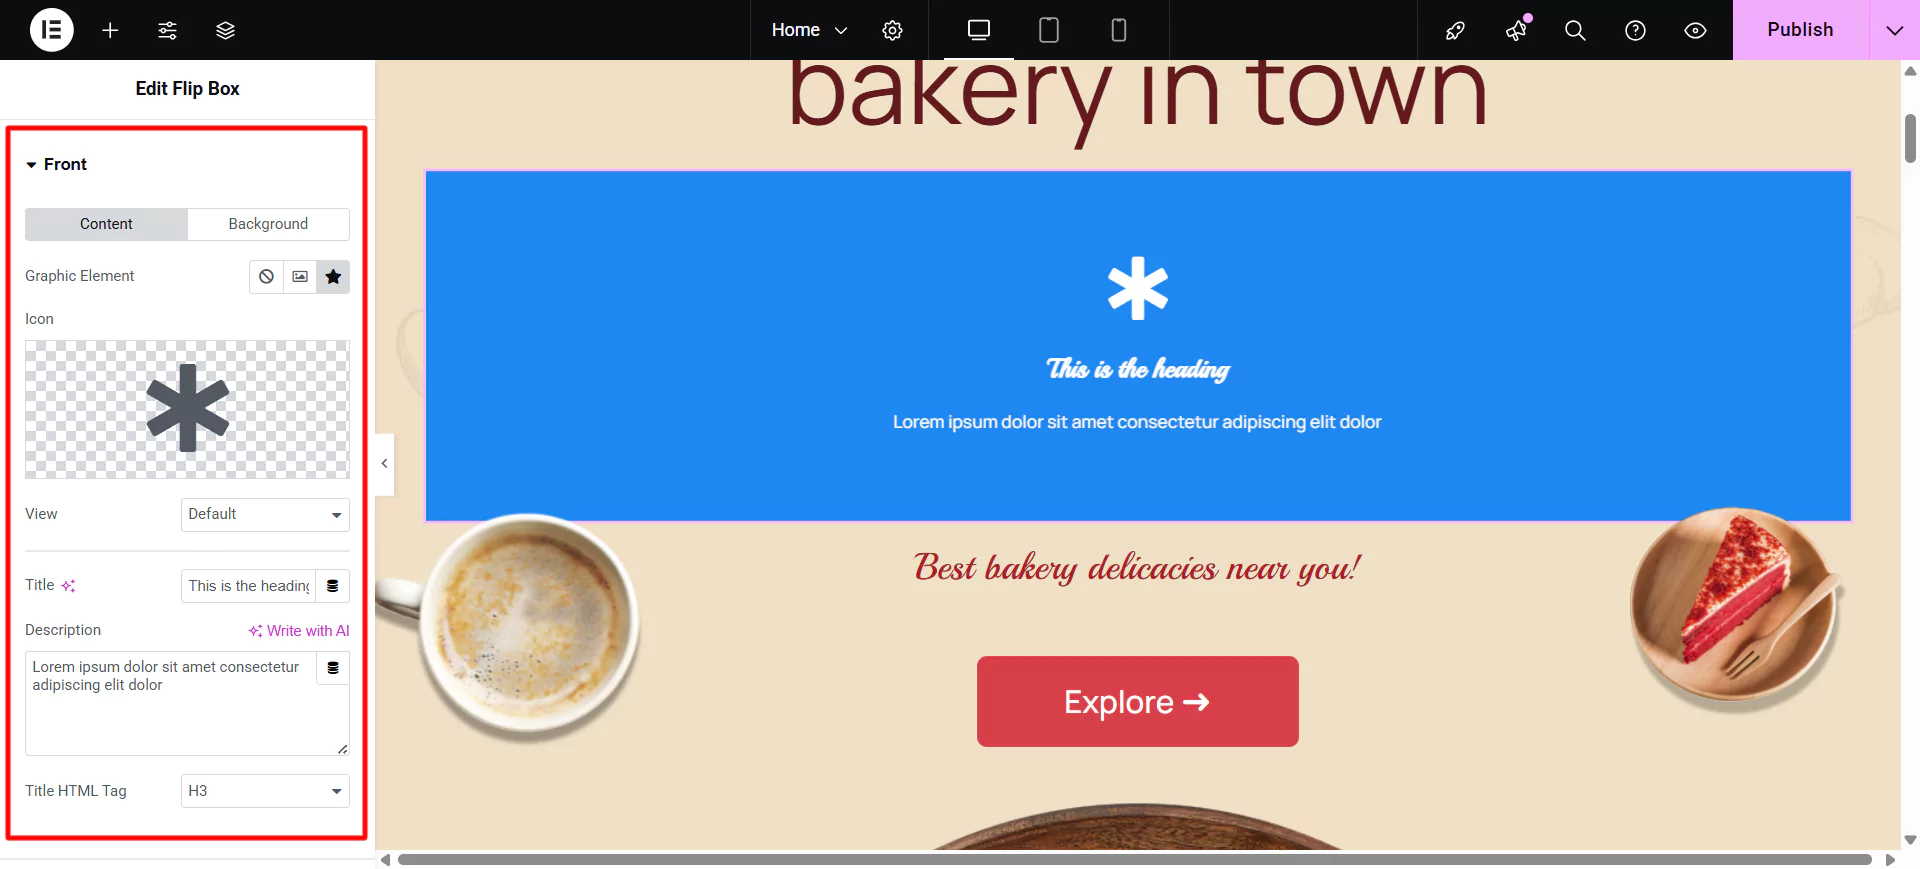
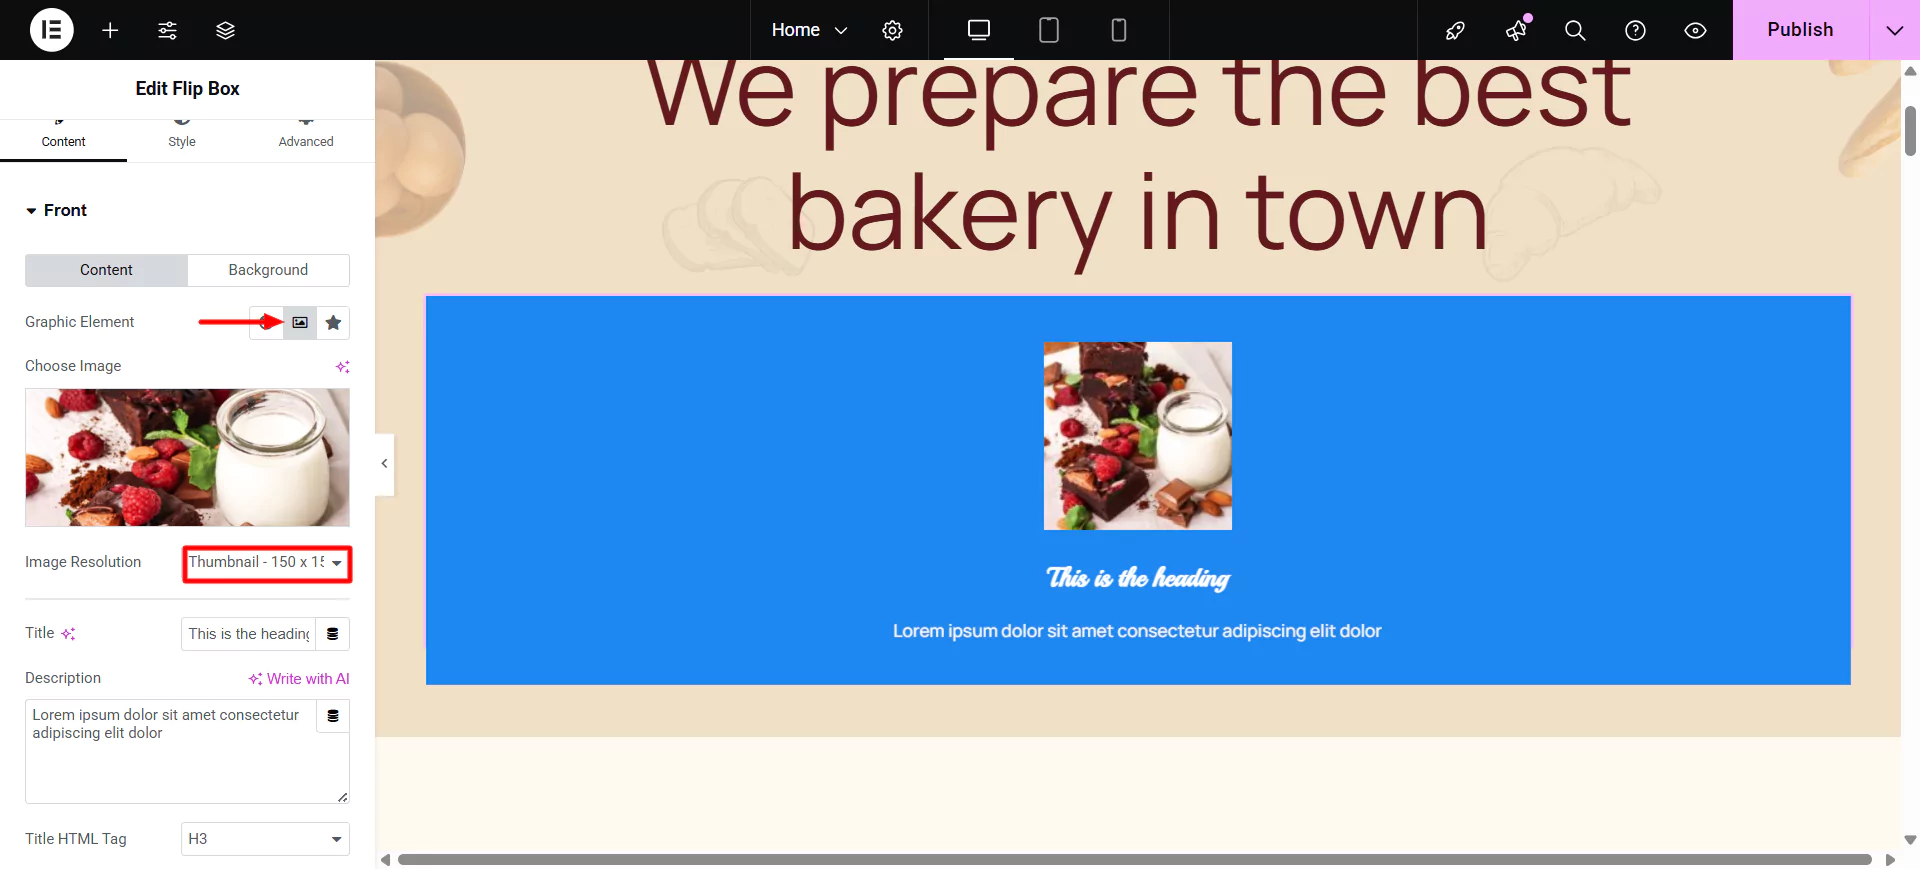
To edit the Graphic Element of the Flip Box, you can choose between None, Image, or Icon to display a graphical element in front of the flip box.
If Image is selected as the Graphic Element, you can:
Choose Image: You can select or upload an image.
Image Size: You can also set the size of the image.
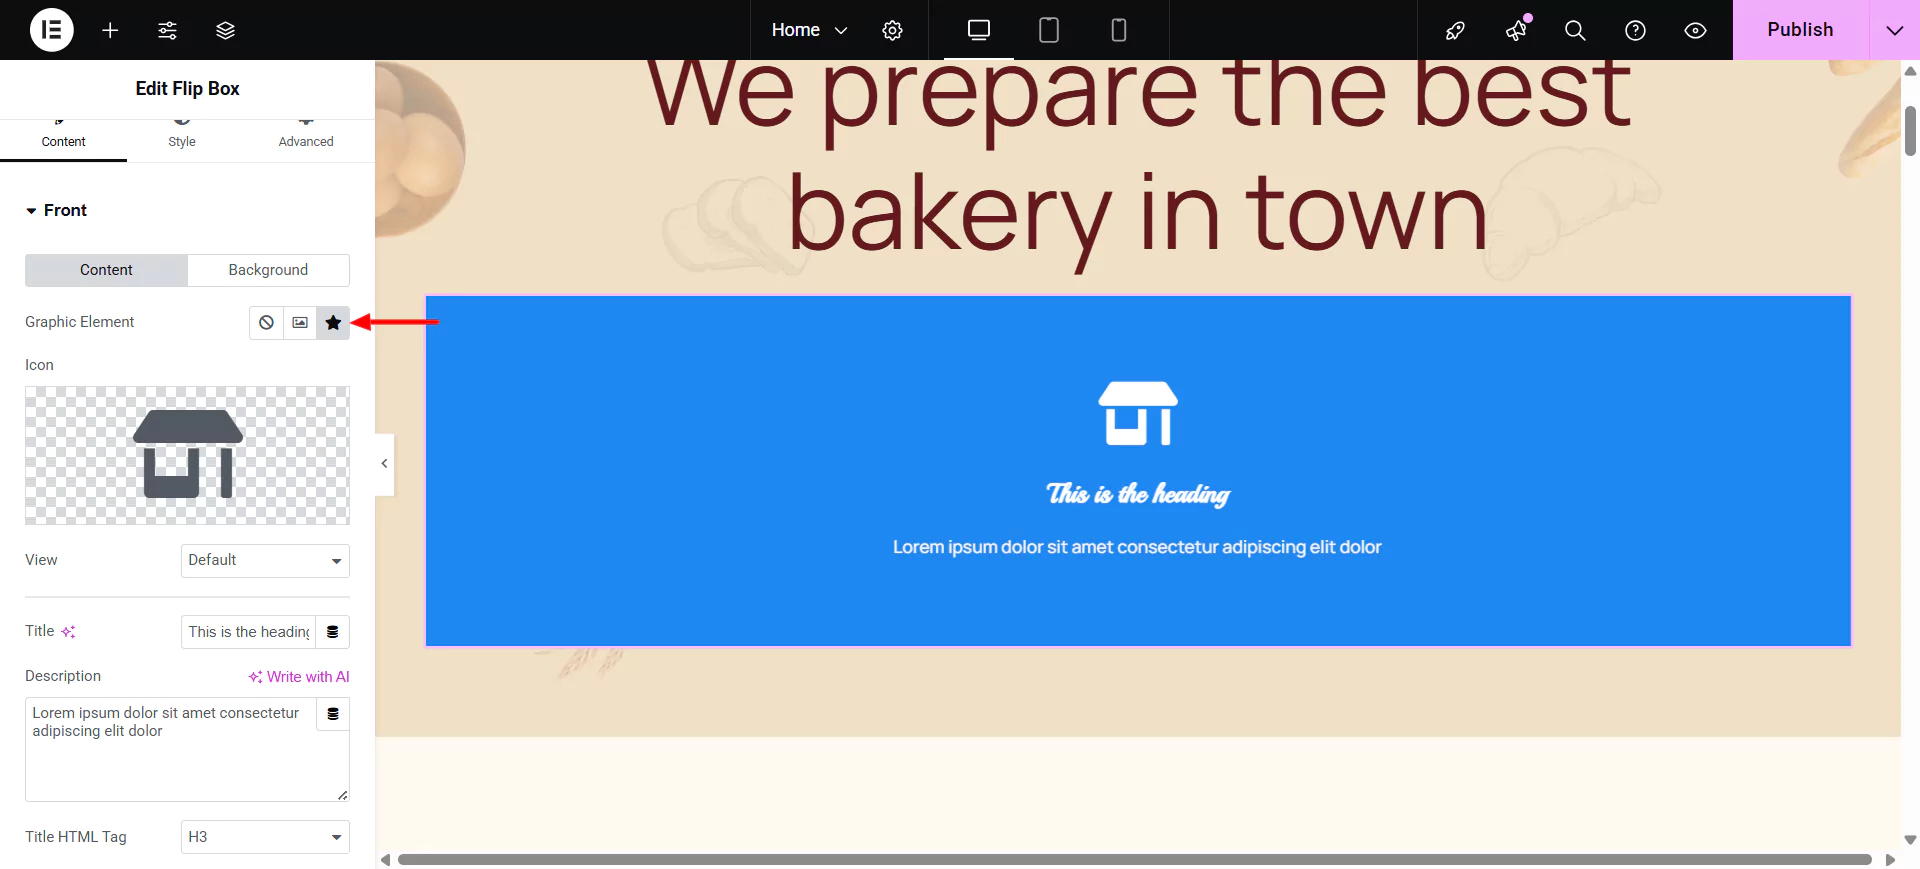
If Icon is selected as the Graphic Element:
Icon: Select an icon from the FontAwesome library.
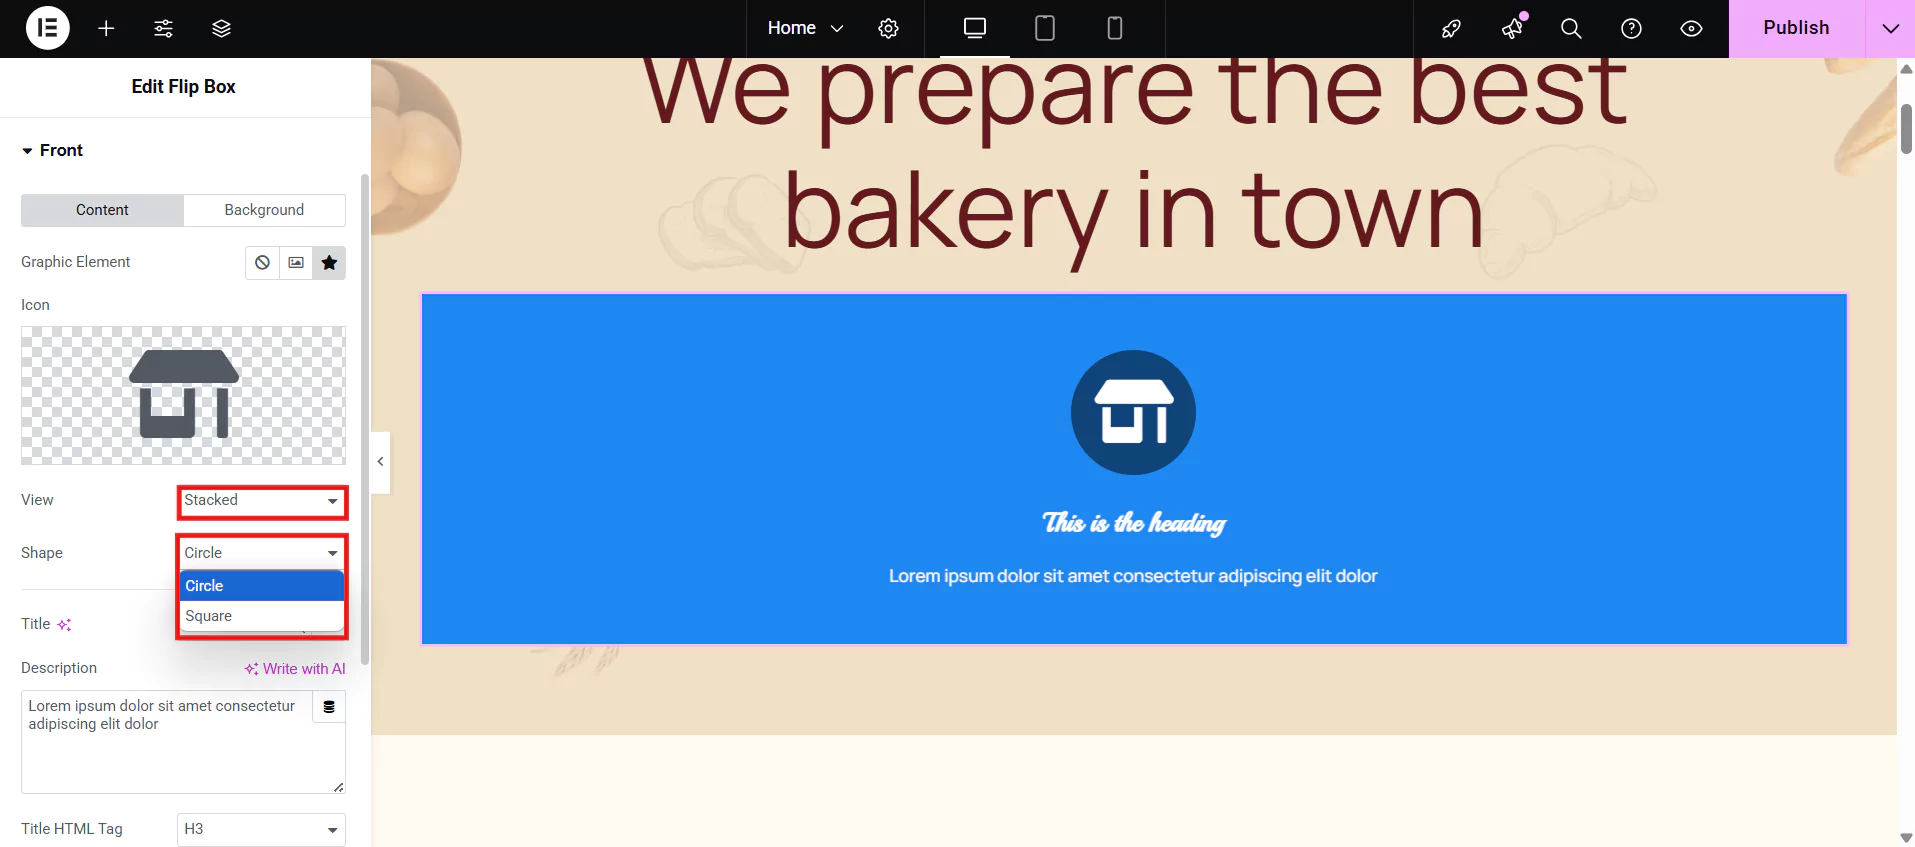
View: Choose the default icon view, or select Stacked or Framed.
If the Stacked or Framed view is chosen for the icon, you can select the shape between Circle or Square.
Next, choose the Title, Description, and the Title HTML Tag that appears in the front of the flip box.
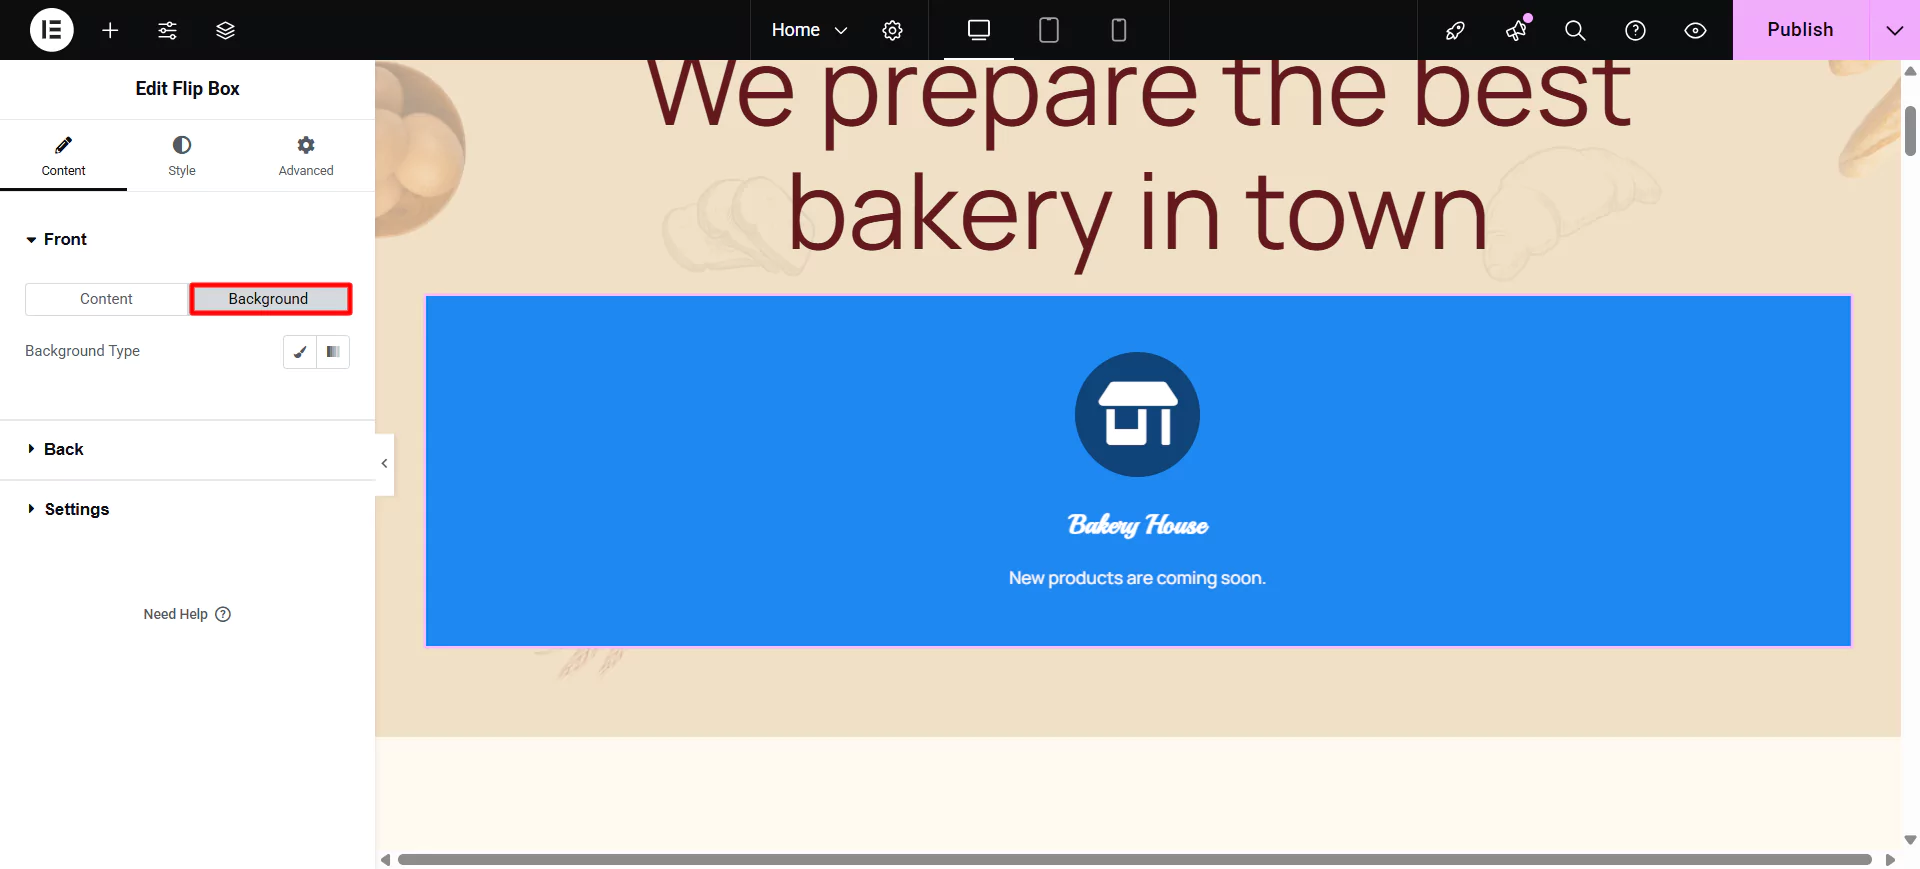
Editing the Front Side Background
You can also edit the front background and select between a classic or a gradient look for the background.
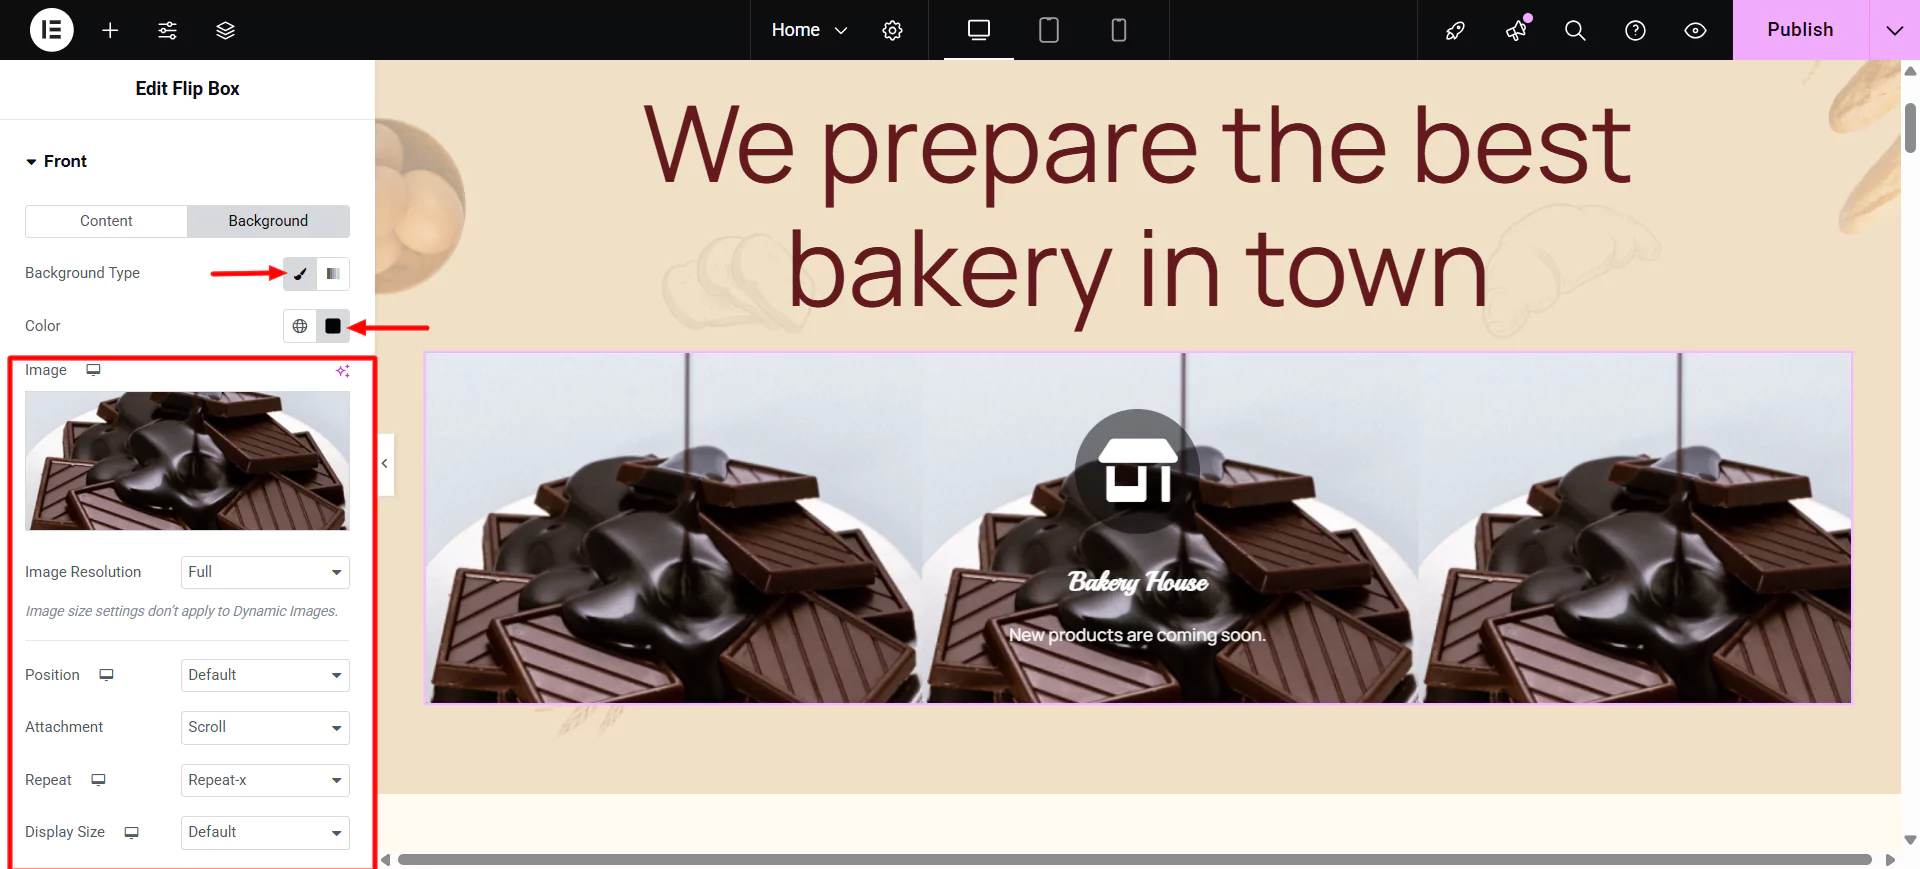
If you choose a Classic Background, the following options become available:
- Position: Select the position of the image, such as Top Center, Top Right, Center Center, etc.
- Attachment: Select from Default, Scroll, or Fixed.
- Repeat: Choose from Default, No-repeat, Repeat, Repeat-x, or Repeat-y.
- Size: Select from Default, Auto, Cover, or Contain.
- Background Overlay: Choose a color for the overlay.
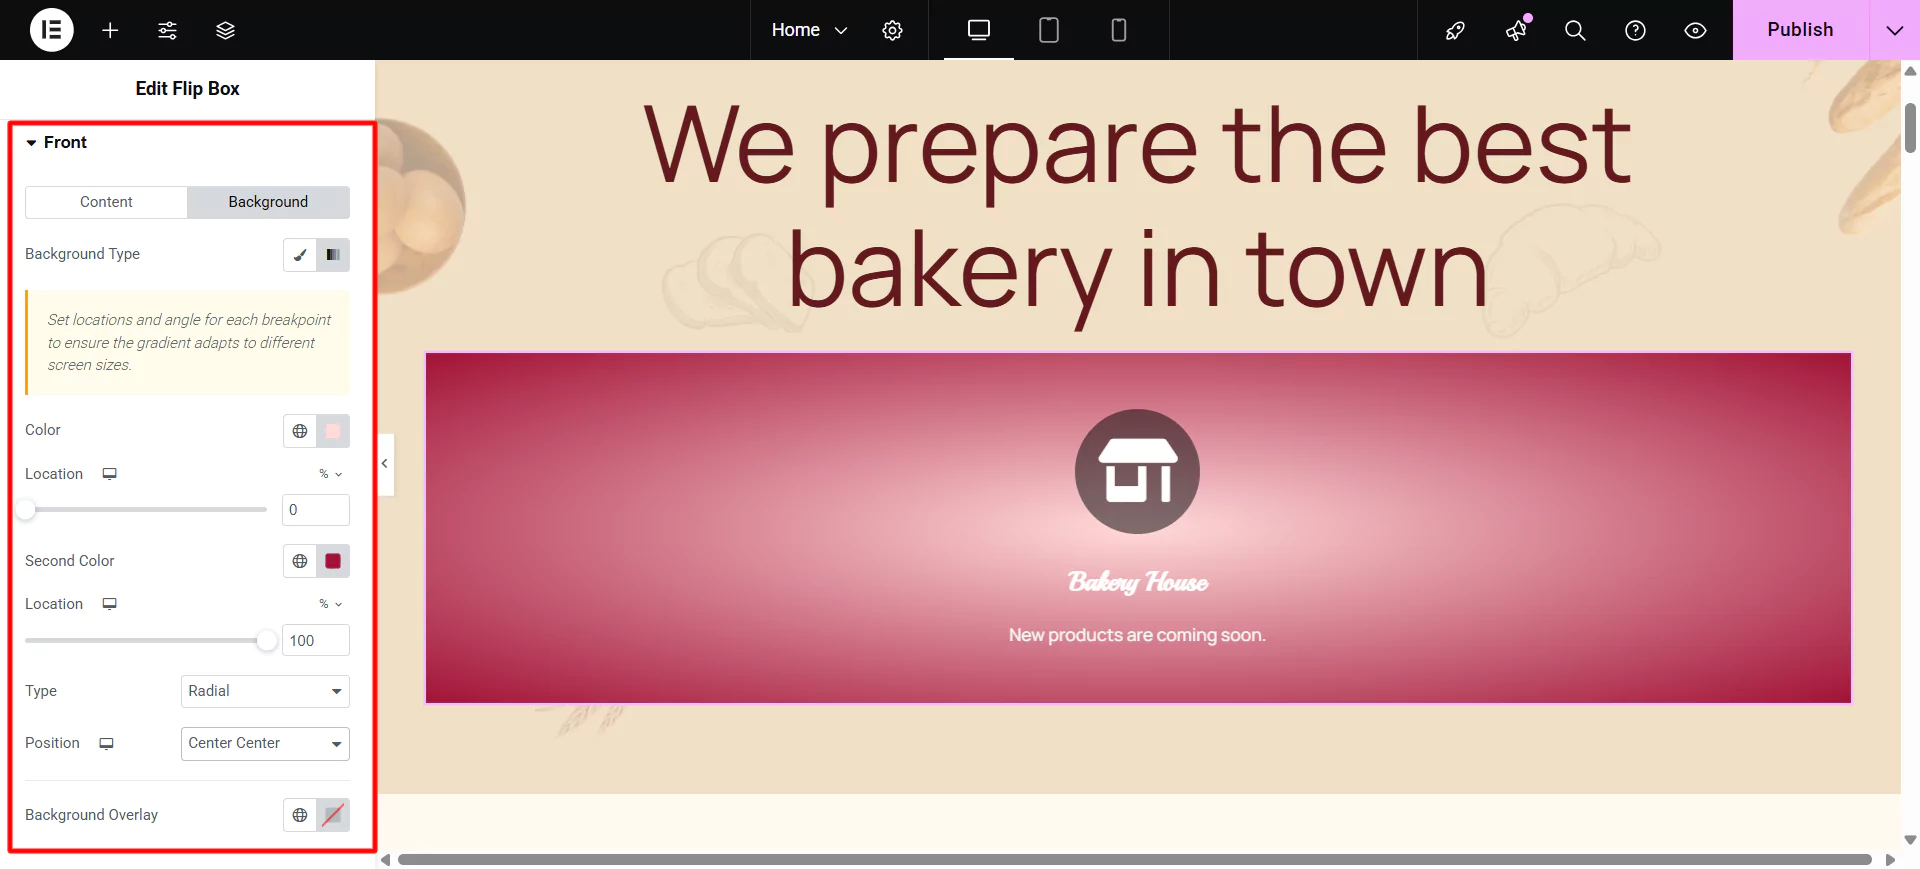
If you choose Gradient Background, the following options become available:
- Color: Select the primary color of the gradient.
- Location: Select the location of the primary color.
- Second Color: Select the second color of the gradient.
- Location: Select the location of the second color.
- Type: Choose Linear or Radial.
- Angle: Set the angle of the gradient.
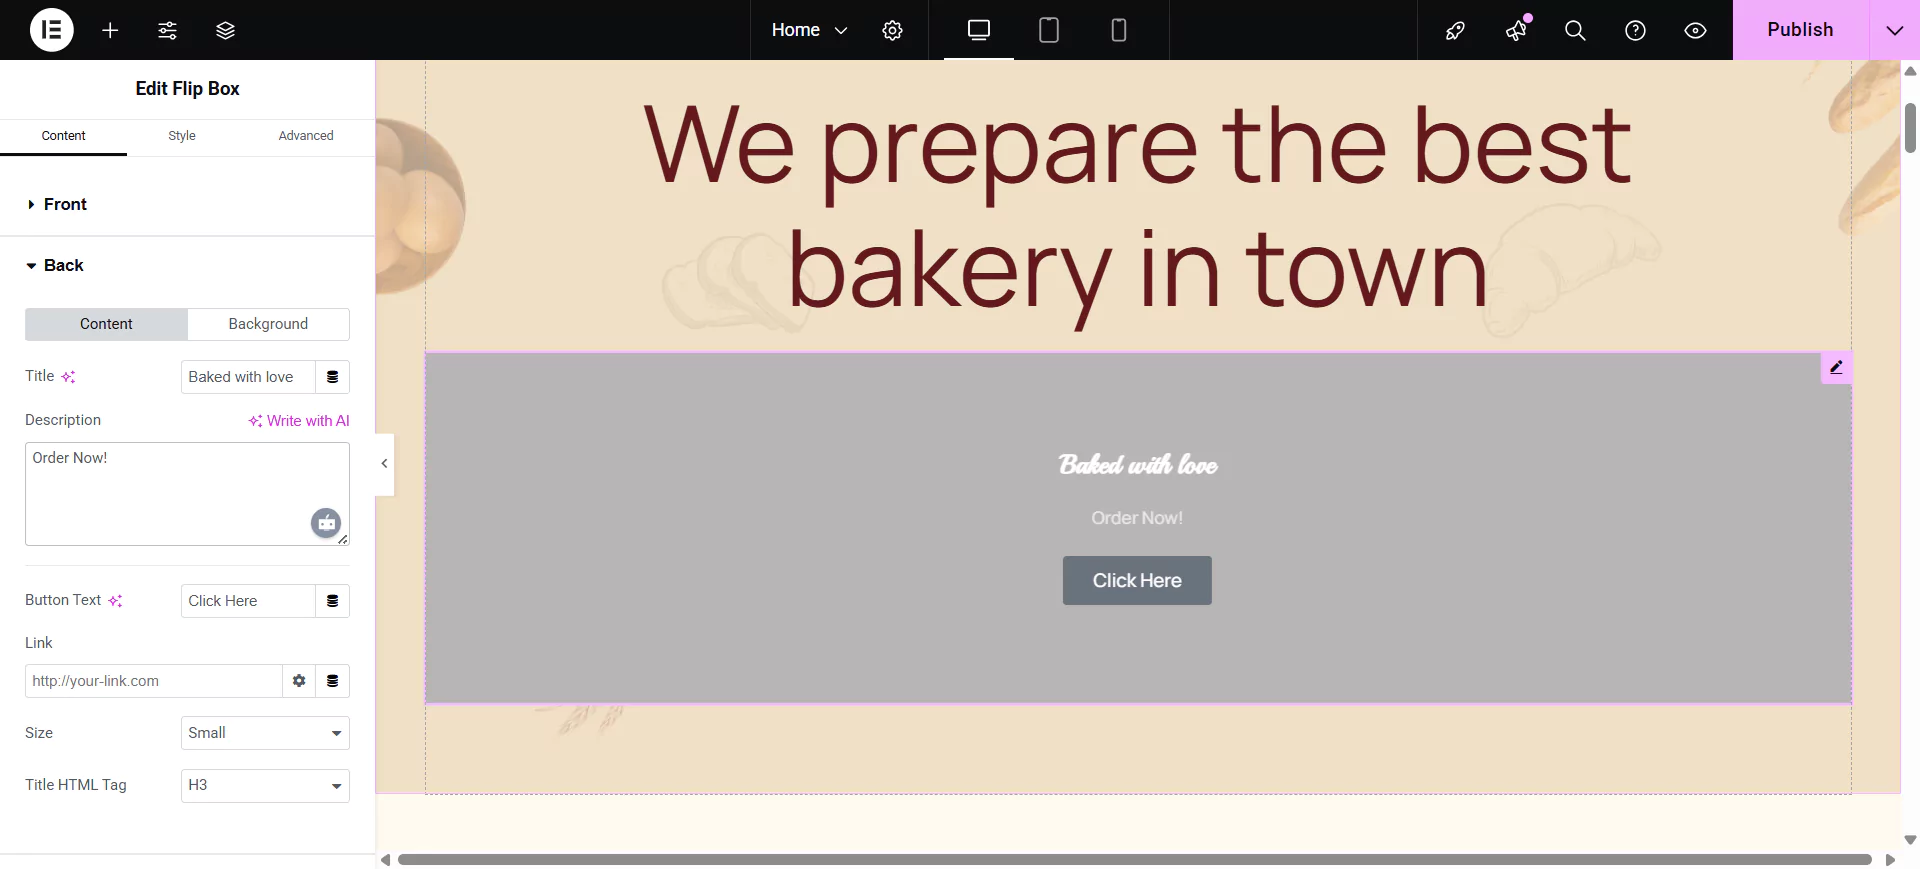
Editing the Back Side Content
To edit the Back Side of the Flip Box, click on Back in the sidebar
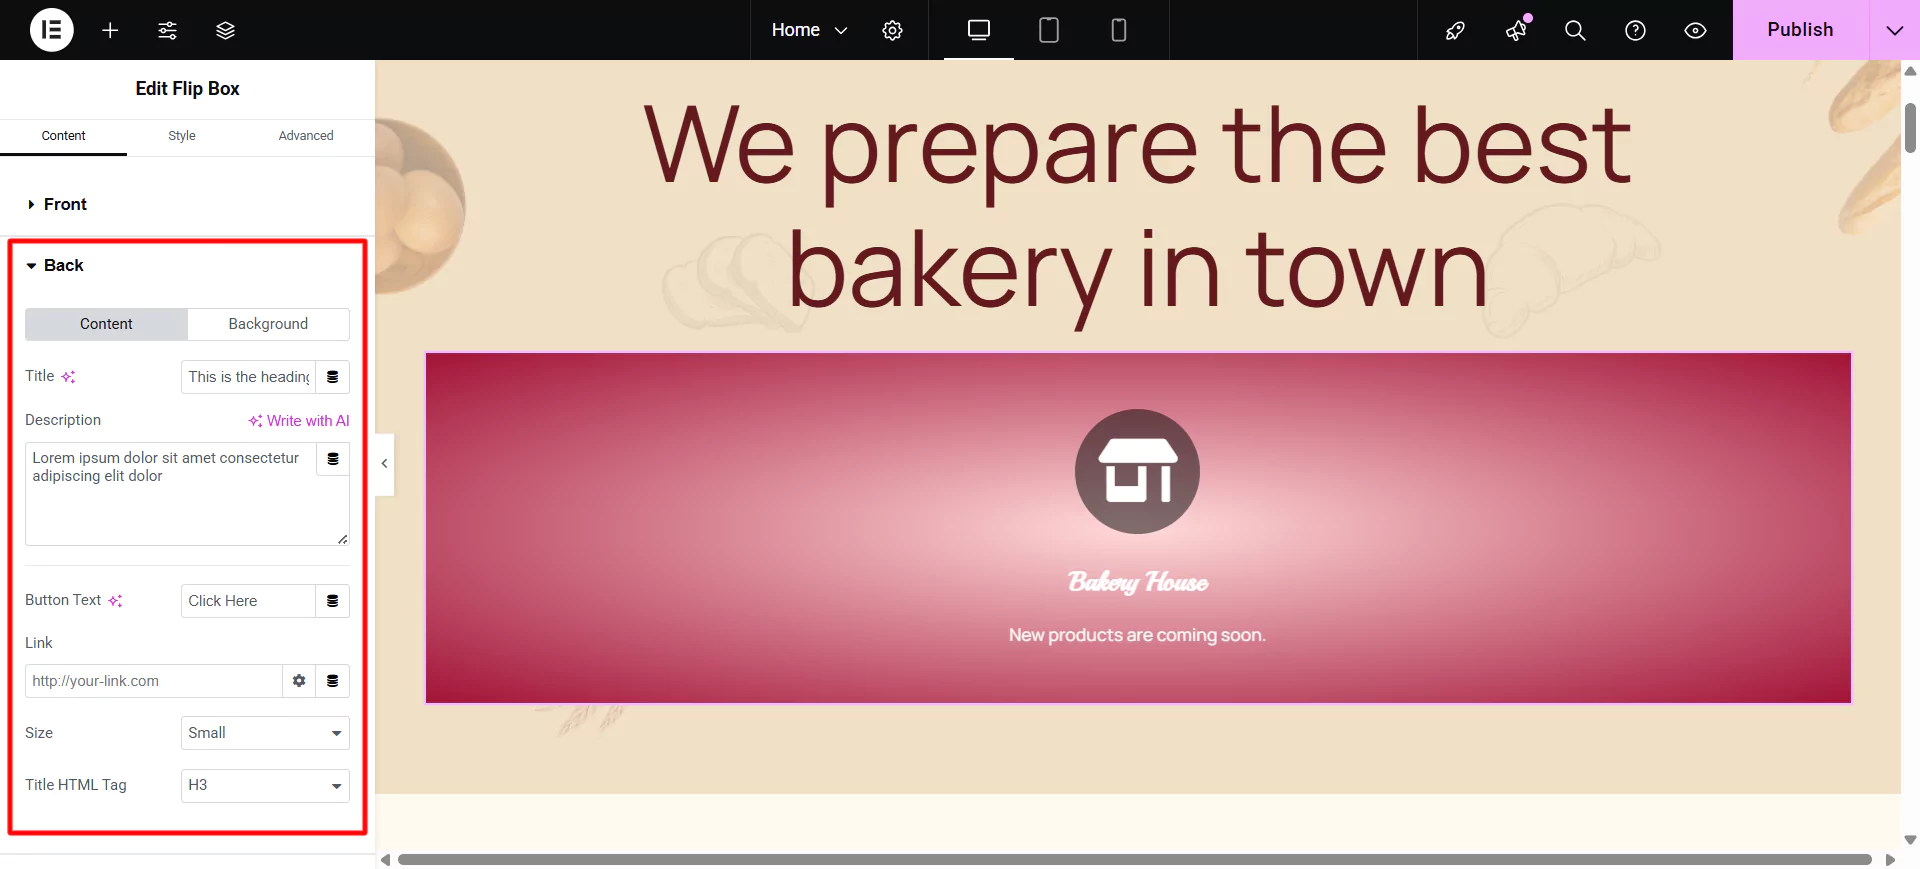
The backside of the flip box has the same elements as the front side listed above, except for the graphic element that only appears on the front. The backside also includes a button.
- Button Text: Choose the text that appears inside the button.
- Link: Choose where the button points to. The link needs to include the entire URL (including http / https).
- Apply Link On: Choose to apply the clickable link to the Button Only, or to the Whole Box.
Similar to the front background, you can also edit the back background, and select between classic or gradient look for the background, and edit it exactly the way you can edit the front.
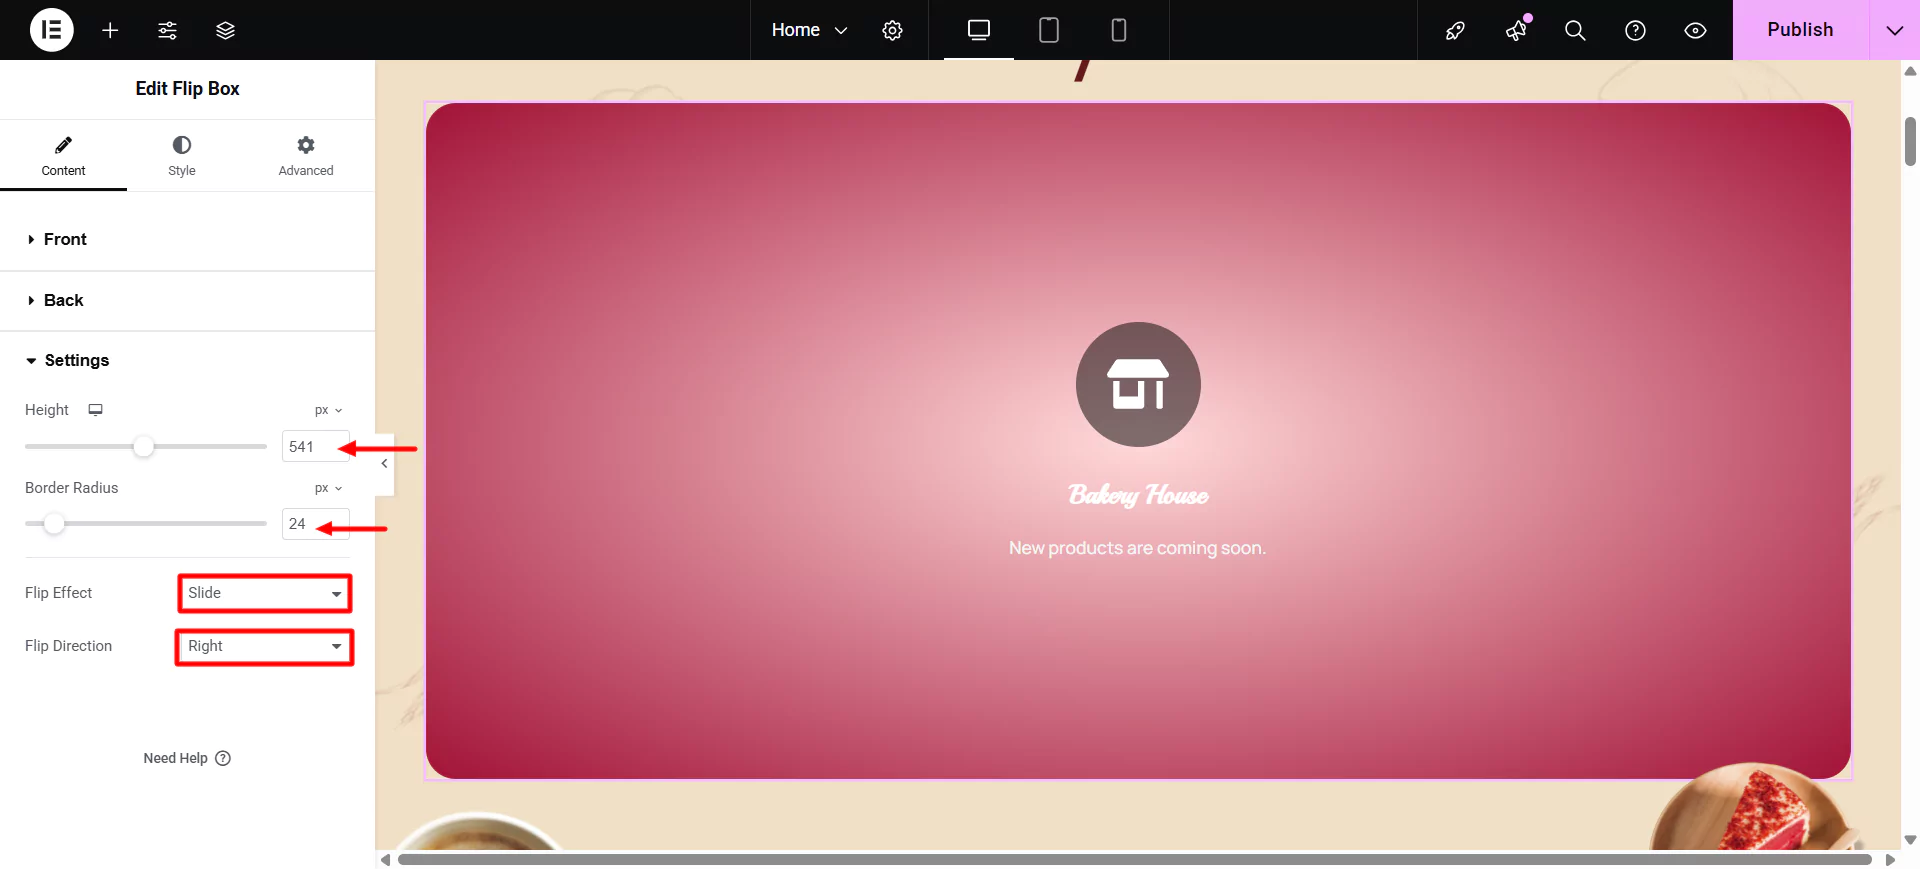
To customize the settings of the flip box, click on Settings in the sidebar.
Customizing the Settings
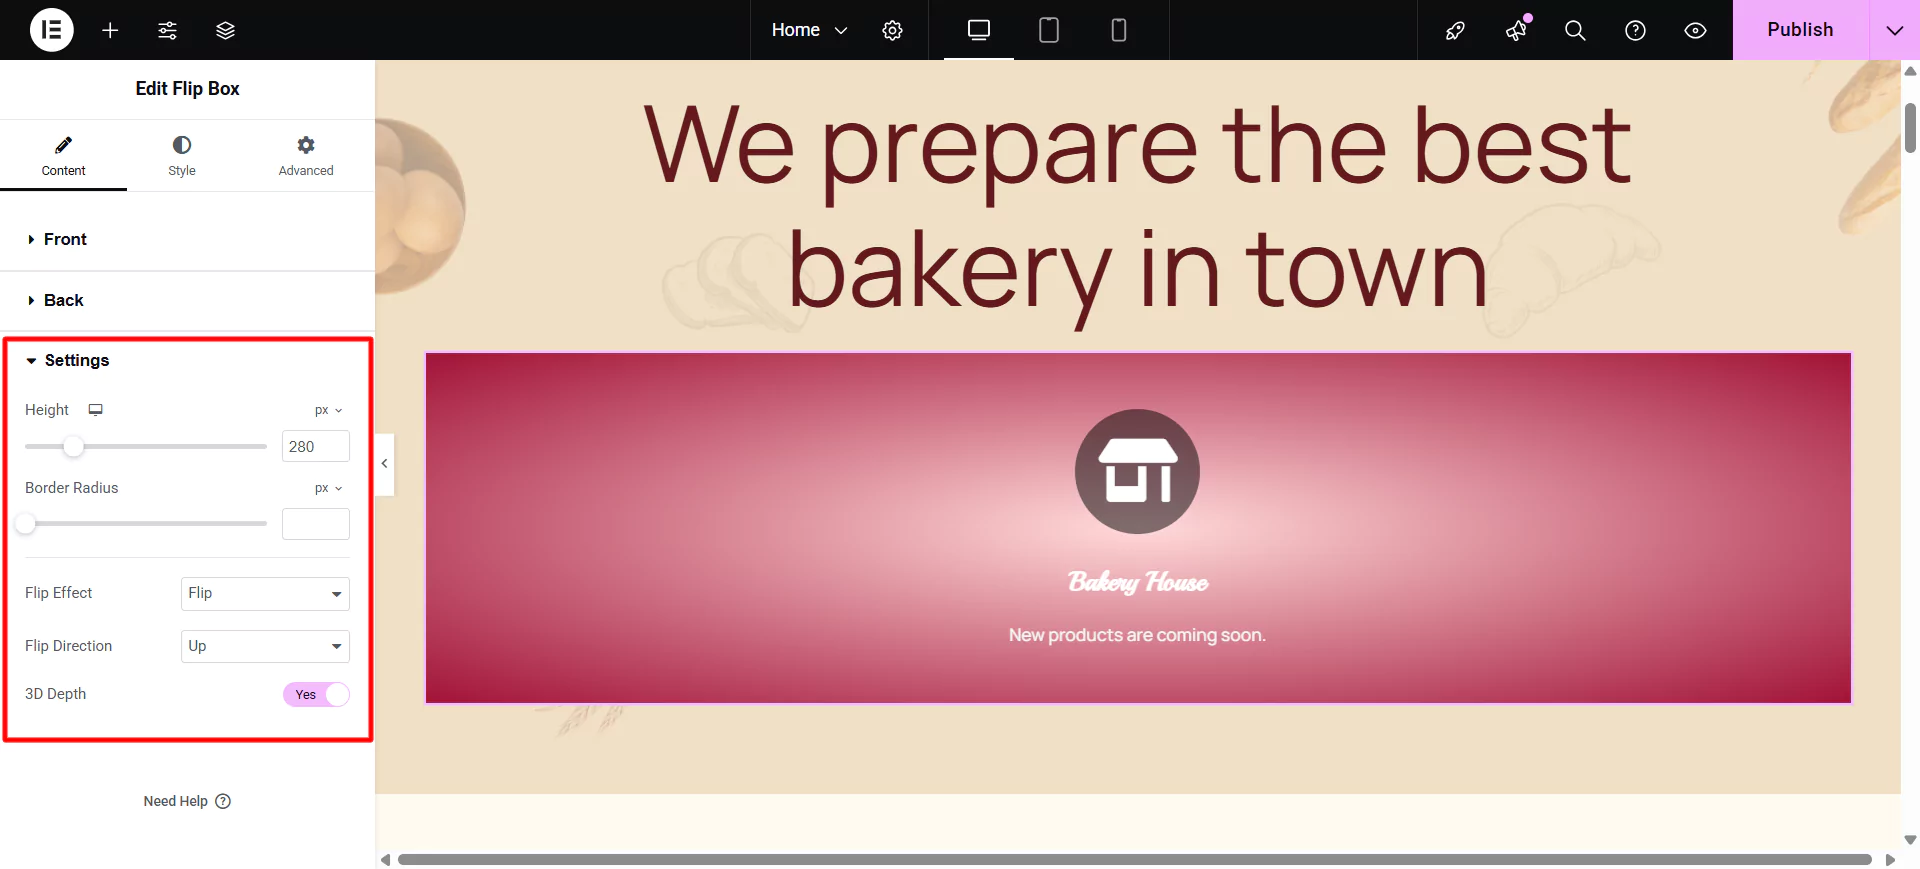
You can further edit the following in the flip box Settings
- Height: Control the height of the flip box.
- Border Radius: Set the border radius of the flip box, and make its corners round.
- Flip Effect: Choose between flip effects, including flip, slide, push, zoom in, zoom out or fade.
- Flip Direction: If you choose the flip or slide effects, you can have the flip box flip right, left, up or down.
- 3D Depth: Slide to On to give the flip box a 3D animation effect.
Let’s style the flip box.
Step 4: Styling the Flip Box Widget
Styling the Front Side
To style the Front Side of the Flip Box, click on Front in the sidebar.
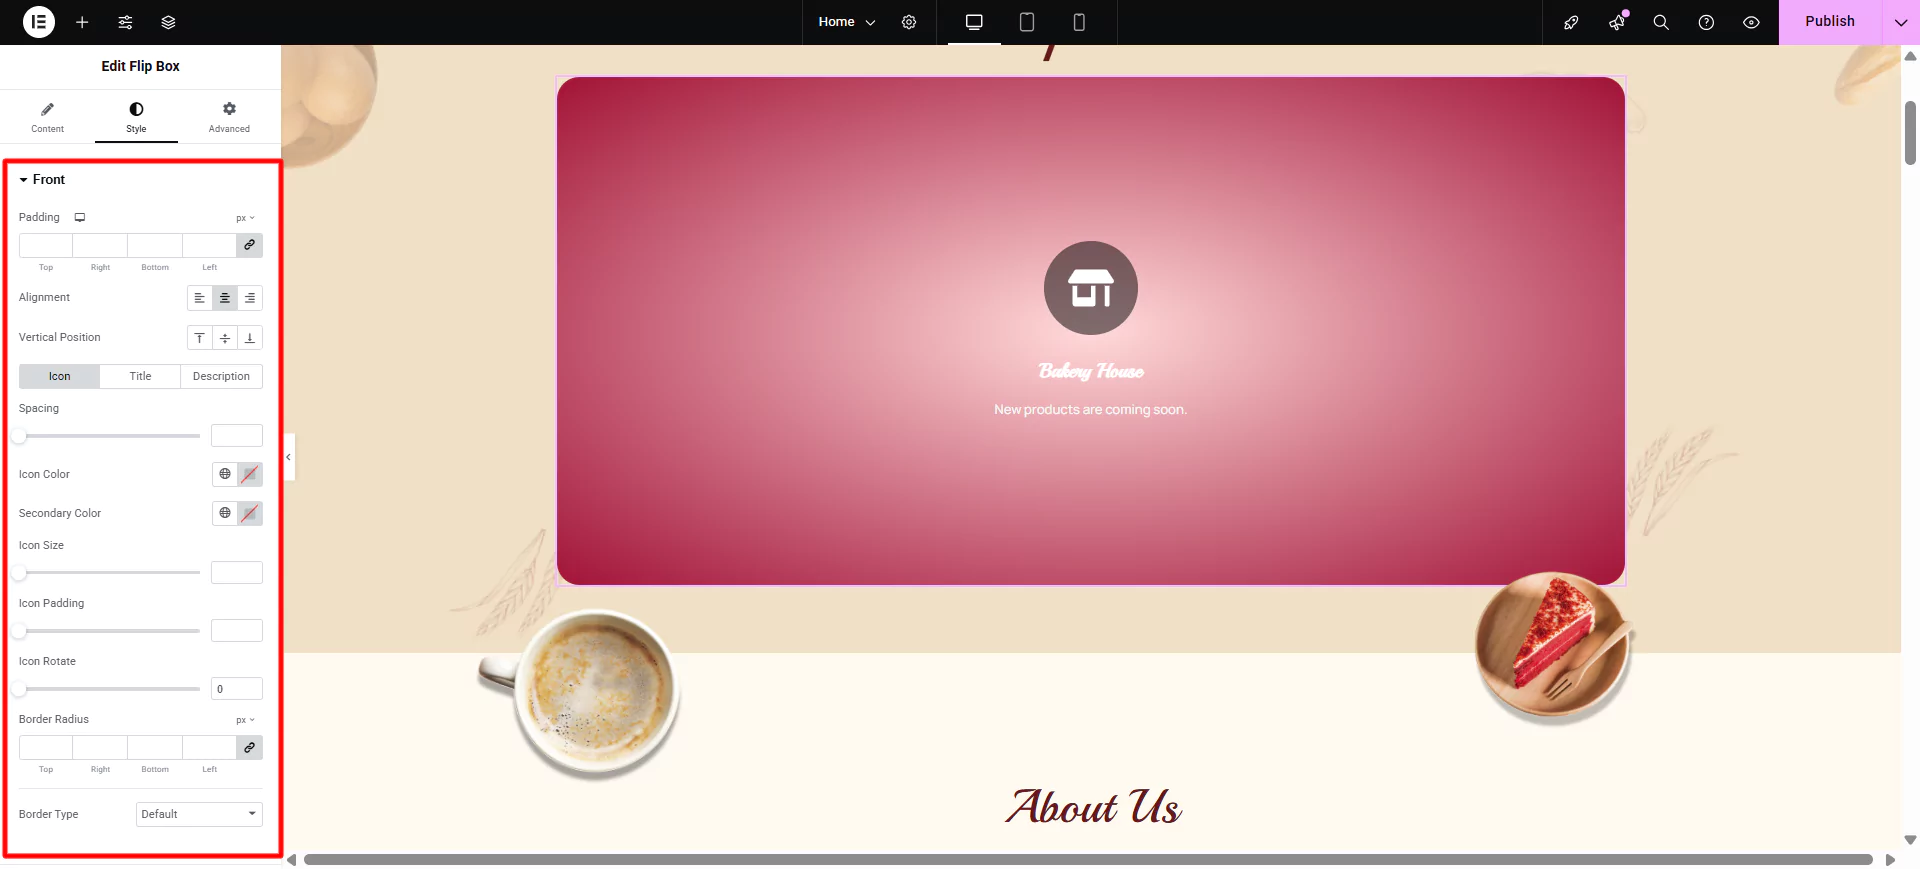
On the front side of the flip box, you will be able to style the following:
- Padding: Add padding to the content area of the front of the flip box.
- Alignment: Choose to align the flip box content to the left, right, or centre of the flip box.
- Vertical Position: Align the flip box content to the top, centre, or bottom of the flip box.
You can also style each element of the Flip Box, such as:
Icon
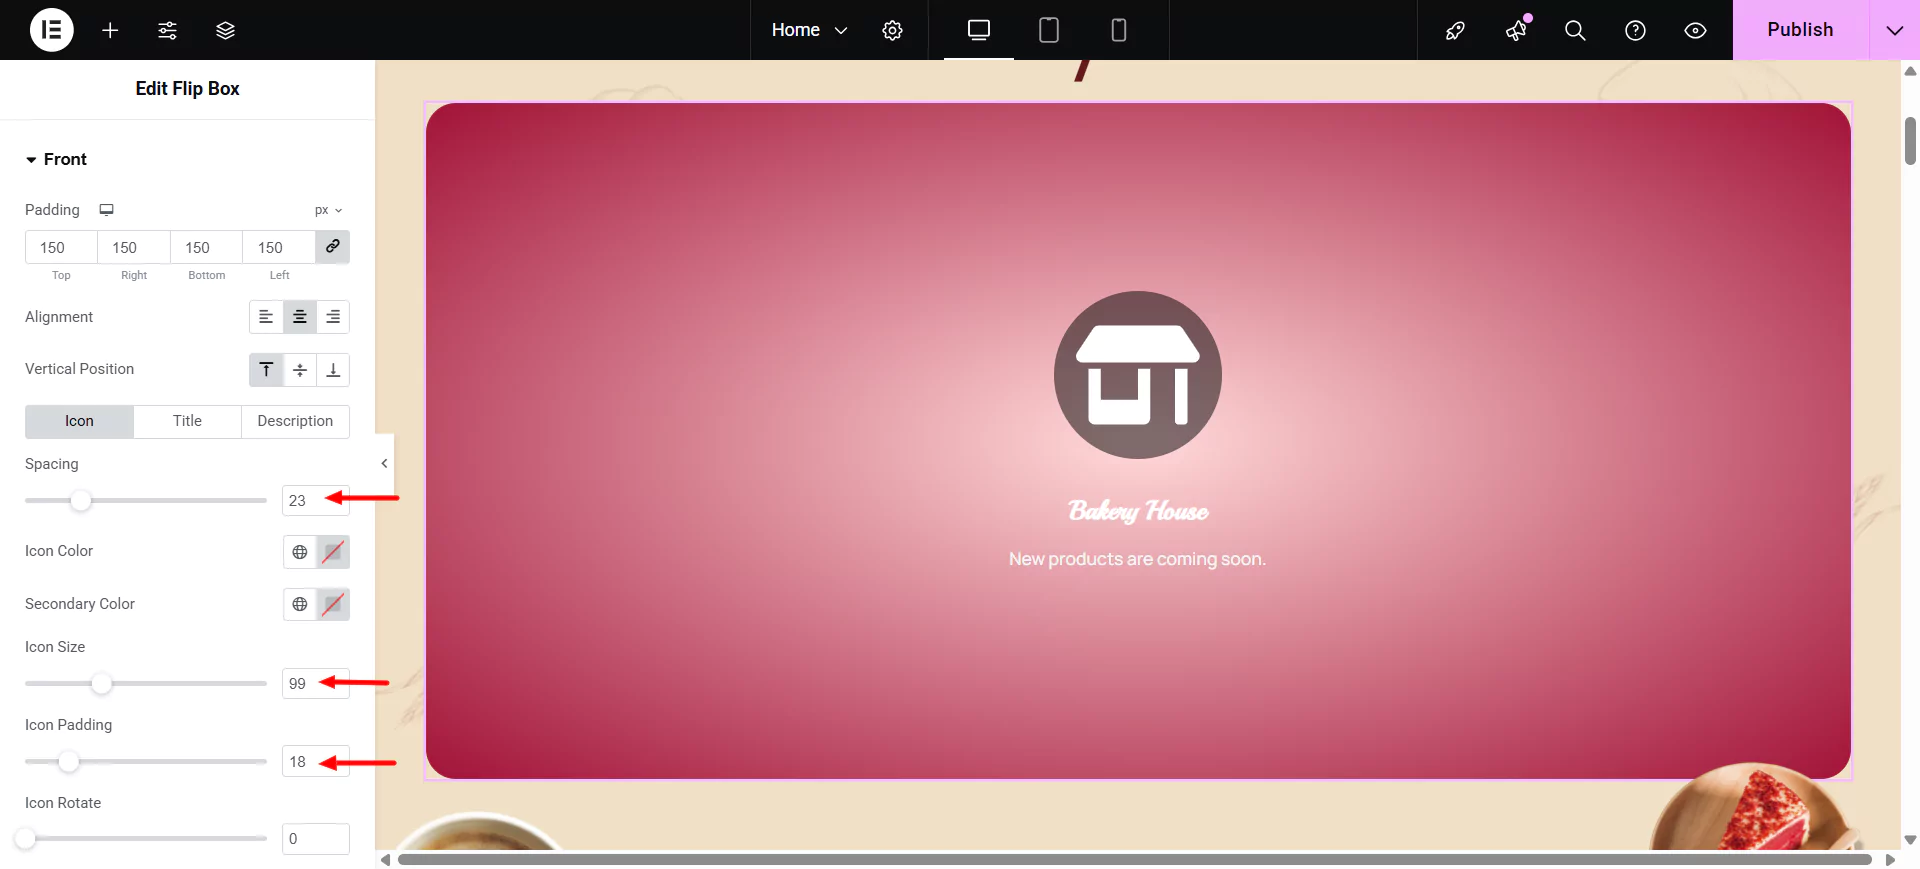
- Spacing: Control the space between the icon and the title.
- Primary Color: Choose the primary color of the icon.
- Secondary Color: Choose the secondary color of the icon.
- Icon Size: Choose the size of the icon.
- Icon Padding: Set the amount of padding around the icon.
- Icon Rotate: Rotate the icon to any angle.
- Border Width: Set the width of the icon border.
- Border Radius: Set the radius of the icon border to control corner roundness.
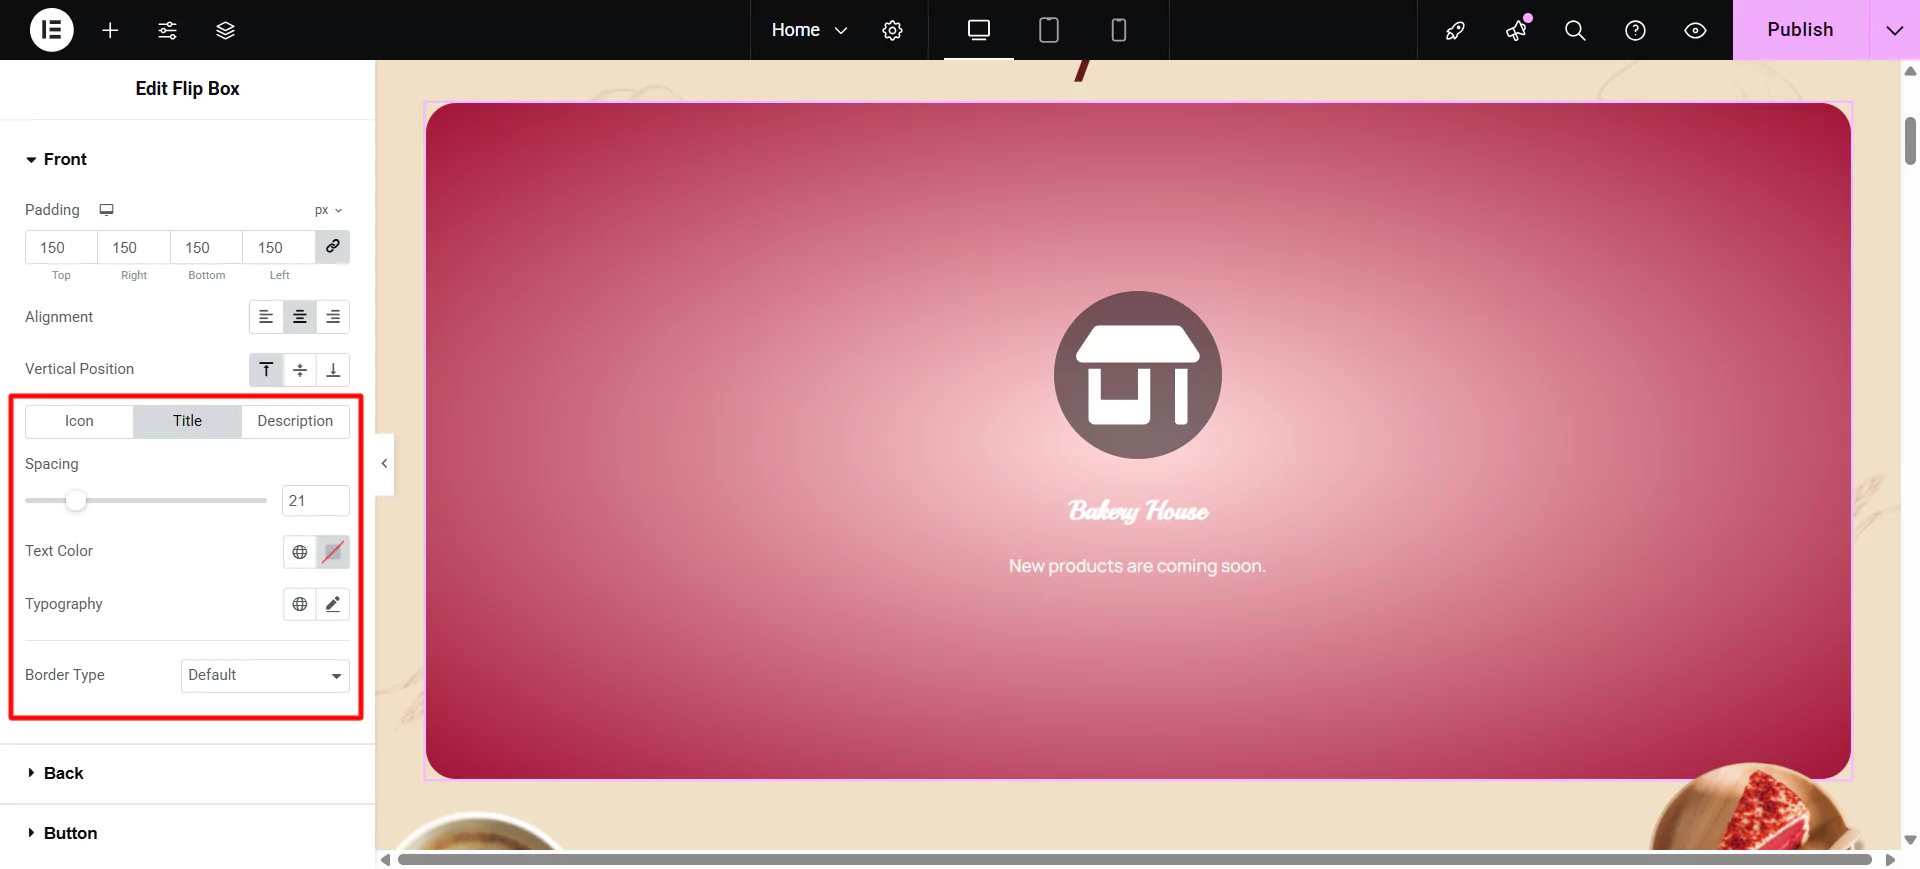
Title
- Spacing: Control the space between the title and description.
- Text Color: Choose the color of the title.
- Typography: Set the typography settings of the title.
Description
- Text Color: Choose the color of the description.
- Typography: Set the typography settings of the description.

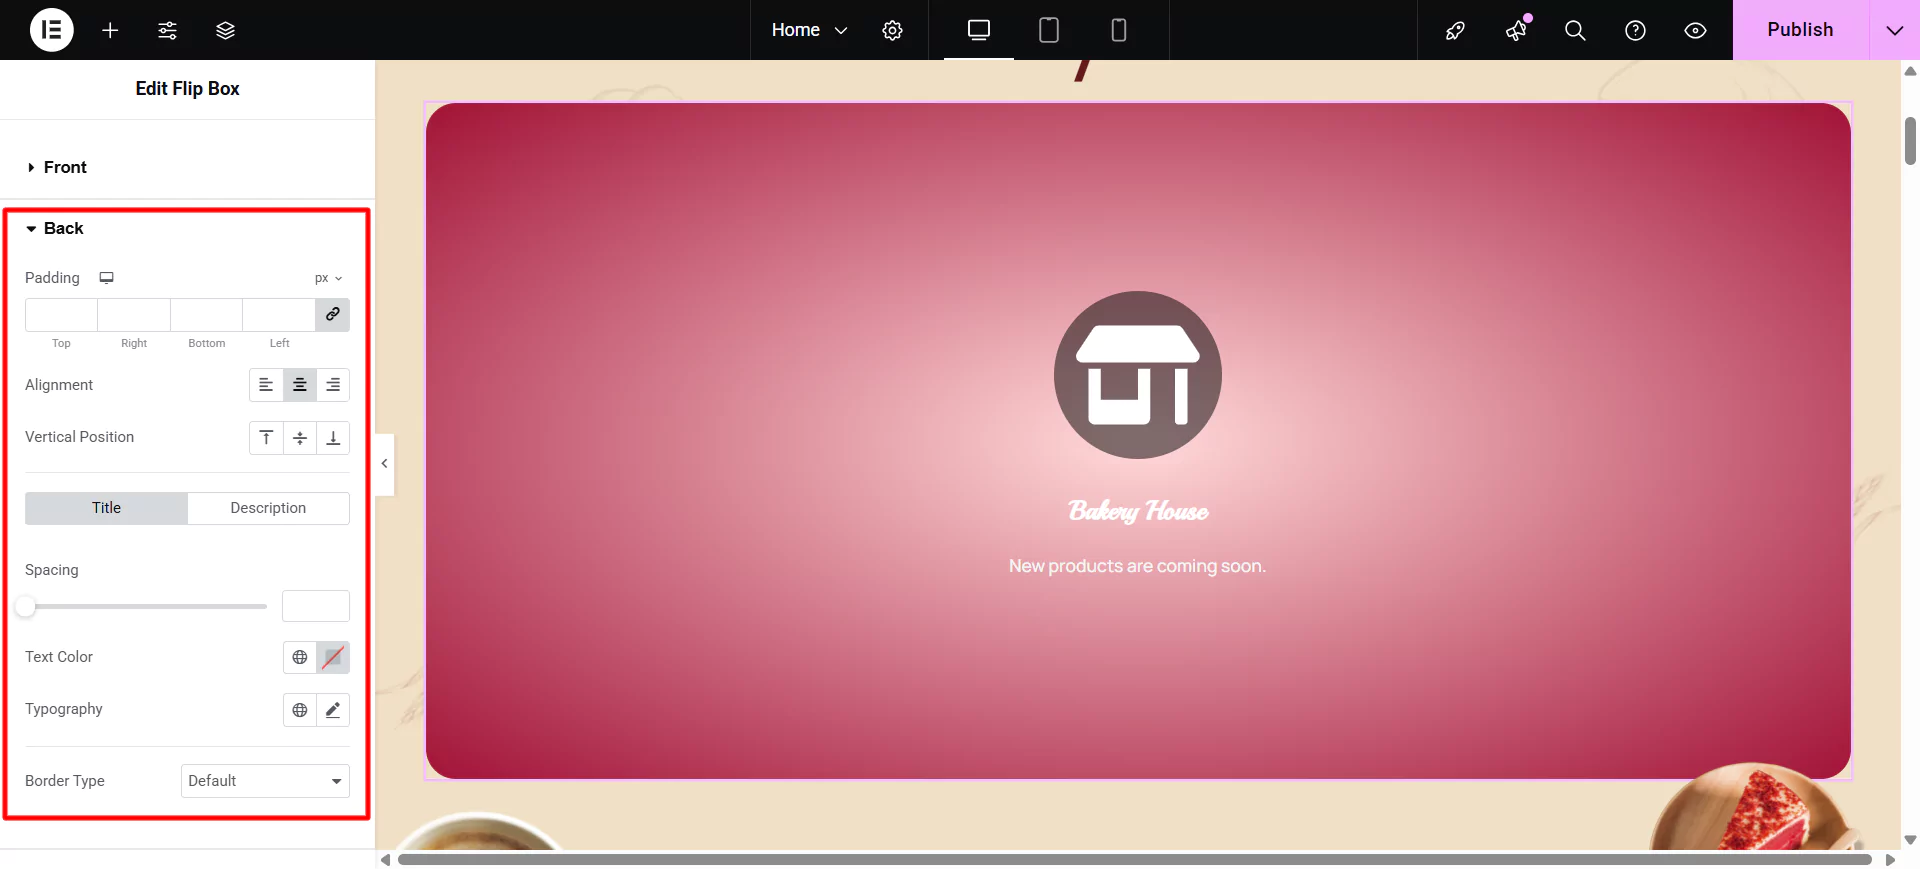
Styling the Back Side
For the backside of the flip box, you get all the options listed for the front side, excluding the graphical element settings. In addition, you also get control over the button settings.
You get the following option to edit the button:
- Size: Choose a size for the button (extra-small, small, medium, large, and extra-large).
- Typography: Customize the typography of the button text.
- Text Color: Choose the text color of the button.
- Background Color: Choose the color of the button background.
- Border Color: Control the color of the button border.
- Border Width: Control the width of the button border.
- Border Radius: Control the border radius of the button
Following the above steps, you can easily add, customise, and style an Elementor Flip Box widget.
Now you know how you can create flip box elementor, it’s time to use Responsive Blocks plugin to create one.
How to Create Flip Box Using Responsive Blocks
Install and activate the Responsive Blocks Plugin and click on post > add new post.
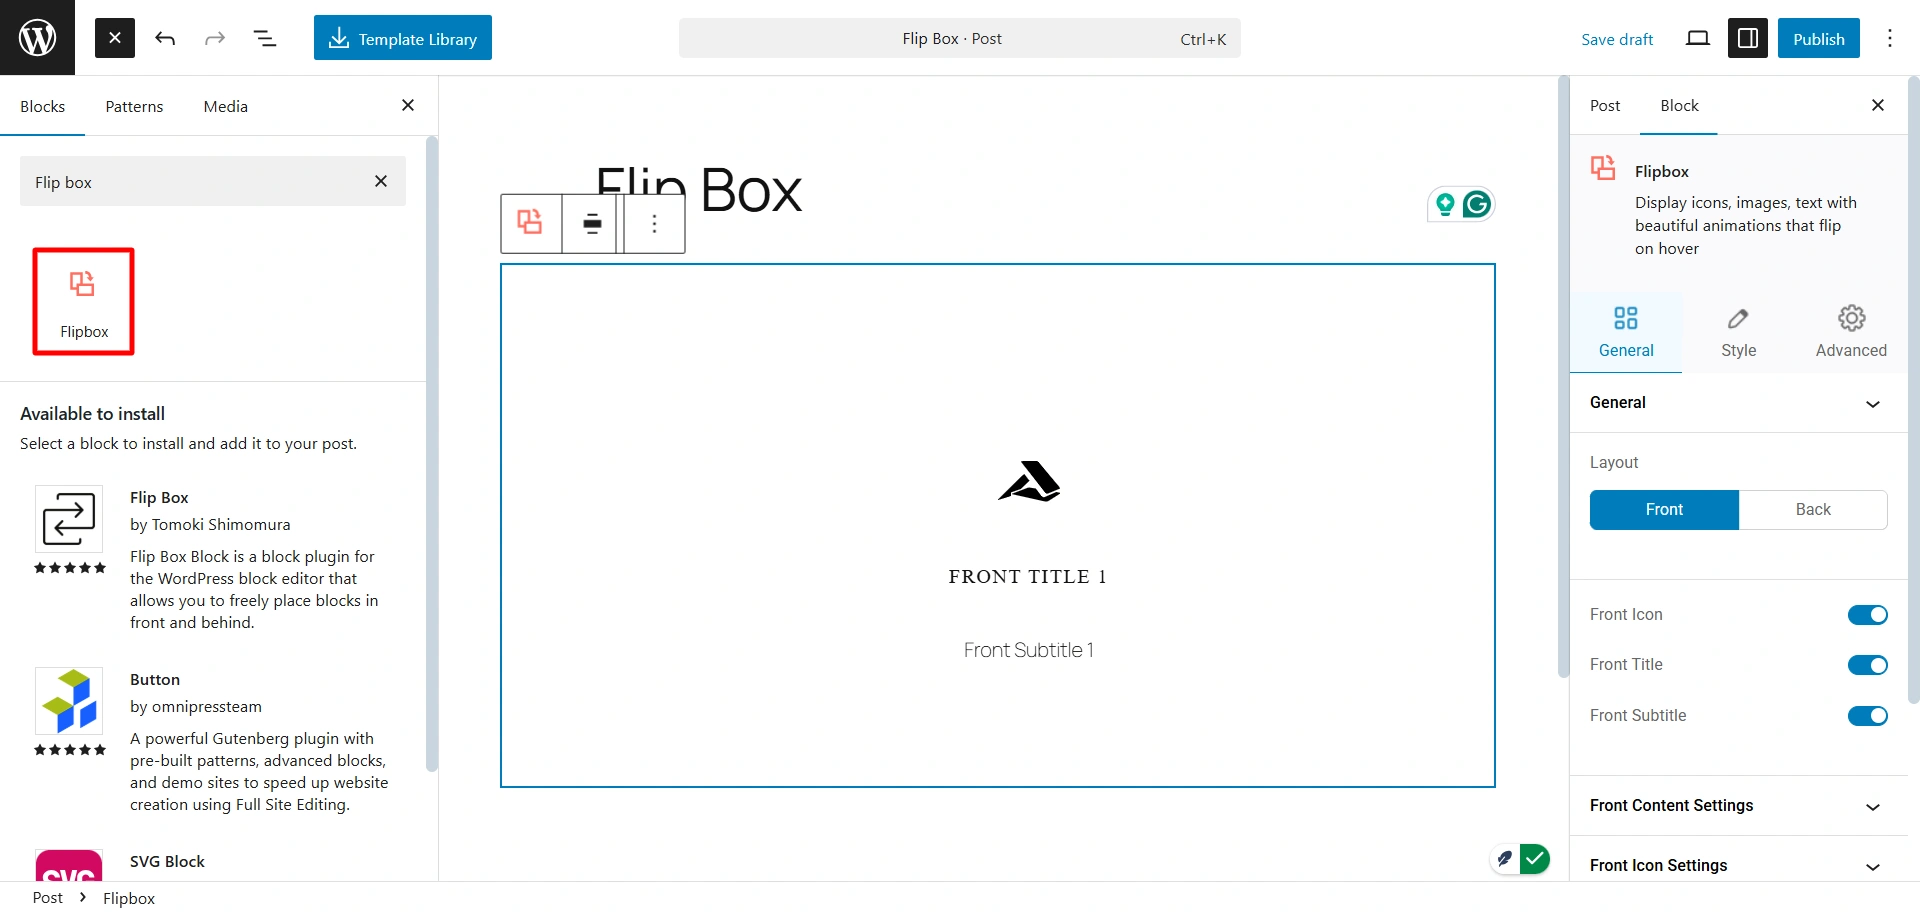
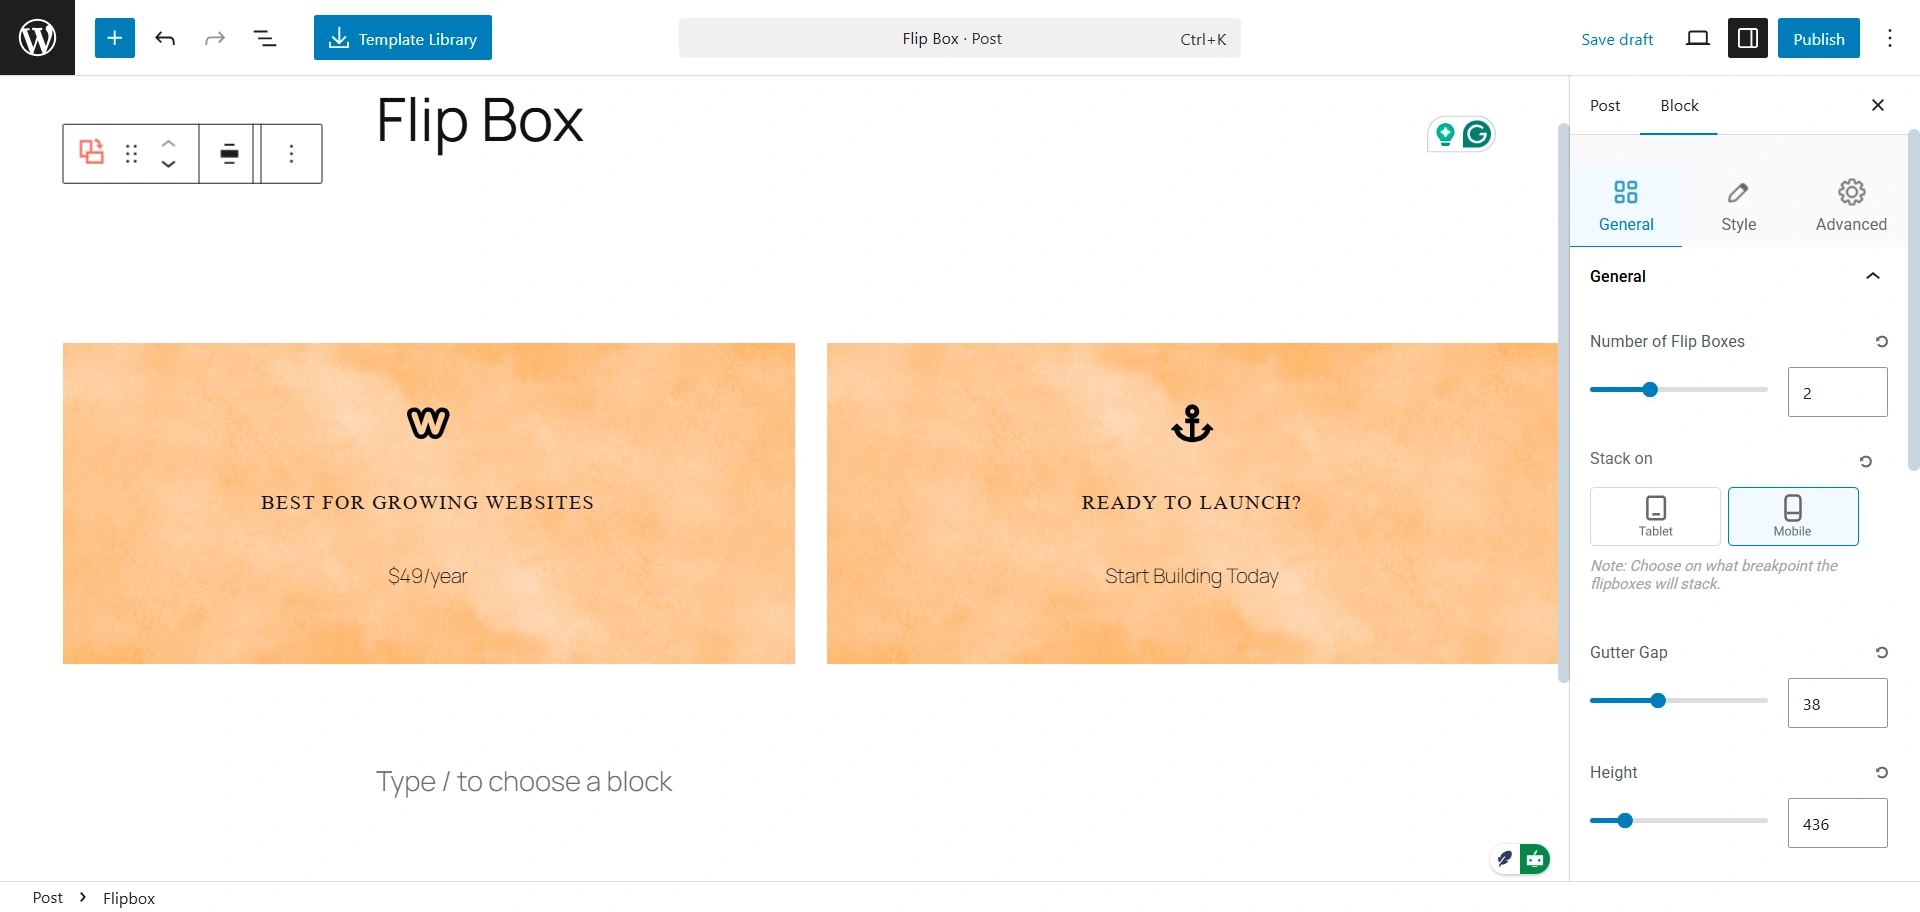
Click on General and set the number of flip boxes you want. After that, click on Front content setting and fill in the data for both blocks.
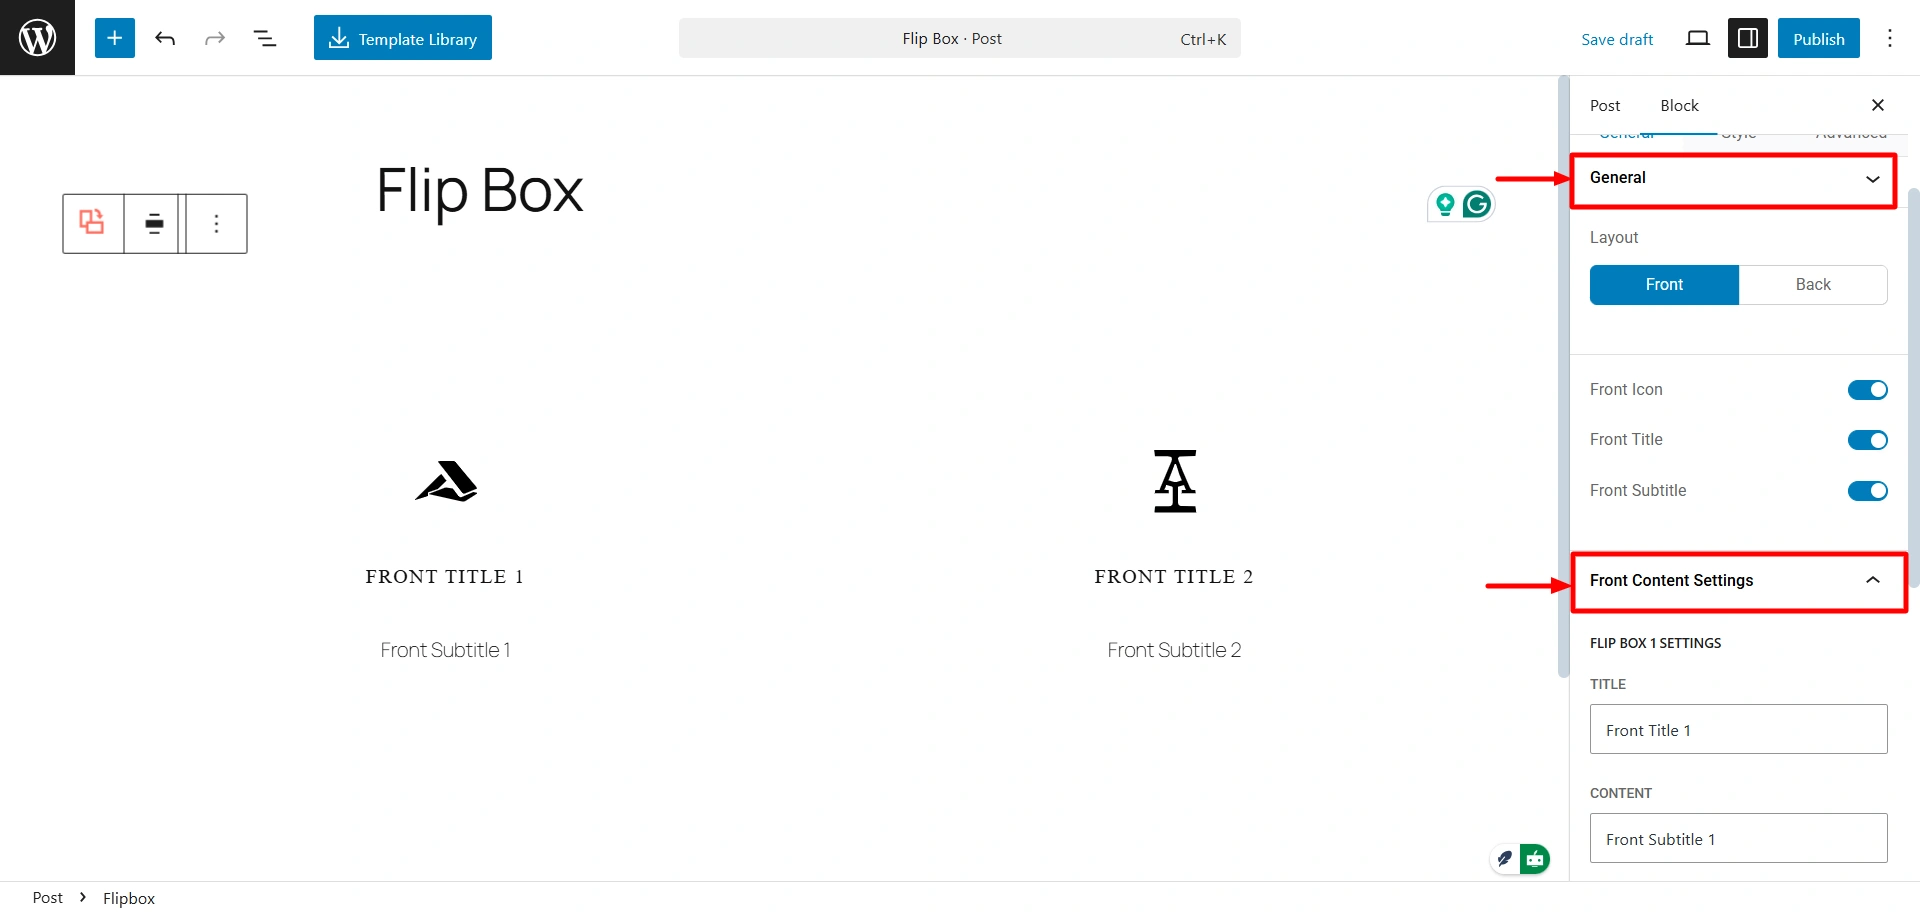
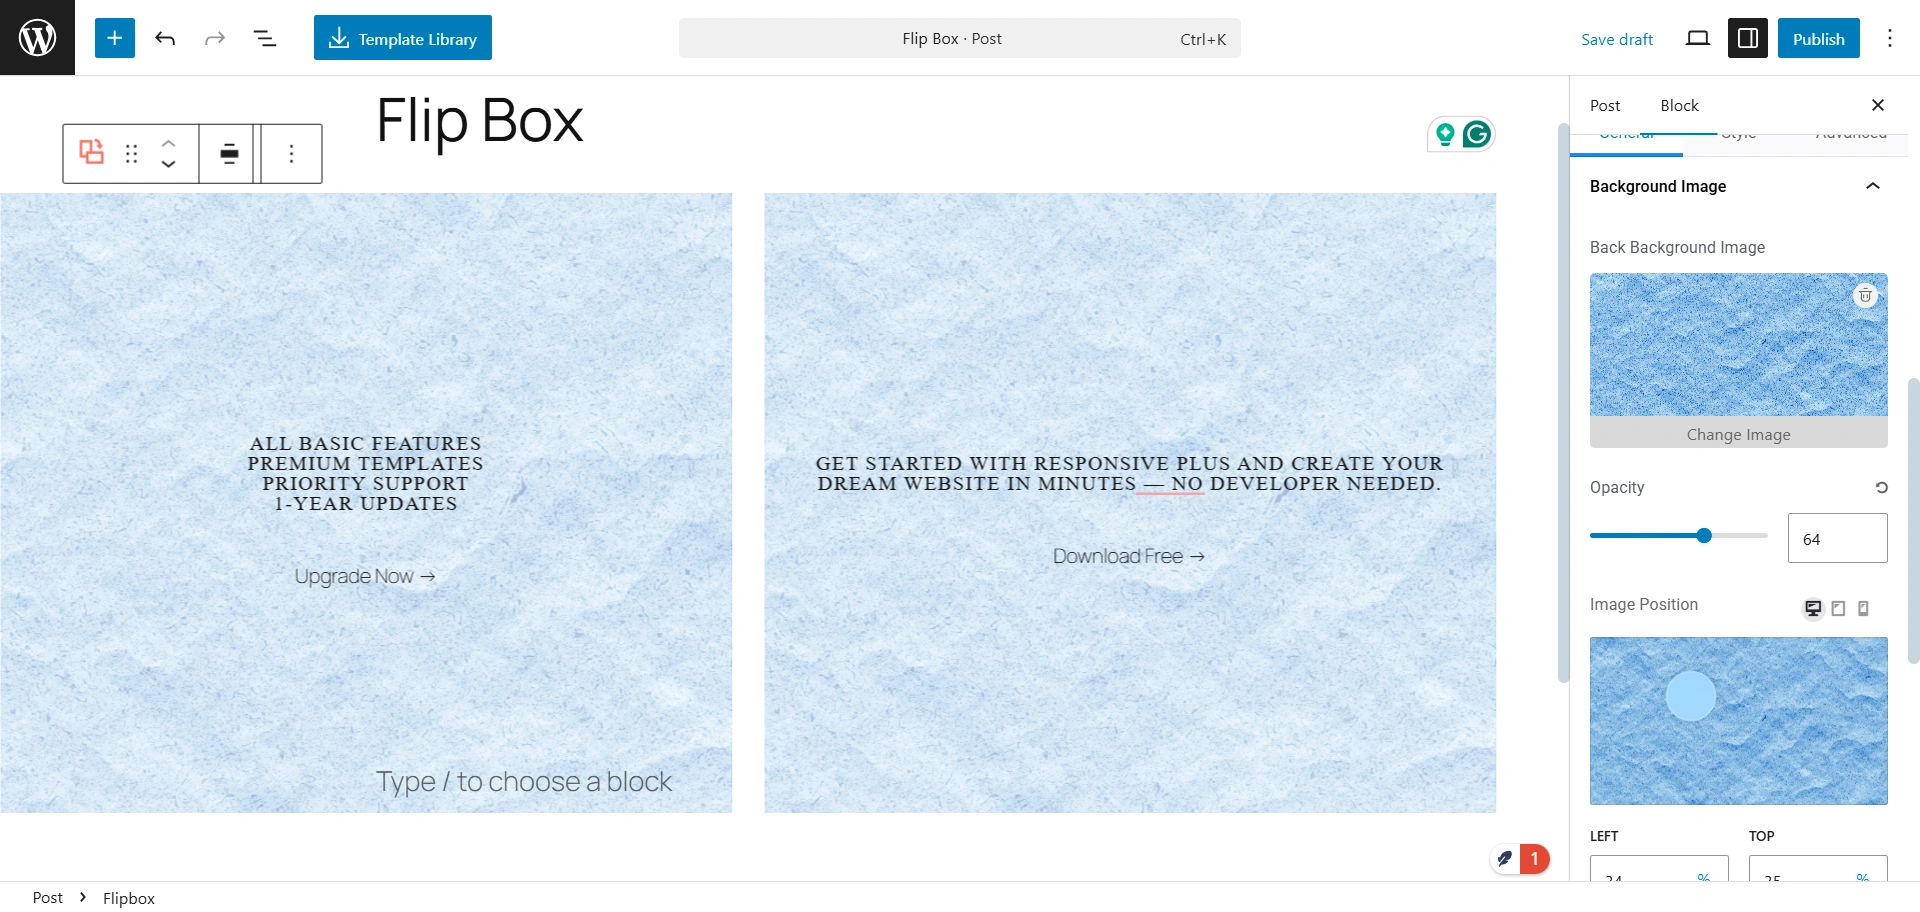
If you scroll down, you will find a background image option. Select the image, then adjust the gutter gap and height.
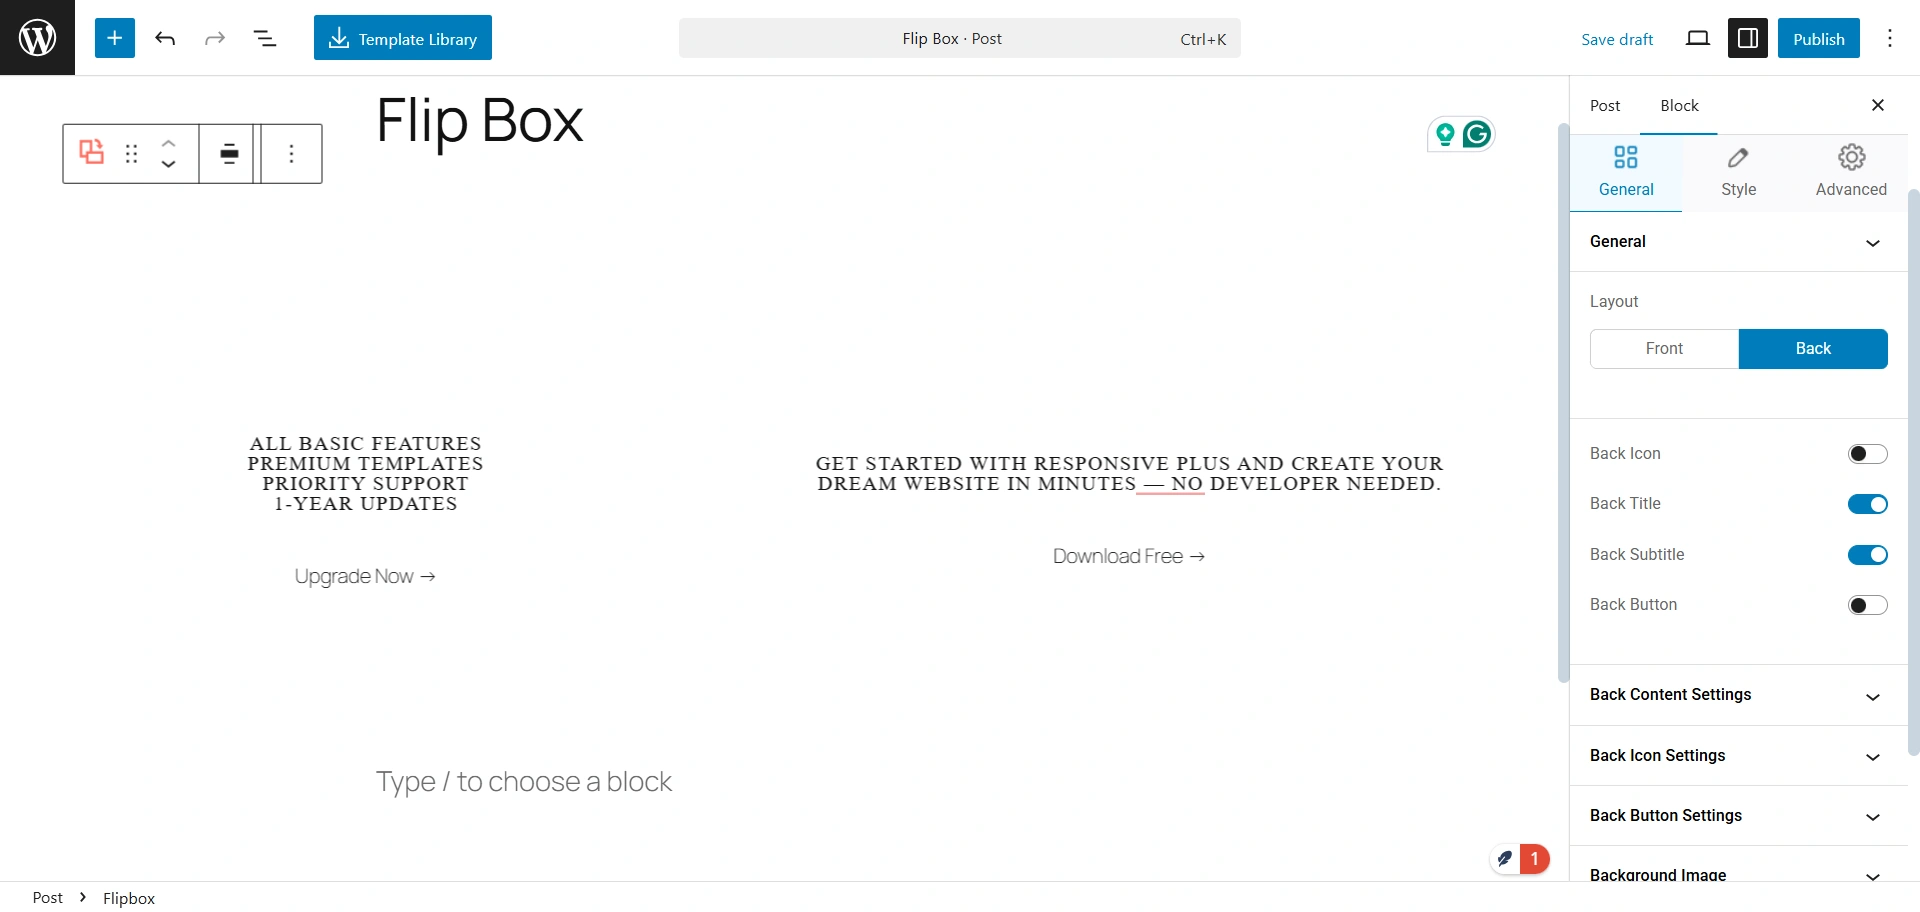
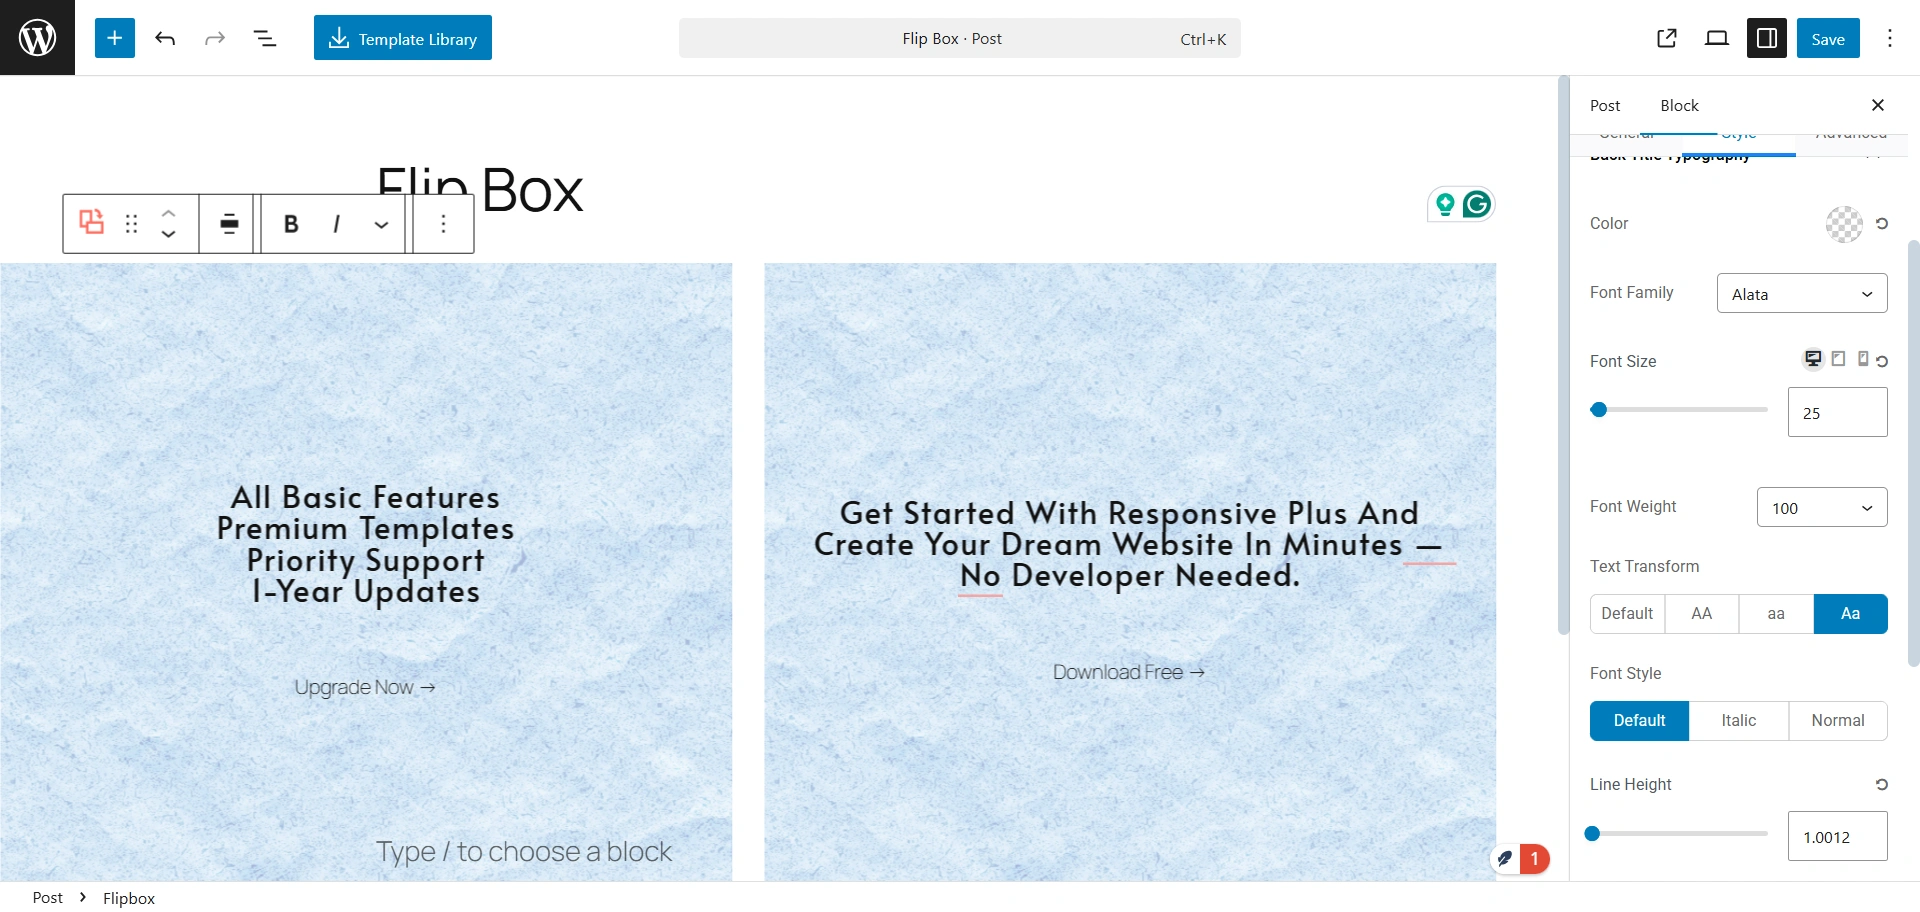
From the General tab, switch to the Back section once you’ve finished editing the Front. Just like before, fill in your content, choose the elements you want to display, and customize them as needed.
Upload the background image and set the opacity.
You can change the style of the text to match your design preferences. This includes adjusting the font family, size, color, weight, line height, and letter spacing. You can also modify font size and font weight.
This is what your flip box can look like.
FAQ
To add a flip box to your WordPress website, you’ll need to a plugin that offers interactive interface widgets that integerates with a page builder plugin like Responsive Addons for Elementor. It offers a dedicated “Flip Box” widget that makes it easy to create and customize flip box overlays without any coding.
To add a flip box to your website, simply follow drag and drop the Elementor Flip Box widget onto your page or post. Then, configure the content, design, and animation settings for both the front and back sides of the flipbox.
Responsive Addons for Elementor offers a free widgets including Elemnetor Flip Box widget, allowing you to add flip box overlays to your WordPress site without any cost.
Conclusion
The flip box overlay is a unique way of presenting your content, products, or services to you visitors. This is not only visually engaging but also is highly space-efficient and informative.
Using the Elementor flip box widget, offered by Responsive Addons for Elementor you can easily create and display engaging flip box on your WordPress website.
If you liked this article, you can also read:
- How to Show/Hide WordPress Blocks Based On Screen Size
- How To Create A Sticky Header Using Cyberchimps Responsive Theme
- How to Create a Staging Site for WordPress – A Beginner’s Guide
Also, check out Cyberchimps Responsive Theme and create any type of website with ease.