Summary
The article explains how to set a 404 page in WordPress using Elementor. Showing how to create a custom 404 template, design the layout, and add helpful elements like messages or buttons.
It also covers display conditions to assign the 404 page site-wide.
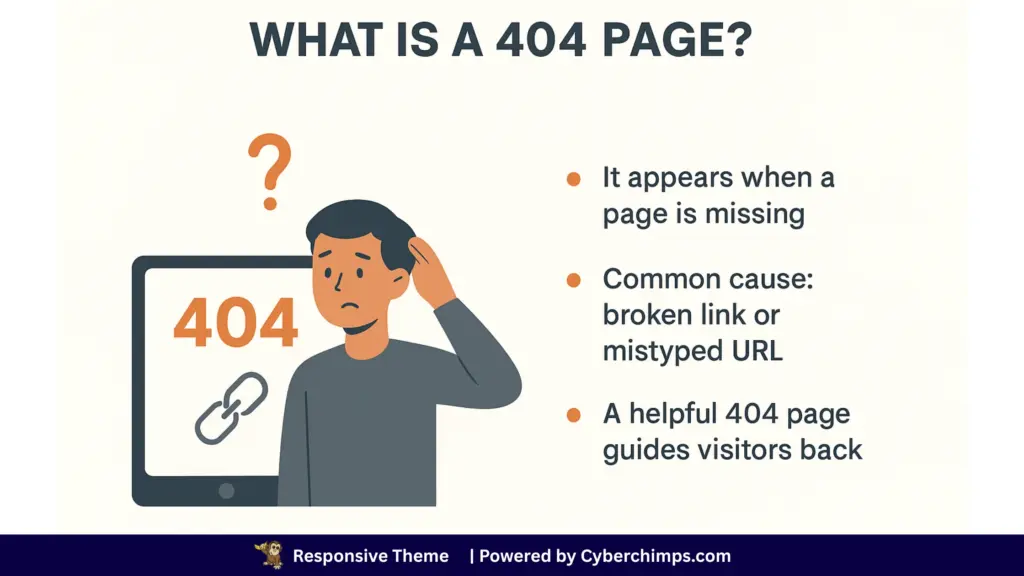
Have you ever clicked on a link and landed on a page that says “Oops! Page not found”? That’s a 404 page.
It appears when someone attempts to visit a non-existent page on your site.
Now, here’s the thing: a boring default 404 page can frustrate visitors and make them leave your site right away. But a custom 404 page turns a dead end into a helpful source.
The good news?
You can use a 404 page to guide people back to your homepage, show them your products, or even add some humor to keep them smiling.
If you’re using WordPress, creating a custom 404 page is super easy. You don’t need coding skills. With the Responsive theme and its tools, you can set up a professional 404 page in just a few minutes.
Let’s go through the article and learn how to make a custom 404 page for your website.
Responsive Starter Templates is the best plugin to import Website Templates – Get it for free.
What is a 404 page?
A 404 page is what visitors see when they try to access a webpage that does not exist. This usually happens if they click on a broken link, type the wrong URL, or visit a page that has been removed.
Instead of showing the content they expected, the server responds with an error message “404 Page not found.” The number 404 comes from the HTTP status code used to indicate that the server could not find the requested page.
Instead of showing the content they expected, the server responds with an error message “404 Page not found.” The number 404 comes from the HTTP status code used to indicate that the server could not find the requested page.
While the message is technical in nature, for users, it simply means they have hit a dead end. That is why the way a website presents its 404 page is so important.
A plain error screen can frustrate visitors, but a well-designed 404 page can guide them back on track and even improve their overall experience with the site.
Why you should set a custom 404 page
For most visitors, landing on a 404 page is an interruption. They expected useful content but instead found a dead end. If your site leaves them stuck here, they are likely to exit and look elsewhere, which means that your website loses traffic, and people are likely to engage less with your website.
A well-designed 404 page changes this outcome. By adding simple elements such as navigation links, a search bar, or a button to return to the homepage, you can help visitors quickly find what they were looking for.
From a brand perspective, a thoughtful 404 page also shows that you care about user experience. It transforms an error into an opportunity to keep people on your site longer, reduce bounce rates, and even inject personality into your design with creative text or visuals.
So, to put it short, you need a custom 404 page to:
- Improve User Experience: A helpful 404 page makes it clear what went wrong and shows visitors where to go next.
- Keep Visitors Engaged: Instead of bouncing away, users can keep exploring your site through links or a search bar.
- Guide Users Back to Key Pages: Quick navigation to your homepage, blog, or services ensures visitors find something valuable.
- Reflects That You Care About Users: Creative design and friendly wording can turn an error into a positive impression.
What to Include on a 404 Page
A 404 page is not just about saying “Oops, something went wrong.” It’s also about guiding visitors to the right place.
Also, to make your 404 page truly helpful, here are a few things you should include:
- A Clear Message – Let people know the page they’re looking for doesn’t exist. Keep it simple and friendly.
- A Search Bar – This gives visitors the power to quickly find what they came for.
- Links to Important Pages – Add shortcuts to your homepage, blog, shop, or contact page so visitors don’t feel stuck.
- A Call-To-Action – Invite people to check out your products, sign up for your newsletter, or explore your services.
Next, let’s look at how we can add a 404 page to our WordPress website.
How to Set a 404 Page in WordPress

There are 2 best ways you can create a custom 404 page for your website.
Method 1 utilizes the site builder, while Method 2 employs the Elementor plugin.
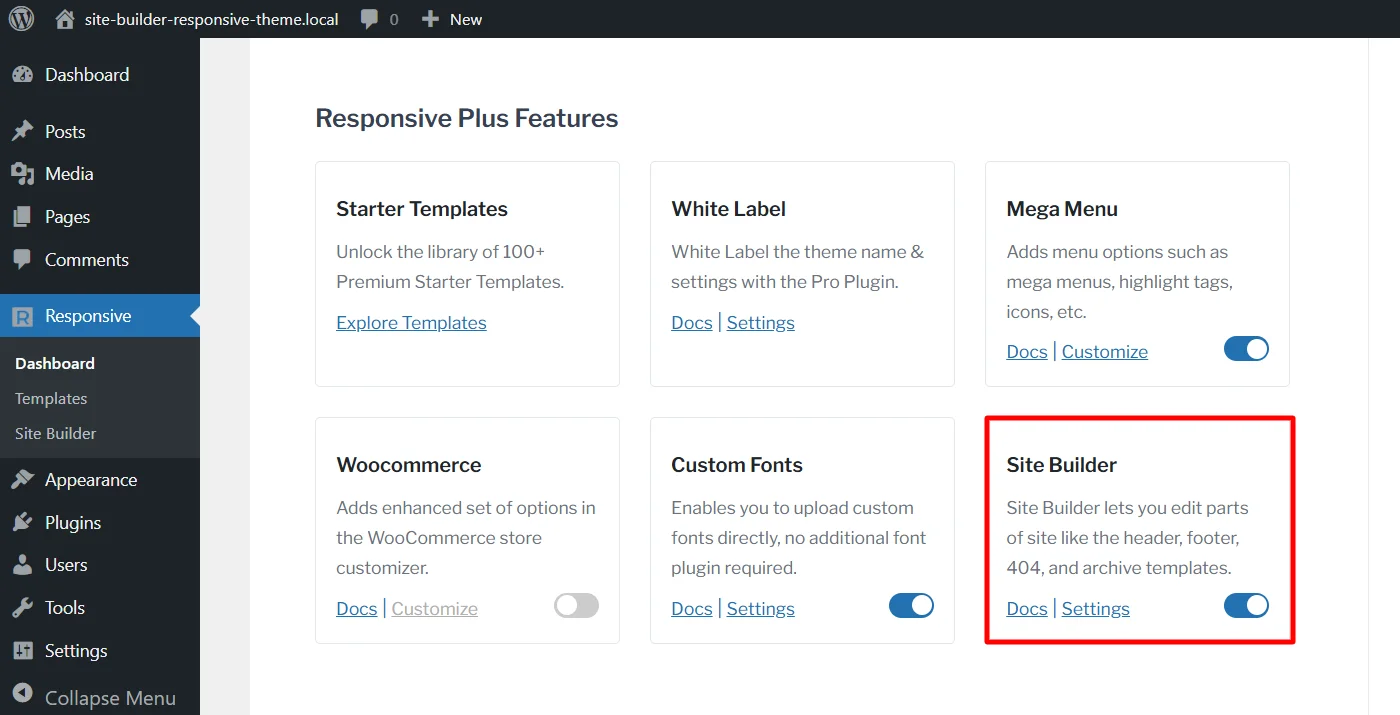
Method 1: Setting a 404 Page Using Responsive Plus Site Builder
The simplest way to set a custom 404 page is by using the Responsive Site Builder. This tool comes with the Responsive Plus plugin and makes designing a 404 page as easy as dragging and dropping blocks. No coding needed.
Before you can start building a custom 404 page, make sure you have:
- Responsive Theme (free from Cyberchimps)
- Responsive Plus Plugin (unlocks Site Builder)
Also, double-check that both are updated to their latest versions.
Once you’ve installed the Responsive Theme and Responsive Plus plugin, follow these steps to enable the Site Builder:
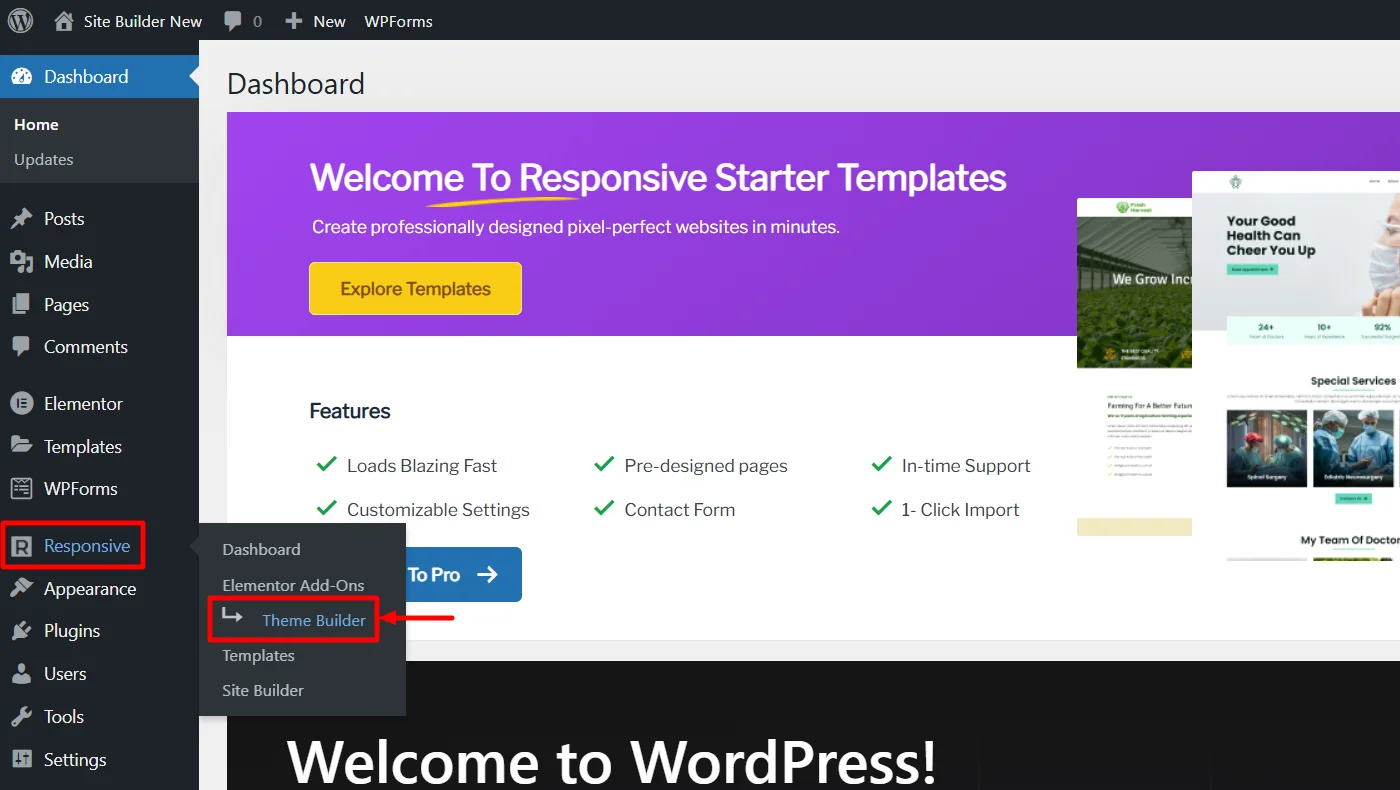
In your WordPress Dashboard, click on the Responsive menu.
Find Site Builder in the modules list and toggle Enable to activate it.
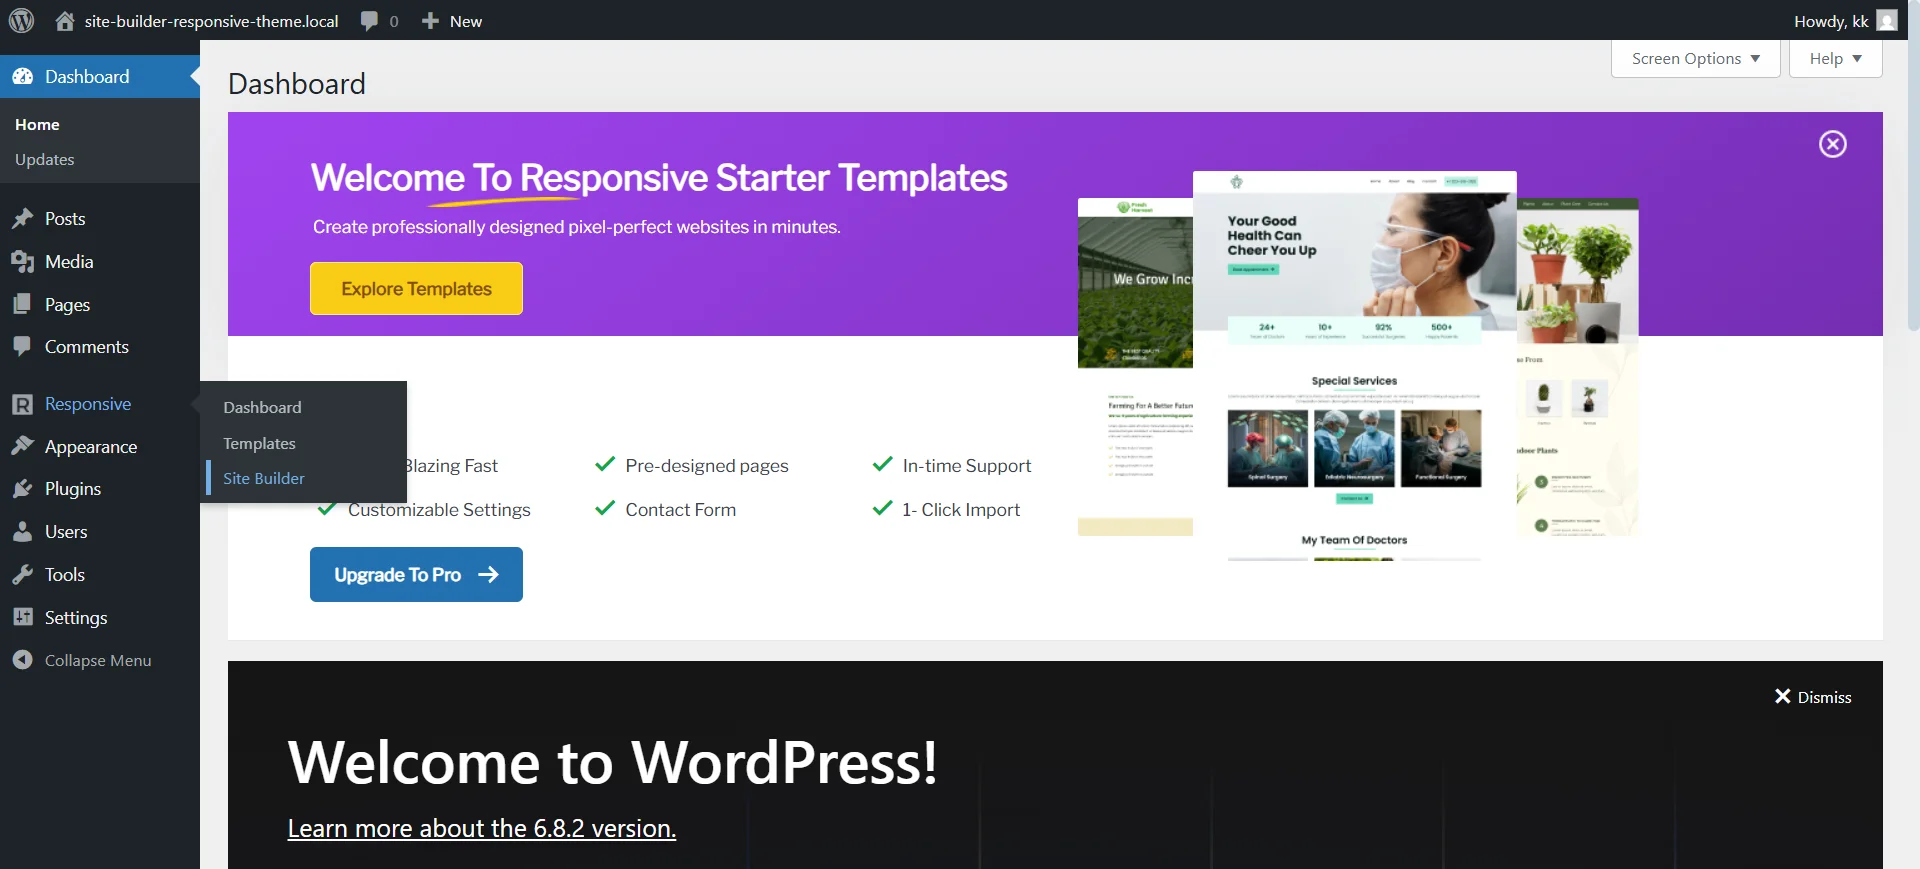
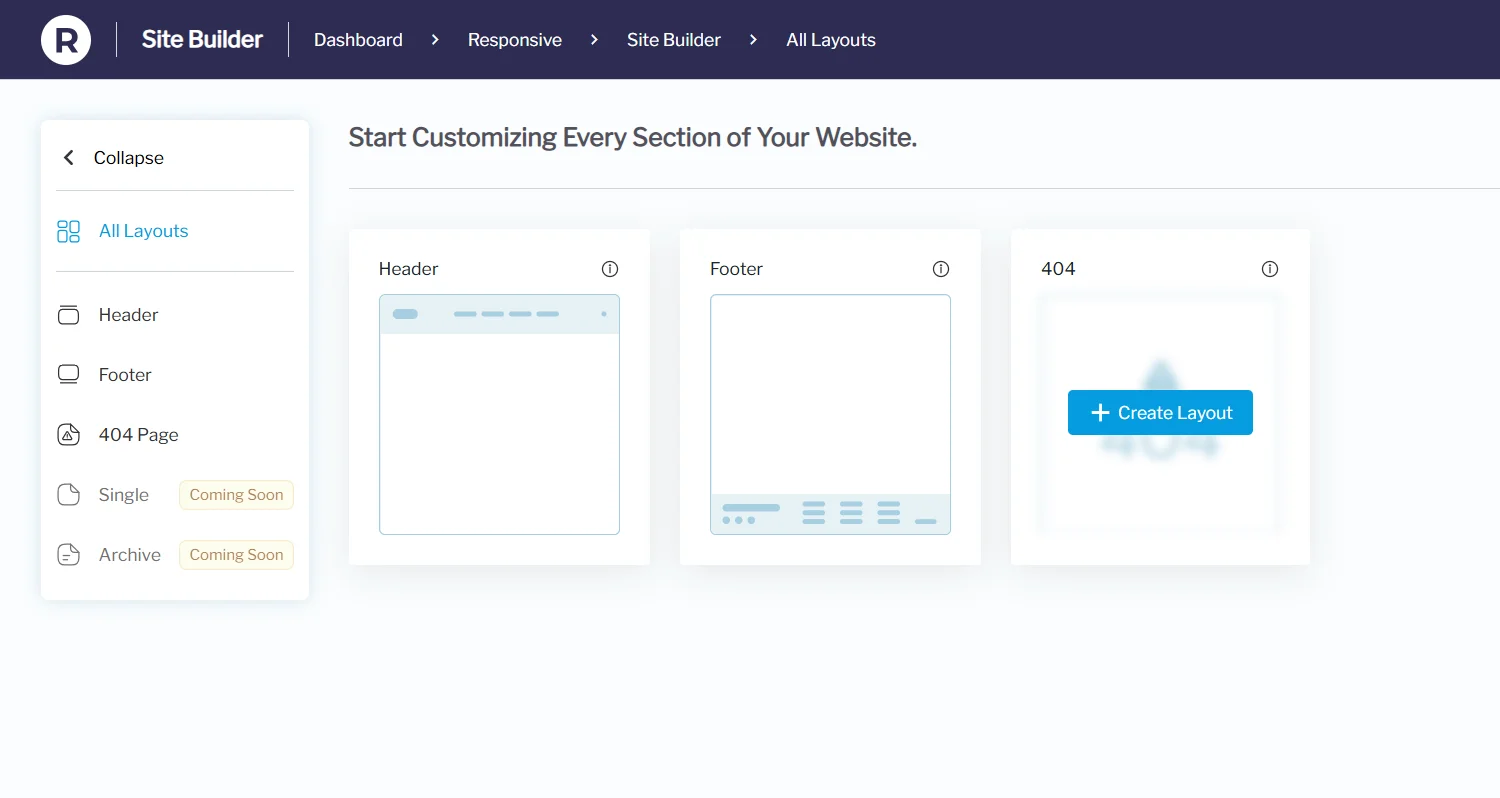
From your WordPress dashboard, hover over Responsive and click on Site Builder.
In the dashboard, hover over the 404 page layout and click on Create Layout.
The Block Editor will open.
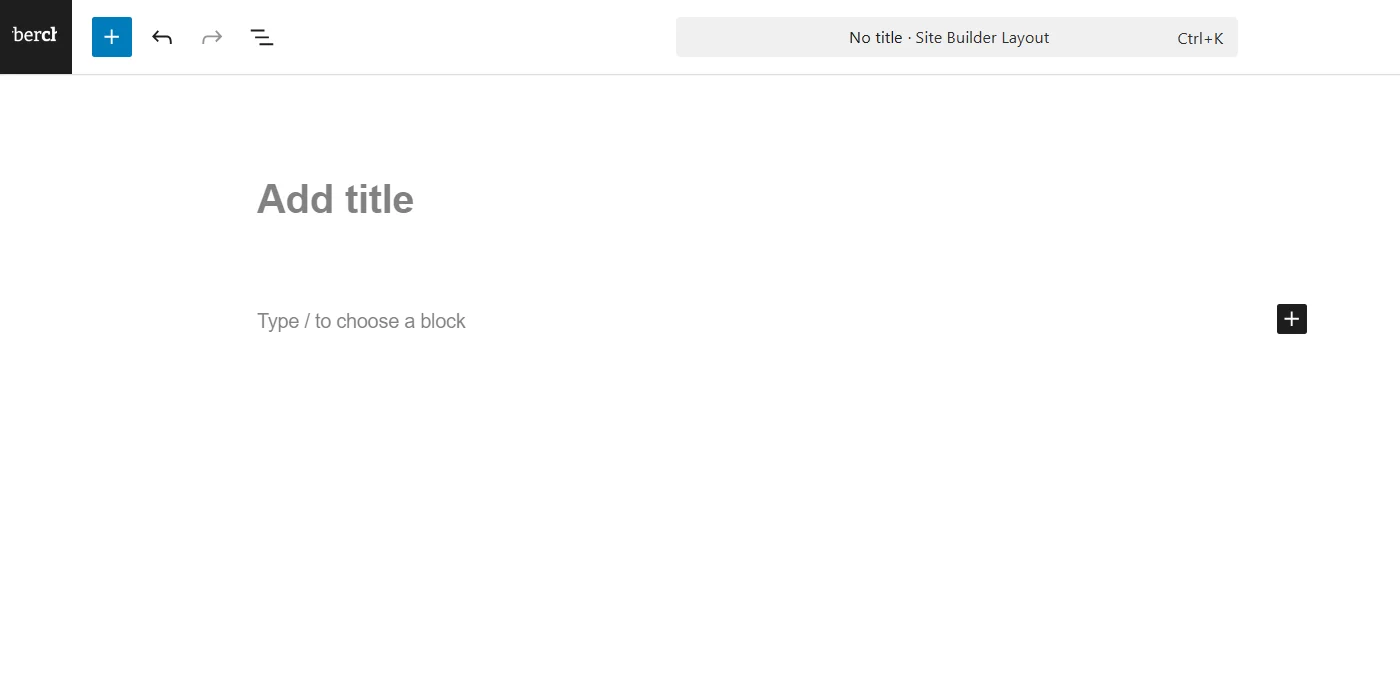
Give a suitable name for the page, for example, “404 page”.
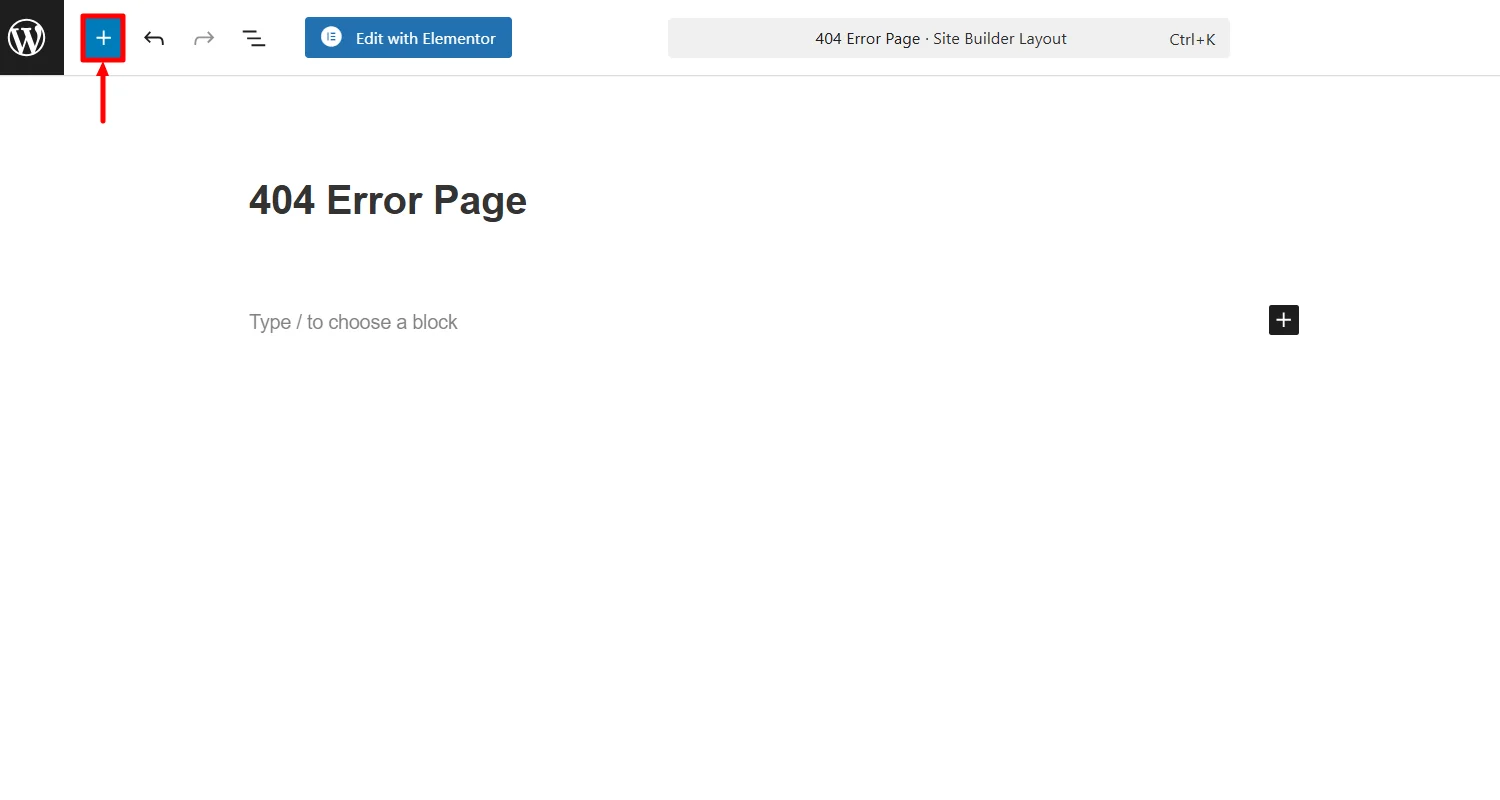
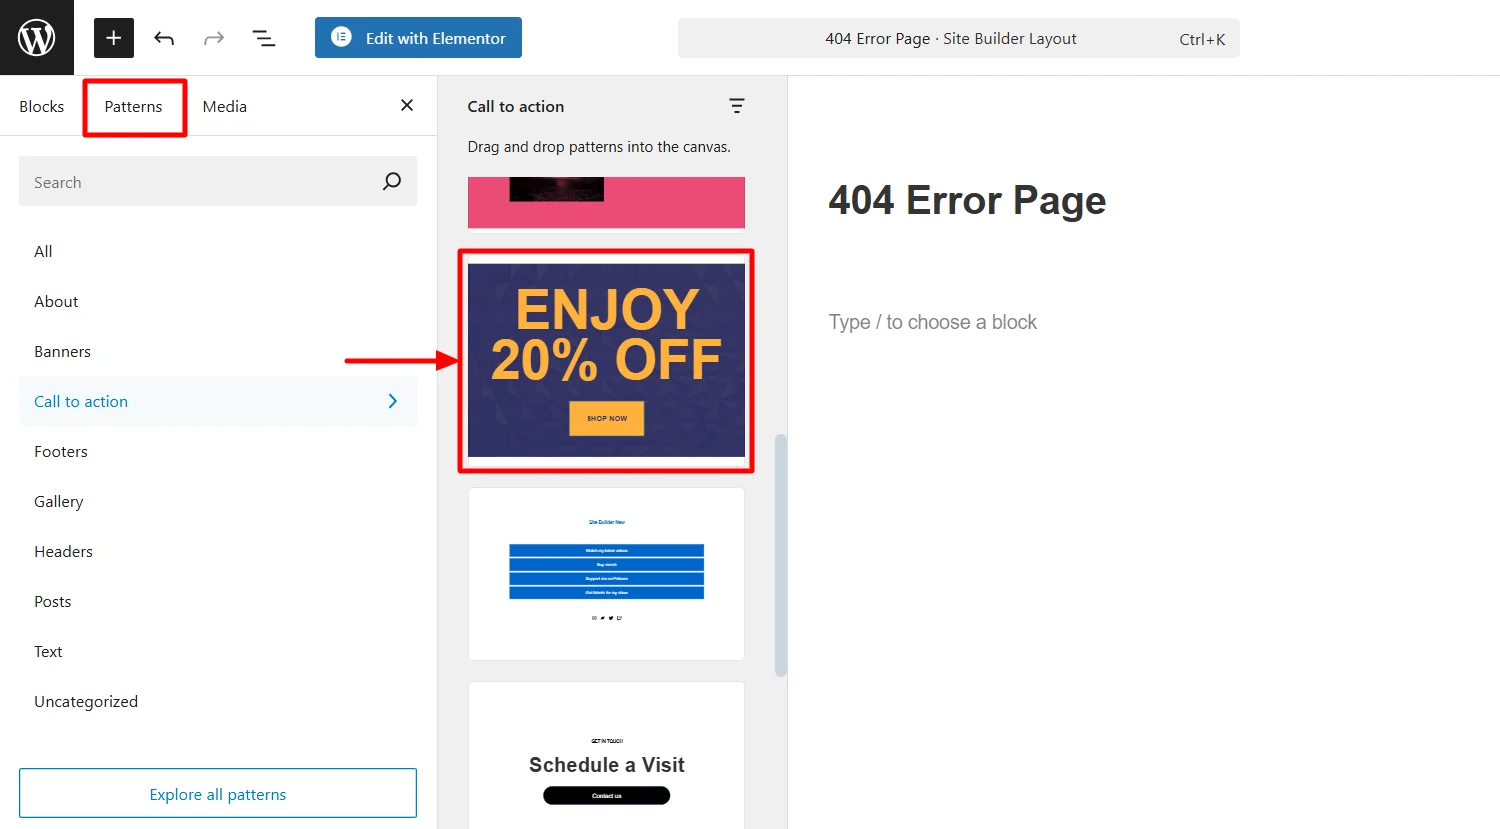
Next, use the + icon to add blocks or explore Patterns for ready-made layouts.
For this tutorial, I’m using a pattern from the Call to Action category.
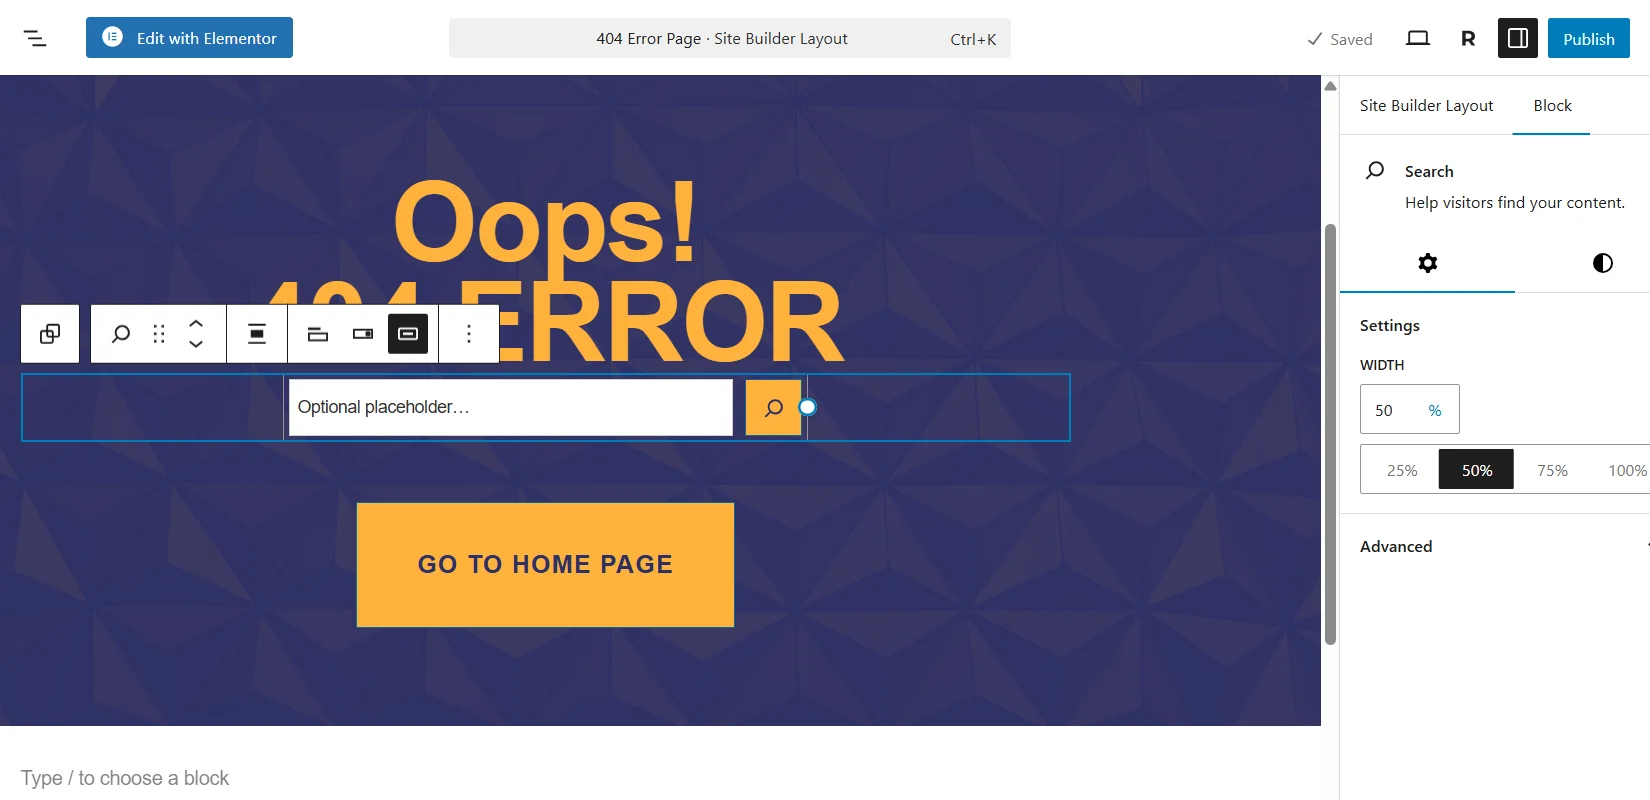
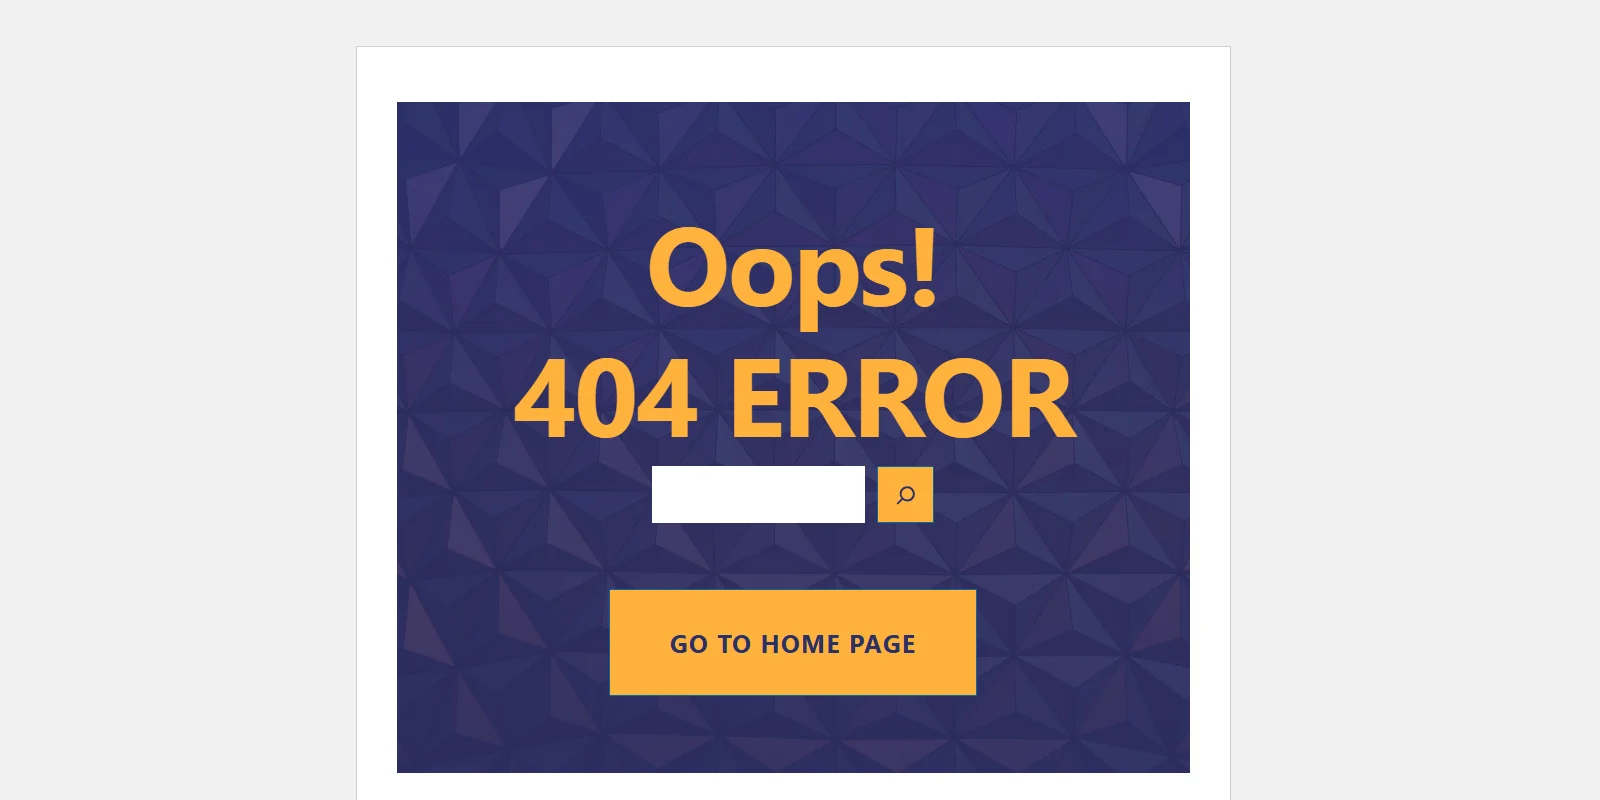
Now, edit the 404 page according to your brand’s requirements. You can add a headline, short message, search bar, or buttons linking back to your homepage.
Here, I will be adding a headline, a search bar, and a button that leads back to the homepage.
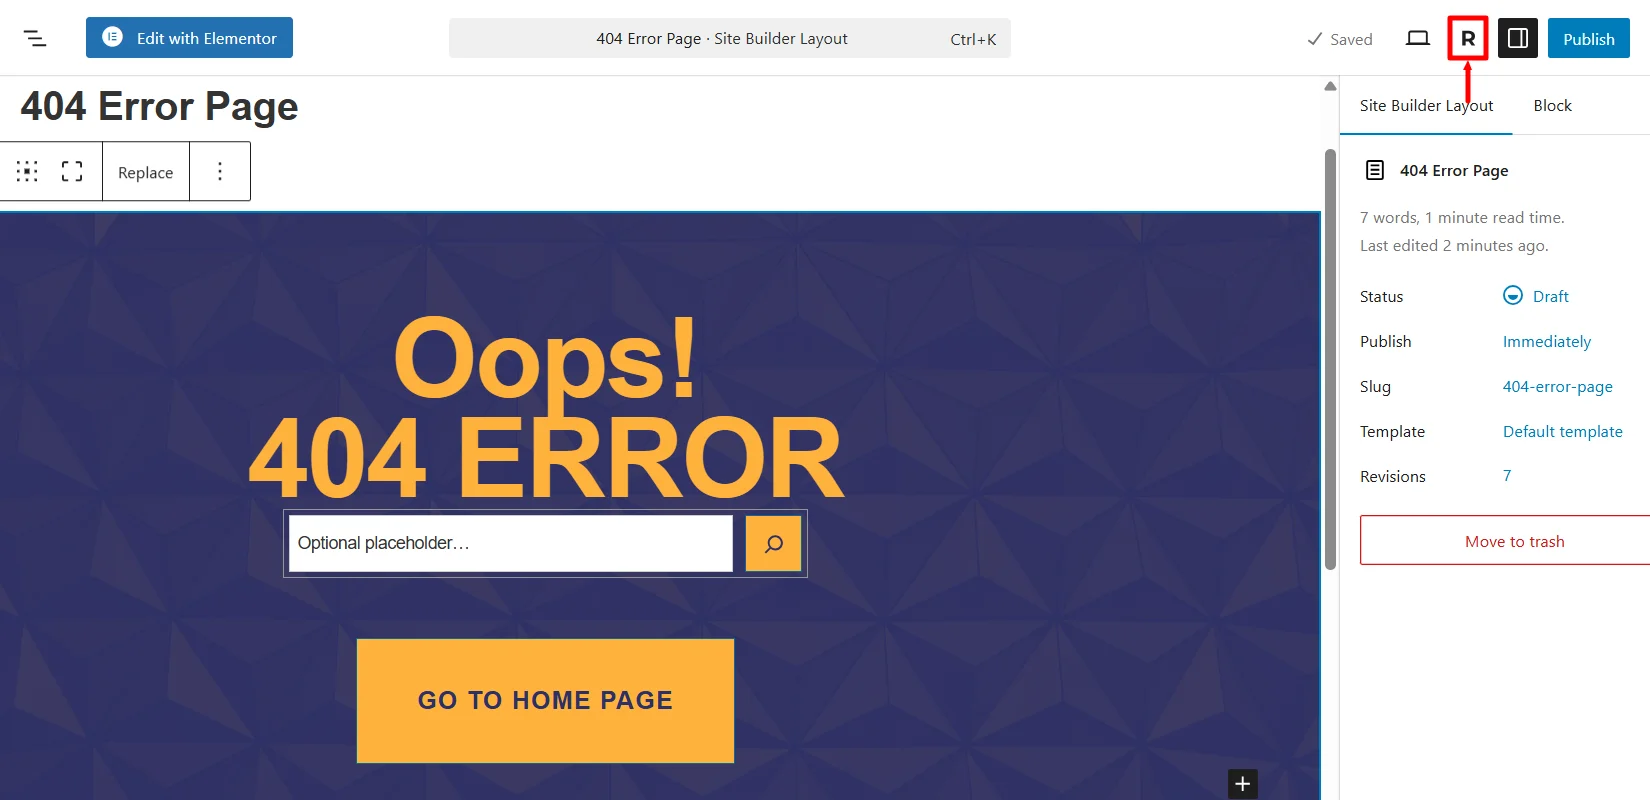
You can also change colors, fonts, and styles to match your branding. Once the page is created, you can now set up some conditions for your 404 page layout. To do that, click the R icon to open Site Builder settings.
Here, you can edit the Layout tab to switch to a different template type.
Additionally, by default, the 404 page layout is designed so that you don’t need to create a separate page for 404. It automatically detects if the URL exists, and if it doesn’t, it will directly redirect to the 404 page you just created.
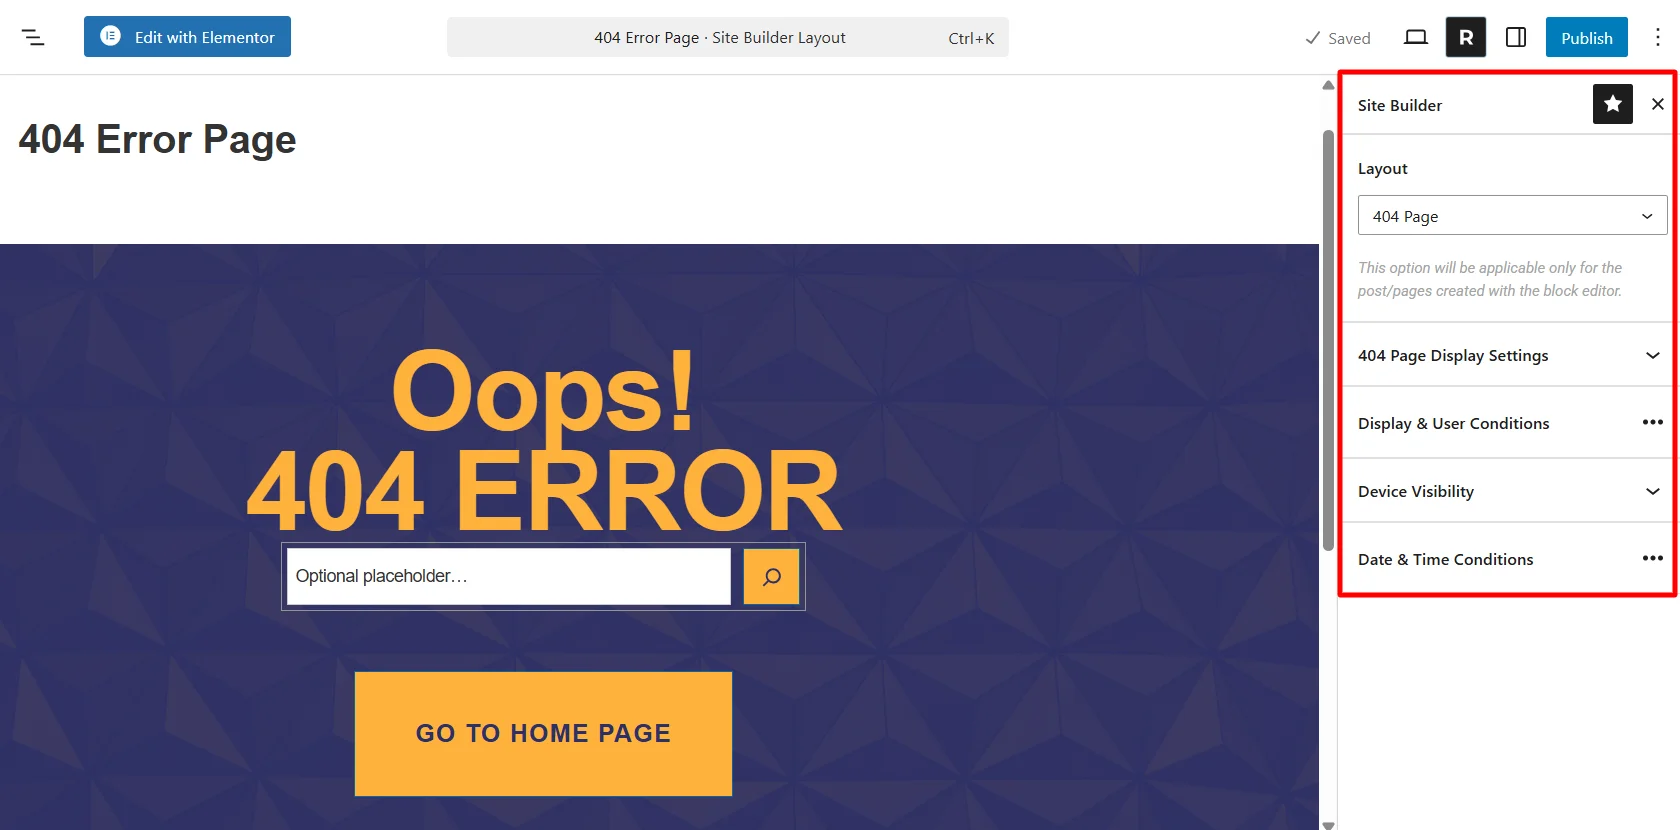
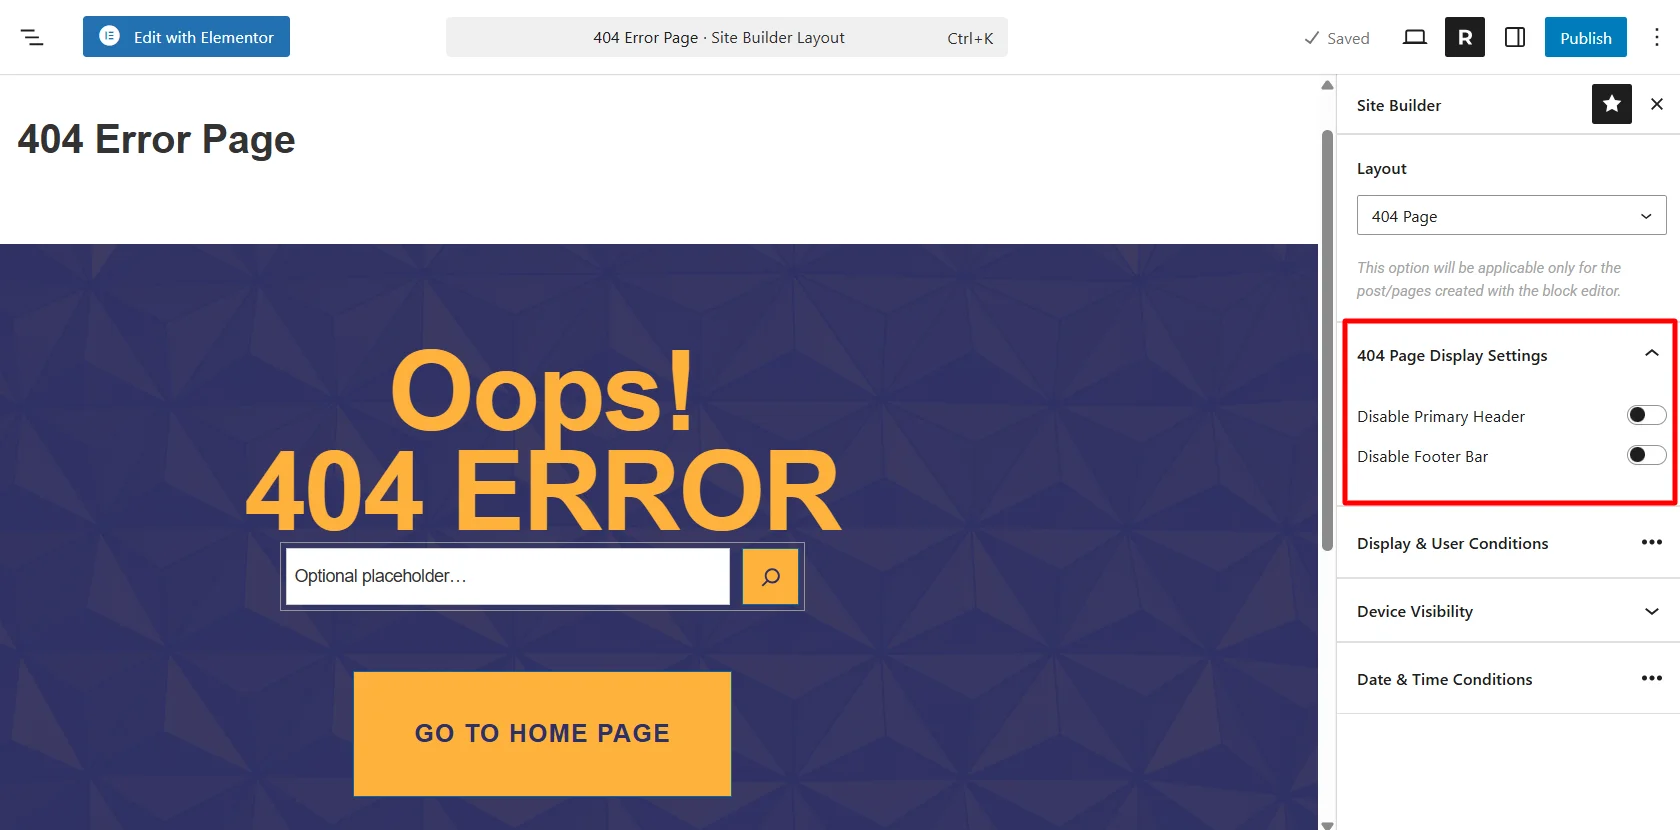
Choose if you want to disable the primary header and footer bar from the 404 Page Display settings.
Under user conditions, you can choose who you want to display this page to.
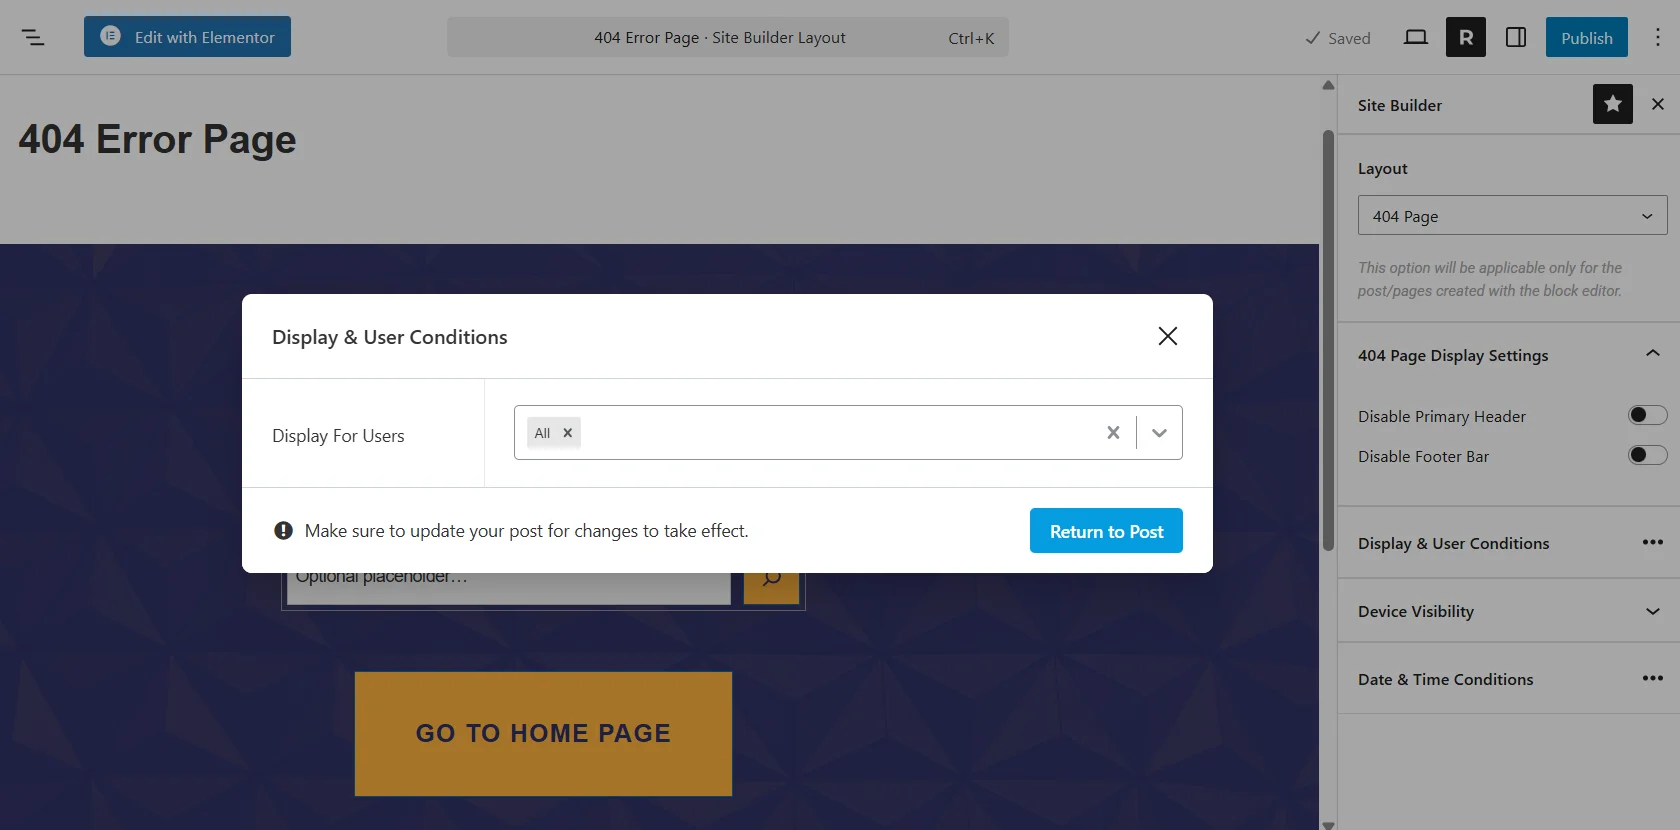
Similarly, you can also select the devices you want to show under the device visibility setting. Once you’ve set all the conditions, you can now click on the Publish button.

Next, type a wrong URL and you’ll be able to see the 404 page you just created. Here’s how my 404 page looks when typing a non-existent URL.
Also, the published layout will be visible in the Site Builder dashboard.
Editing an Existing 404 Page Layout in Site Builder
If you’ve already created a custom 404 page and want to update or improve it, you can easily do so from the Site Builder dashboard.
Head over to the Site Builder dashboard. Here you’ll see all your saved layouts, including the 404 Page.
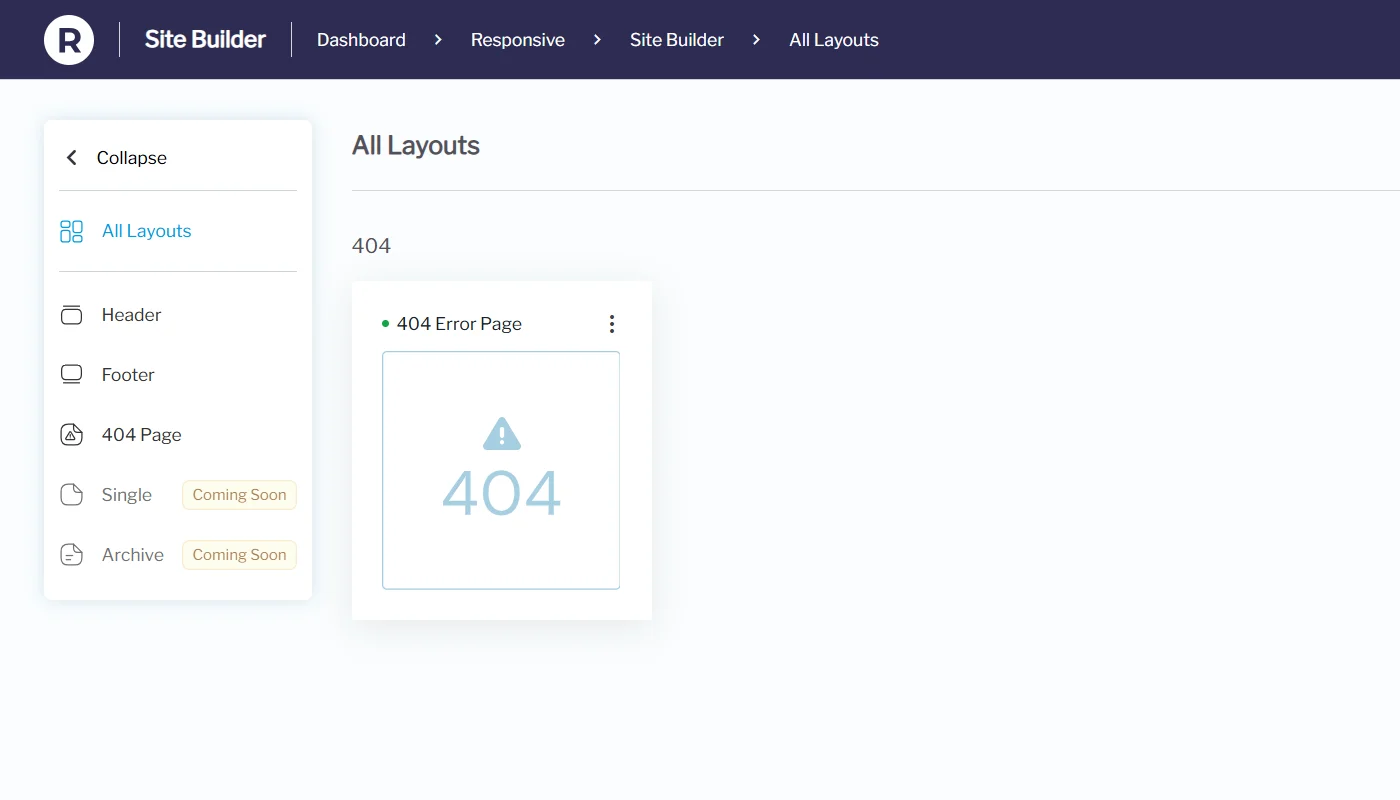
Move your cursor over the 404 Page card. You’ll see quick actions like Edit and Quick View.
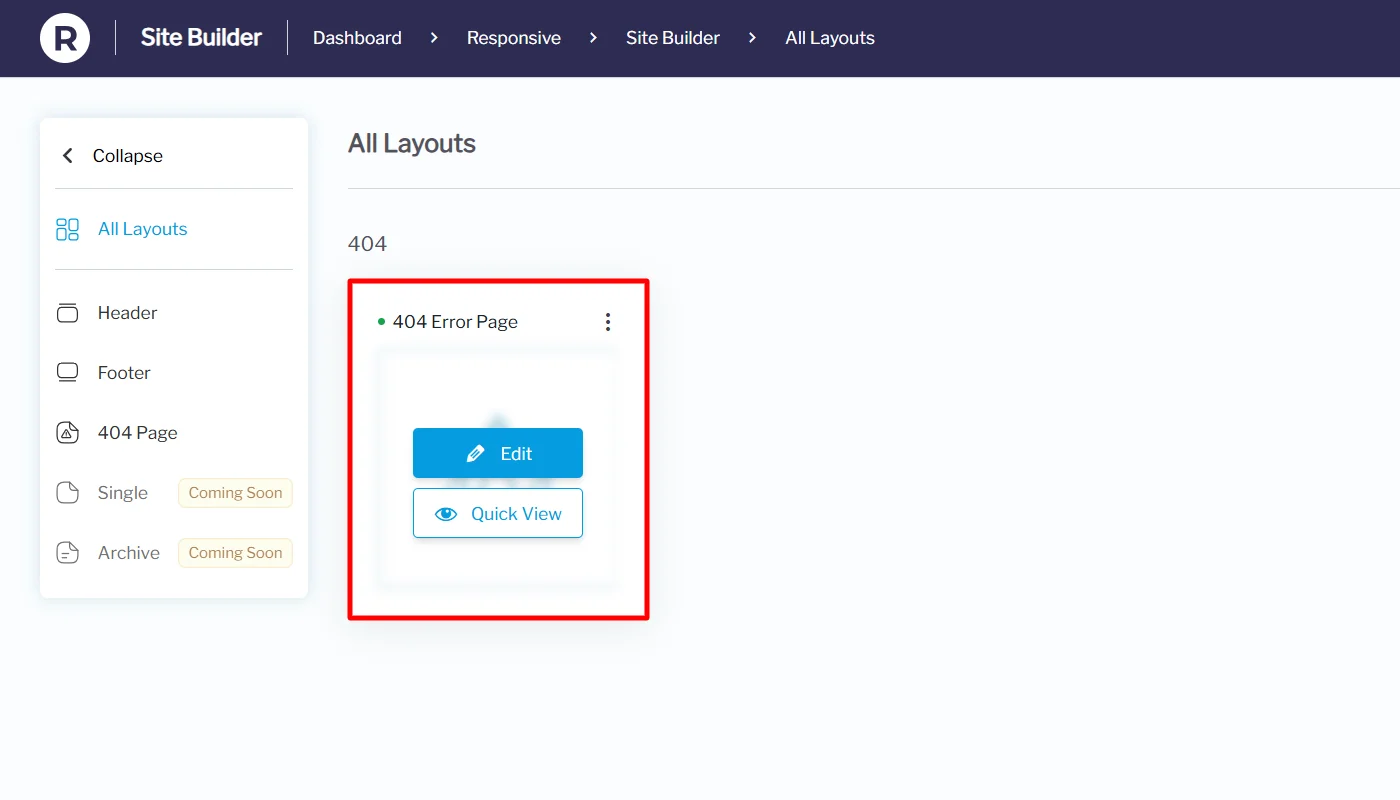
Select Quick View to get a preview of your 404 layout before editing.
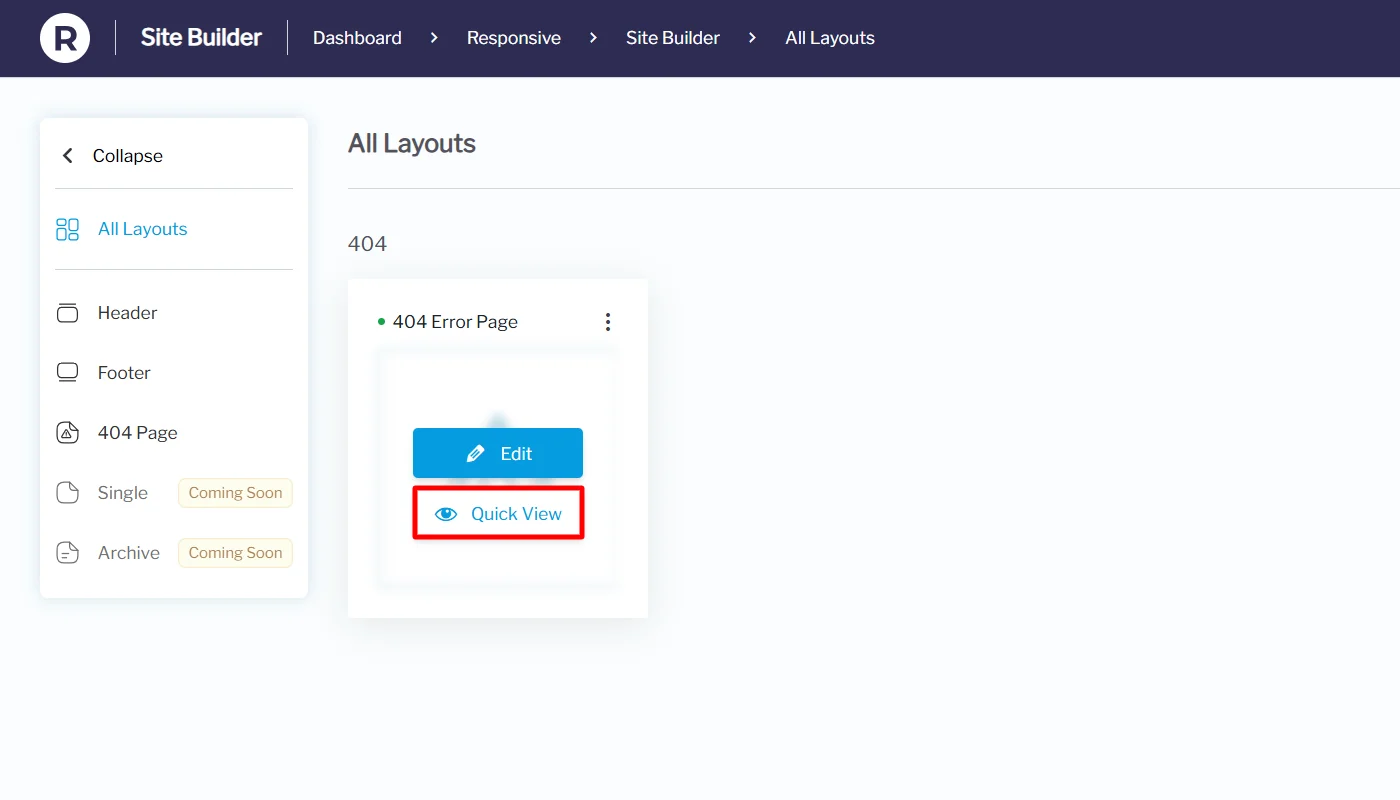
From this view, you can also delete the layout if you’d like to start fresh.
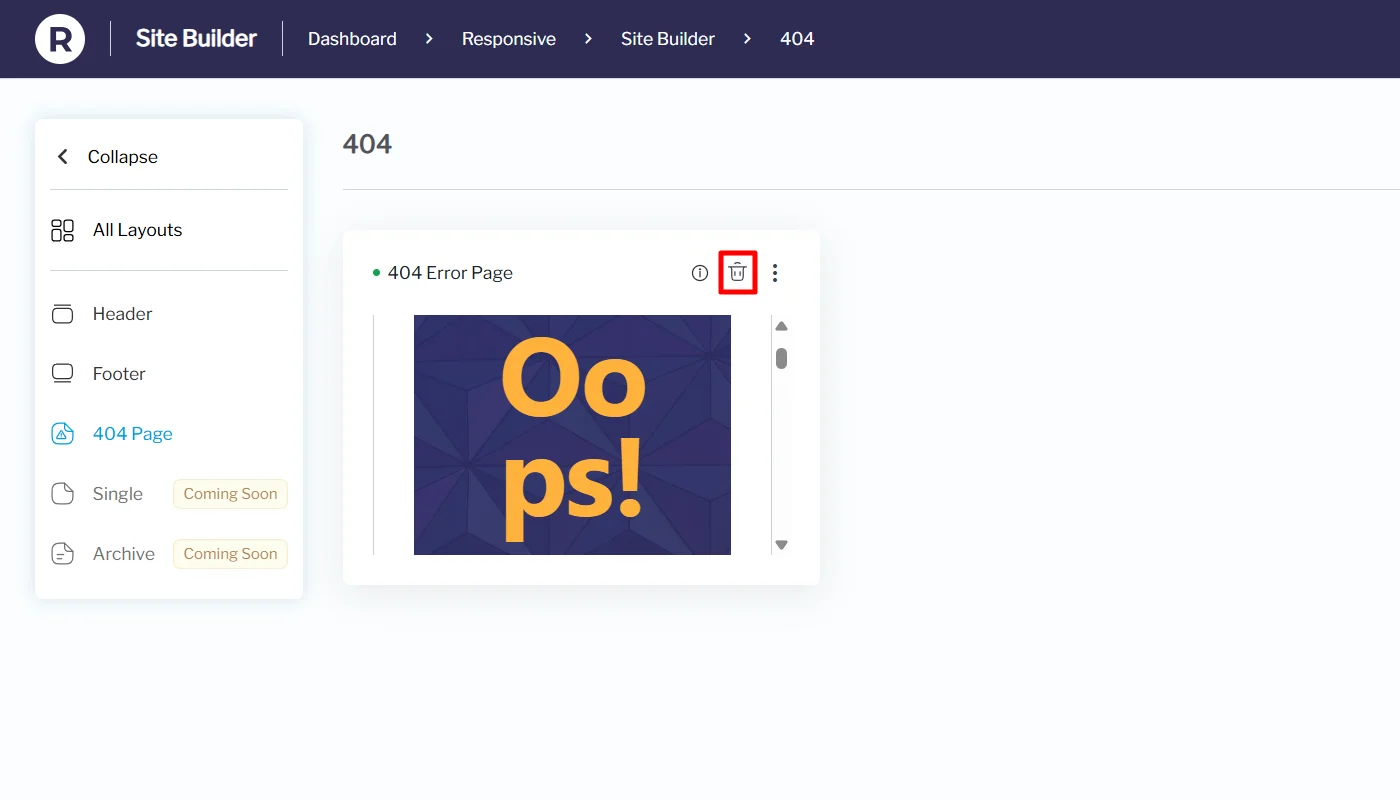
Click on the kebab menu.
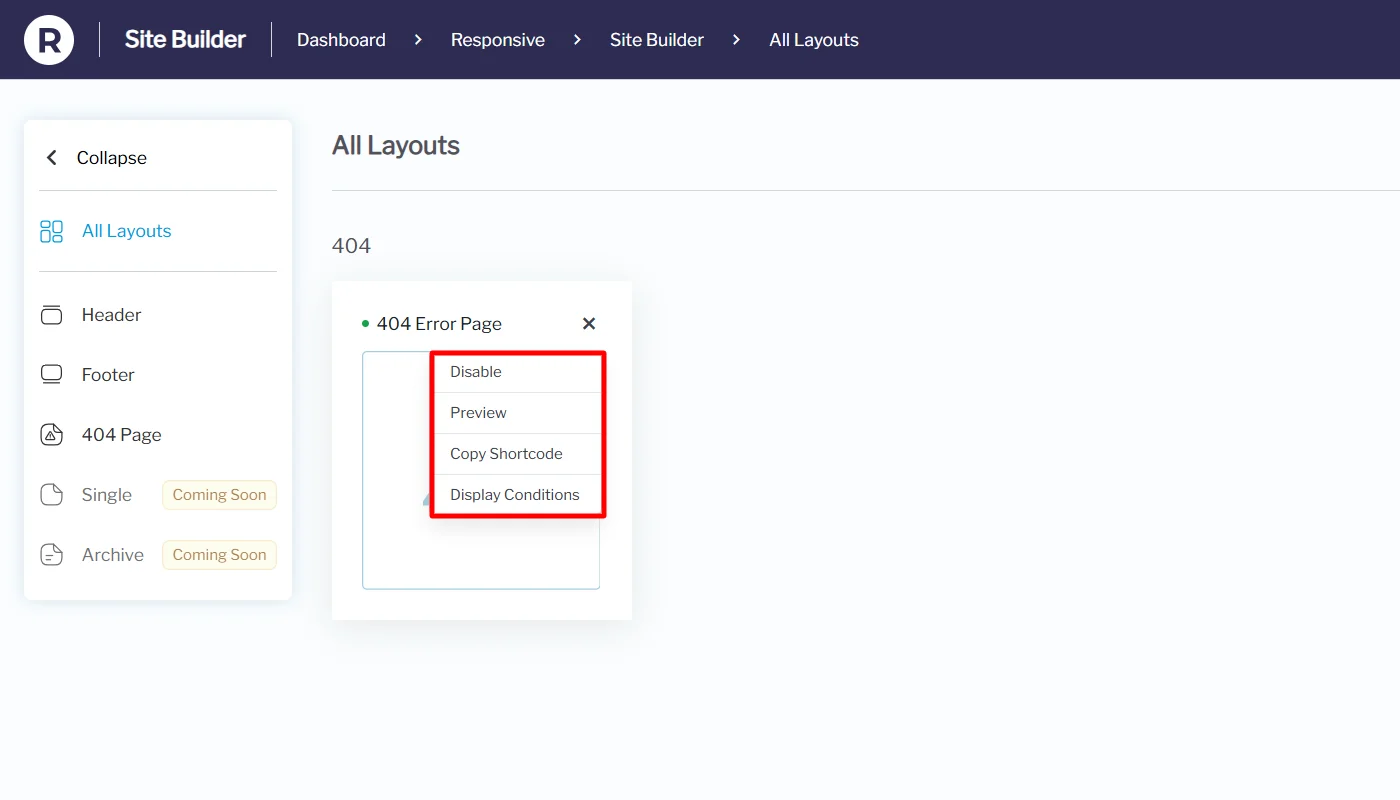
Here you’ll get options like:
- Display Conditions – Set user conditions, device visibility, disable the primary header or footer bar option, and set a suitable date and time for the layout.
- Disable – Turn off the layout temporarily and enable it again later.
- Preview – See exactly how your 404 page looks on the front end.
- Copy Shortcode – Get a shortcode to insert your 404 template into posts or pages (helpful for testing).
Return to the card and click the Edit option if you wish to make changes to the layout. Once you click on Edit, it’ll take you back to the block editor.
You can change the message, update styles, add links, or include extra elements like a search bar or navigation menu, as we discussed before.
Once the changes are made, click on Save.
Method 2: Setting a 404 Page Using Responsive Addons for Elementor’s Theme Builder Feature
With Responsive Addons for Elementor (RAE), you can design and assign a fully custom 404 page using Elementor’s drag-and-drop editor. This method gives you complete creative control and access to pre-designed templates, making it perfect if you prefer Elementor over the Site Builder.
Before you start, make sure you have the following installed and active on your WordPress site:
- Responsive Theme (free from CyberChimps)
- Responsive Addons for Elementor (RAE) plugin
- Elementor page builder (free version works, but Elementor Pro unlocks even more design flexibility)
- The latest versions of both the theme and plugins to ensure compatibility
Now, let’s learn how to add the 404 page using Elementor.
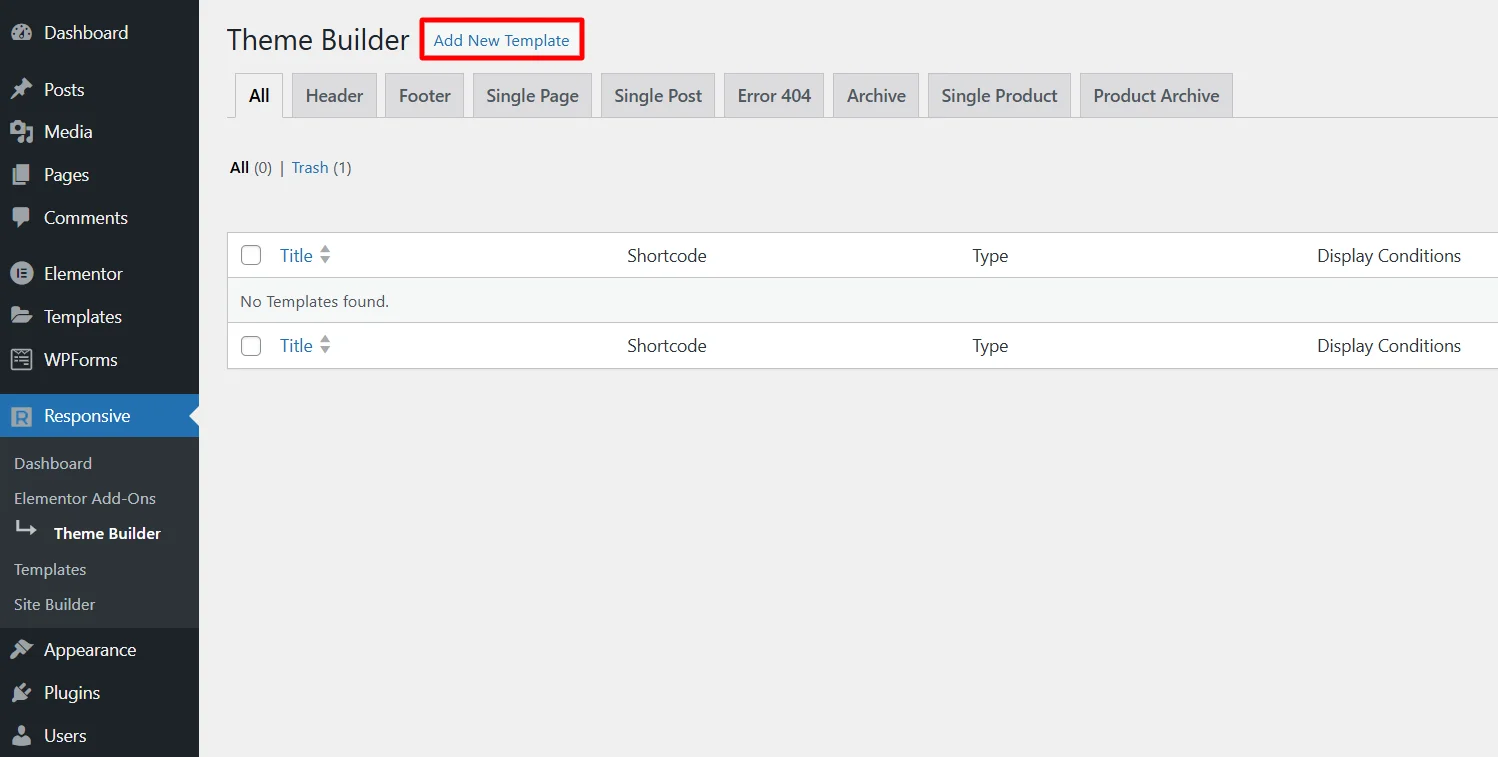
In your WordPress dashboard, go to Responsive > Theme Builder.
You’ll see options to create different layouts:
- Header
- Footer
- Single
- Archive
- 404 Page.
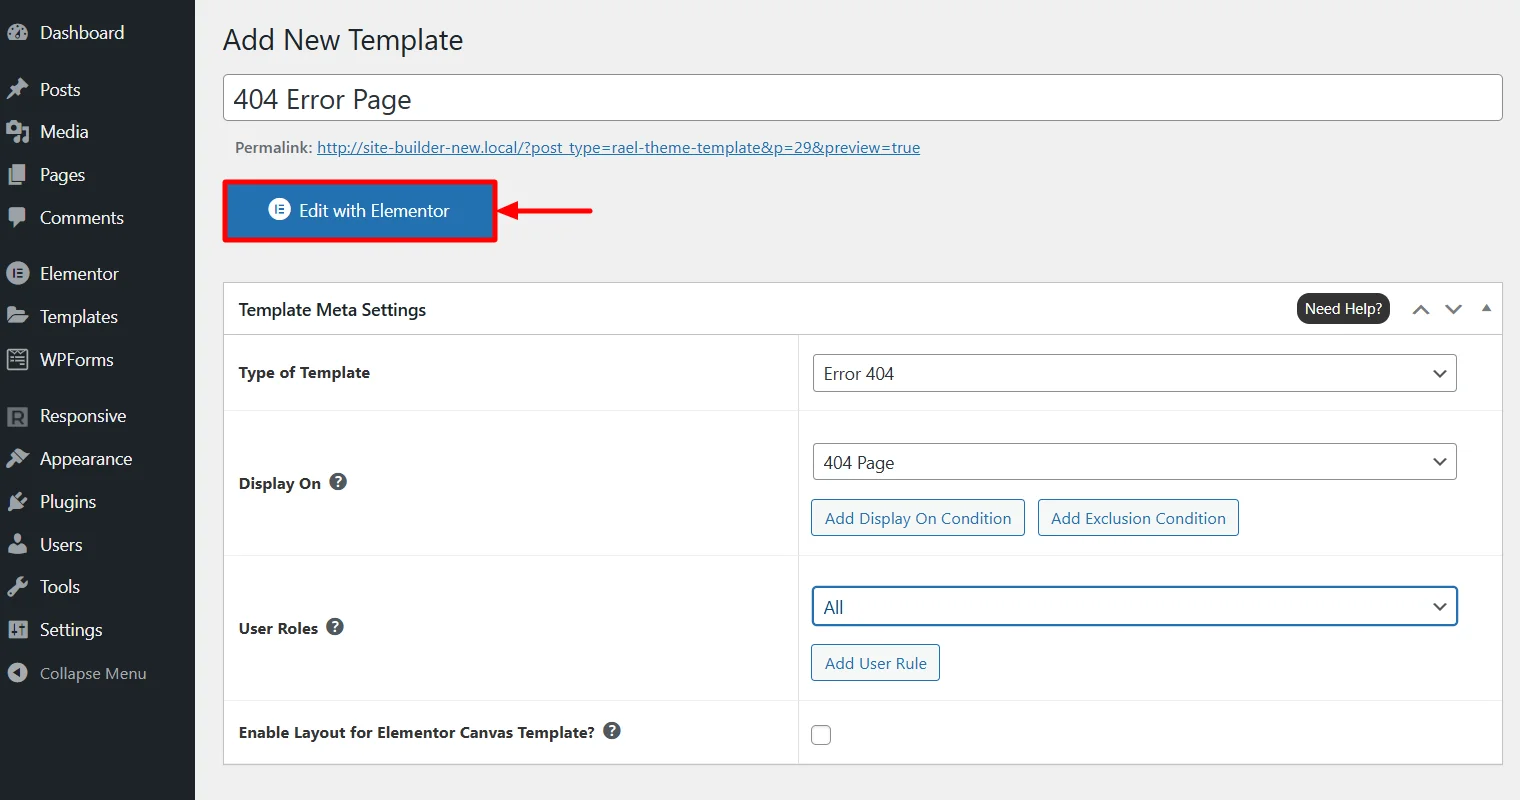
Click on Add New Template button.
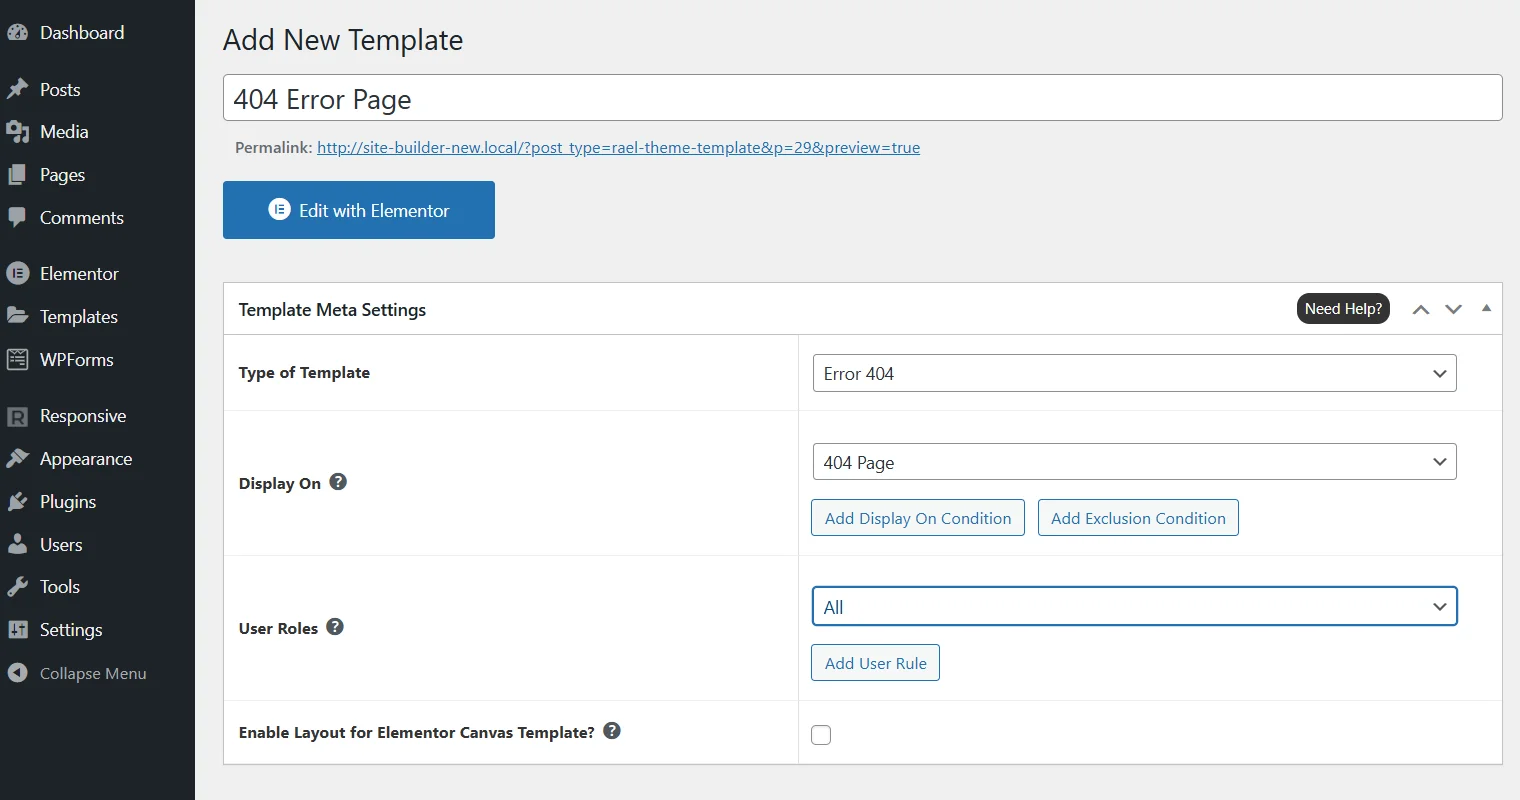
Give it a name like 404 Error Page.
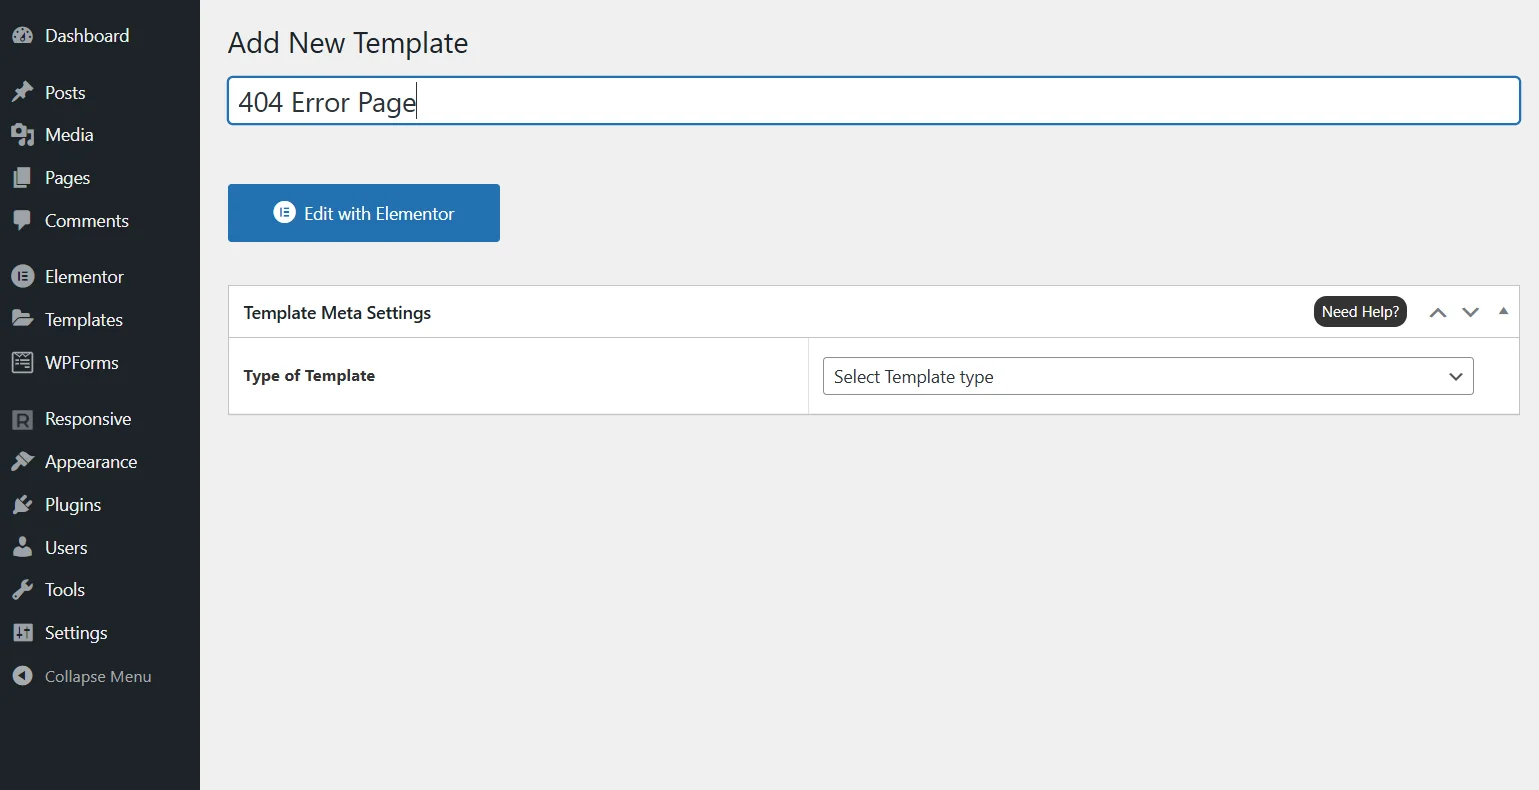
Provide the type of template and other display conditions.
Next, click on the Edit with elementor button.
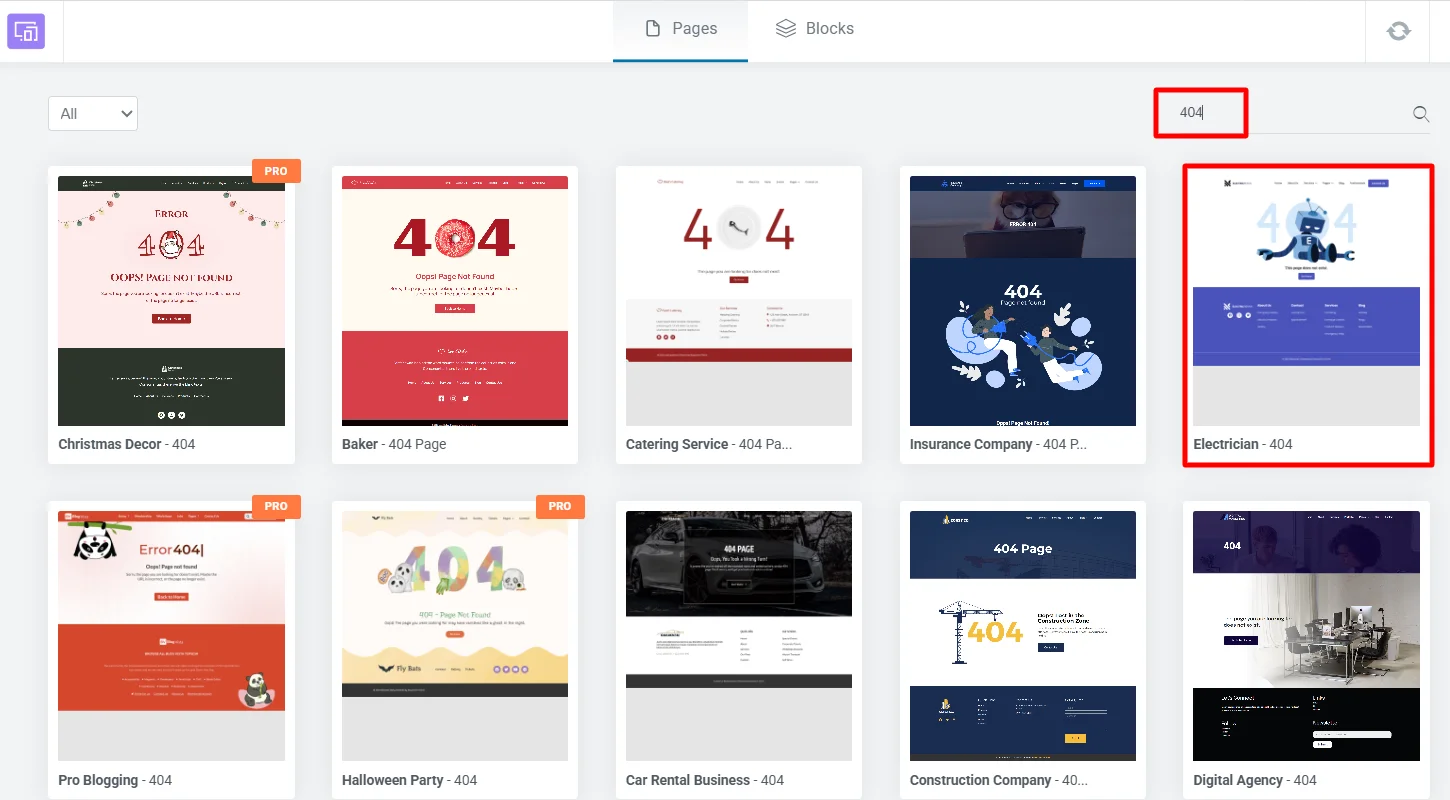
Click on the Responsive Starter Templates icon.
Type 404 in the search bar and choose a 404 template of your choice. For tutorial purpose we’re choosing the Electrician 404 page.
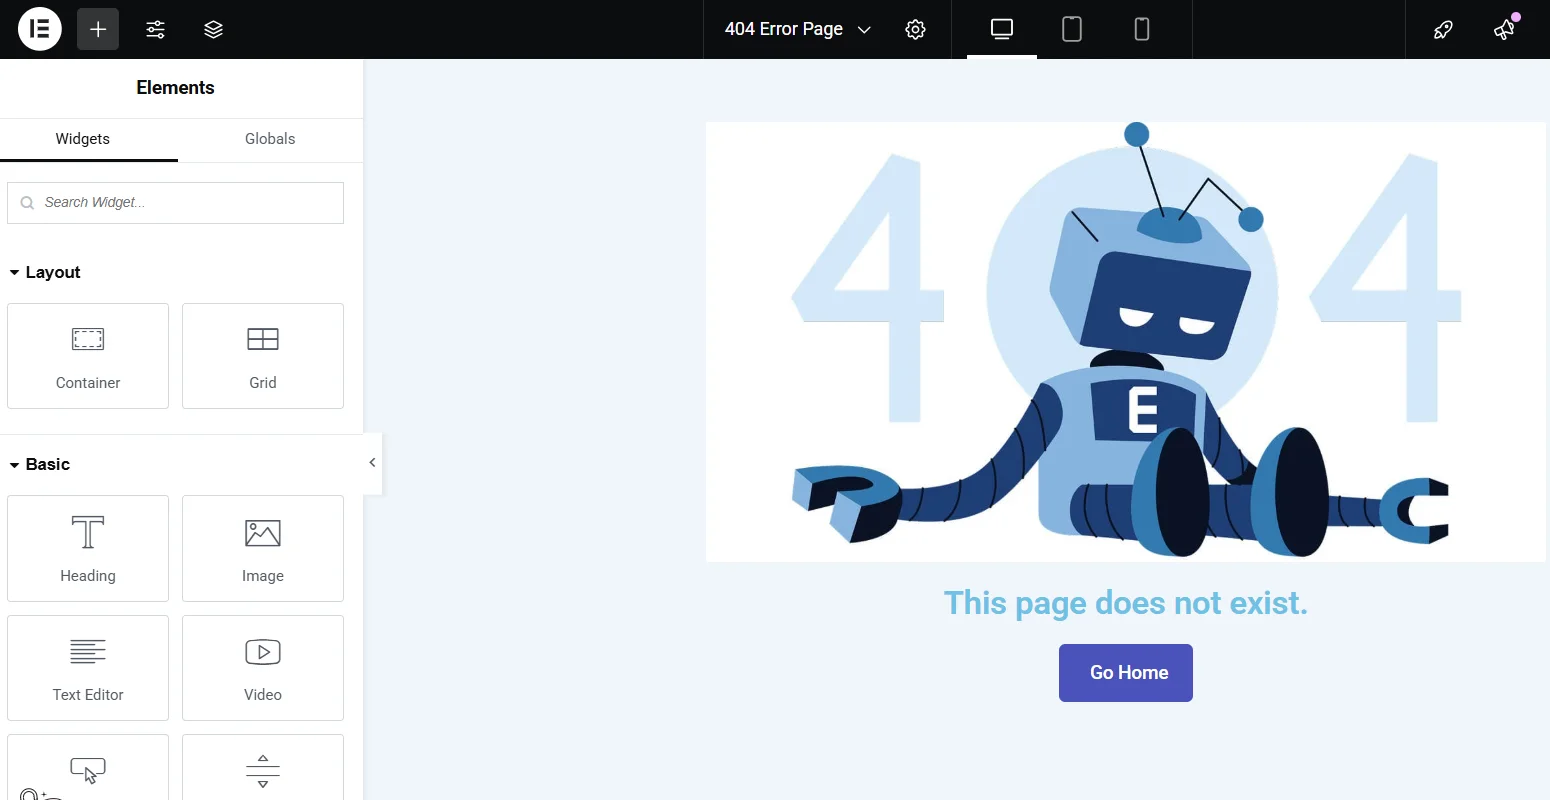
Edit the text, add button and more to the 404 page template.
Once you’ve made all the changes, click on Publish. Your final 404 page will look like this:
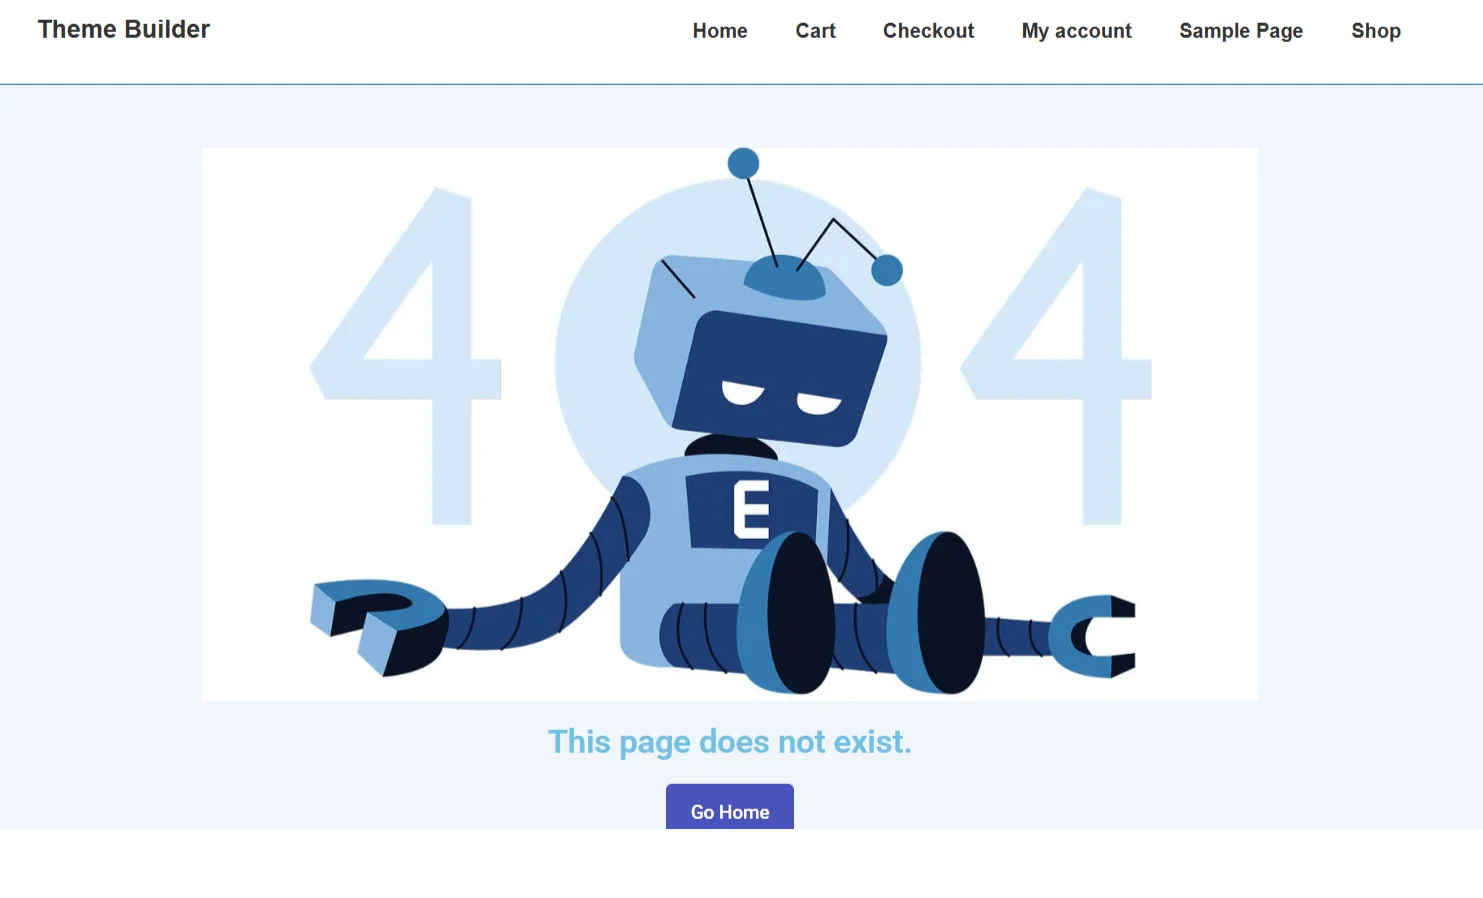
You can find the 404 Error Page by going to the Theme Builder dashboard.

That’s it! This is how easy it is to add a custom 404 page to your website.
FAQ
A 404 page indicates an error when a visitor tries to access a URL that does not exist on your website.
The purpose of a custom 404 page is to enhance the overall experience of your visitors by directing them towards helpful information.
You can change the default 404 page using your theme’s 404.php file or via page building software like Elementor.
A good 404 page should include useful links, a search bar, and a positive message helping users move forward.
Conclusion
Creating a custom 404 page is an ideal way to handle 404 errors, as your user could have landed there with the intention of finding something for them. A custom 404 page will provide them with a path to where they can go from the error page.
With the Responsive Site Builder and Responsive Addons for Elementor (RAE), you have flexible ways to design a user-friendly 404 page.
You can design one with Site Builder or Elementor. Both tools make it easy to set up the page in your own style.
Adding a search box, menu links, or even a short message makes the page more helpful. This keeps people exploring your site longer.
Creating a custom 404 page is simple and worth the effort. A good one turns a dead end into a smooth experience.
If you’ve liked reading this article, check out our other similar articles:
- How to Create Sticky and Transparent Headers with Responsive Theme
- Introducing the Responsive Site Builder
- How to Add Custom Fonts in WordPress – Best Methods
Want to create a fully advanced WordPress website? Grab the Responsive theme now!