Summary
The article explains how to create sticky and transparent headers with Responsive Theme. It shows how to enable sticky and transparent header options, adjust settings, and customize appearance.
It also covers style controls like colors, transparency levels, and scroll behavior.
Do you want to enhance the look of your header and make it sticky or transparent?
A sticky header is a feature that remains at the top, allowing you to navigate without scrolling back up. Furthermore, a transparent header is a feature that allows you to keep your header transparent, where your hero image or banner shines right behind the menu.
Sometimes, to improve your website navigation, it’s ideal to add additional functionalities, such as a sticky or transparent header.
The good news? If you’re using the Responsive theme, you don’t need custom code or extra plugins. Its powerful Header Builder makes it incredibly easy.
In this guide, let’s look into detail on how to add a sticky and transparent header using the Responsive theme.
Without further ado, let’s dive right into the content.
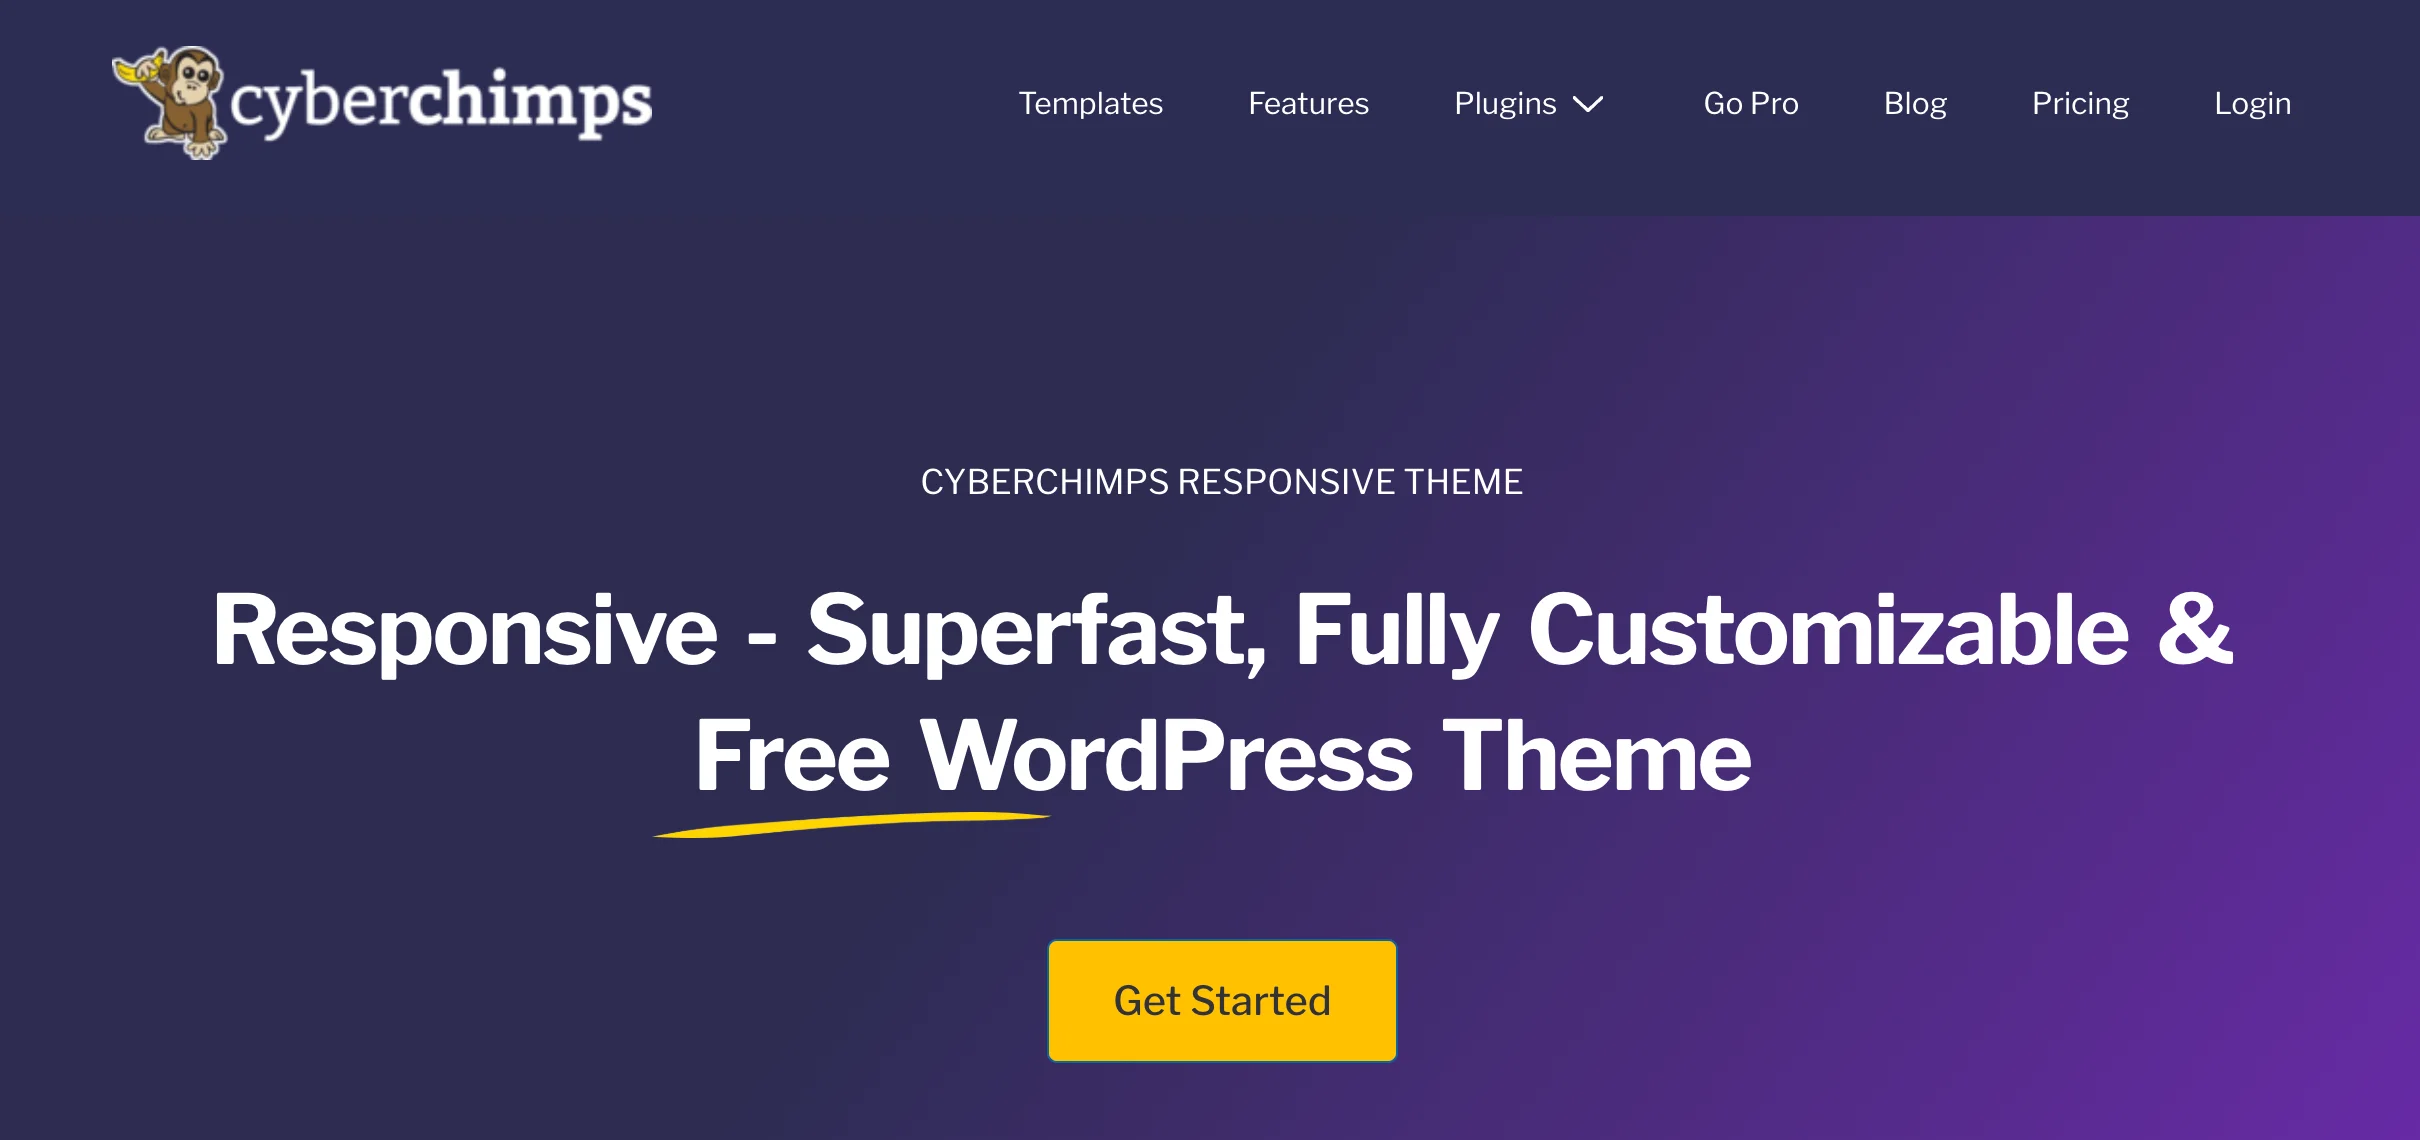
Cyberchimps Responsive is the Best WordPress Theme – Get it for free!
What are Sticky and Transparent Headers?
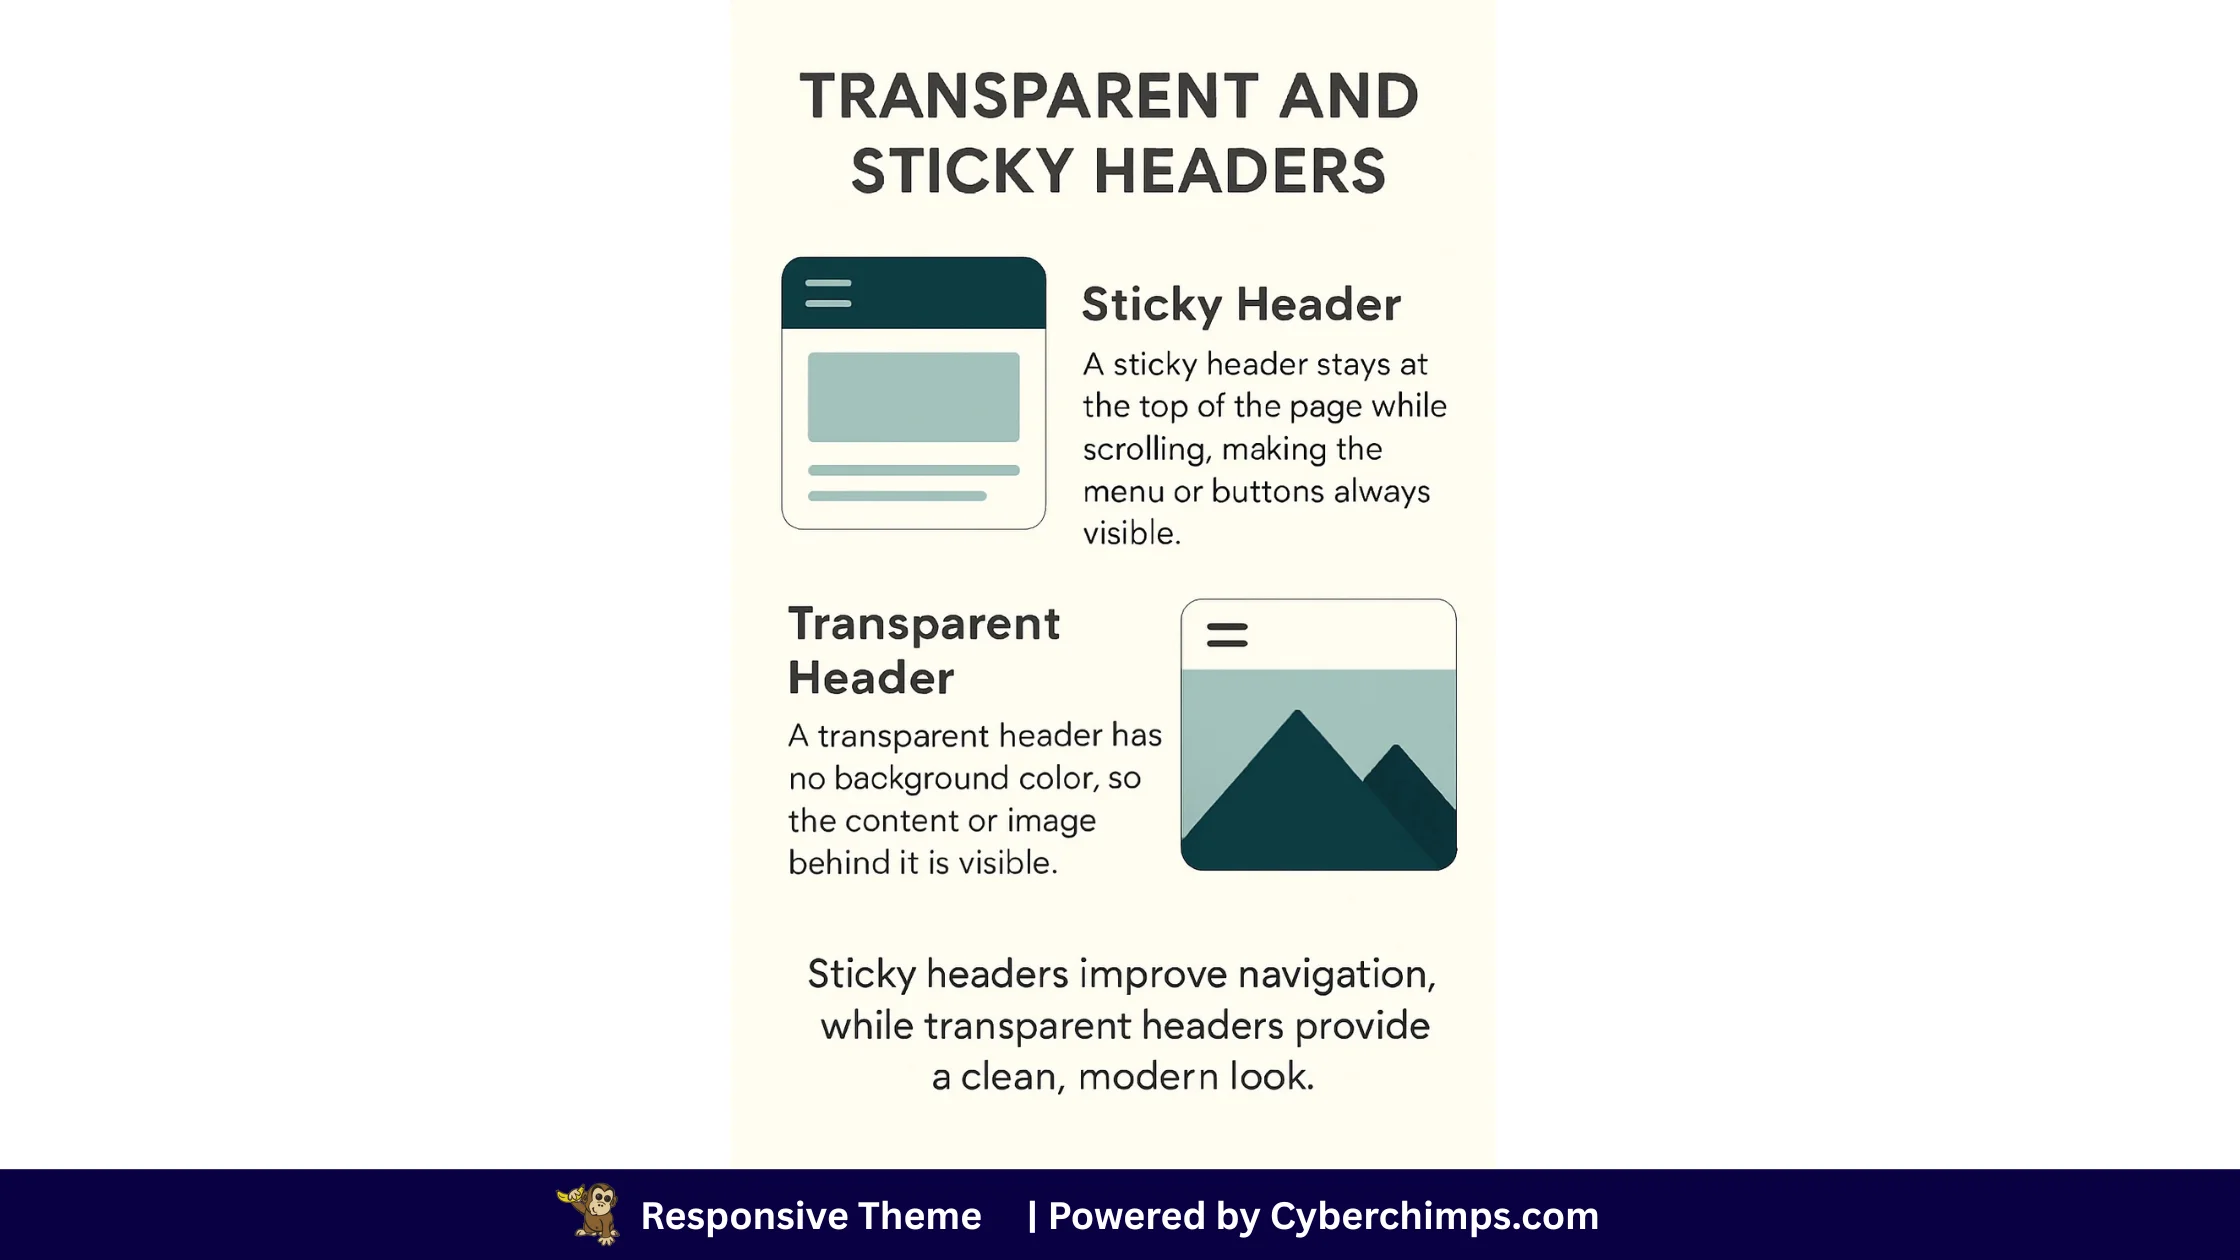
What is Sticky Header?
A sticky header is the part of your website (usually the top navigation bar) that stays visible even when you scroll down the page. It’s useful because visitors always have quick access to your menu or buttons.
It allows you to view the header as you scroll down, eliminating the need to scroll up to click on a different header menu.
A sticky header serves as a great navigation bar and is helpful for most website users.
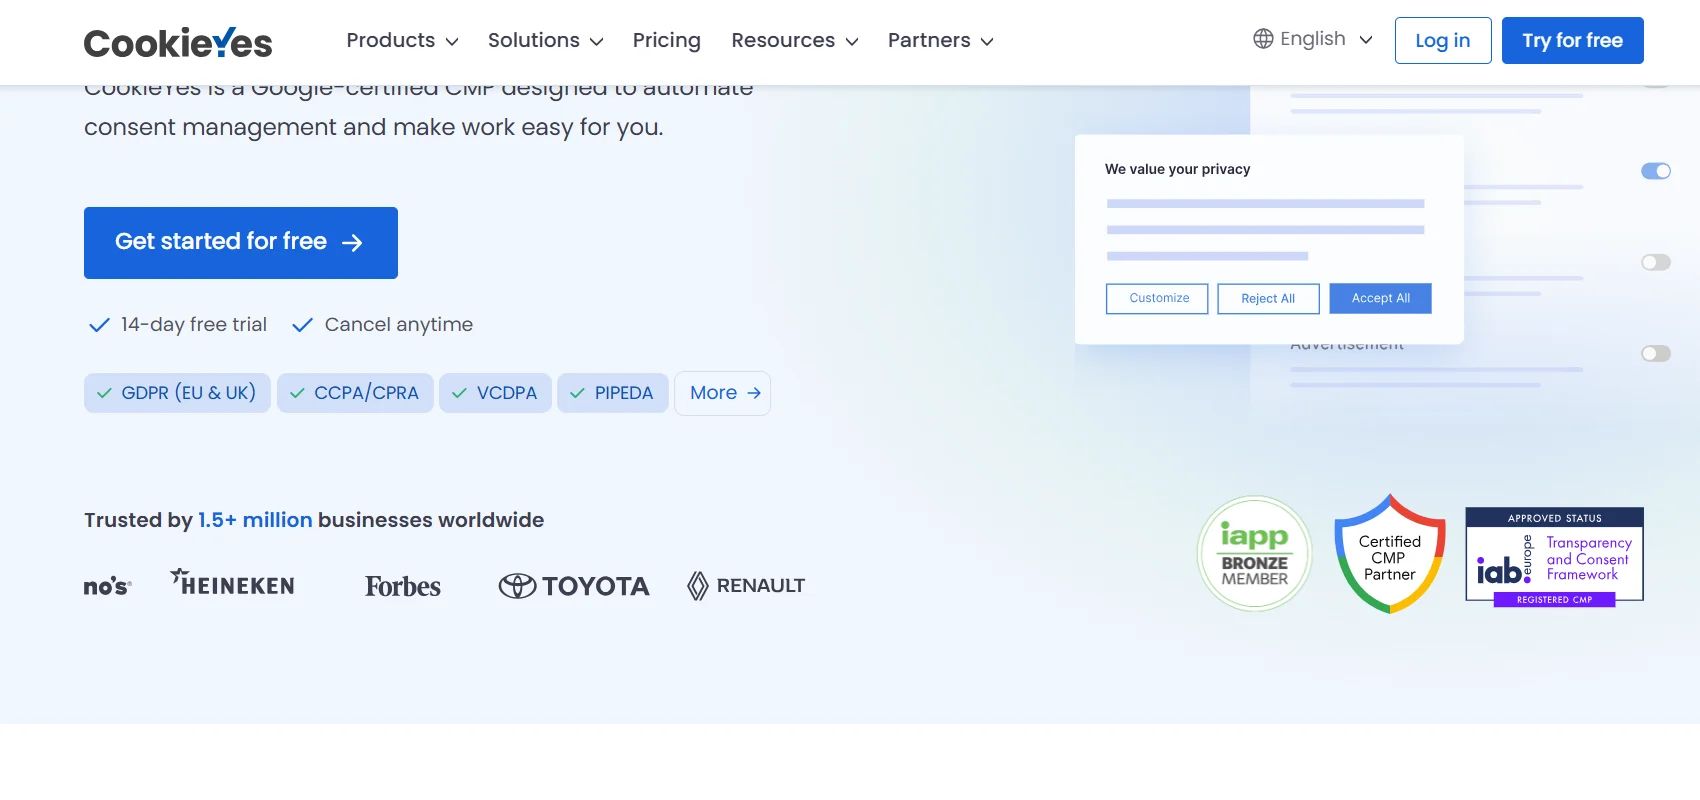
Sticky Header Example
Here is an example of a sticky header used by the CookieYes website:
What is Transparent Header?
A transparent header means the header has no background color. So, when someone lands on your site, they can see the background image or banner behind the header.
This is useful when you want people to see your entire website, along with the header. It’s navigational as well as adds a stylish look to your website.
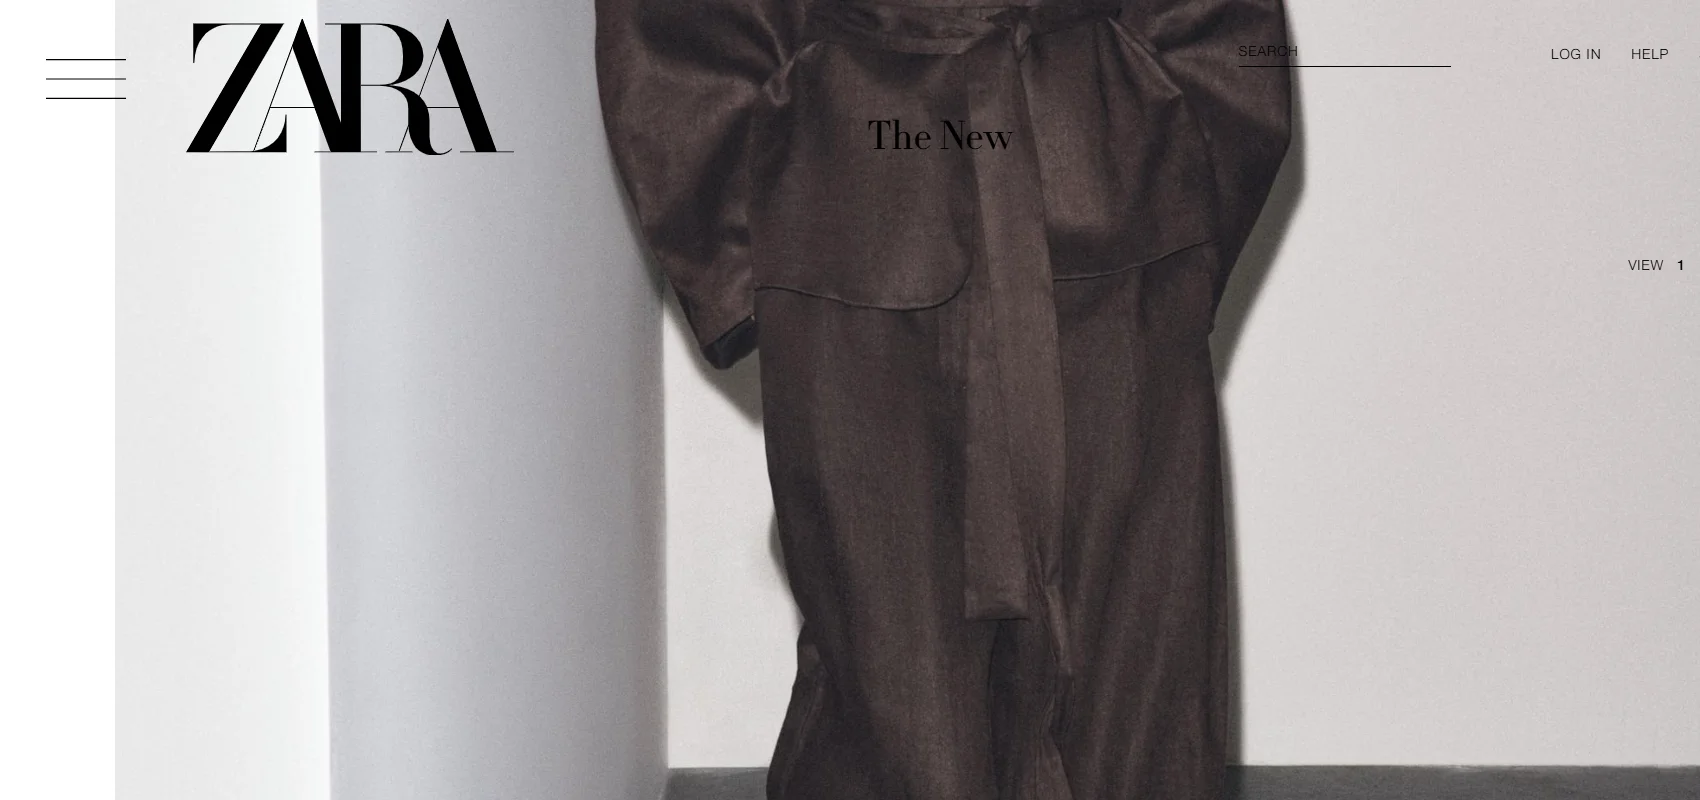
Transparent Header Example
Transparent headers are used by popular companies like ZARA and Netflix.
Do you want to replicate sites like Zara or CookieYes? Well, you’ll need a theme that supports the sticky and transparent options.
If you’re using the Responsive Theme, then you don’t need to worry about styling your header. Additionally, you won’t need to install extra plugins, as the built-in header builder allows you to create sticky and transparent headers visually, with advanced customization features.
Most WordPress themes do not provide the function of adding a sticky or transparent header. Be wise in choosing a theme.
If you’re looking to add a sticky header without touching a line of code or installing extra plugins, you can use the Responsive theme by Cyberchimps.
The theme is fast, user-friendly, and is totally SEO optimized. Further, it allows you to create a stunning website, thanks to its advanced features like white label, sticky header, custom fonts, WordPress templates, addons for Elementor, and more.
You don’t need to rely on third-party tools or go through a complicated setup process. It’s simple, and you get real-time previews as and when you customize or make changes.
You can be a beginner or even an expert with WordPress, but the Responsive theme has a slice of cake for all. You can use the theme for your blog, online store, or even your business website.
It’s fast, flexible, and built for users who want powerful features without the technical complexity.
In the next section, let’s look at what a header builder is and see how the Responsive header builder can help us create a sticky and transparent header for the website.
What Is the Header Builder in the Responsive Theme?
???? My Real World Test Results:
- Load time on shared hosting: 0.78 seconds
- GTmetrix Performance score: 100%
- Total theme size: Under 80KB
- Mobile PageSpeed score: 99/100
- Save design time with 100+ Premium-grade Starter templates
The header builder in the Responsive theme is a visual tool that helps you design and customize your website’s header without needing to write any code.
It uses a simple drag and drop interface, allowing you to add, remove, or rearrange header elements easily. You can see all the changes live as you build, so there is no need to switch between editing and previewing.
The builder is divided into three rows: Top, Main, and Bottom.
In each row, you can drag elements like your site logo, navigation menu, search bar, social media icons, and call to action buttons. This gives you complete control over the look and layout of your header.
You also get built-in options to make your header sticky or transparent completely for free. These features can be applied directly within the builder, without using extra plugins or custom coding.
Themes like Astra and Kadence offer these options only in their premium version, making Cyberchimps Responsive theme a unique WordPress theme.
Want to create a sticky header for free with the Responsive theme?
How to Create a Sticky Header (Completely Free)

As our primary focus is on the sticky and transparent headers, let’s see how to create one now.
Let’s walk through exactly how to add a sticky header to the WordPress menu with Responsive Themes.
If you’re new to WordPress, read from Step 1. But if you’re an existing Responsive theme user, please skip to Step 2.
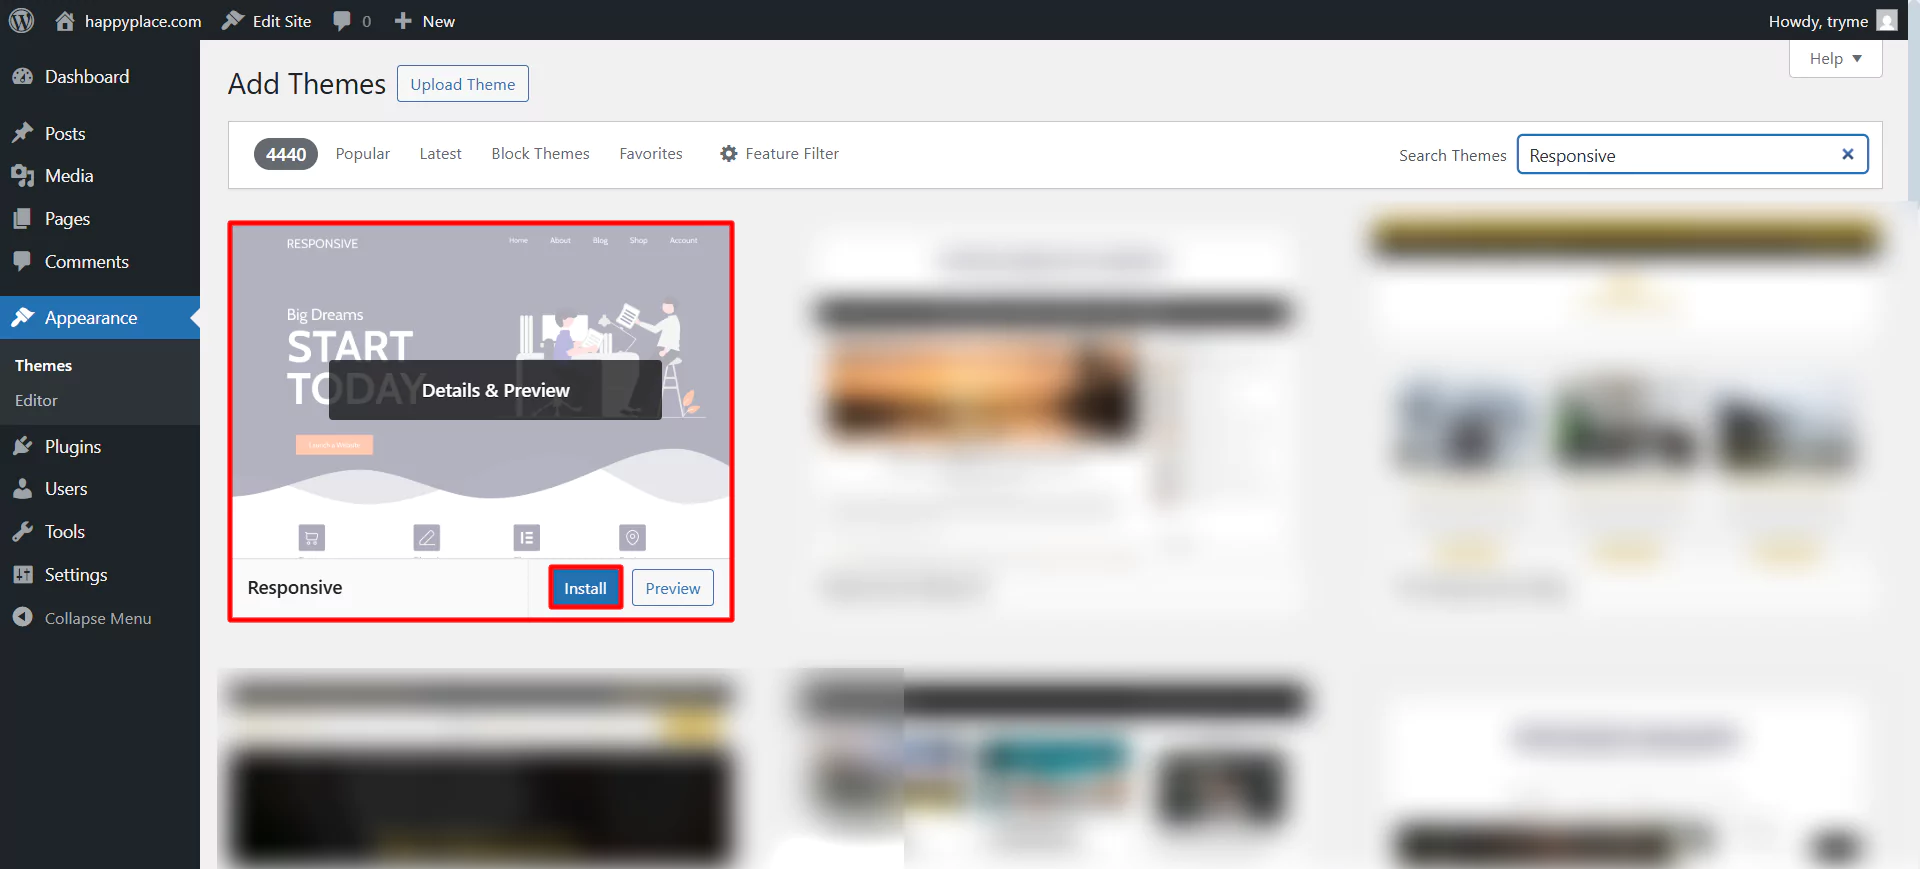
Step 1: Install the Responsive Theme
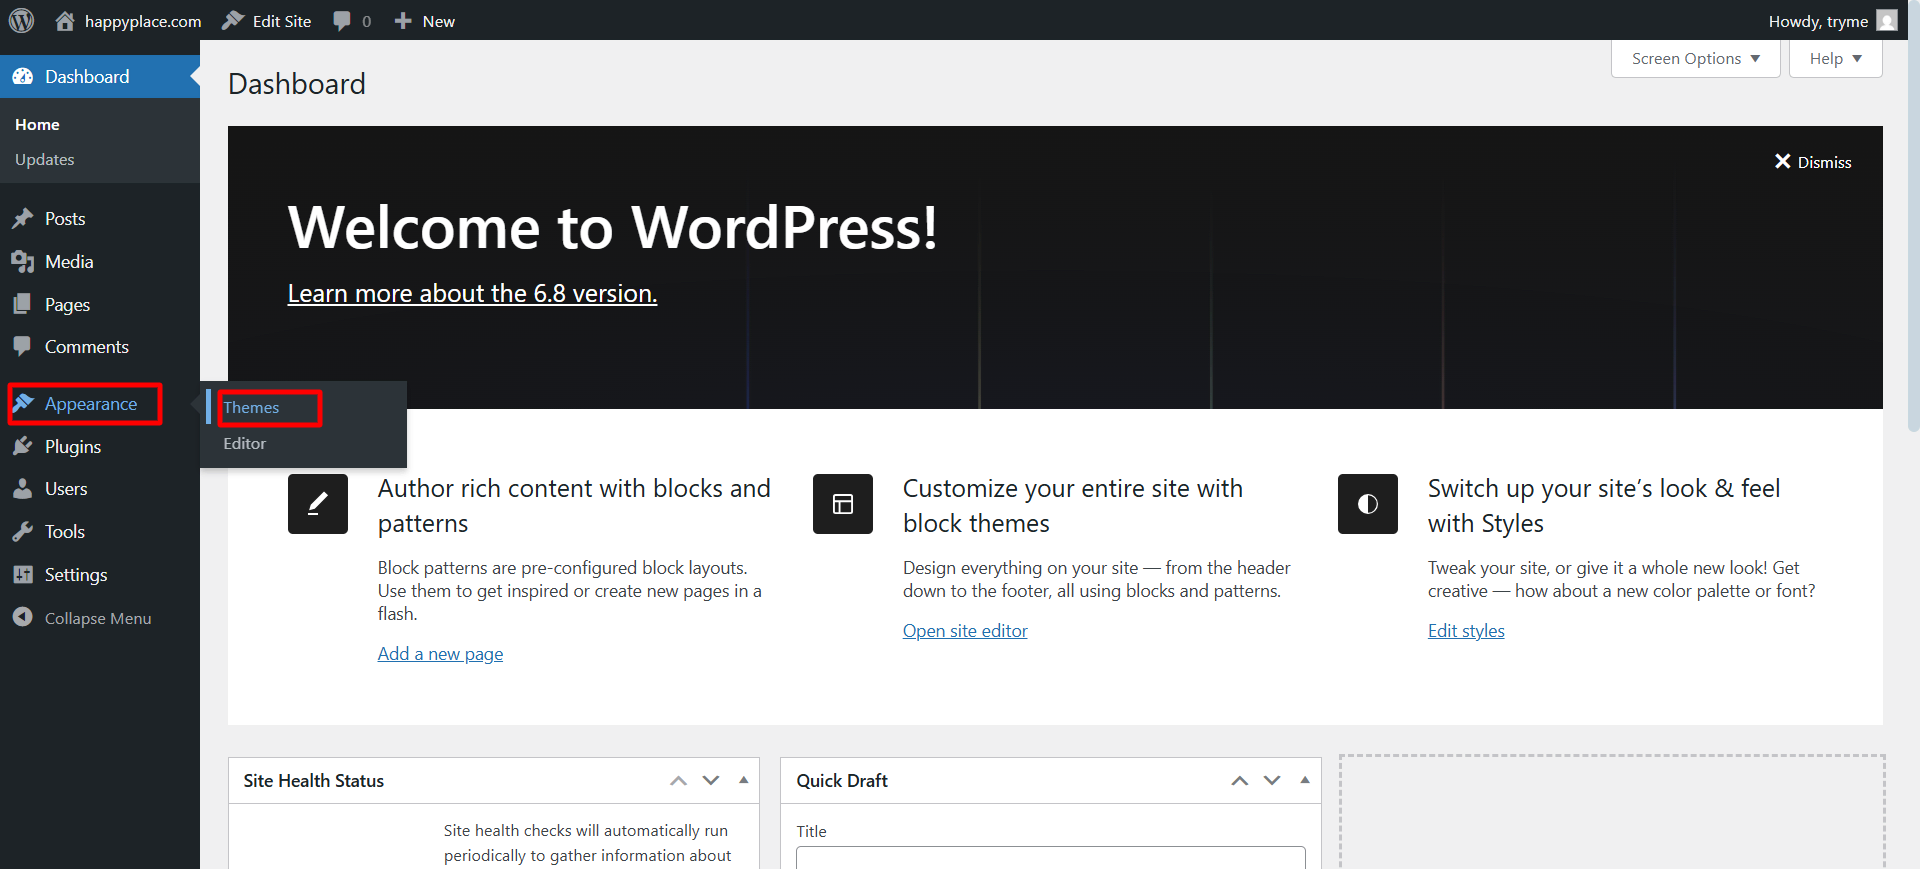
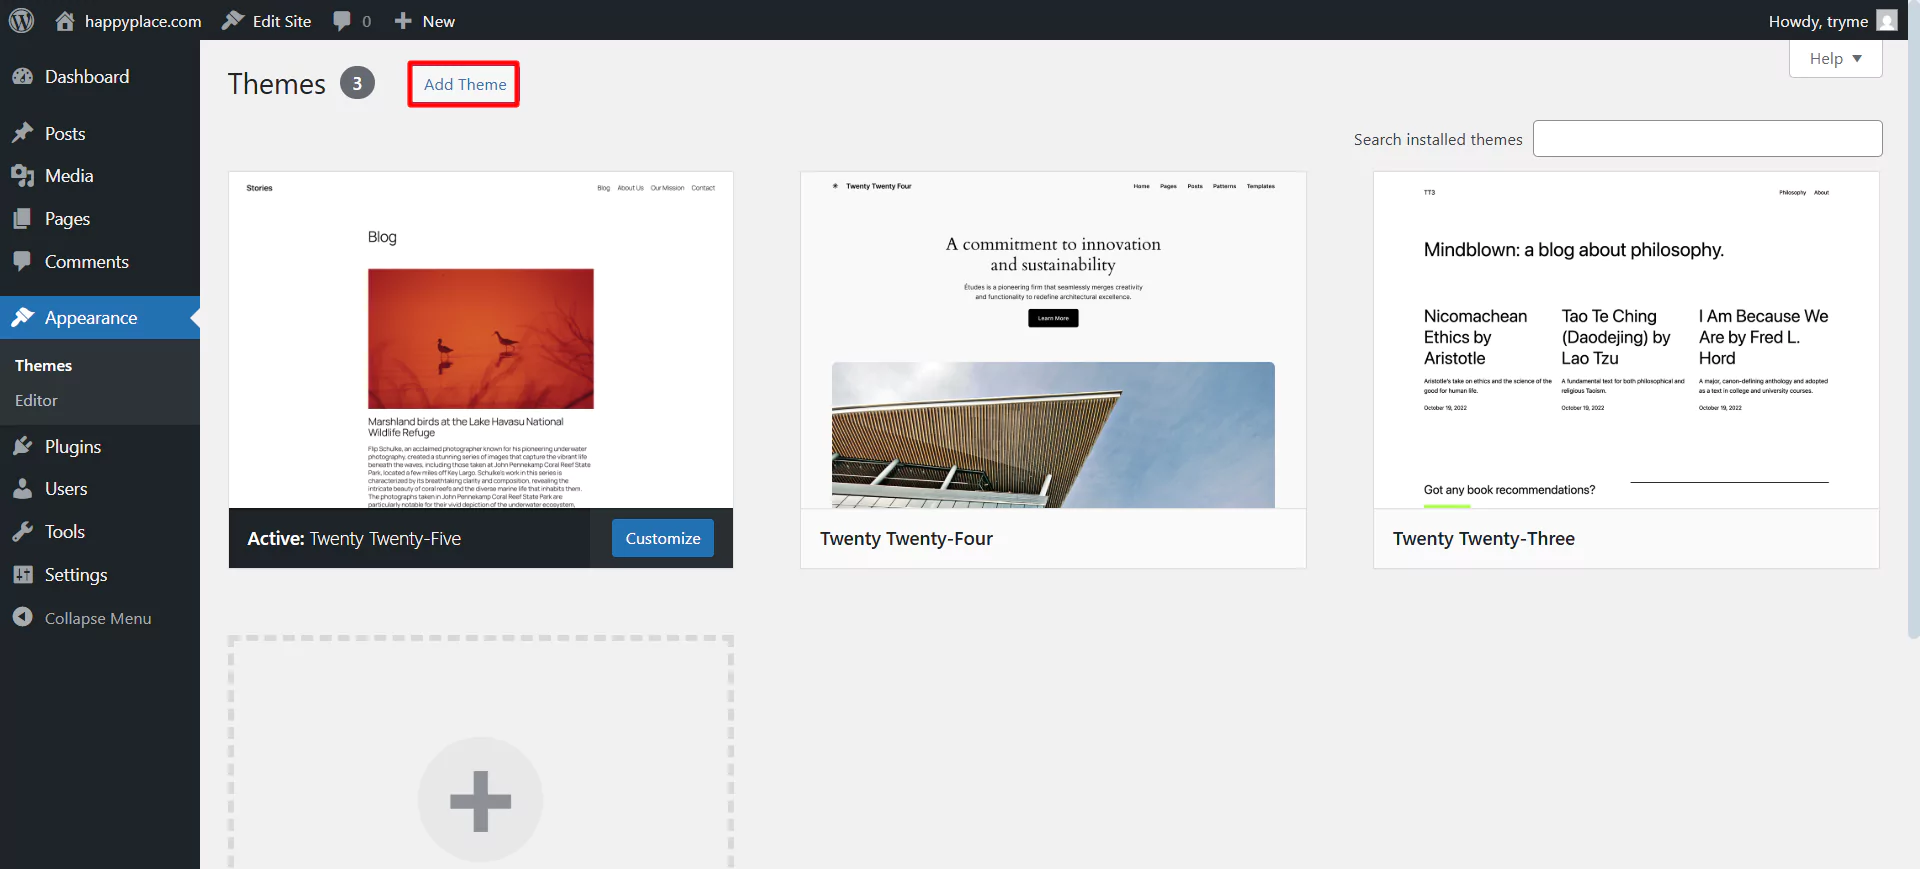
Open your WordPress dashboard and navigate to Appearance> Themes.
Click on Add Theme.
In the search bar, type Responsive.
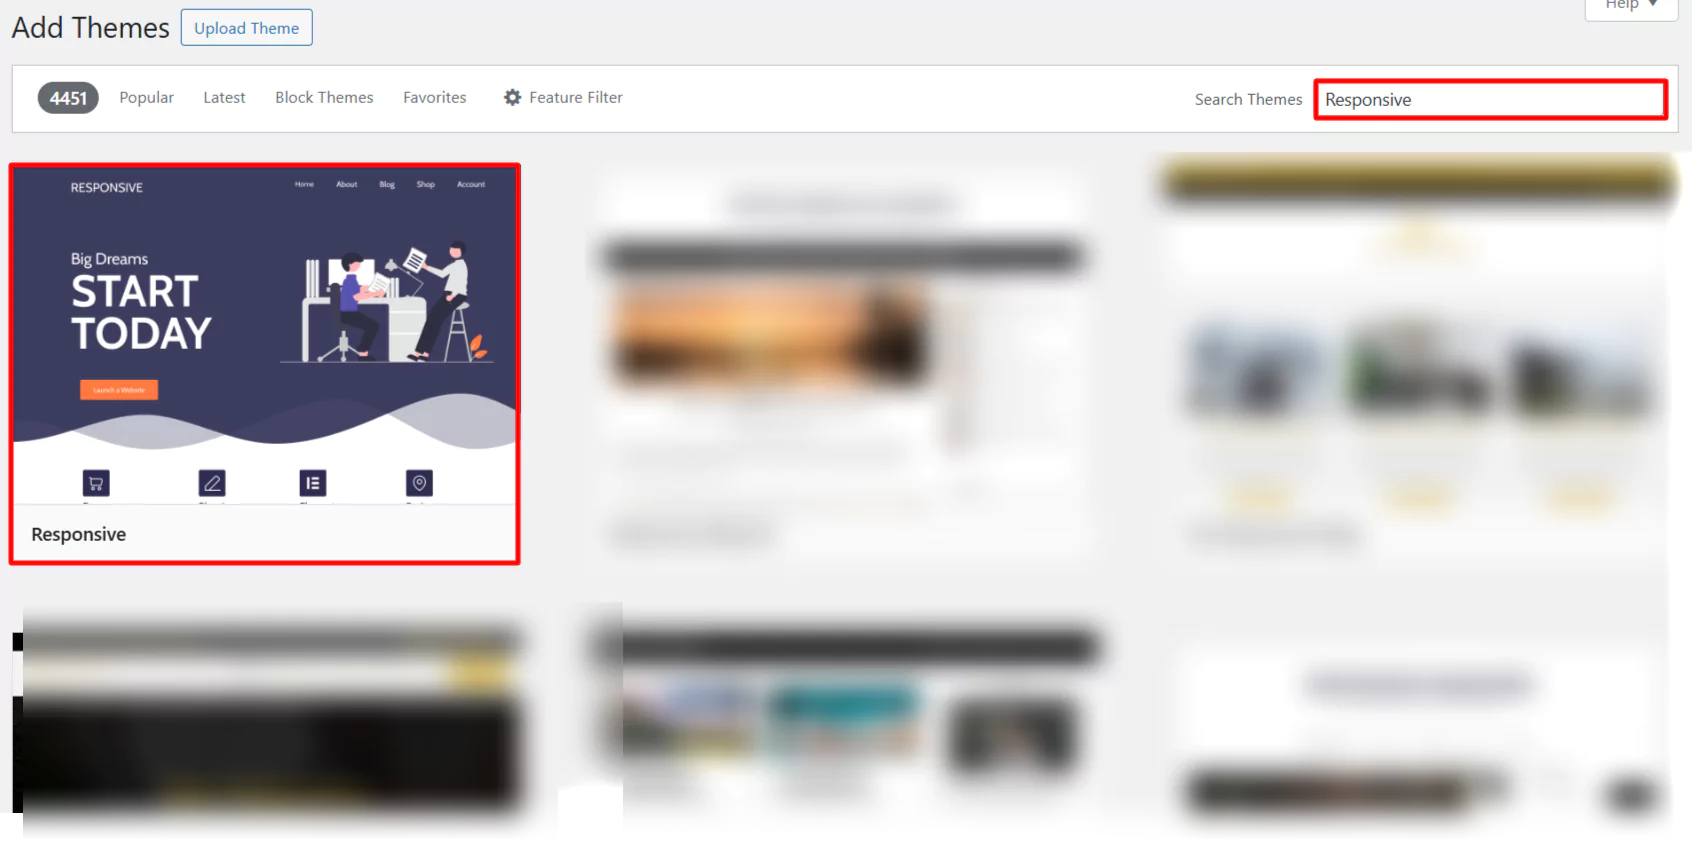
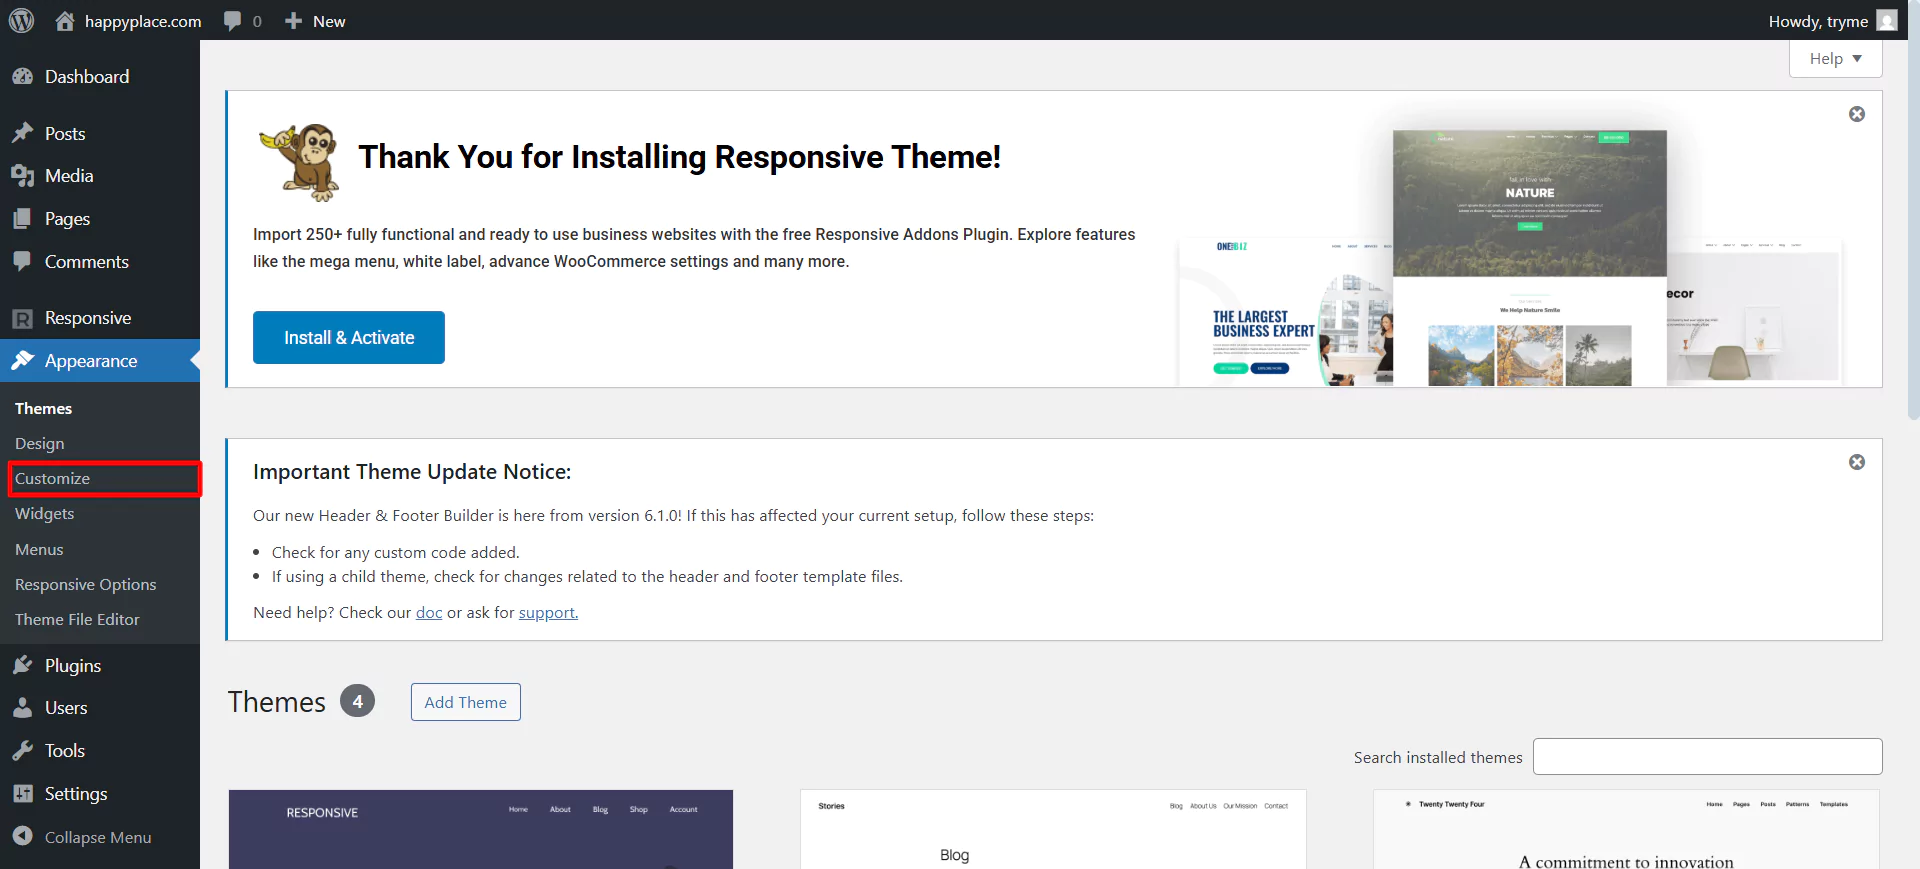
Next, Install and Activate the Responsive theme.
Once the theme is installed, let’s check out how to make the header sticky.
Step 2: How to Add a Sticky Header
Click on Appearance and select the Customize menu.
Click on Header option.
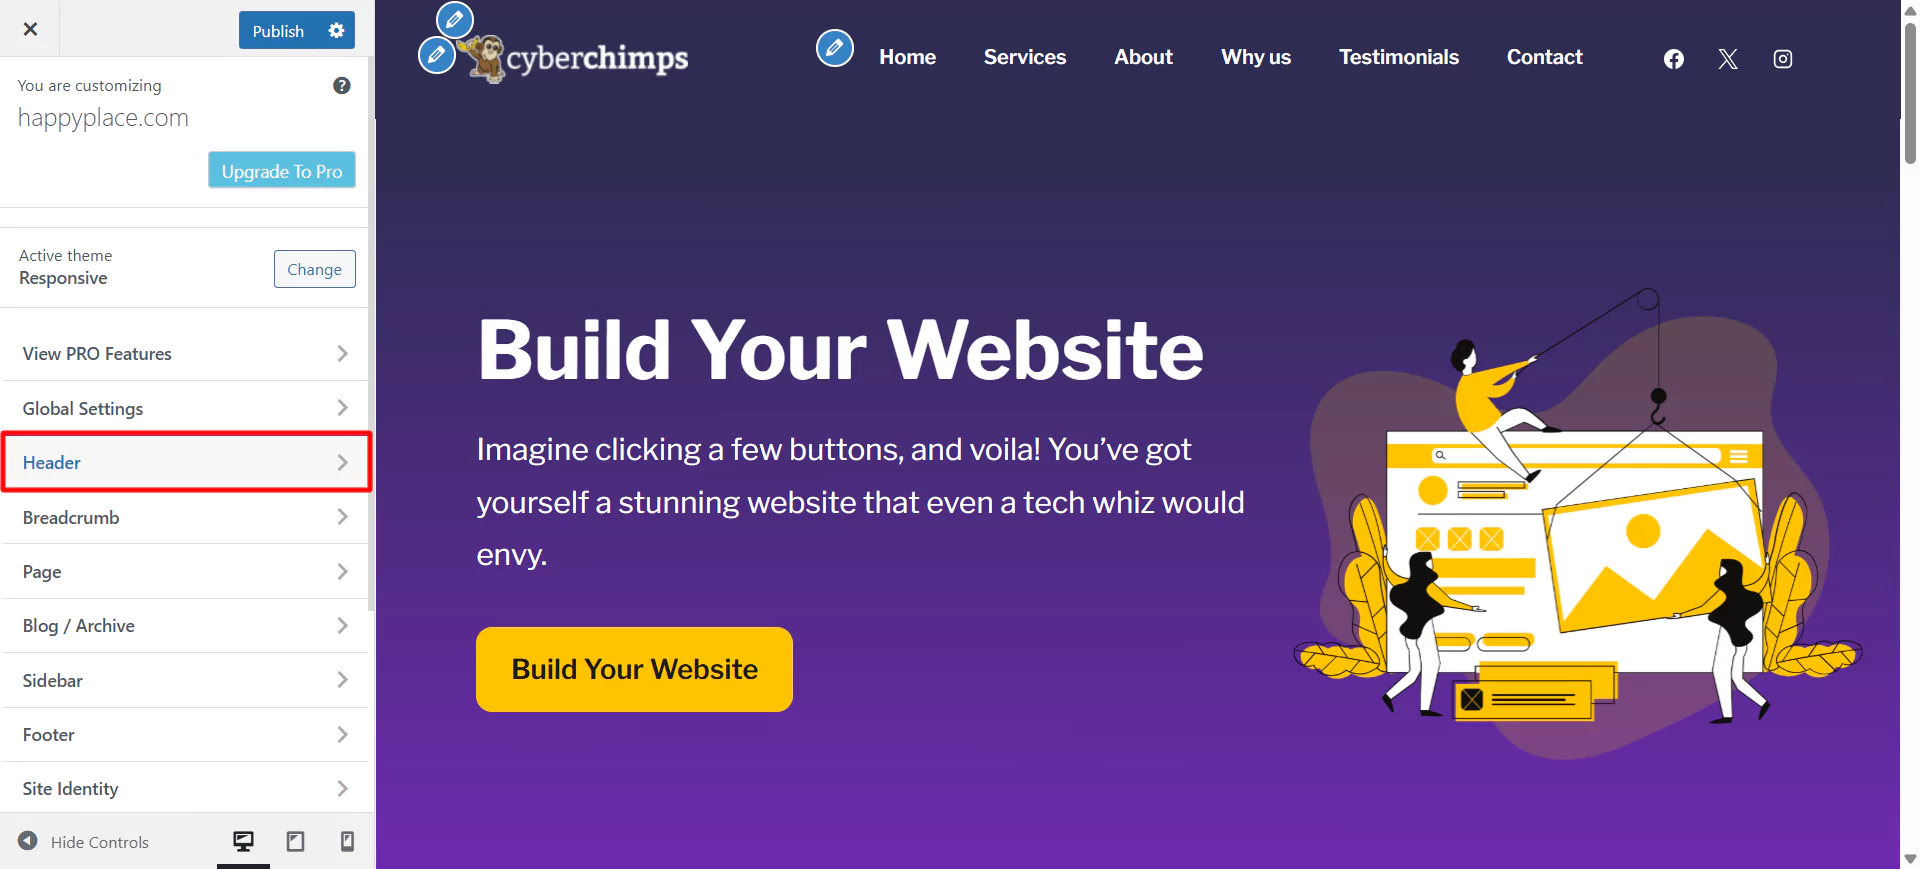
Select the Sticky Header option.
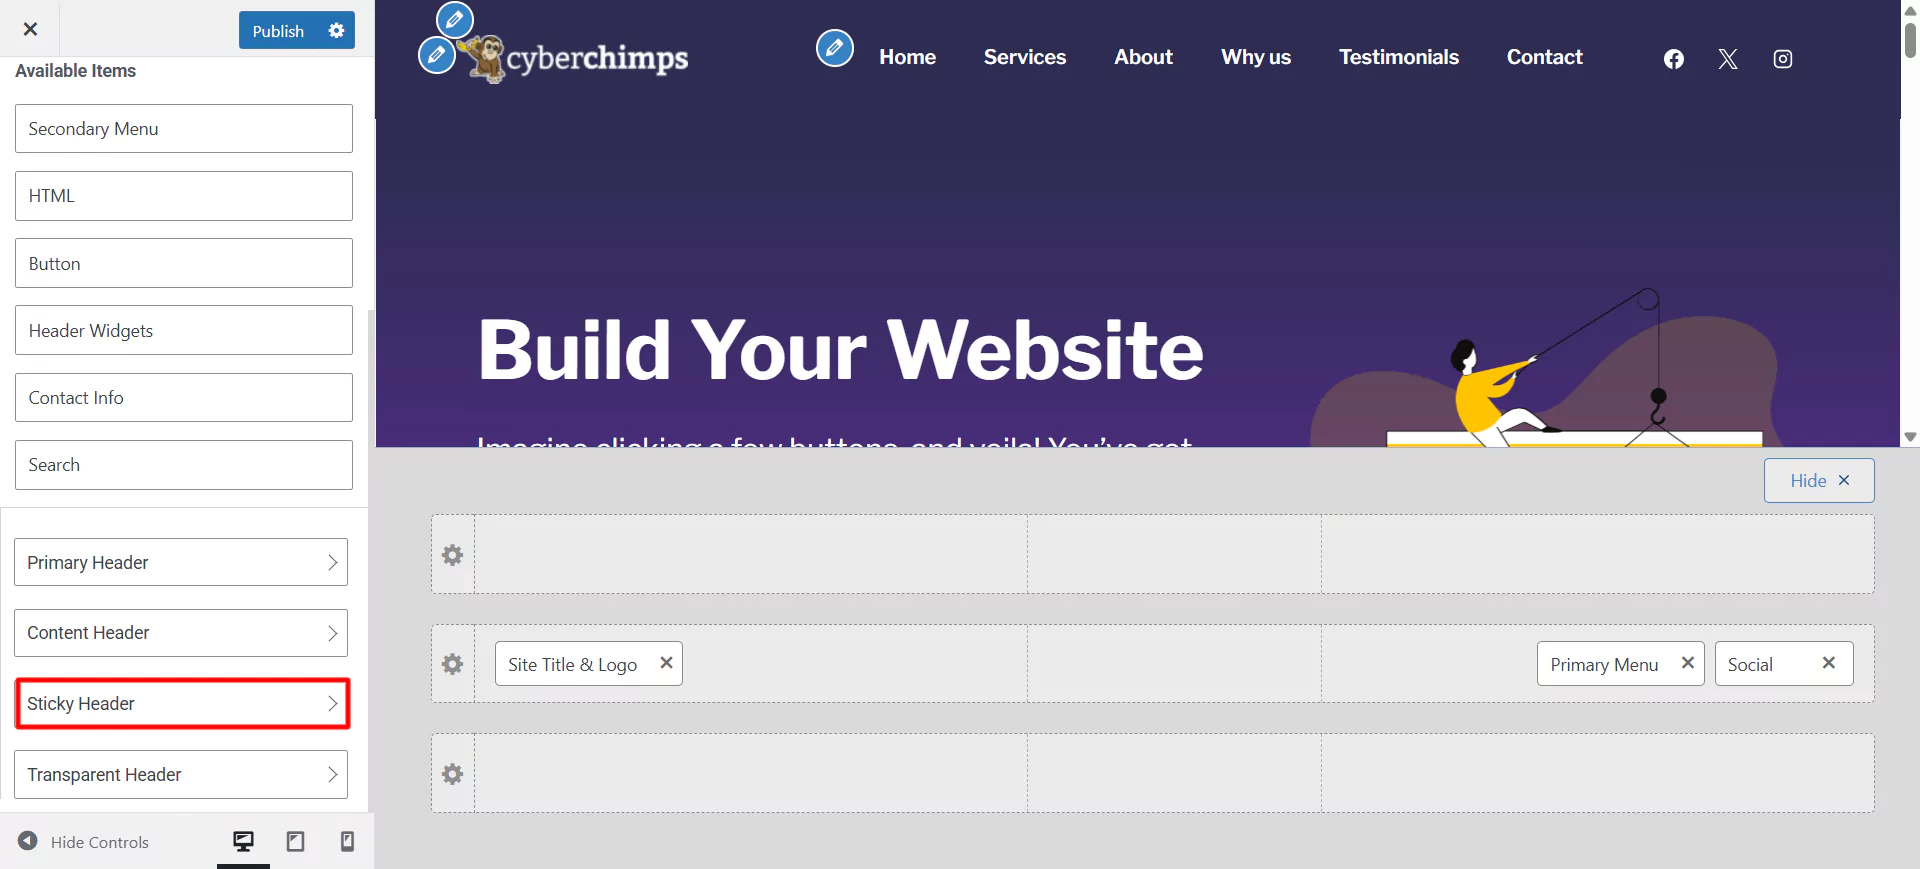
Toggle the option ON to enable the sticky header. And click on Publish.
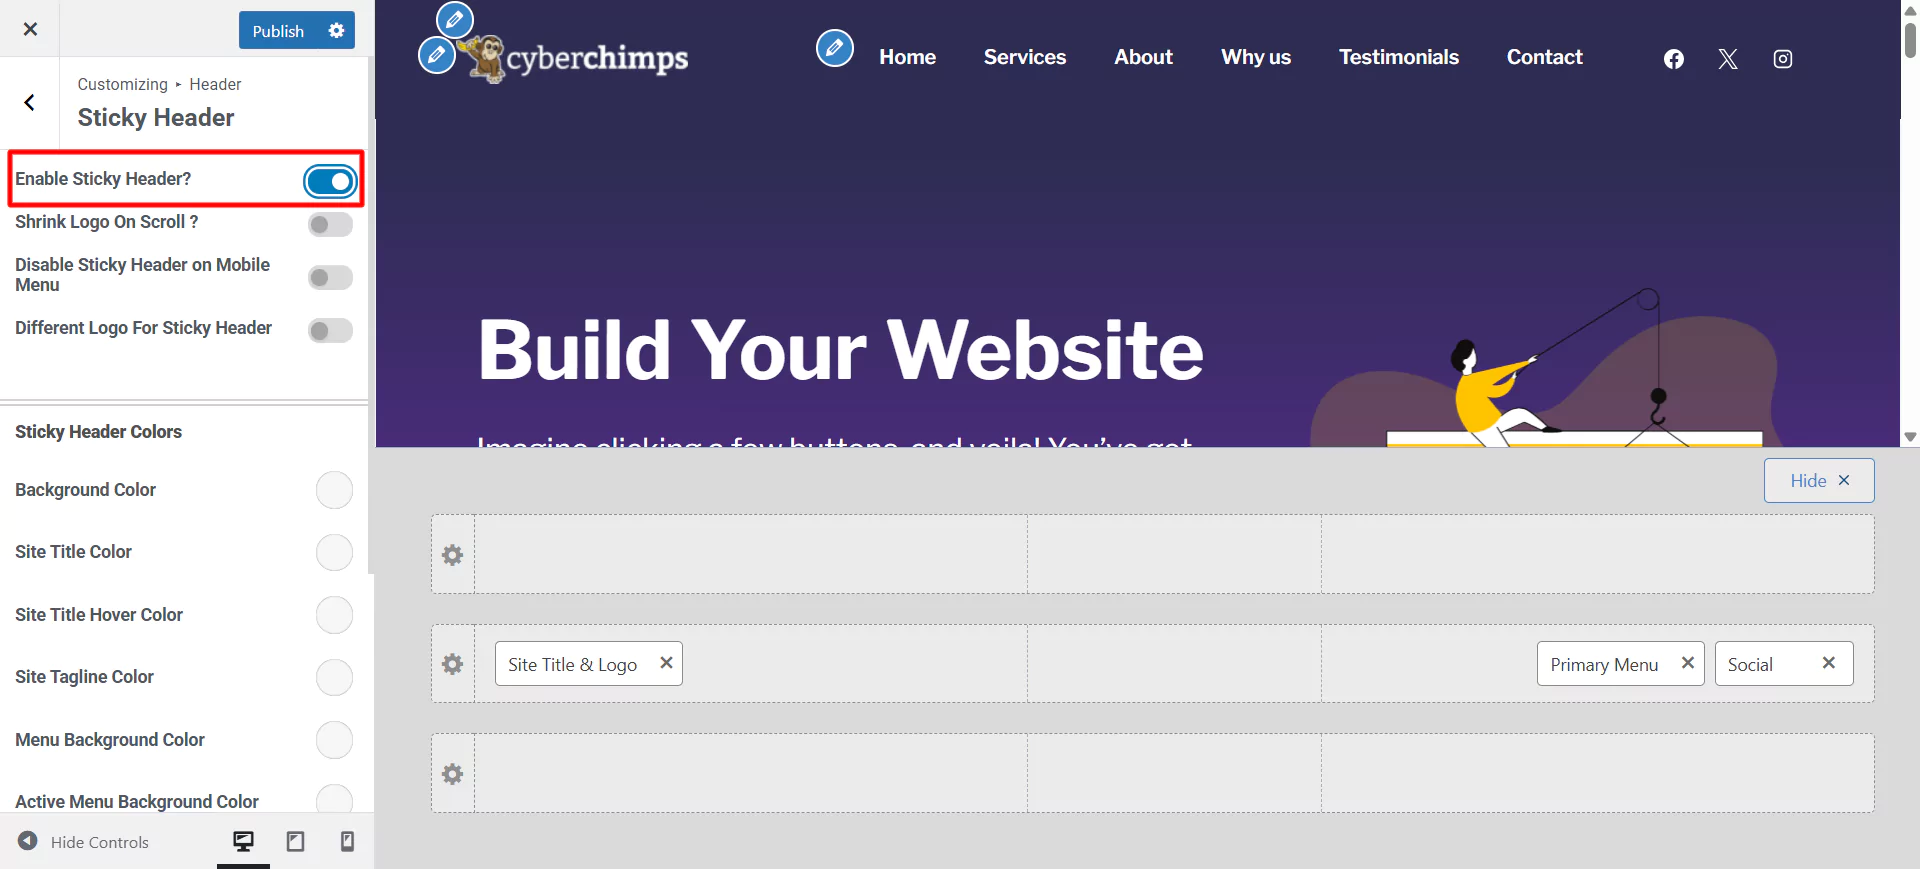
Now, you have converted your website header into a sticky header. The Responsive theme panel provides additional customization options to make your website header more attractive.
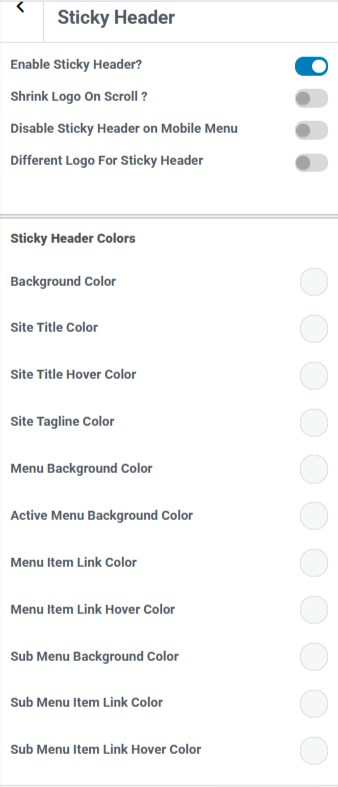
- Enable Sticky Header: When enabled, your site’s header stays fixed at the top while scrolling.
- Shrink Logo on Scroll: When turned on, the logo size reduces slightly on the scroll to save space and improve visibility (For this, you need to upload the logo)
- Disable Sticky Header on Mobile Menu: Prevents the sticky header from appearing on mobile devices.
- Different Logo for Sticky Header: You can upload a distinct logo that appears only when the header becomes sticky (ideal for better contrast or branding during a scroll).
- Background Color – The background color of the sticky header.
- Site Title Color – Color of the site title.
- Site Title Hover Color – Color when hovering over the site title.
- Tagline Color – Tagline text color.
- Menu Background Color – The background color of the entire menu.
- Active Menu Background Color – The background color of the menu item that is currently active.
- Menu Item Link Color – Color of menu links.
- Link Hover Color – Color of menu links on hover.
- Background Color for Sub Menu – Background color for dropdown (sub) menus.
- Sub Menu Item Link Color – Color of links inside the sub-menu.
- Sub Menu Item Link Hover Color – Hover color for sub-menu items.
You can see how the sticky header will look on the website. I have kept all the settings default for this case, but you can change them according to your needs and preferences.
Try out the different settings and see what works for your brand. Here, I wanted a basic sticky header for my company, so I did not do much customization.
Step 3: How to Add a Transparent Header
Like we created a sticky header, you can also make a transparent header for your website using the Responsive theme.
Here are the simple steps to create a transparent header.
Head over to the dashboard. Click on Appearance and select the Customize option.
Under the Customize option, click the Header menu.
Next, click on the Transparent Header option.
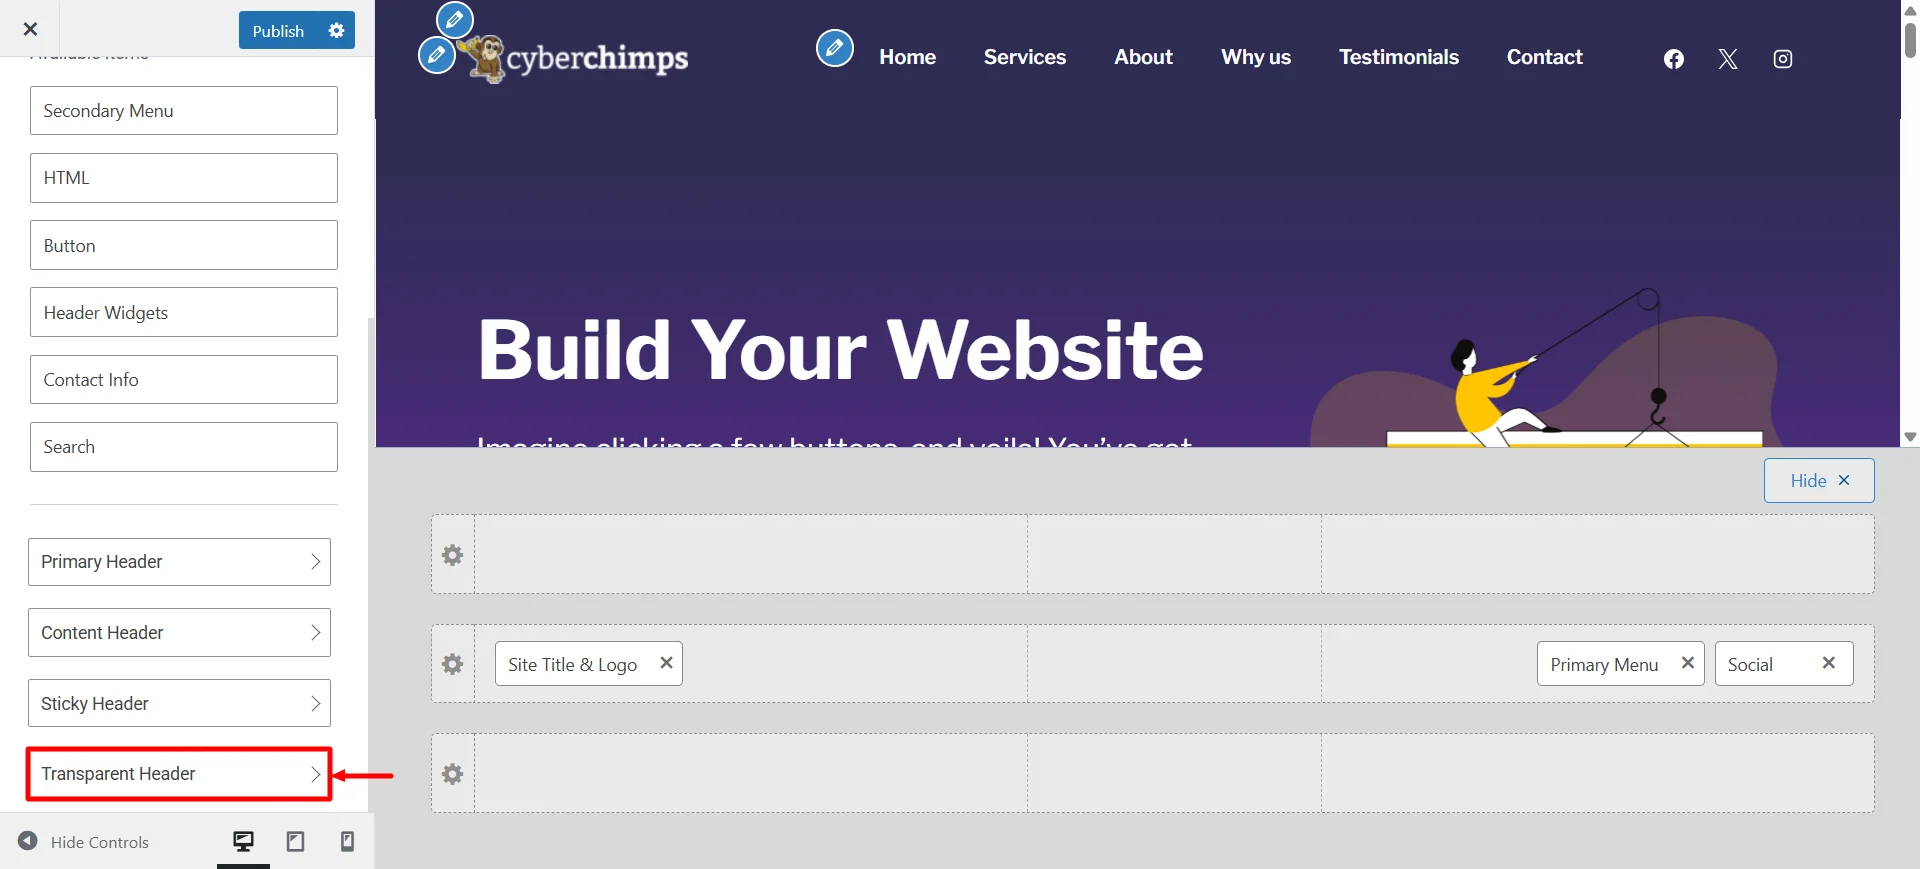
You’ll find various customization options that you can use to edit your transparent header. First, you can choose if you want the transparent header for the entire site or only on certain pages.
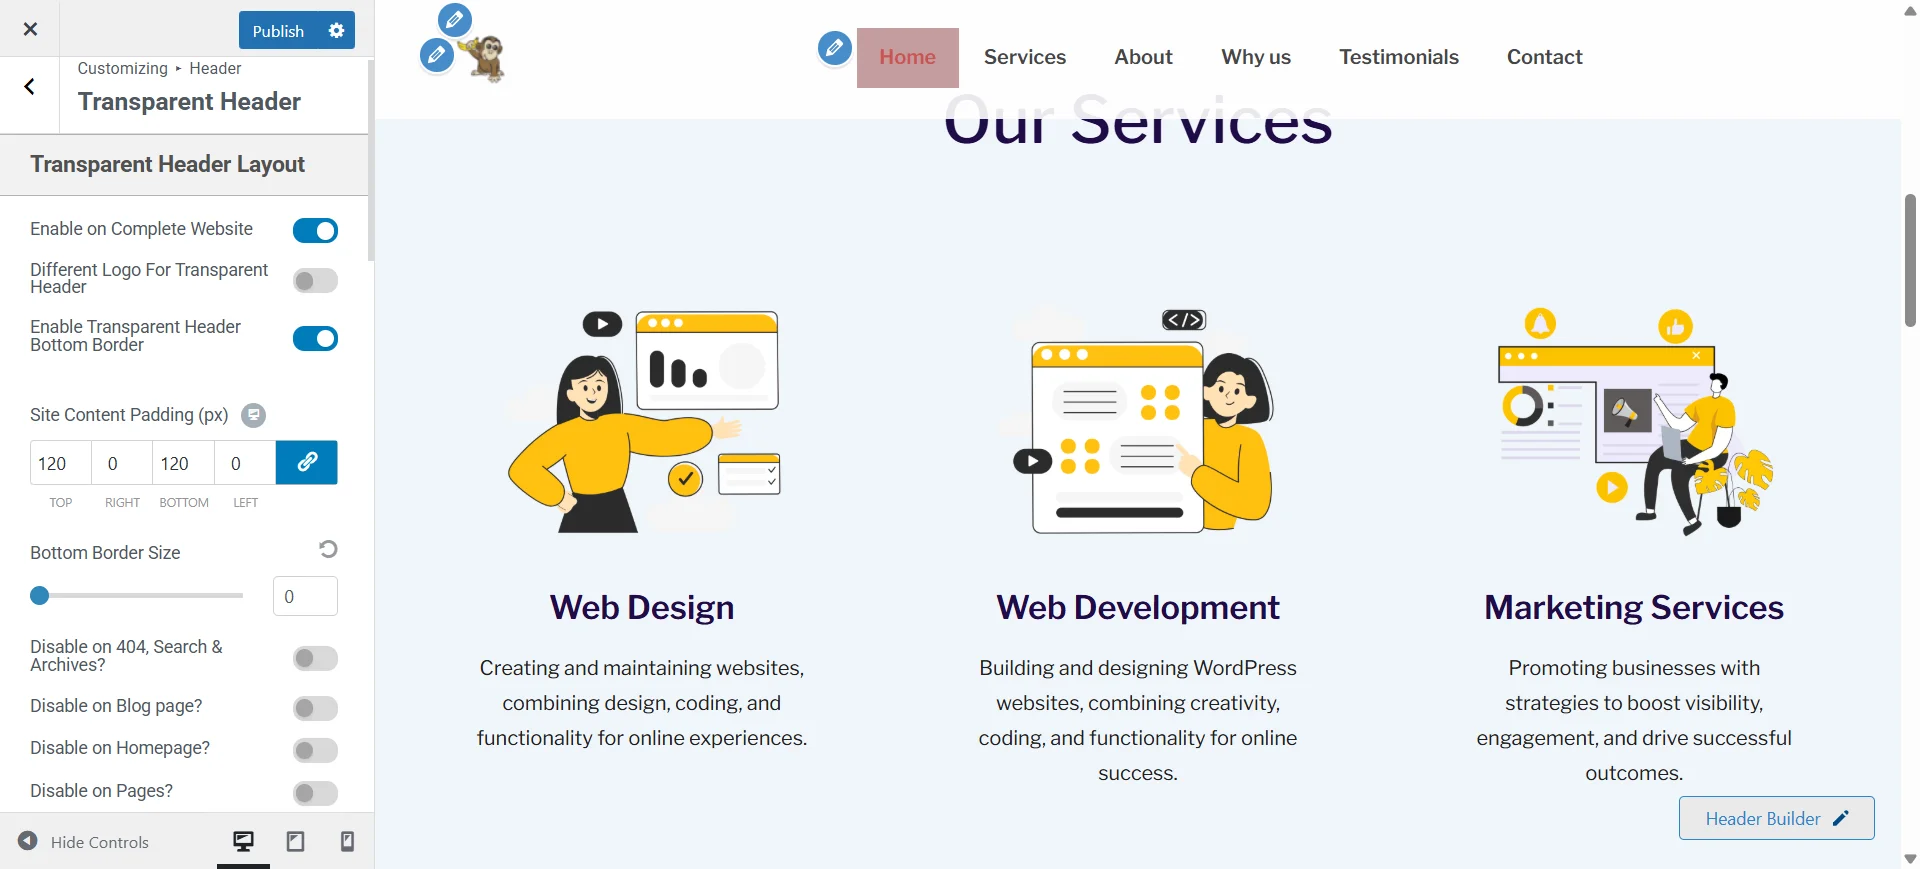
Next, you can choose to edit a variety of settings under the header menu options.
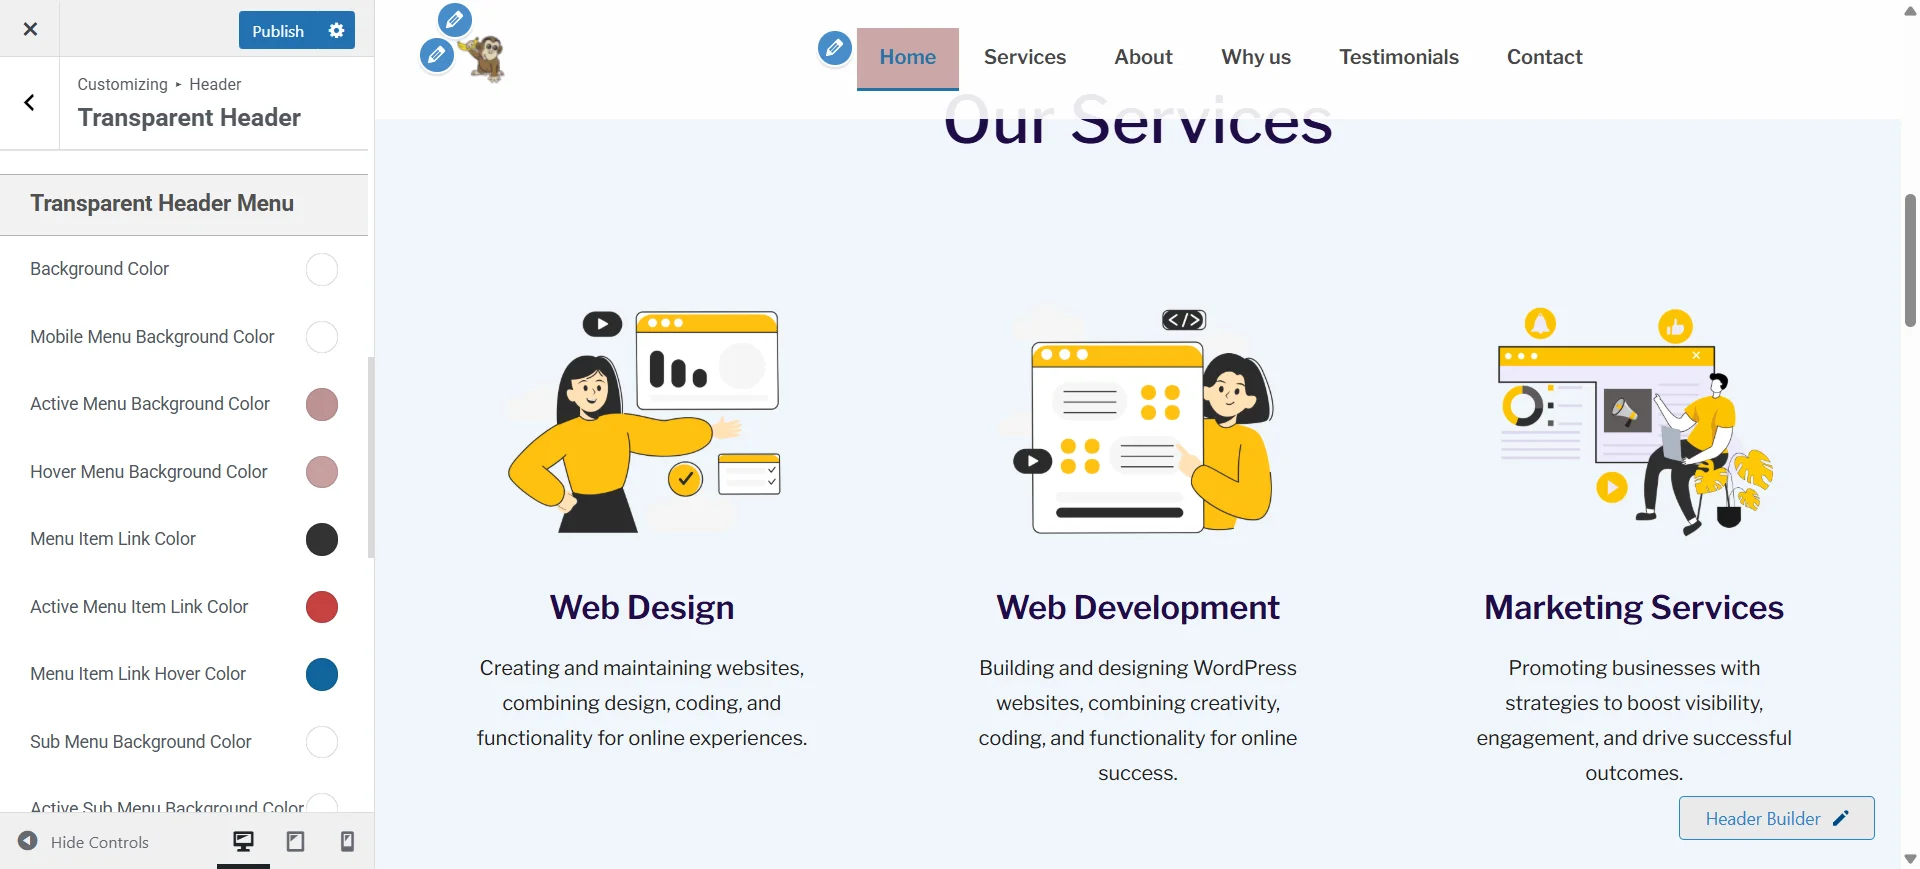
Additionally, you can edit transparent header colors to make your header more attractive.
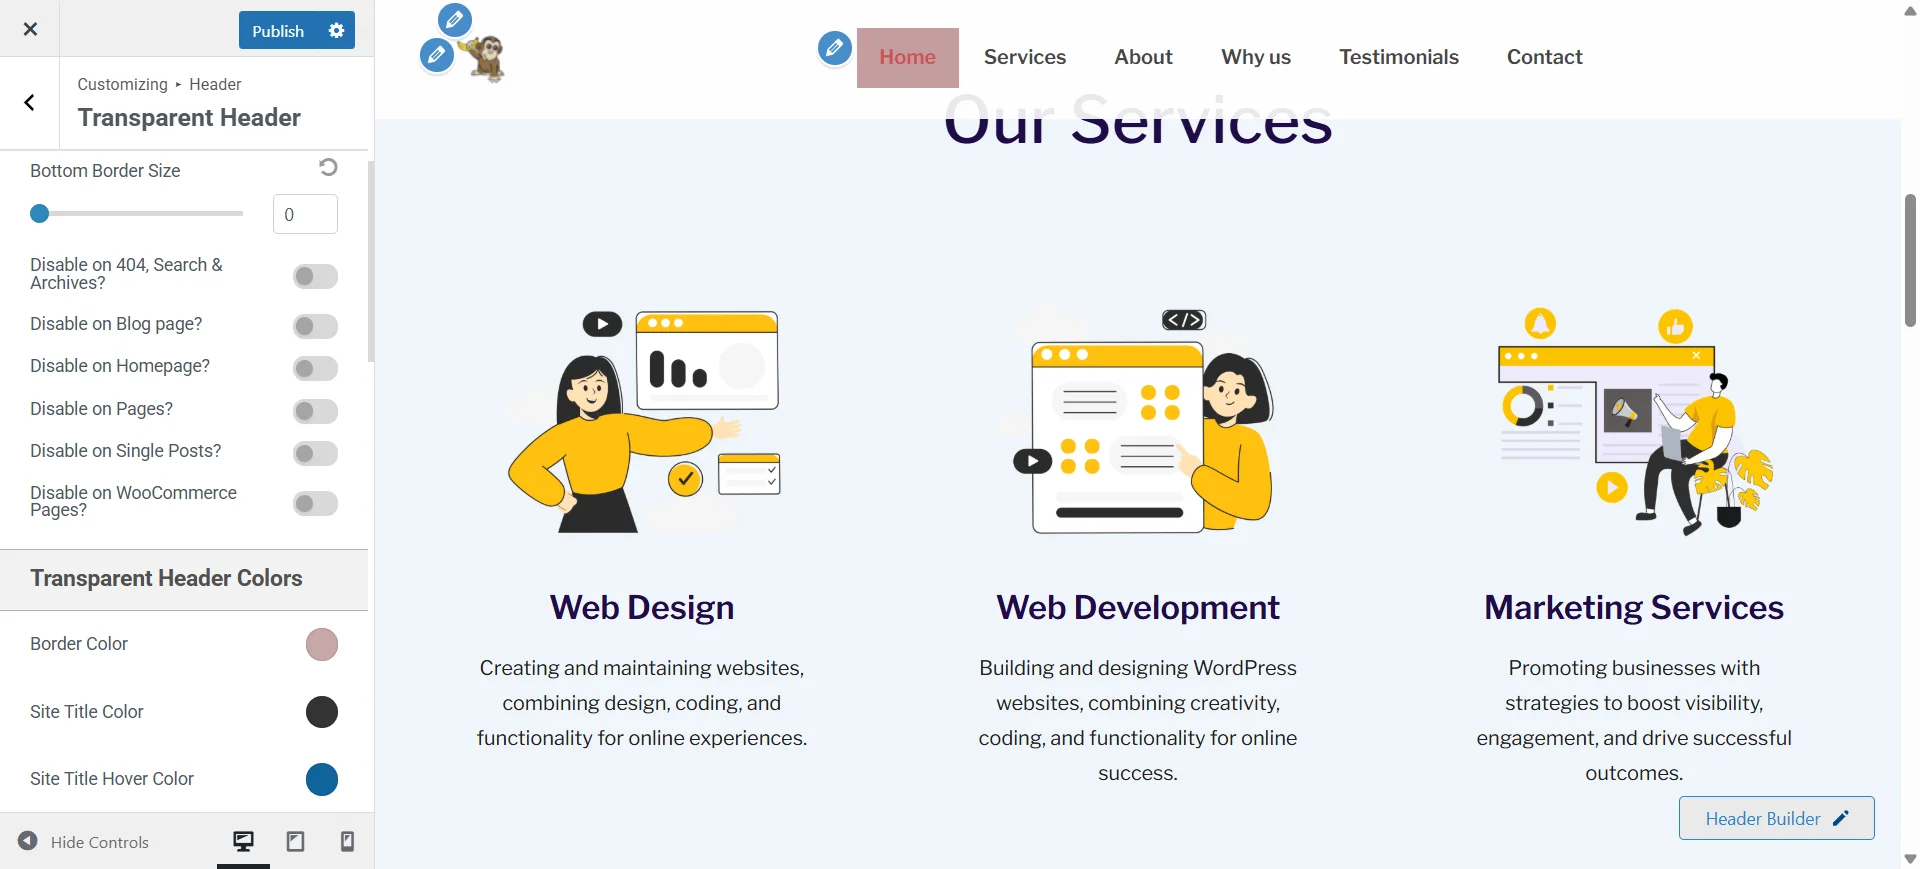
We added some colors to the header menu, and here’s how our transparent header looks:

You can customize the way you want and add colors according to your brand to make a successful transparent header.
Moreover, you can also enable both sticky and transparent headers for your site using the Responsive theme.
FAQ
A sticky header is a website header that stays fixed at the top of the screen while users scroll down the page. It keeps important navigation elements, like menus and logos, visible at all times for easier browsing.
Some of the best example sites using sticky headers include Spotify and CookieYes.
A transparent header is a website header where the background is see-through, allowing the page content or hero image to show behind it. It creates a modern look for the website.
Some of the best example sites using a transparent header include Netflix and Zara.
Yes, it’s possible to add both a sticky and a transparent header to a website using the Cyberchimps Responsive theme. It offers a variety of options in its header builder that include features to add a sticky as well as a transparent header for free.
To add a sticky header for free, follow these simple steps:
1. Install and activate a WordPress theme like the Cyberchimps Responsive theme
2. Head over to the Customize option and click on Header.
3. Select the Sticky Header option.
4. Customize a variety of options, such as colors and layouts, under the Sticky Header settings, and then publish your changes.
5. That’s it. You’ve successfully added a sticky header for your website.
To add a transparent header for free, follow these simple steps:
1. Install and activate a WordPress theme like the Cyberchimps Responsive theme
2. Head over to the Customize option and click on Header.
3. Select the Transparent Header option.
4. Customize a variety of options, such as colors and layouts, under the Sticky Header settings, and then publish your changes.
5. That’s it. You’ve successfully added a sticky header for your website.
Conclusion
Creating sticky and transparent headers can significantly elevate both the design and usability of your WordPress site. With the Responsive Theme’s Header Builder, achieving this takes just a few clicks, that too with no coding, plugins, or developer help required.
The drag-and-drop interface lets you insert and arrange elements like your logo, navigation menu, and call-to-action button with ease. You also get to view them live in real time as and when you make changes.
Plus, there are built-in options for creating a sticky header and a transparent header.
Many premium themes lock these features behind paid upgrades, but Cyberchimps Responsive Theme gives you sticky and transparent header options completely for free. Additionally, you receive a range of customization options at no extra cost.
In just minutes, you can make a website that will stand out with the Responsive Theme.
Liked reading this article? Check out our other similar articles:
- What is a Header Footer Builder in WordPress?
- How To Add Free Dual Color Header To Your Elementor Website
- How to Build a Custom Header/Footer in Elementor For Your Website
Want to create a stunning header for your website? Grab the Responsive theme now!