Summary
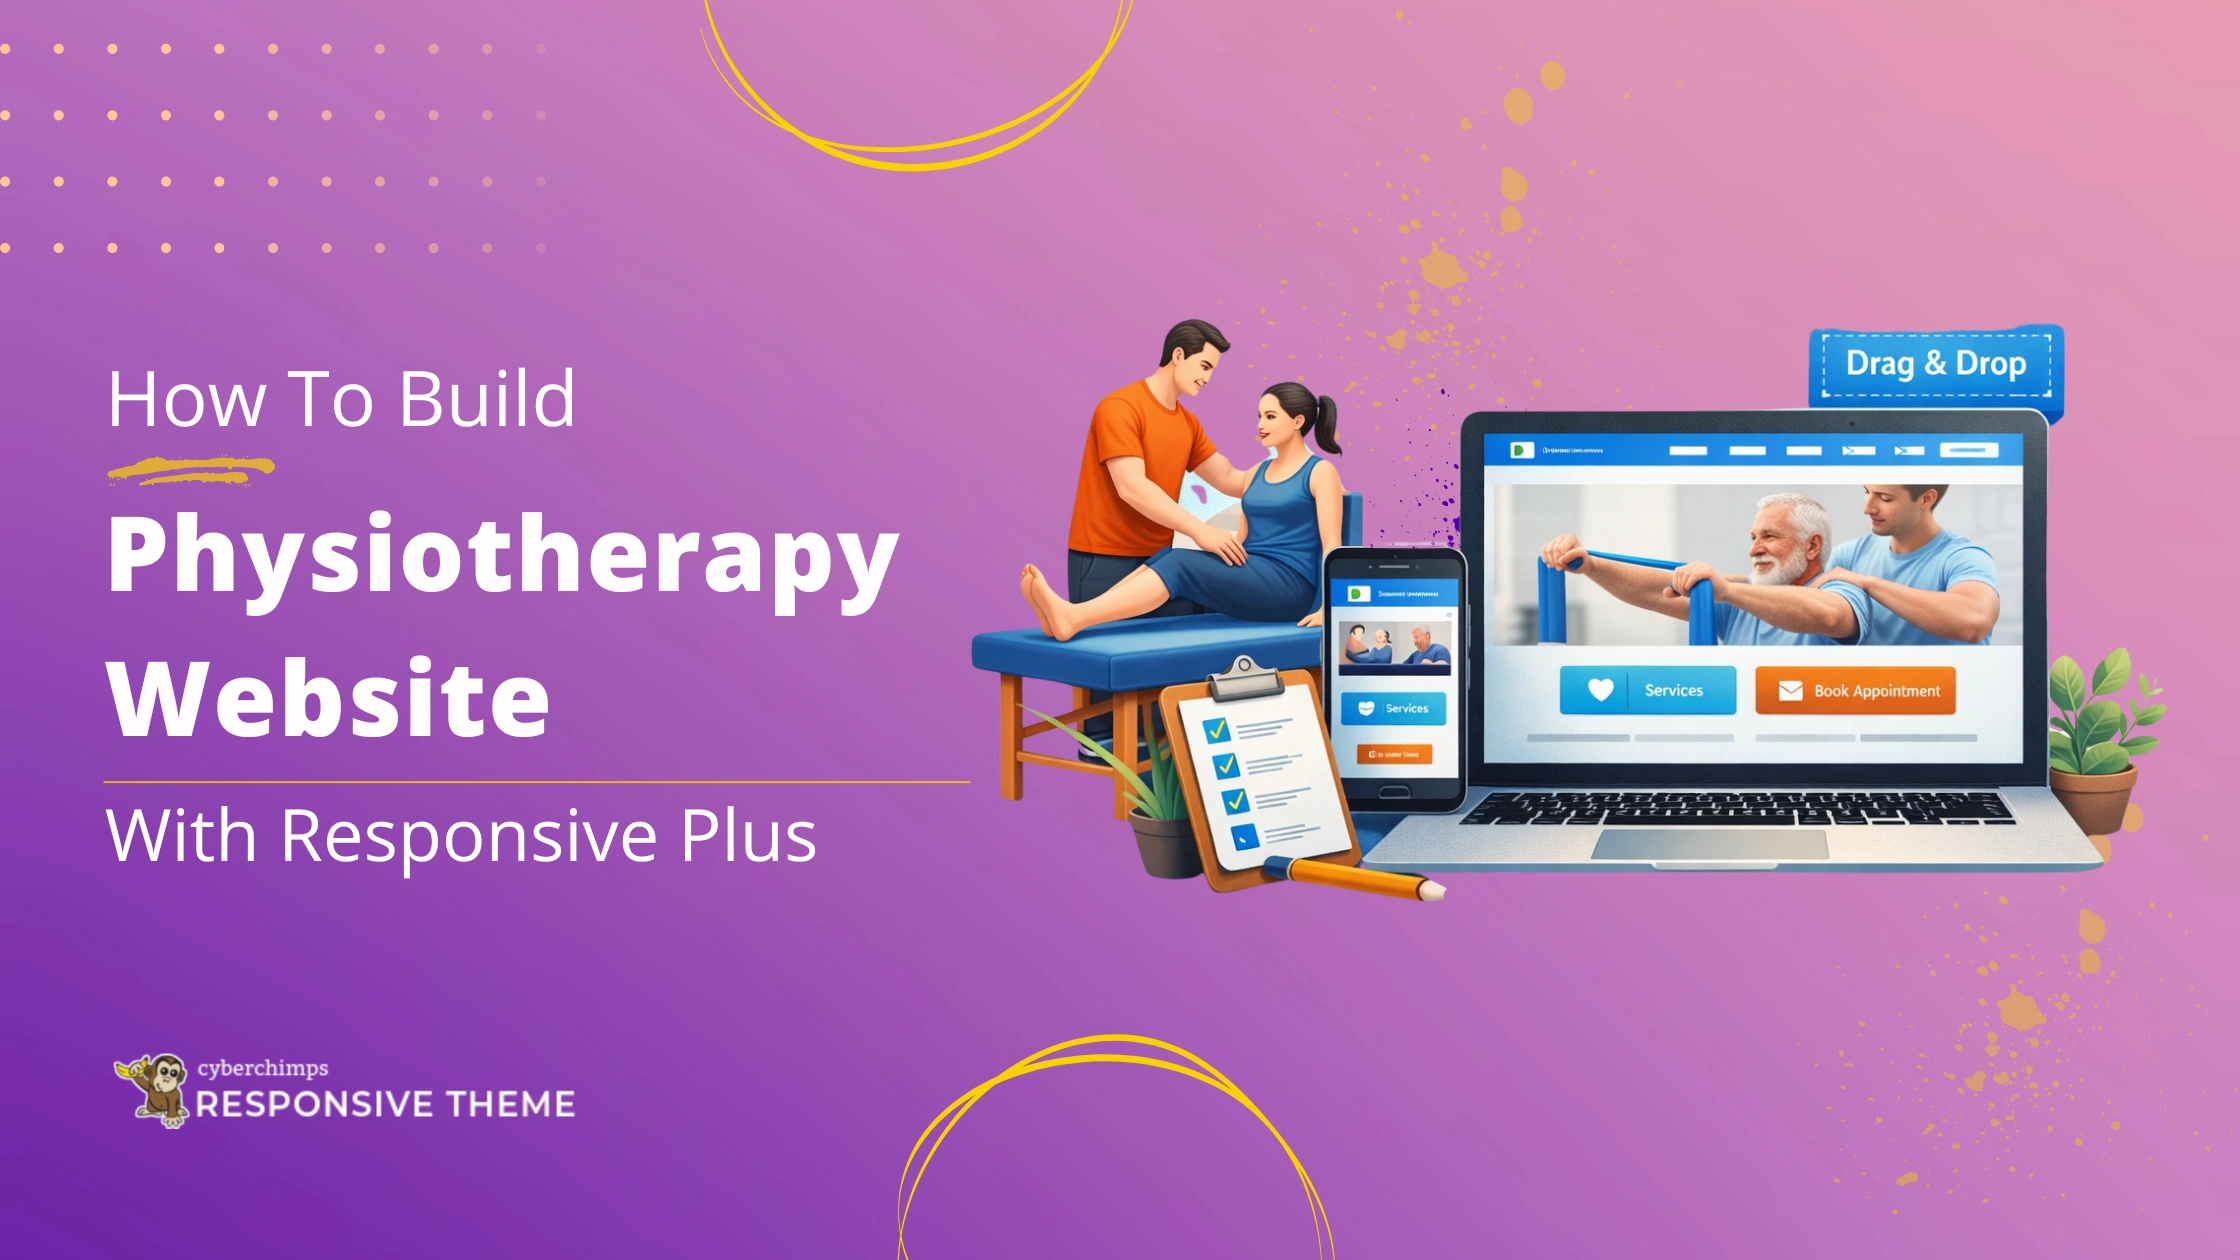
This article will show you how to create a physiotherapy WordPress website in 10 minutes. All you need is WordPress, the Cyberchimps Responsive Theme, and Responsive Plus Starter Templates.
You’ll learn about setting up your domain name, installing WordPress, importing your template, and easily customizing your site through Elementor.
There are also great benefits of having a website and some simple ways to attract more people to your physiotherapy clinic.
Imagine having the best physiotherapy services to offer, but still struggling to attract enough patients.
Often, this isn’t due to your services being of low quality, but rather a lack of an online presence. Many patients today research their health care providers online before making their choice. Without a website, your clinic may not appear in search results to potential patients.
A well-designed website allows you to showcase your services and establish trust with visitors. It also helps your potential patients to contact or schedule an appointment.
The good news is you don’t even need any knowledge of coding to build one. With the Responsive Plus Starter Templates, you can import a professional physiotherapy website template and quickly customise it to meet your needs.
This guide will teach you how to build a physiotherapy website in 10 minutes using Responsive Plus.
- Essential Requirements for Building a WordPress Website
- Benefits of Building a Physiotherapy Website
- How to Build a Physiotherapy Website With WordPress
- Step 1: Choose a Web Hosting Provider and Get A Domain Name
- Step 2: Install WordPress
- Step 3: Selecting a WordPress Theme
- Step 4: Installing Responsive Theme
- Step 5: Installing Responsive Plus Plugin – 250+ WordPress Templates
- Step 6: Import a Physiotherapy Template
- Step 7: Customize the Physiotherapy Template
- Step 8: Launch Your Physiotherapy Website
- Step 9: Tips to Market Your Physiotherapy Website
- FAQ
- Conclusion
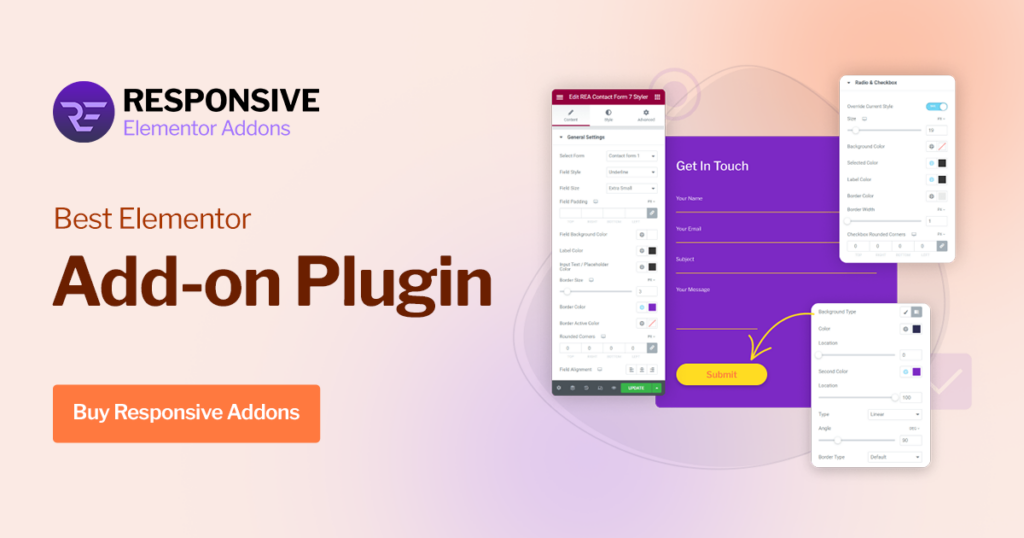
Responsive Starter Templates is the best plugin to import Website Templates – Get it for free.
Essential Requirements for Building a WordPress Website
To create your physiotherapy website, there are several elements you’ll need first. Let’s look at them one by one.
Domain Name and Hosting Service
Firstly, you must sort out the domain name and hosting service for your website.
A domain name is the address that people enter to find your website, for example: myoffice.com. It serves the same purpose that a street address does when you decide to meet someone at a particular location.
The web-hosting portion of your website refers to the service provided by a company that stores your website files and makes them available on the internet.
When selecting a web-hosting vendor, consider the following items:
- Fast load time: This offers visitors a better experience because your website loads quickly.
- High Uptime: Patients can reach your website without concern about excessive downtime.
- One-Click WordPress Install: Your hosting provider should offer a one-click WordPress installation, even if you do not have technical skills.
- Strong Security Features: Your hosting provider must provide protection for your website and your patients against cybercriminal threats.
WordPress Theme

A WordPress theme selects the appearance and feel of the site. It also manages the structure and determines how visitors will interact with your site.
We will be using the Cyberchimps Responsive Theme for this tutorial because it allows you to create an eye-catching website that performs well without needing extensive configuration.
Here’s why this is a great theme for this purpose:
- It is lightweight and fast. Your site will load quickly and run smoothly.
- It has been designed with proper coding techniques that increase visibility in the search engines.
- It is easy to customize with layouts, colour options, and content without needing to be technical.
- It is compatible with all major page builders, including:
- Elementor
- WordPress Block Editor
You can use it to visually edit and create a physiotherapy website with simple drag-and-drop processes without having to write code.
WordPress Plugins
Plugins make it easier to build and manage your site, as well as expand its functionality without needing to have any technical background.
To build your physiotherapy website quickly and efficiently, you should install the following plugins:
- Responsive Plus Starter Templates: Importing pre-designed website templates allows you to create your site much faster than if you were designing it from scratch.
- Elementor: A page builder that allows you to visually edit pages, text, images, and layout sections using a simple drag-and-drop interface.
- SEO plugin (optional): This helps your site be more visible on search engines so potential patients can discover your physiotherapy services online.
By using the above plugins together, you can build a physiotherapy website in just a couple of minutes.
Benefits of Building a Physiotherapy Website
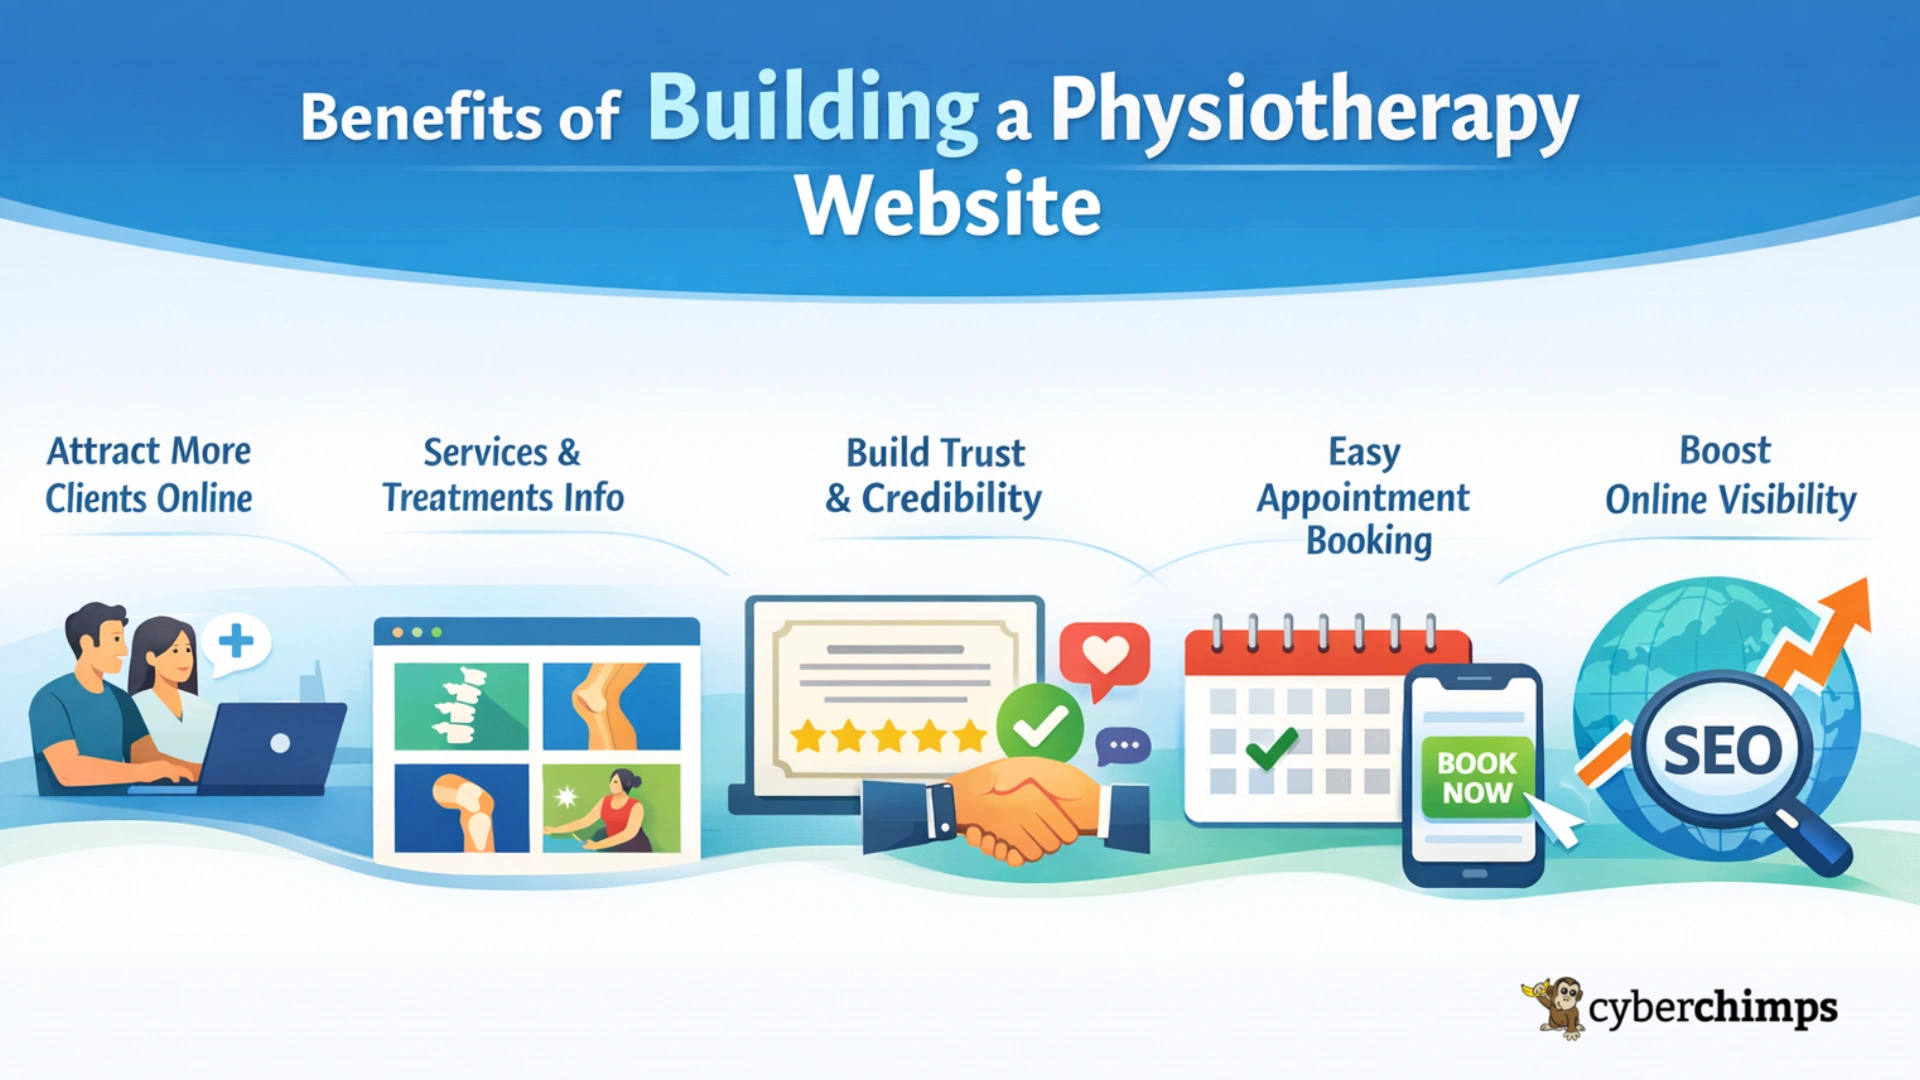
Below are some of the major benefits of creating a physiotherapy website:
- Attract more clients online: Most people will look online first when deciding which physiotherapist to see.
- Provide information on services & treatments: Your website will provide you the opportunity to clearly describe your unique services and treatments.
- Develop trust & credibility: When you design a website, you can display your professional certifications, testimonials, and success stories from former patients.
- Allow easy & efficient appointment booking: You can create a contact form or online booking page to simplify the process for patients to set up appointments with you.
- Increase your clinic’s online visibility: Your website can be designed to rank higher in search engine results. This will allow you to attract local patients who are currently searching for physiotherapy services.
How to Build a Physiotherapy Website With WordPress
Follow these steps to build a physiotherapy website in 10 minutes with Responsive Plus:
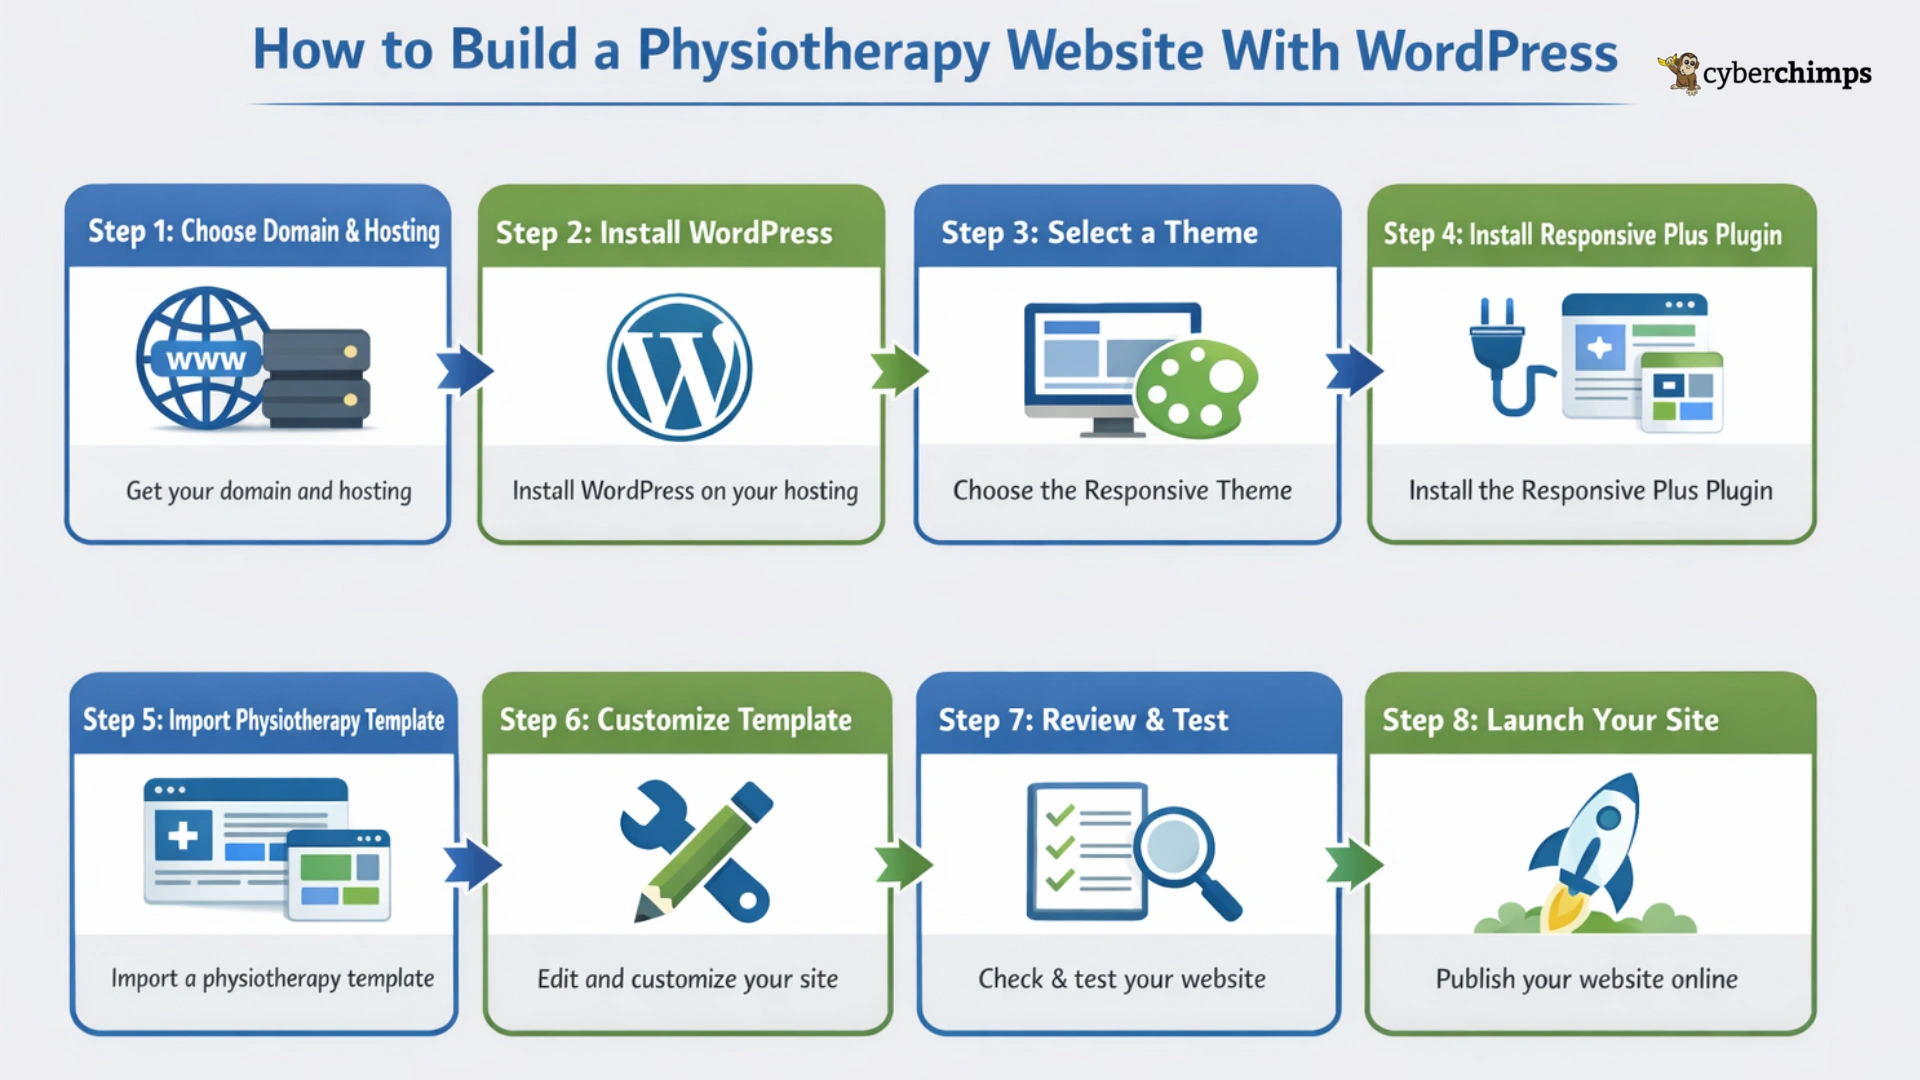
Step 1: Choose a Web Hosting Provider and Get A Domain Name
Creating a physiotherapy website starts with obtaining a domain name and finding a hosting service.
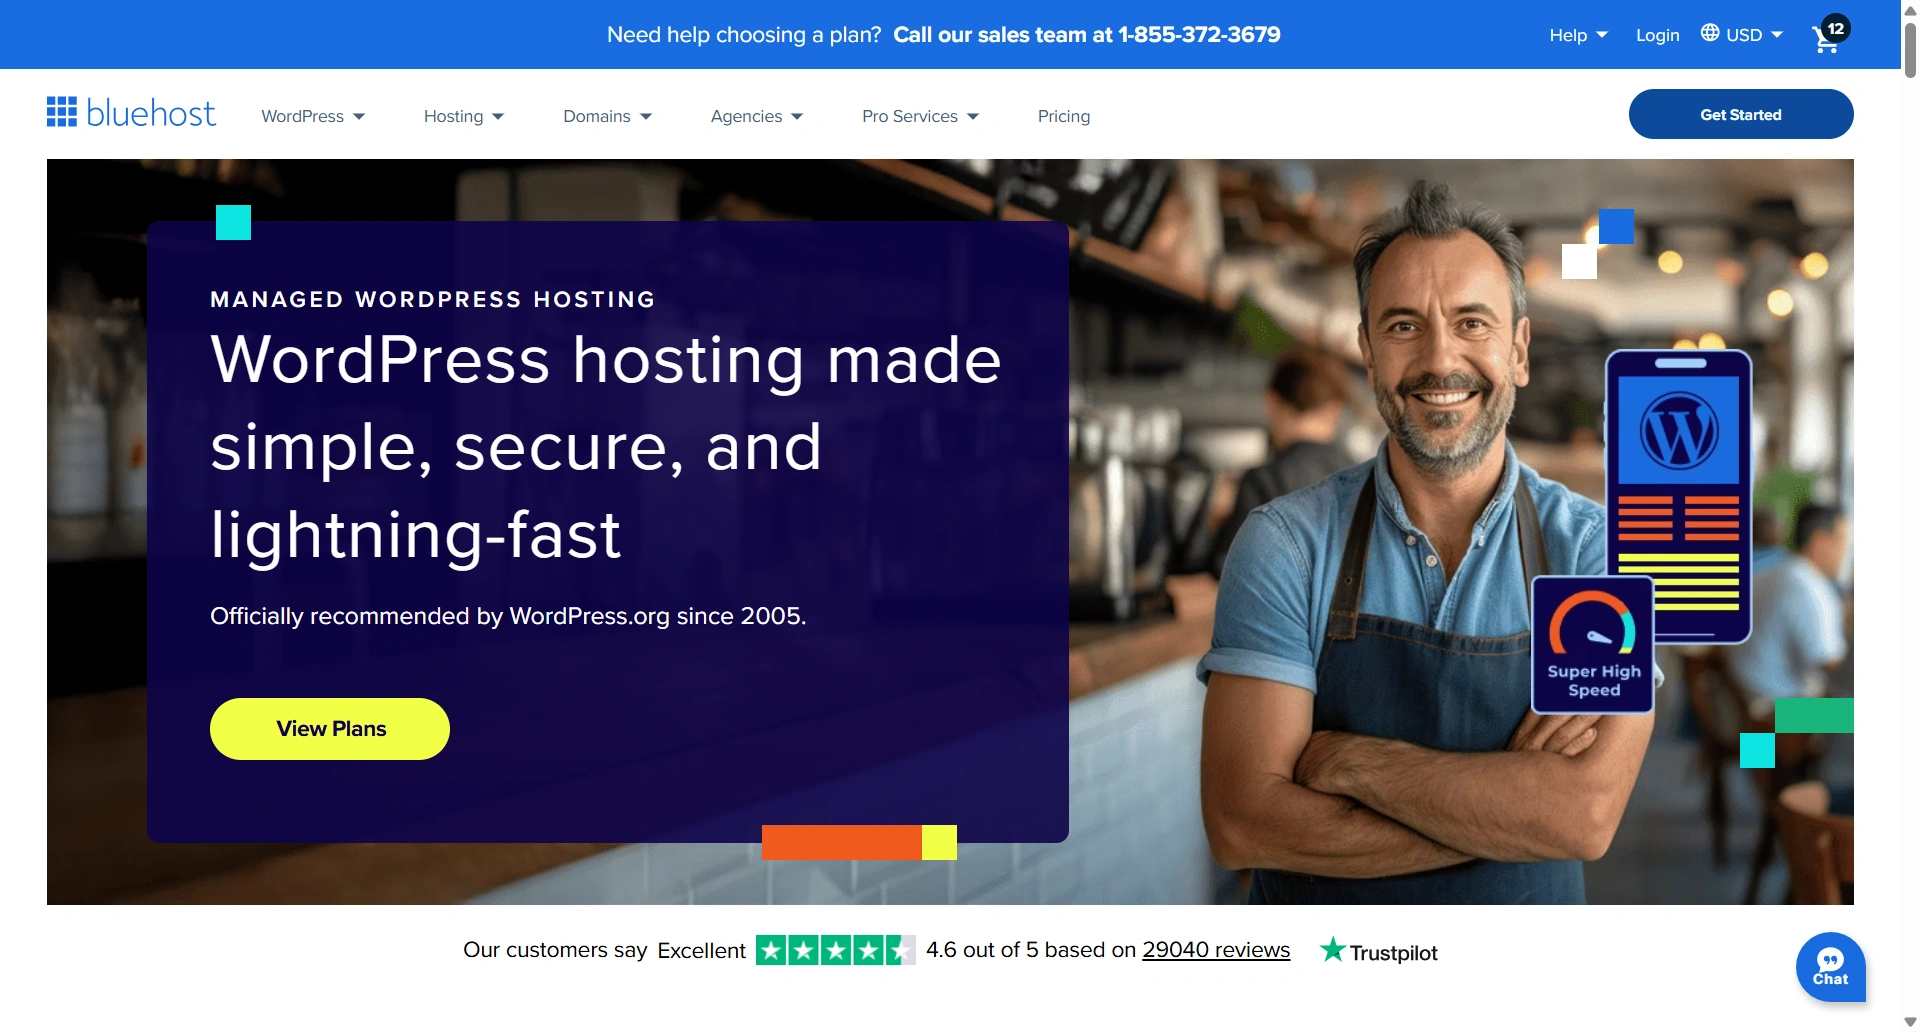
The domain serves as your identity, and the host makes your identity available to the world. You could use any trusted hosting company. Today, we will be using Bluehost to build a physiotherapy website.
To get started with Bluehost, follow these steps:
Visit the Bluehost homepage and click Get Started to start your purchase.
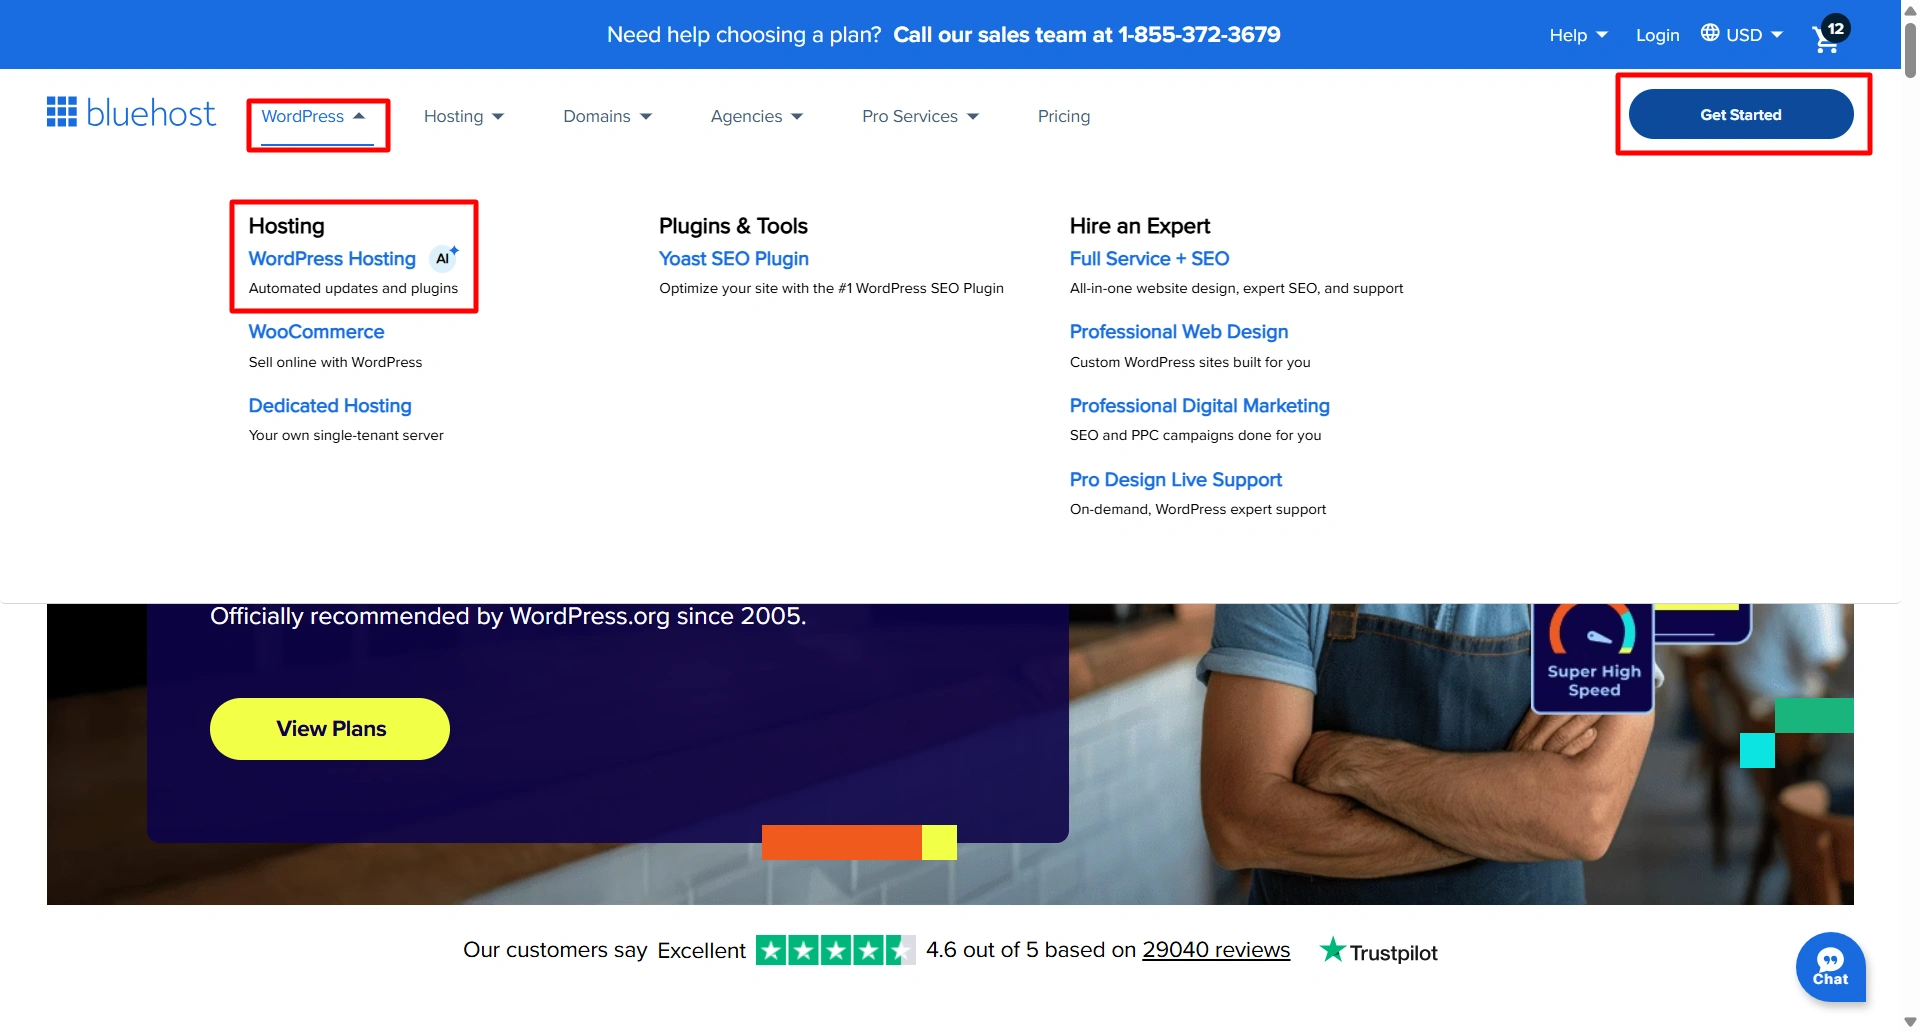
You will now be taken to their signup page to choose a pricing plan. Select the plan that works best for you.

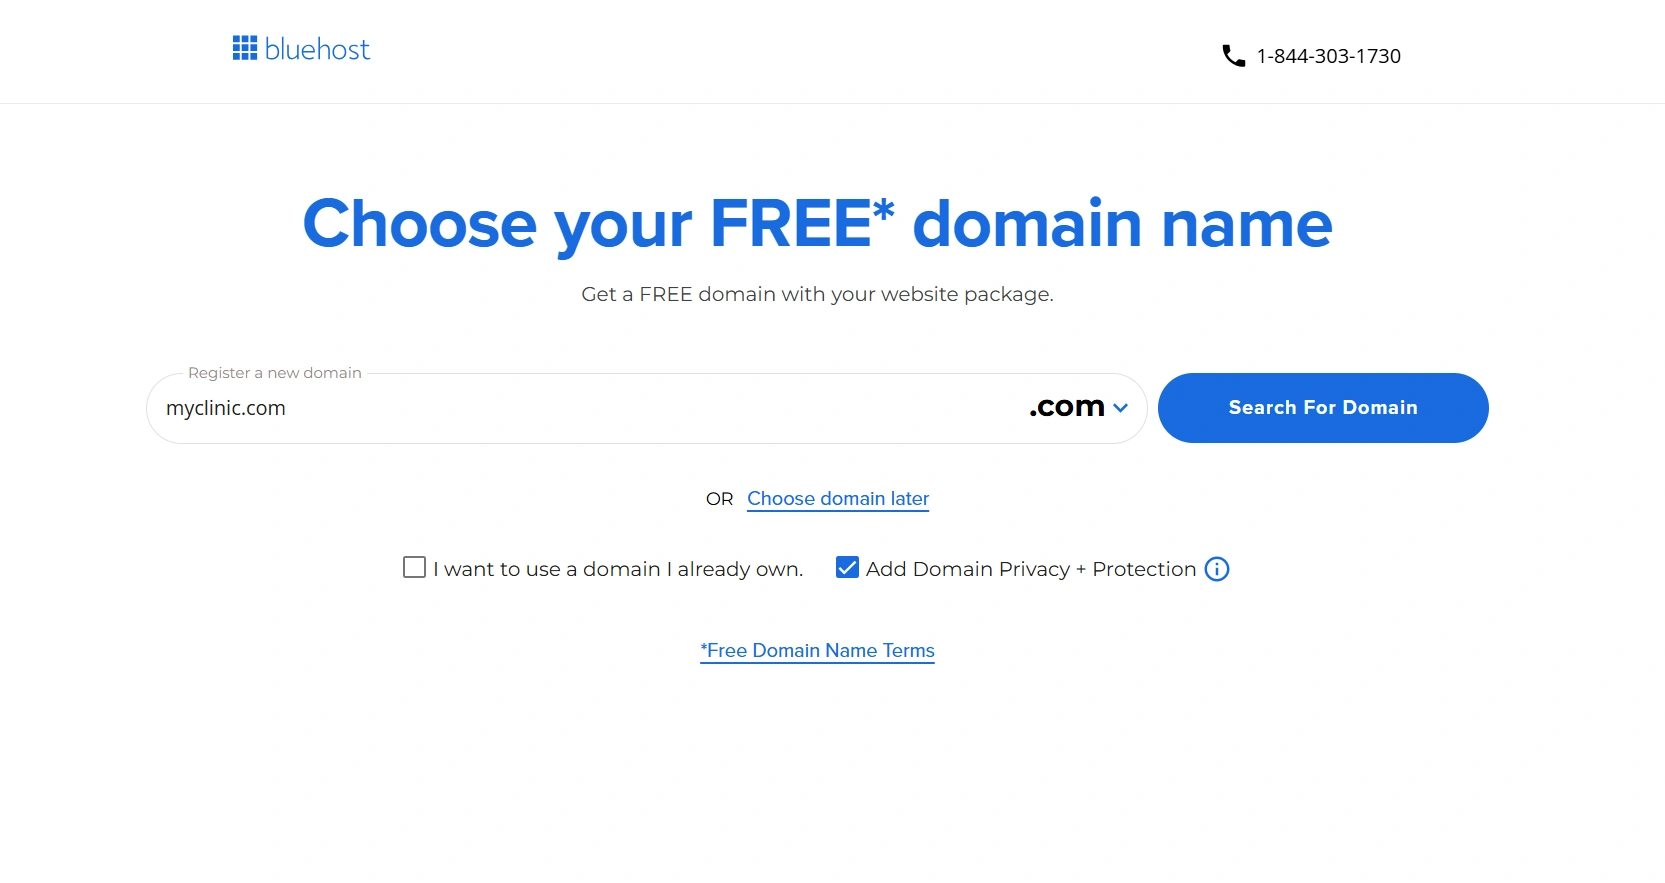
Enter your domain name into the designated field.
Complete the required personal and billing information to create your account.
Review and finish making your payment.
Once you have completed all five steps, your domain and hosting account will be ready.
Step 2: Install WordPress
If you are using Bluehost as your host, the following instructions can help you set up your WordPress installation:
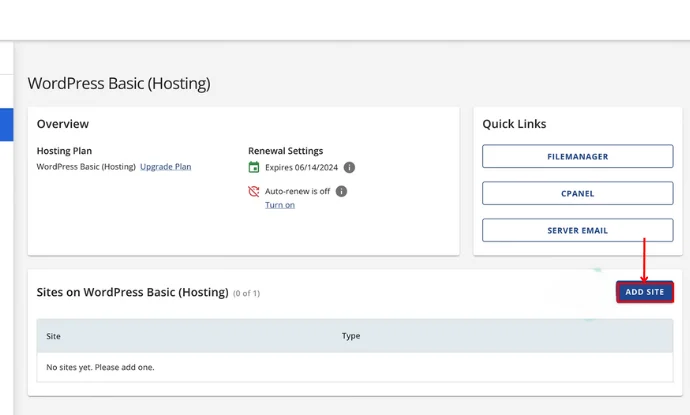
Log in to your hosting dashboard
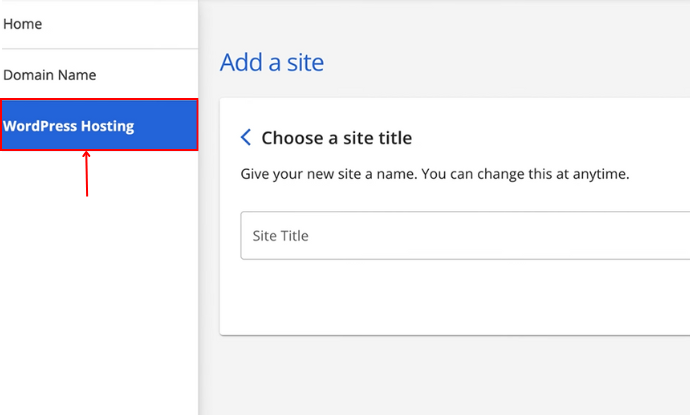
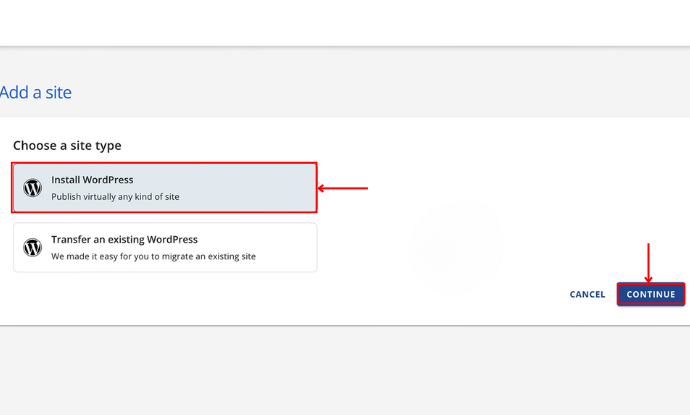
Go to the section of your web host that allows you to create a new website and click the Add Site button.
Select the Install WordPress option and click Continue.
Provide the details regarding the website you’re creating.
Choose the domain name that you registered earlier.
Select the Install option for WordPress, and WordPress will begin installing automatically.
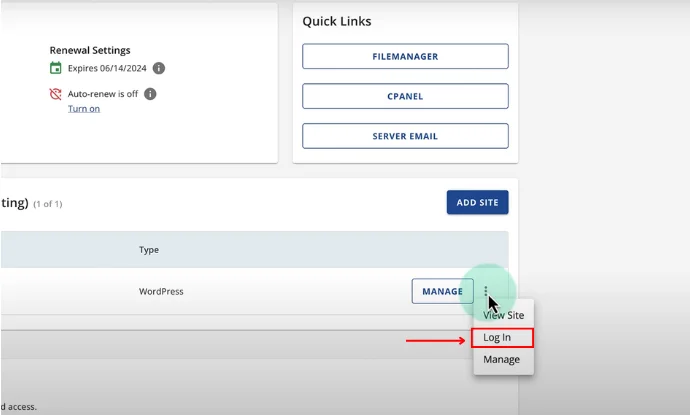
Once WordPress is installed successfully, you will receive the details of your new WordPress account.
Step 3: Selecting a WordPress Theme
Once you have installed WordPress, you will need to select a WordPress theme. A theme determines the look, feel, layout, and user experience of your website. Hence, it is essential to choose the right one for creating your physiotherapy website.
We recommend you use Cyberchimps Responsive Theme because it’s an excellent choice for healthcare and clinic websites with its many powerful and flexible features.

This is why the Responsive Theme is an excellent choice:
- Fast performance: Lightweight and responsive design to allow your website to load quickly and perform well on users’ devices
- SEO-friendly: Built on clean code, which helps to improve search engines’ visibility
- Mobile-friendly responsive design: Your website will look great on all devices, including smartphones and tablets.
- Easy to customize: Easily change the layout, colours, and content of your site, all without needing to know any code
- Compatible with popular page builders: Works seamlessly with popular page builders like Elementor and Gutenberg to edit your website via drag-and-drop
- Pre-built templates: Users have access to over 250 ready-made templates using the Responsive Plus plugin, so you can build your website faster
With all of these features, a Responsive Theme provides flexibility and ease when creating a professional, fully functional physiotherapy website.
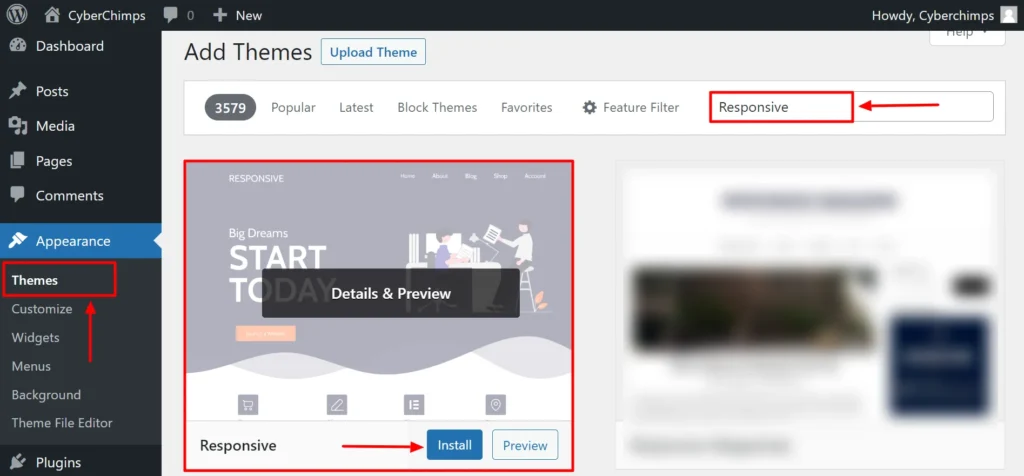
Step 4: Installing Responsive Theme
To install the Cyberchimps Responsive Theme, go through the following steps:
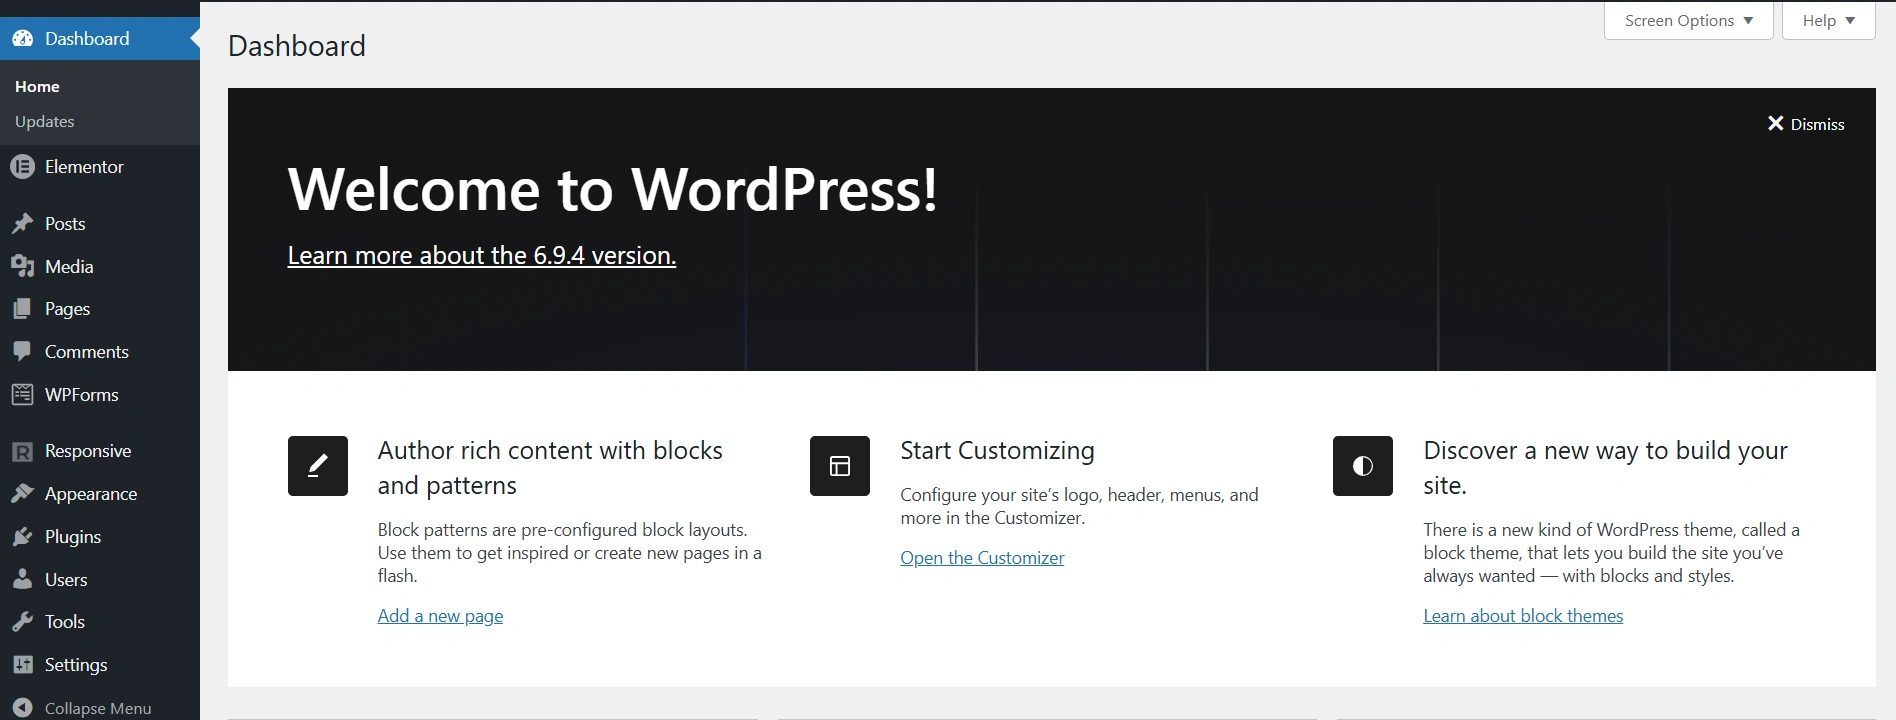
First, log in to your WordPress Dashboard
Next, go to Appearance > Themes > Add New.
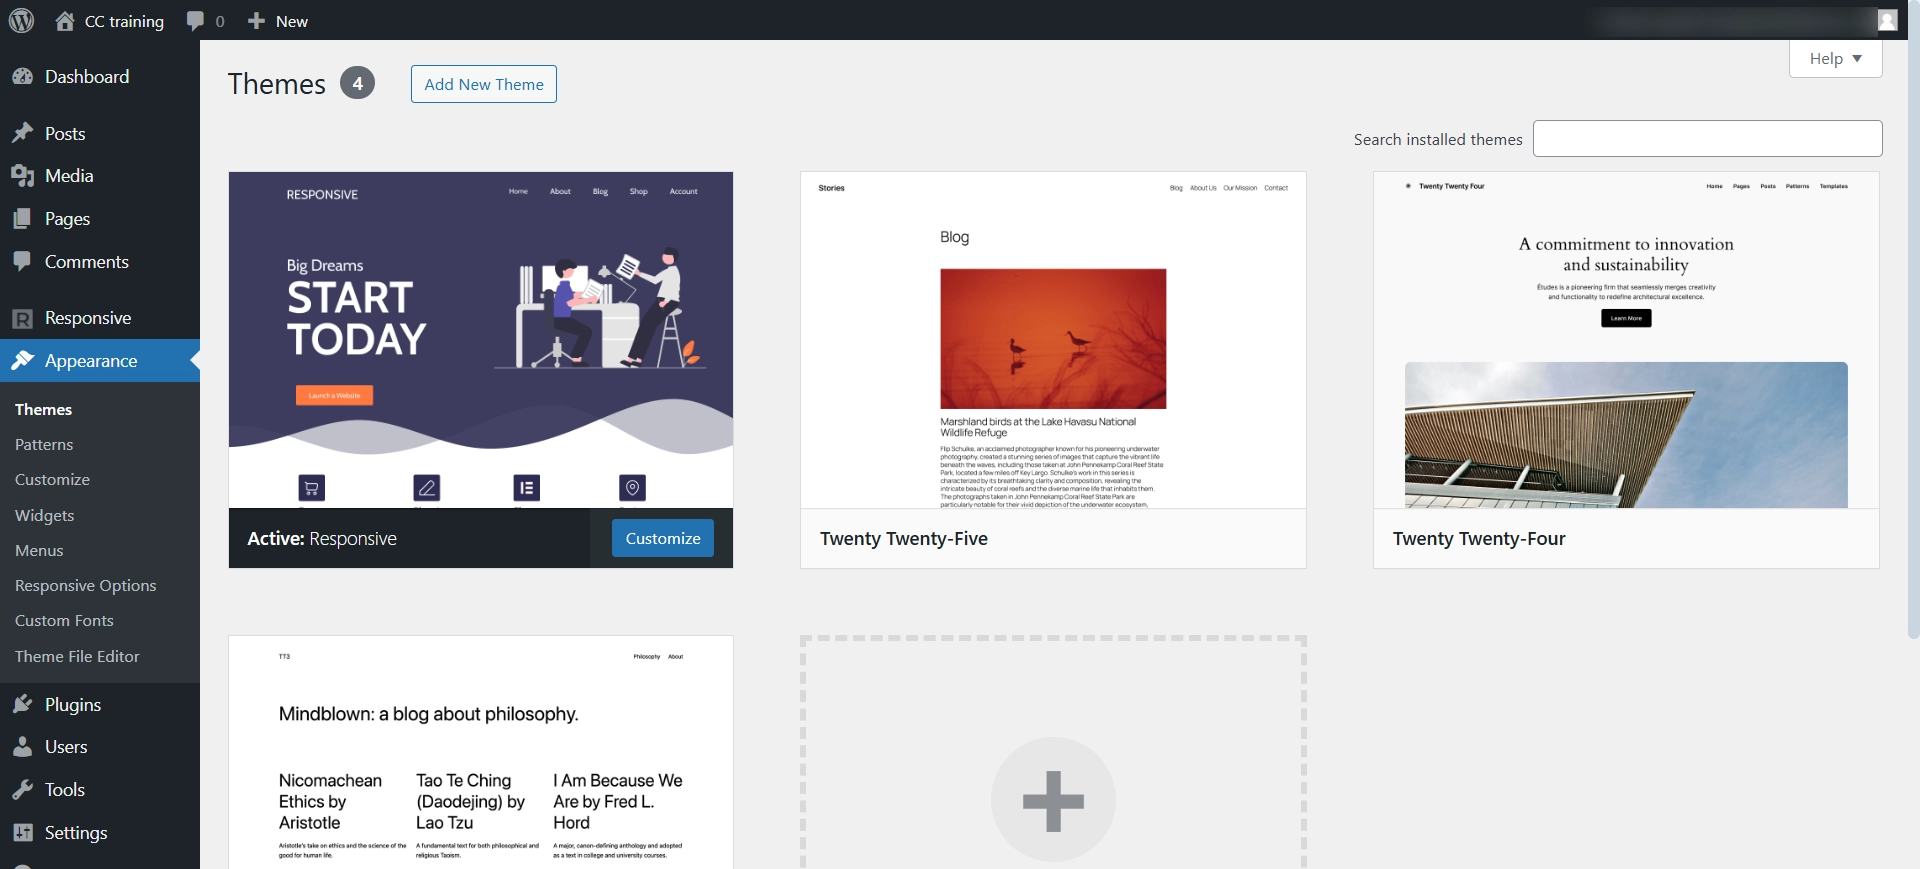
Using the search feature, search for Responsive Theme.
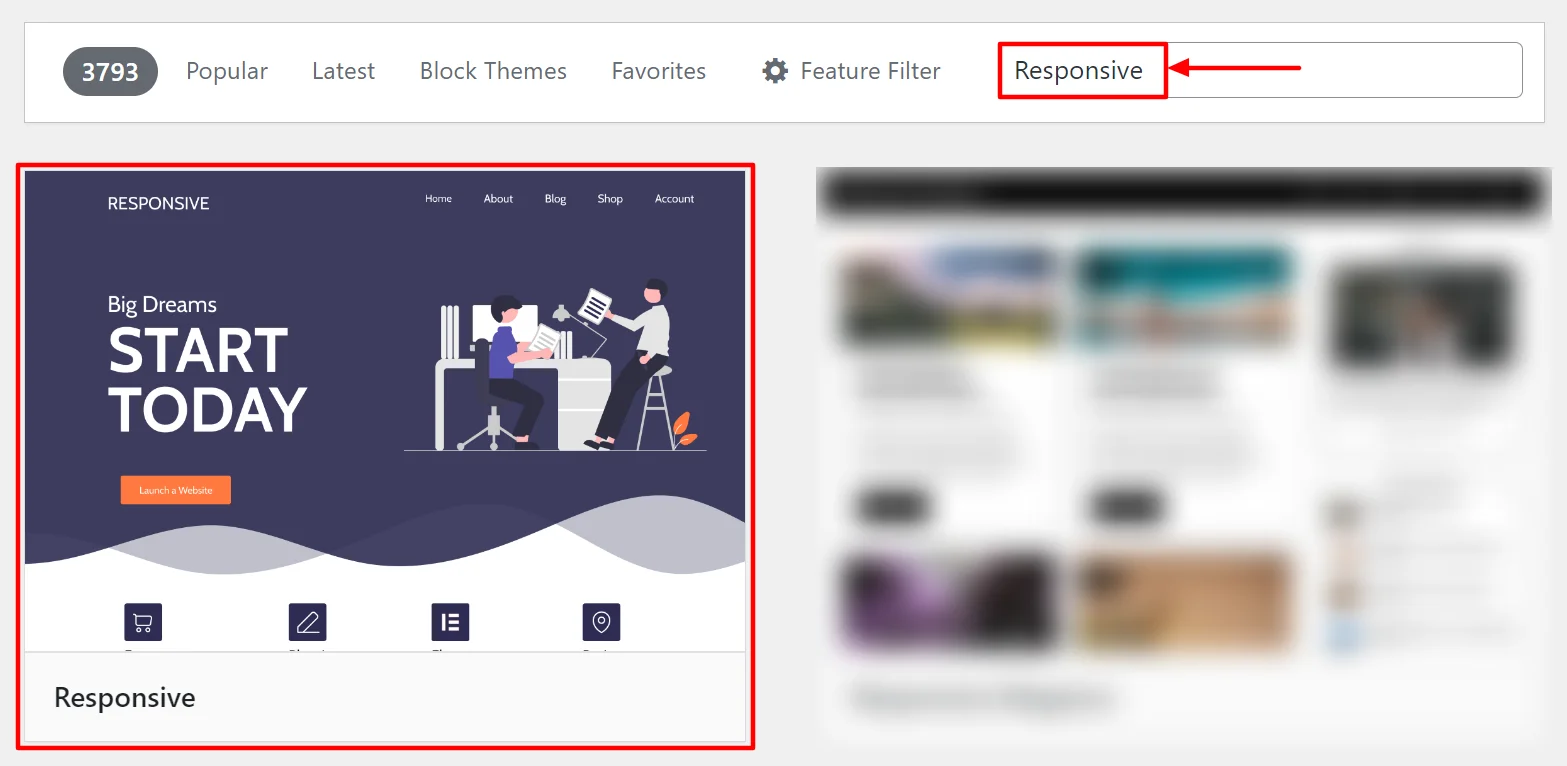
After that, click the Install button to start installing the theme.
When the installation of the theme is complete, click on Activate to activate the theme on your website.
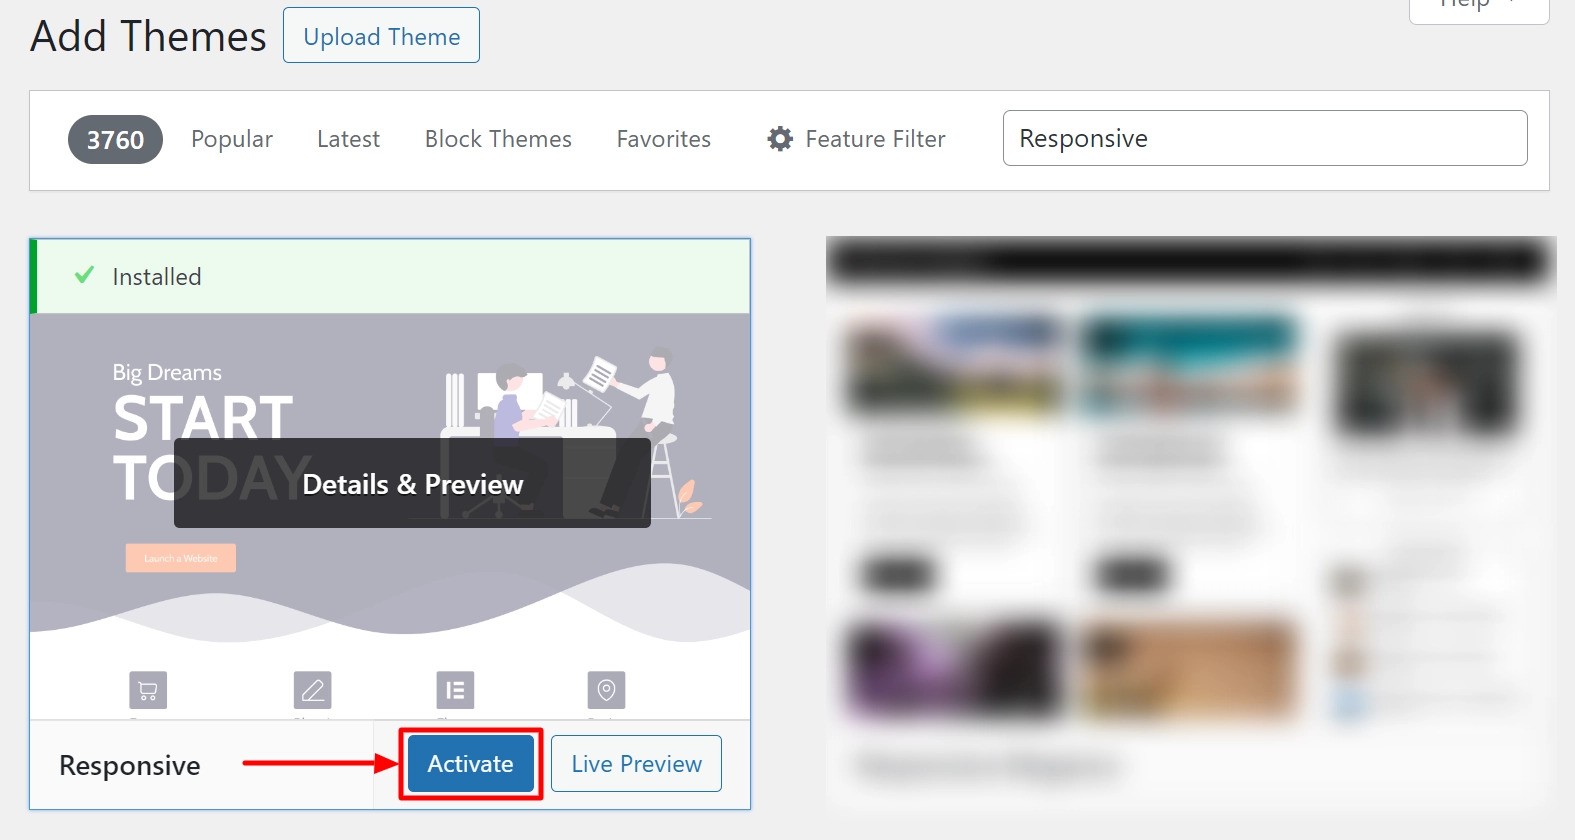
The Responsive theme will now be live on your website.
Step 5: Installing Responsive Plus Plugin – 250+ WordPress Templates
To install the plugin:
Go to Plugins > Add New
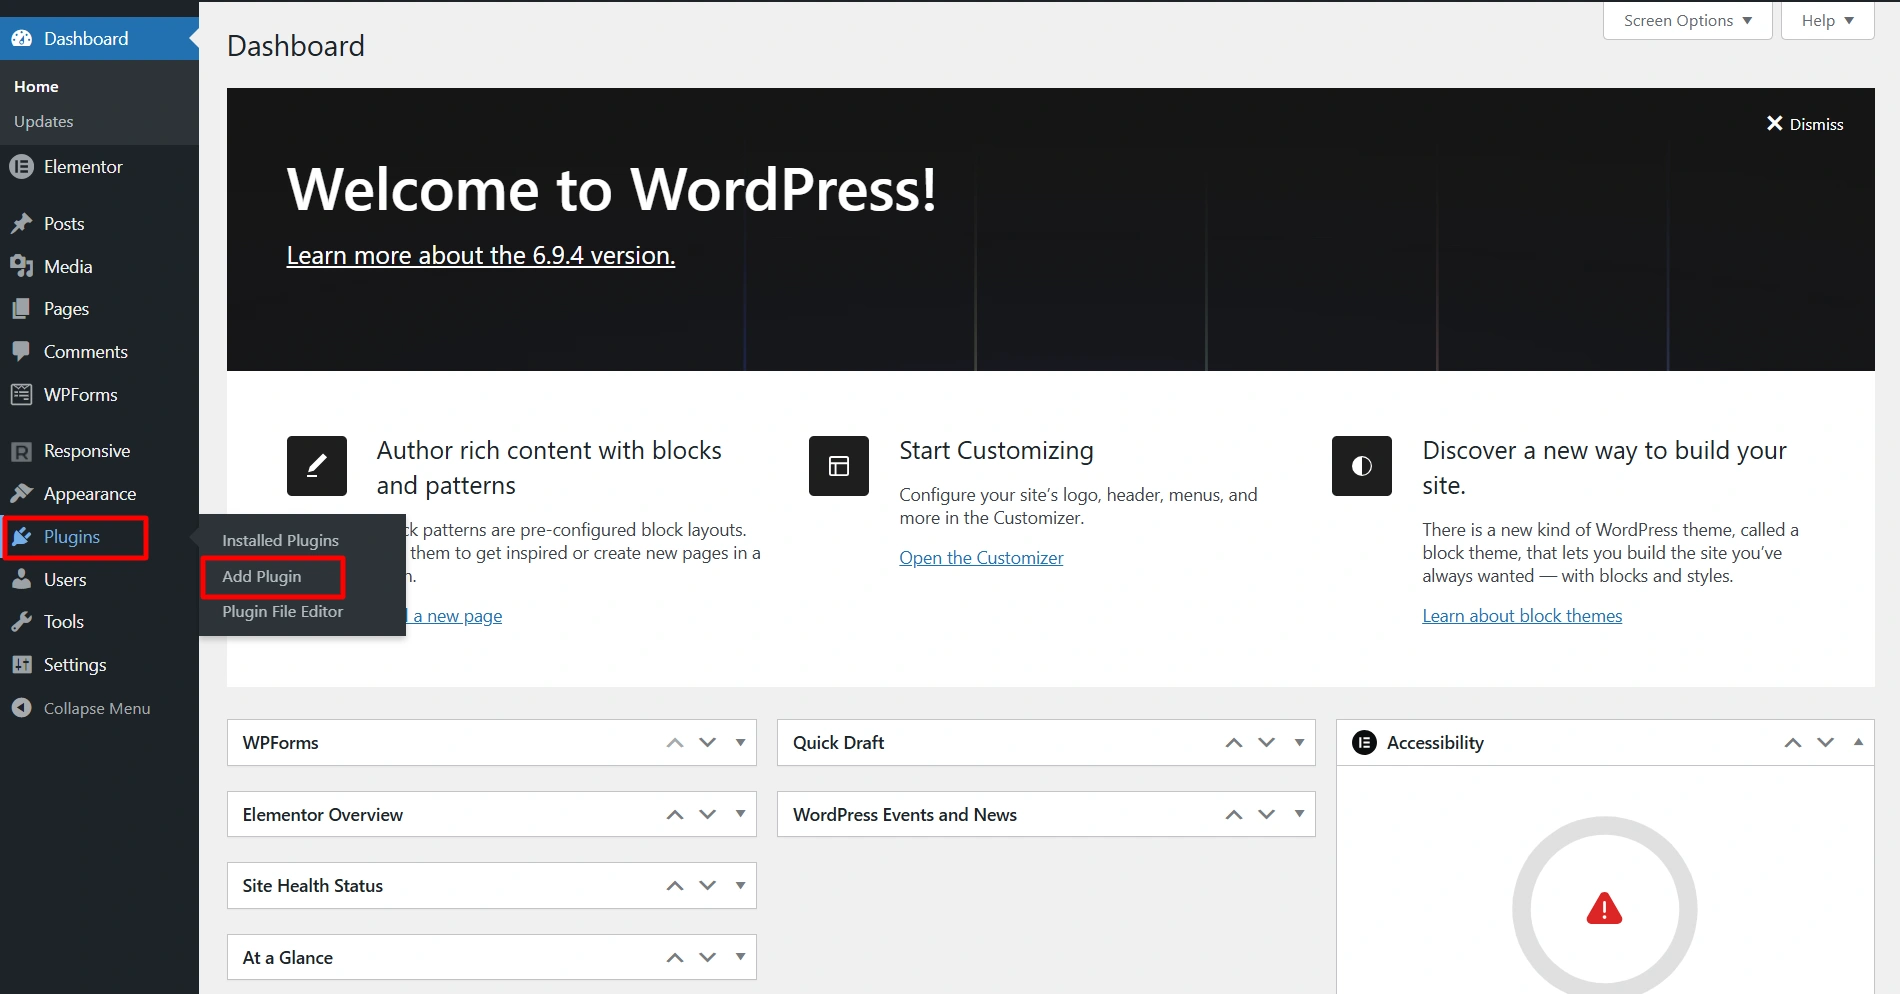
In the search bar, type in Responsive Plus Starter Templates.
Click Install and then Activate.
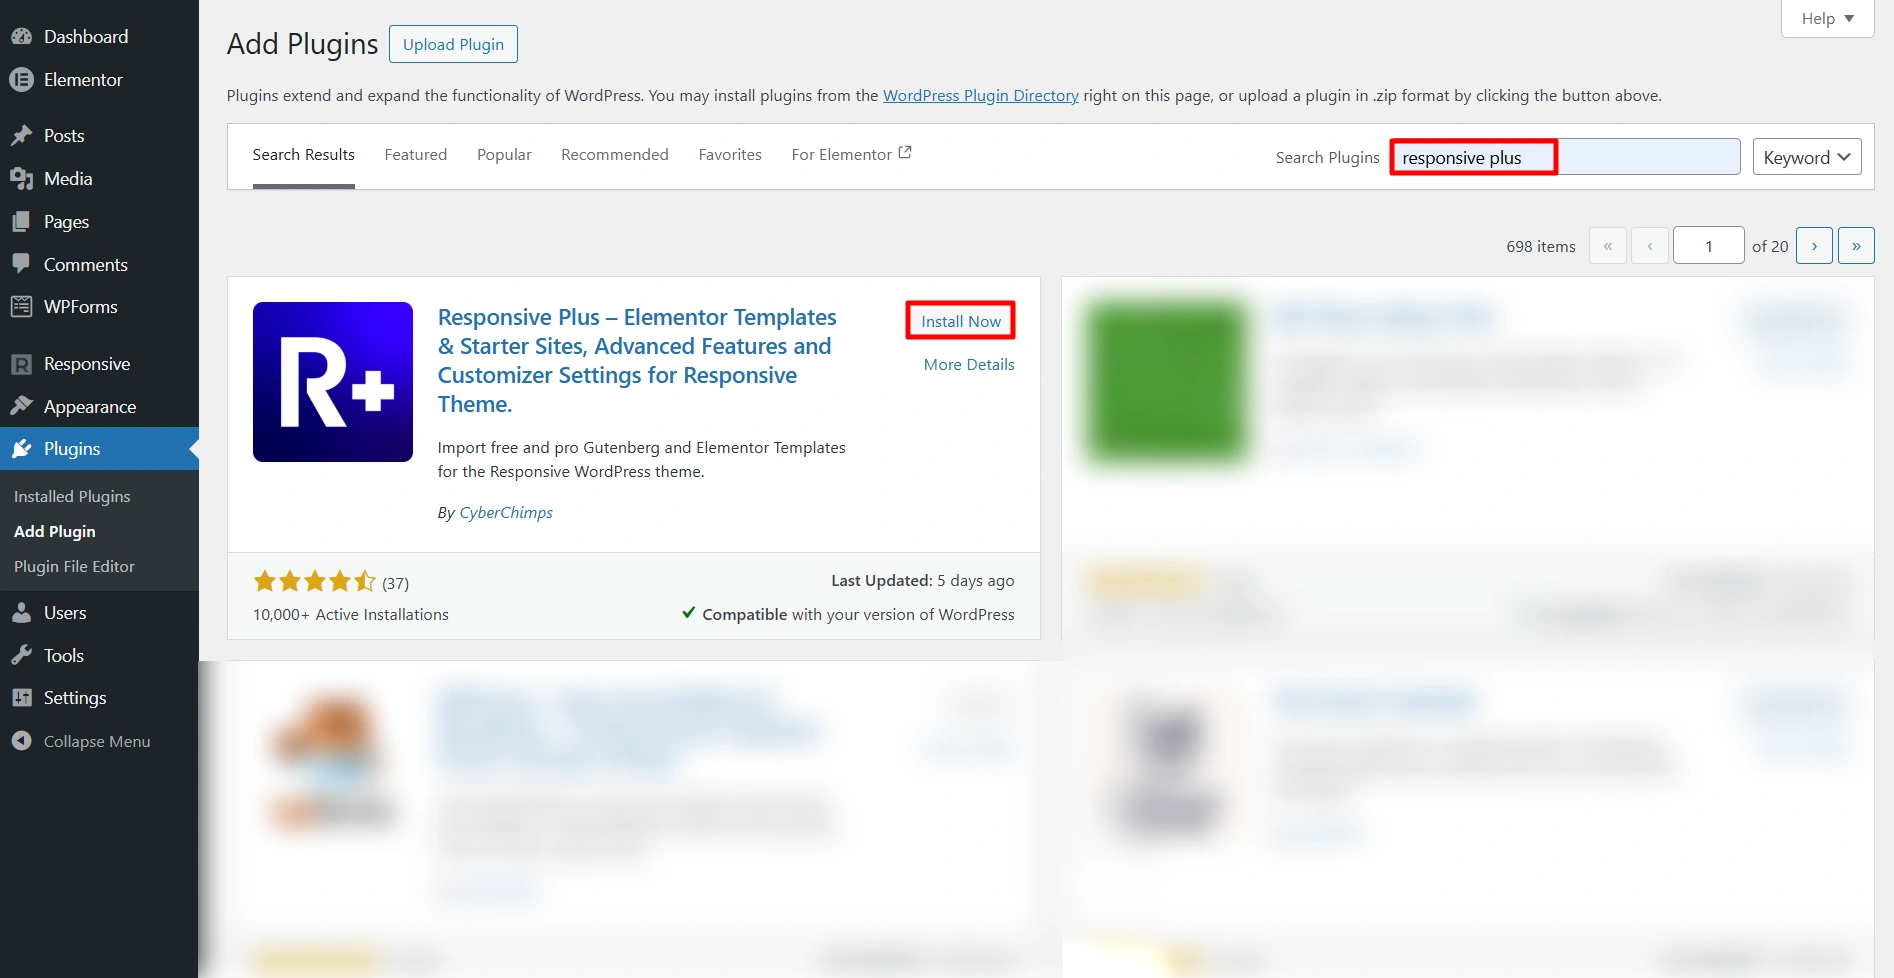
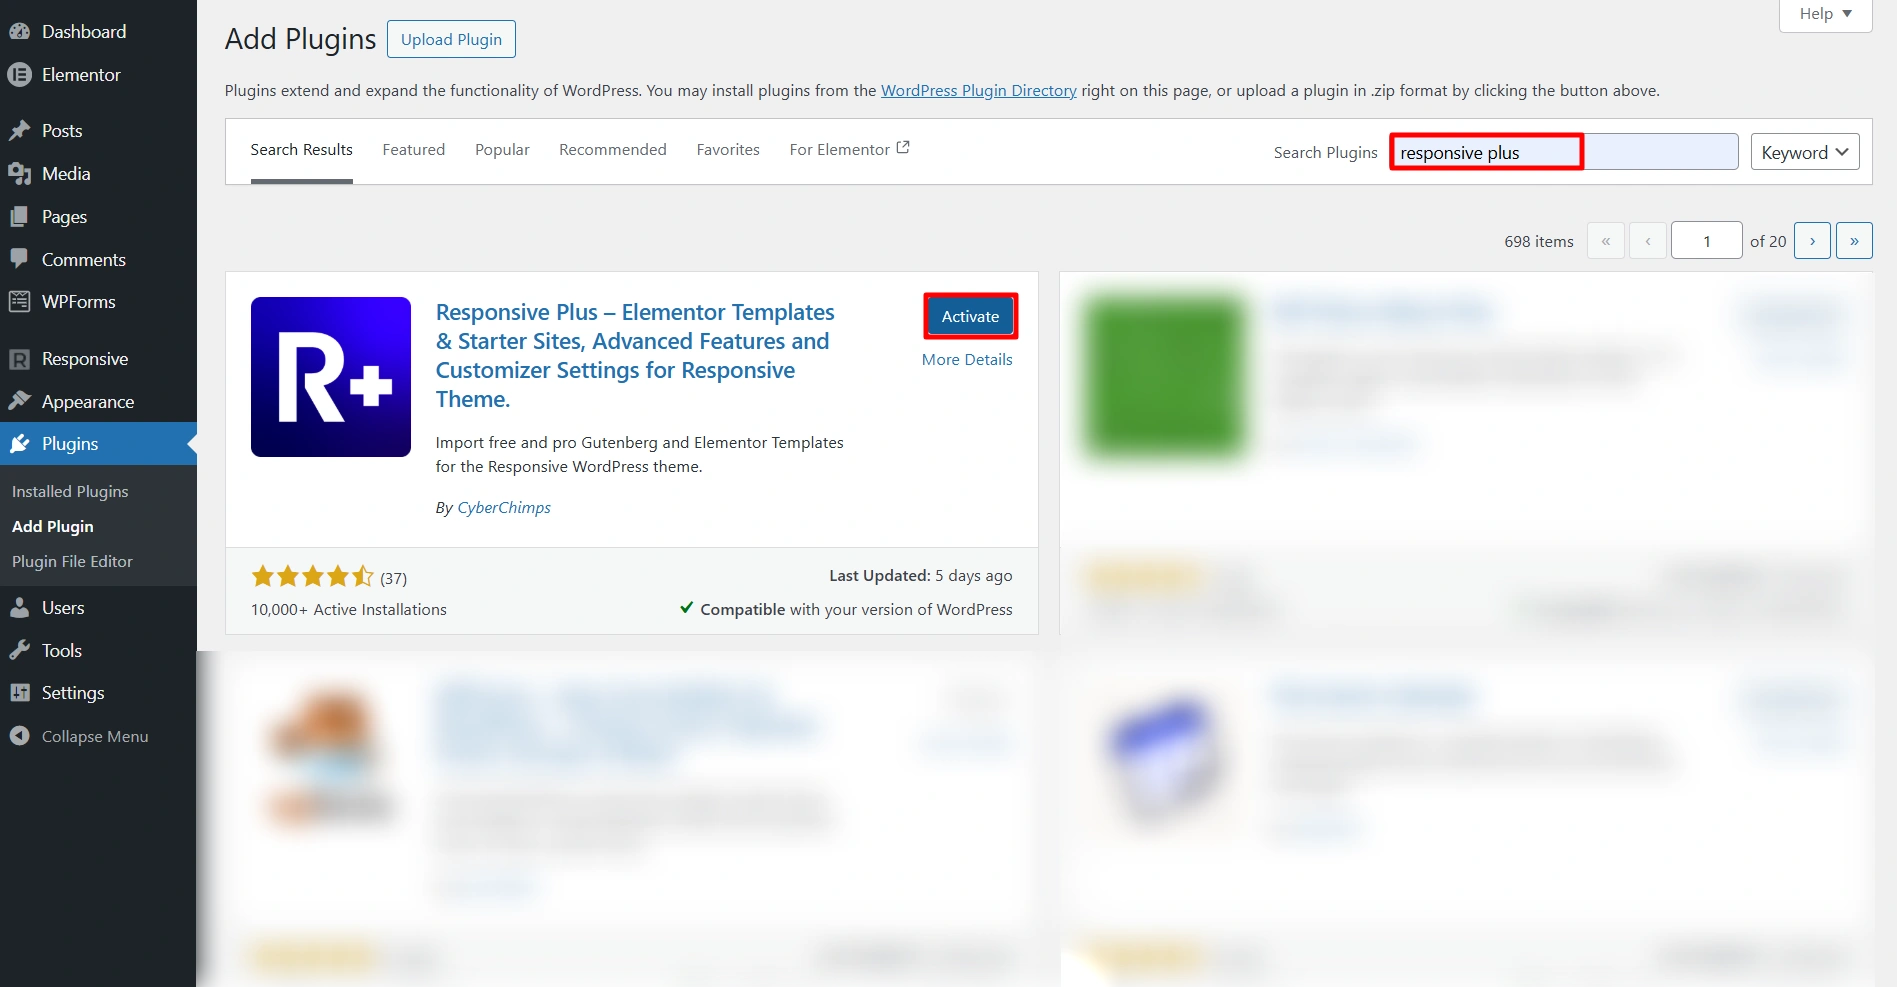
Once you have activated the plugin, you will have access to over 250 pre-formed templates ready to use.
Step 6: Import a Physiotherapy Template
Follow these steps to import your template:
Go to your WordPress dashboard and click Responsive > Templates
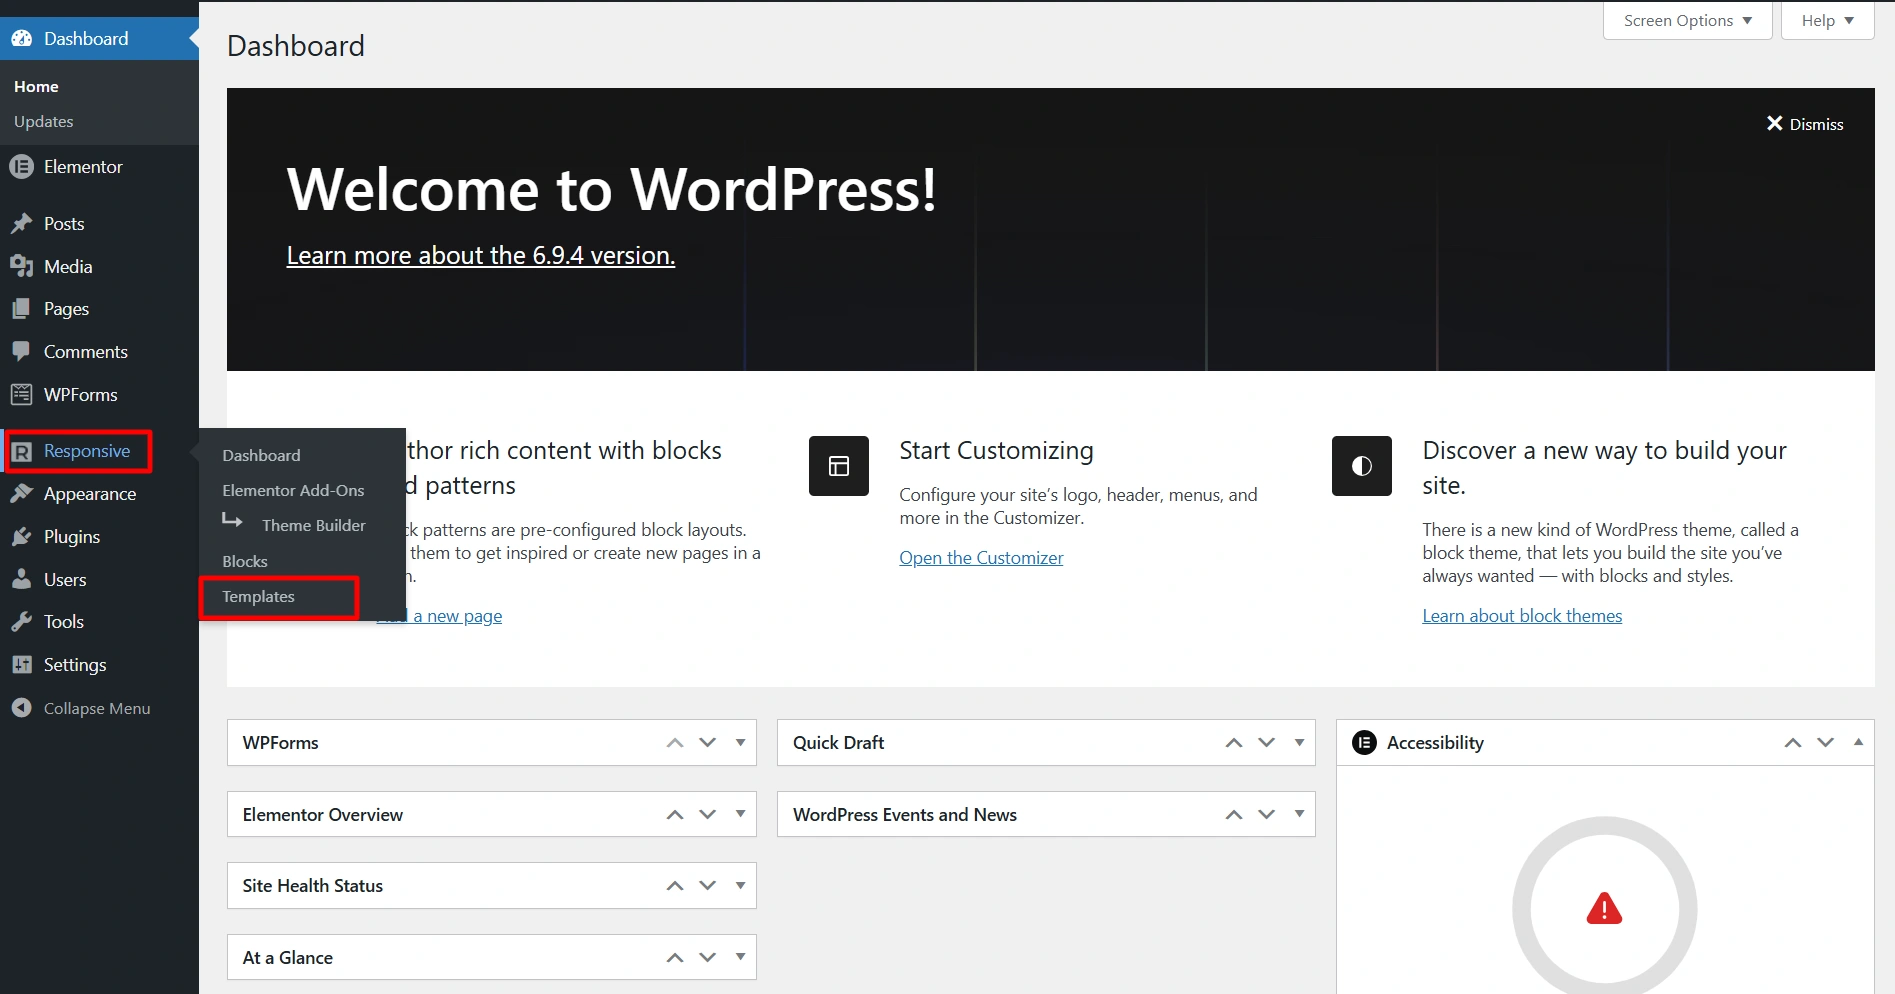
This will open the templates section.
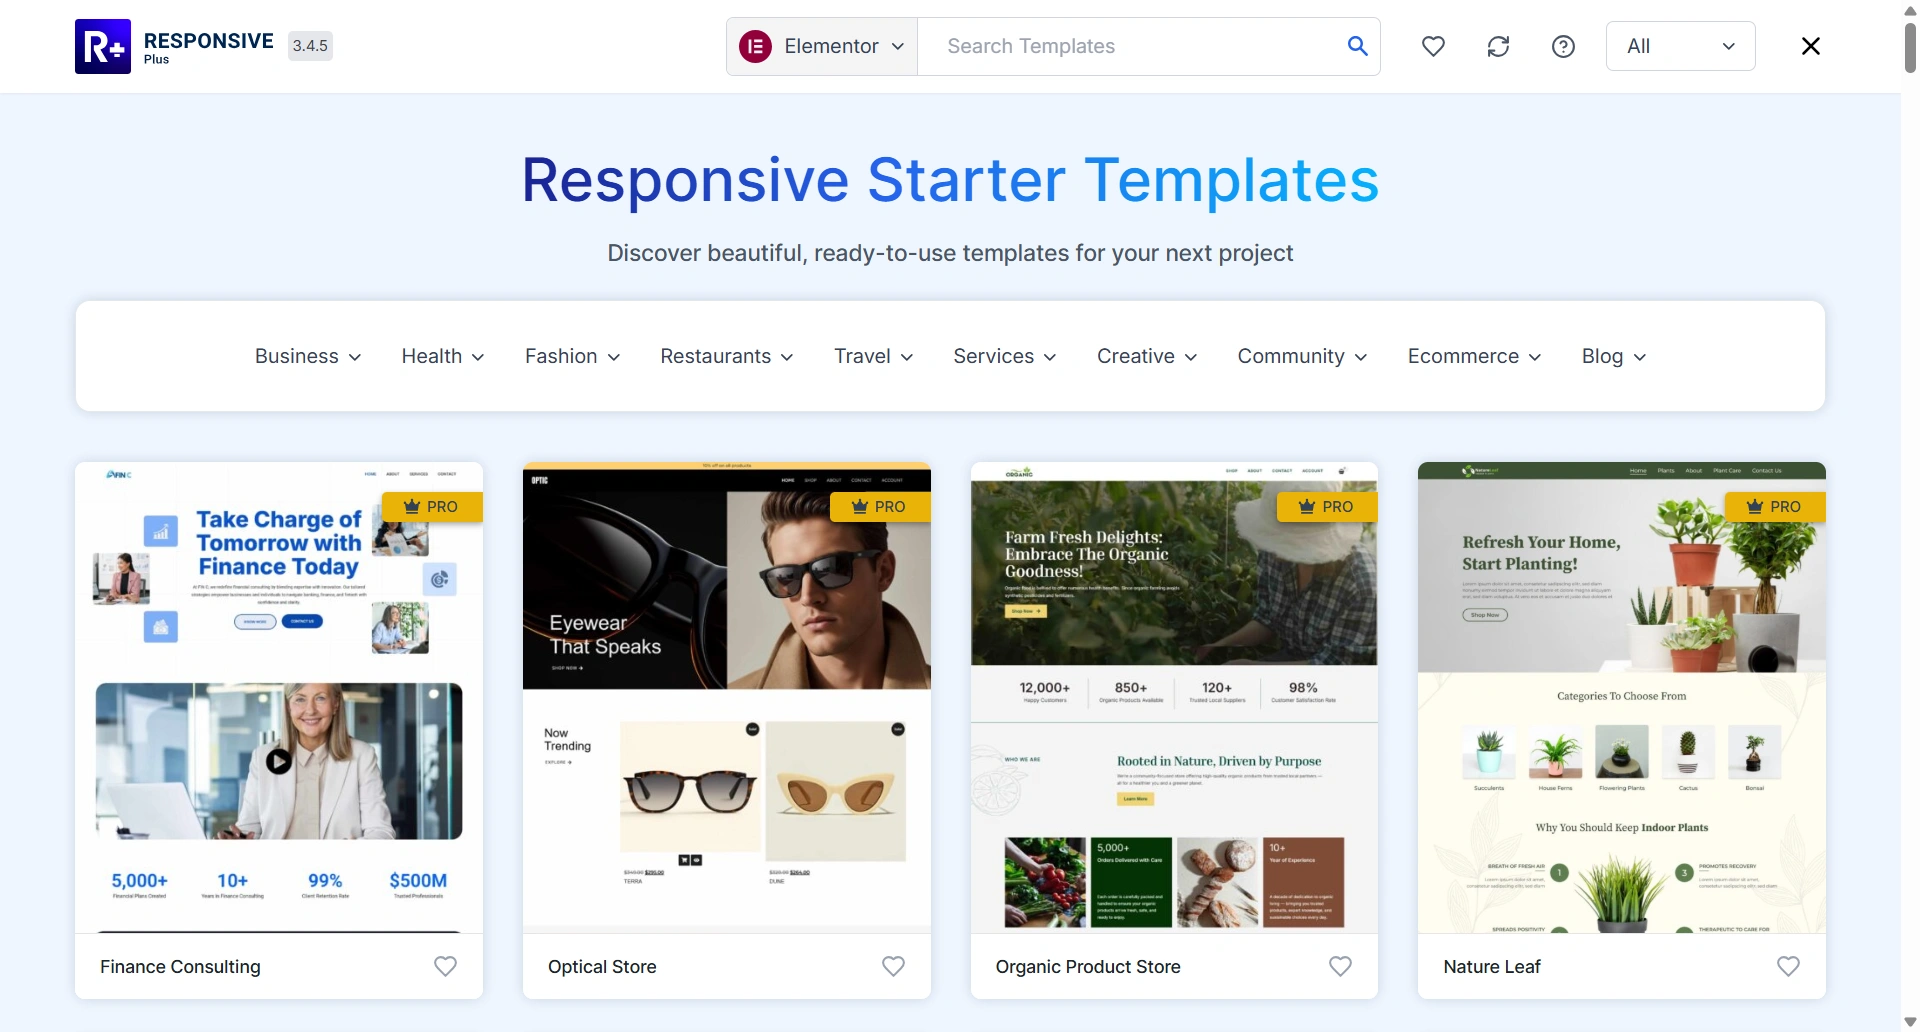
Search for a Physiotherapy template in the search bar.
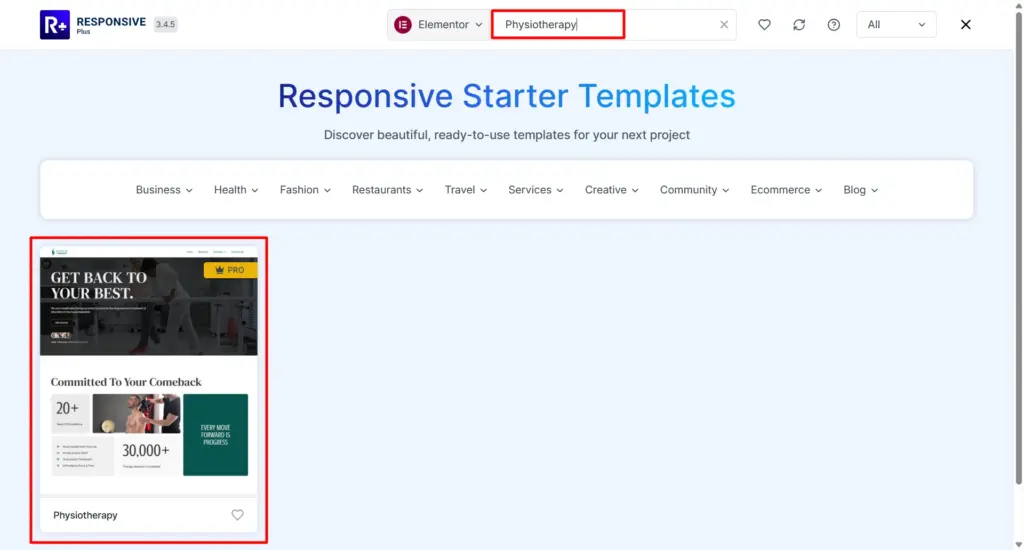
Click on the template you like to view its preview.
Click Import Site.

Before starting the import process, it will ask you to connect your Cyberchimps account. Click on Create a free account if you’re new.
Or you can click Connect your existing account if you already have one
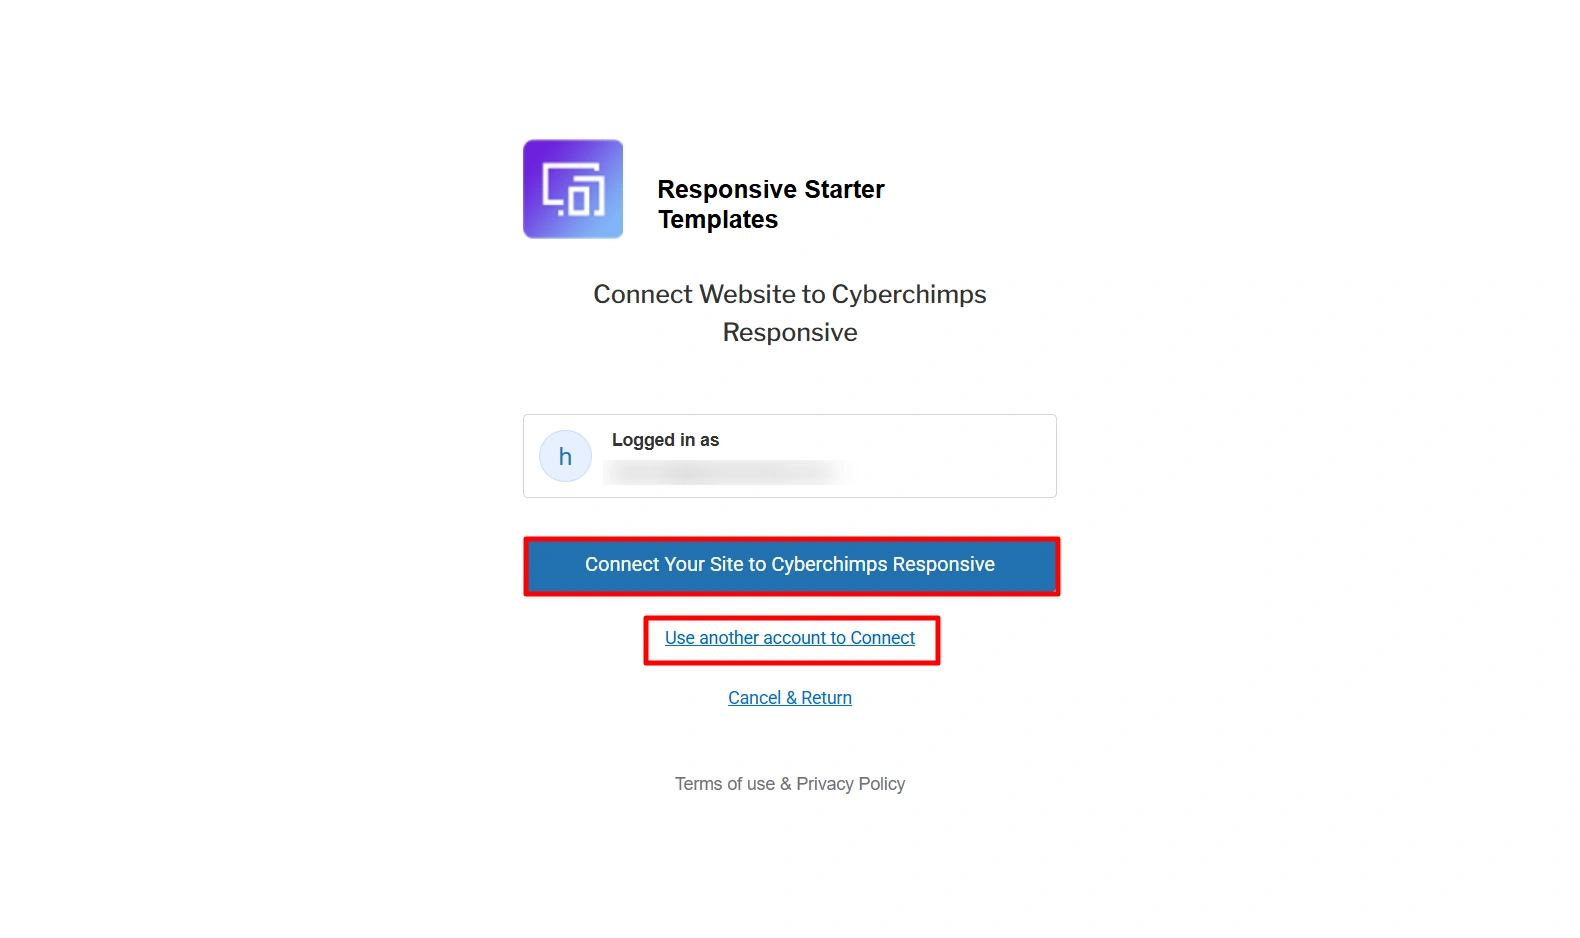
Complete the signup and connect your website
Once done, the import process will begin.
Click Visit Site. Once the import is complete, view your newly created website.
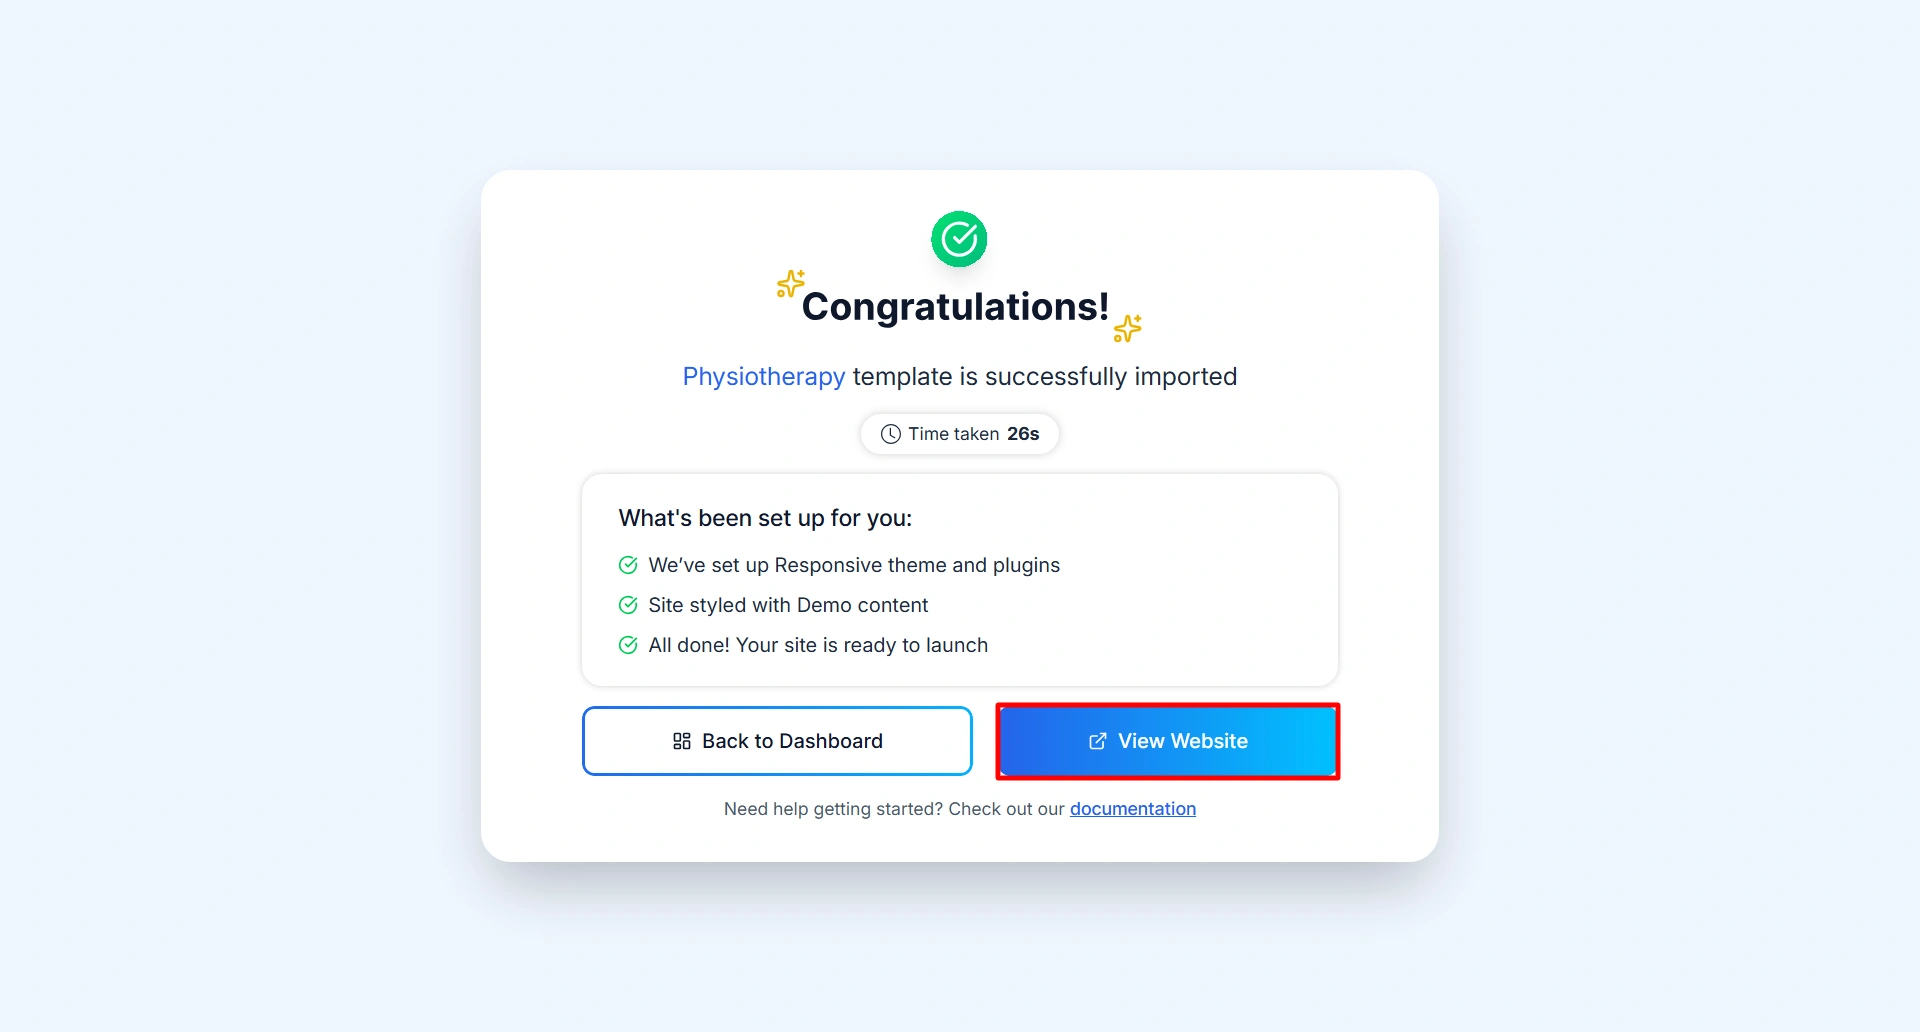
Within seconds, your entire website will be ready with a complete structure.
Step 7: Customize the Physiotherapy Template
Now that we have successfully imported the template. Begin customizing your imported template using the following steps:
Open any page and click on the Edit with Elementor button to start editing.
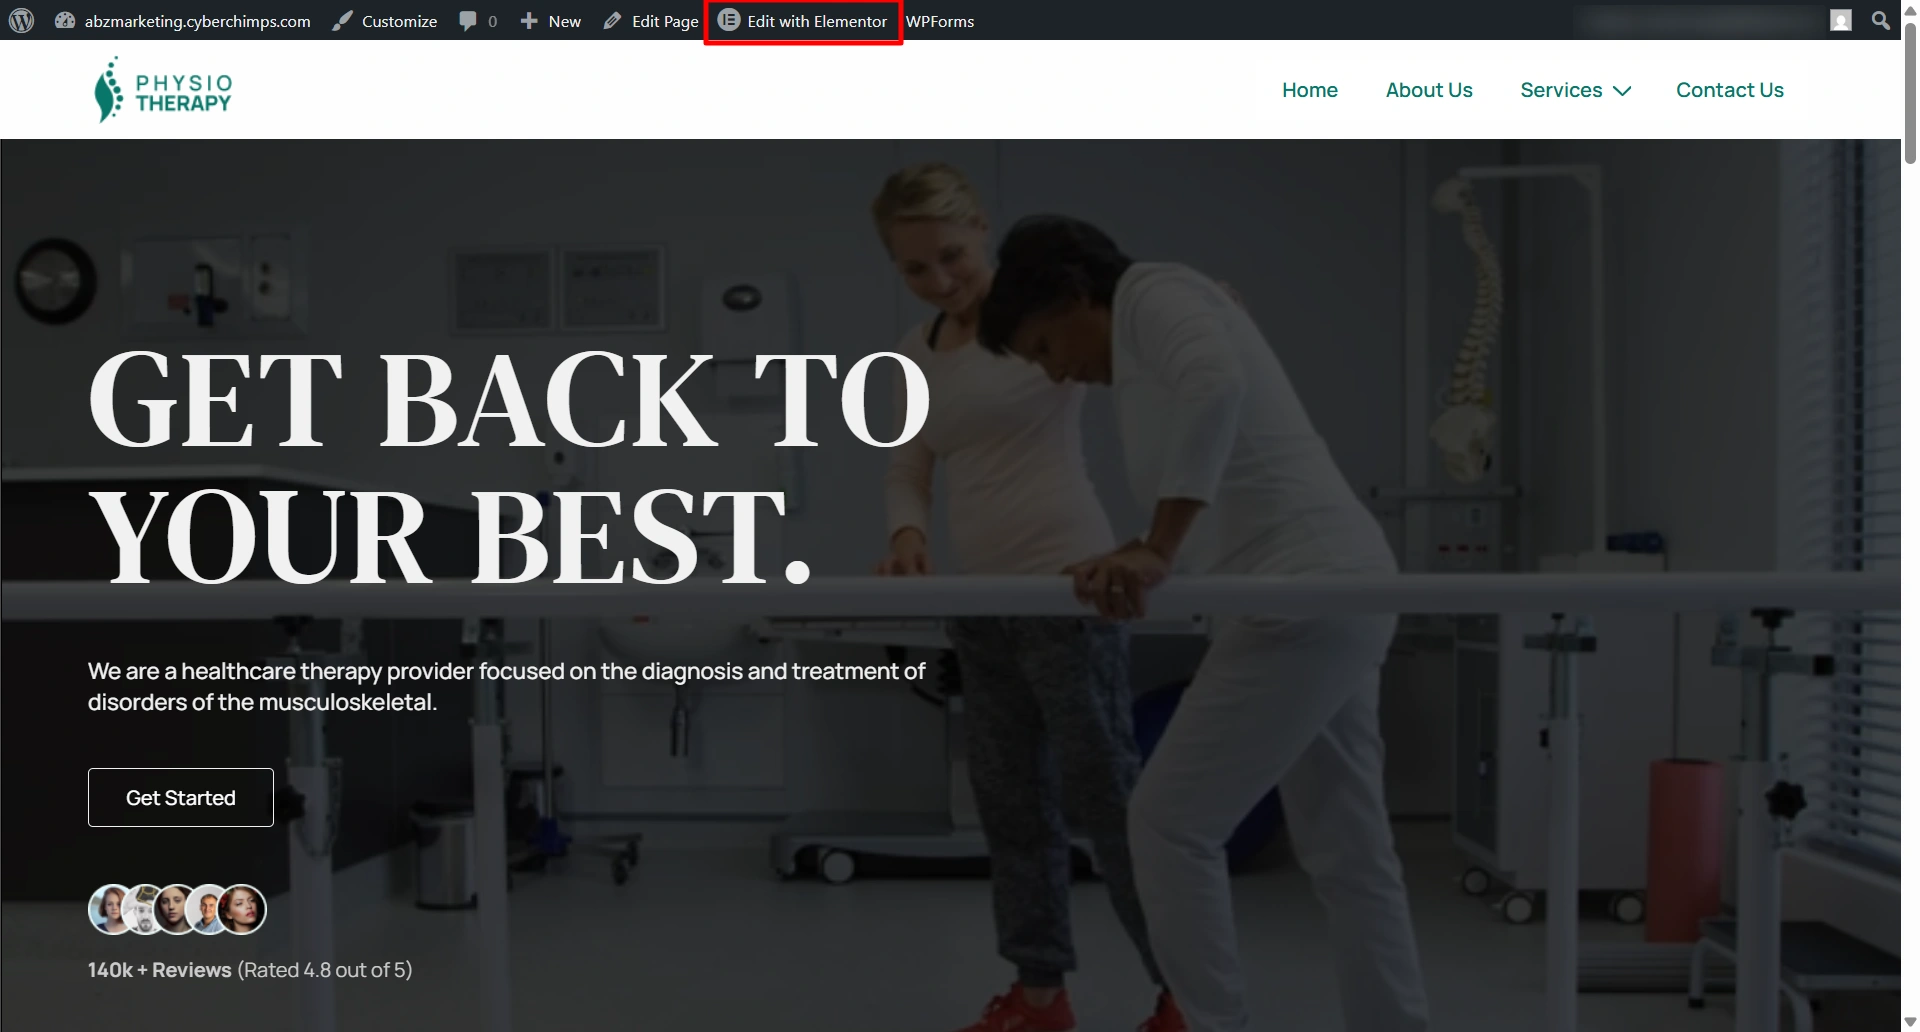
You can change the clinic name, services, and contact details in the content section.
To do so, simply scroll down on the left side of the menu panel and look for the Responsive Addon for Elementor.
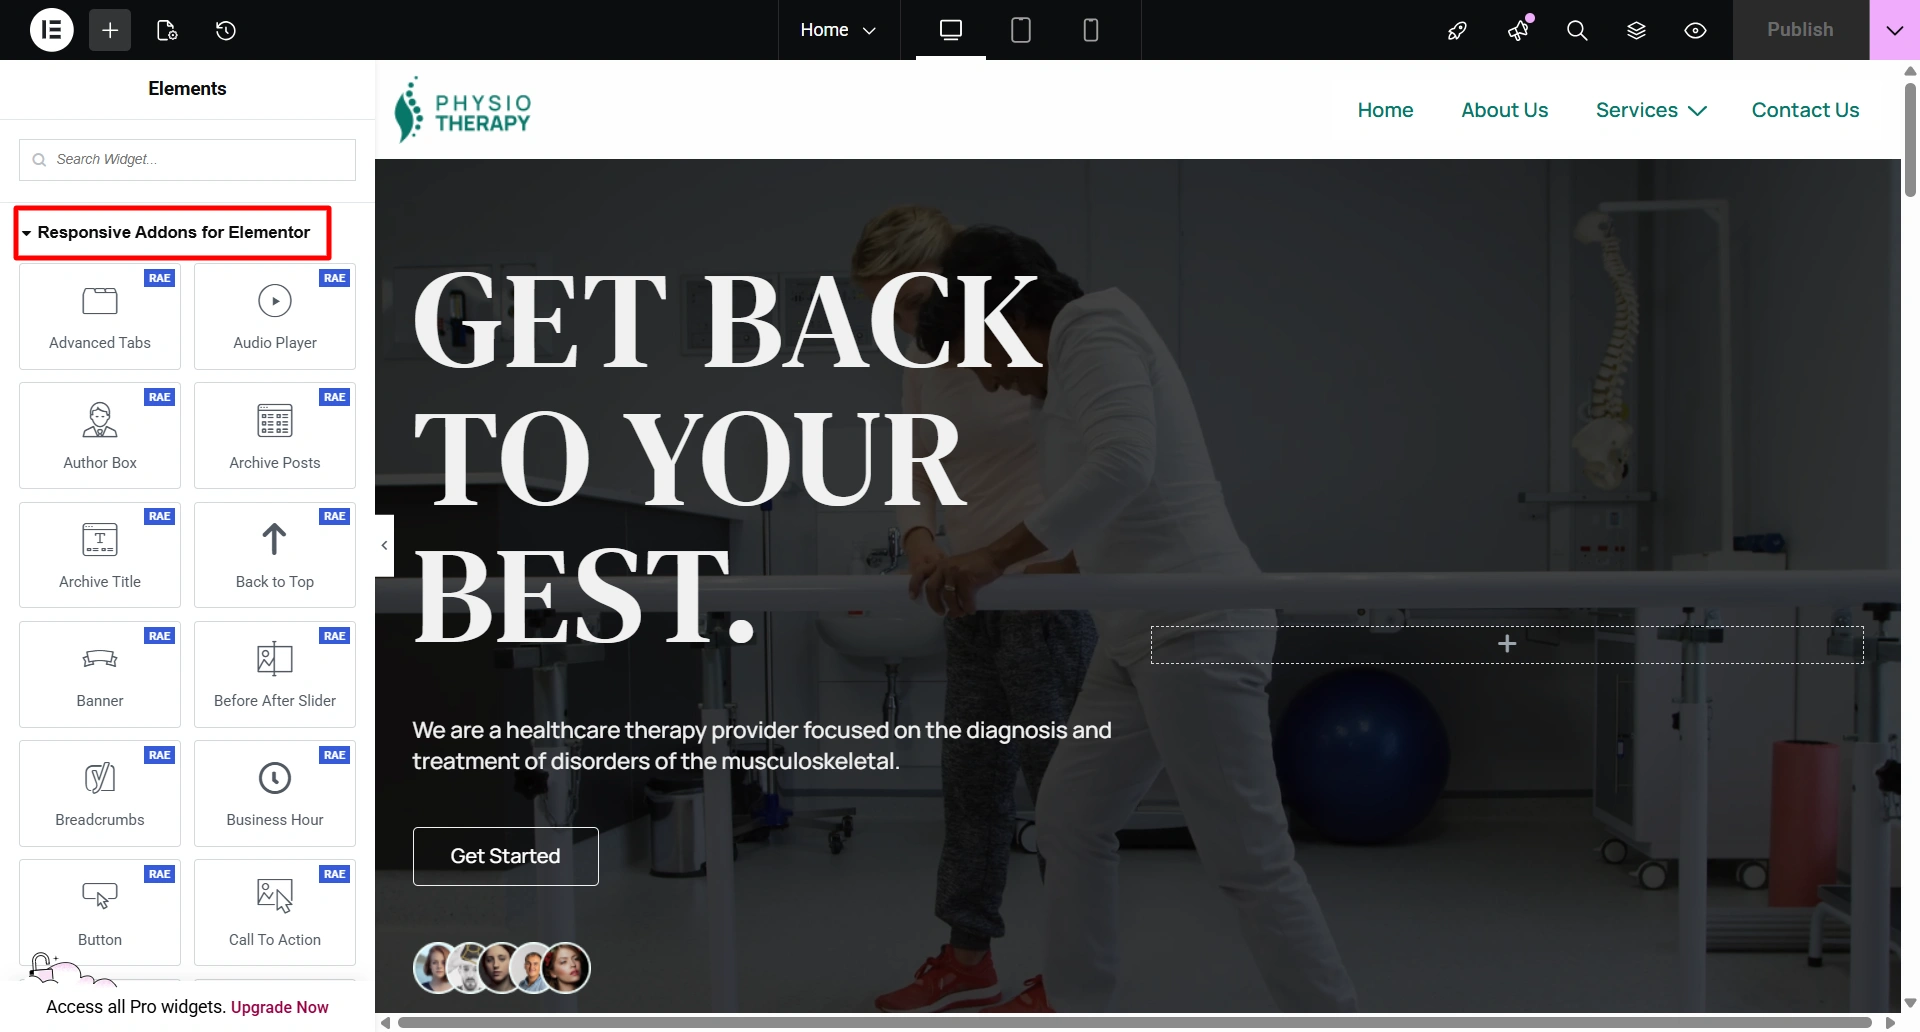
Use the different widgets as per your requirement and make the changes.
Easily customize everything by dragging and dropping, no programming required.
Step 8: Launch Your Physiotherapy Website
When you have finished setting up your site, you will need to check it before making it live. Before publishing, please check:
- All pages are working and opening correctly.
- Test the contact forms and confirm that when a client fills them out, you receive an inquiry.
- Mobile devices need to display your site properly.
- All images on the website must be displayed correctly, without errors.
You can then hit Publish once you have double-checked the above.
Your physiotherapy clinic now has a strong online presence and is ready for new patients.
Step 9: Tips to Market Your Physiotherapy Website
Here are some straightforward ways to promote your website:
- Optimize for local SEO: Claim your business in Google My Business so that your physiotherapy website can be seen in local search listings when patients look for physiotherapy services near them.
- Create health content: Publish valuable, informative blogs. This will help with your organic ranking and help establish you as a credible source in that area.
- Utilize social media: Utilize social media platforms such as Instagram, Facebook, and LinkedIn to share your services.
- Encourage patient reviews: Positive reviews on Google will help establish trust in your clinic and increase the likelihood that new patients will select your clinic.
FAQ
The timeframe for creating a physiotherapy website with Responsive Plus can be as short as 2 minutes using a pre-designed template.
No, you can create and customize your physiotherapy website without knowing any coding skills.
Yes, you will have access to drag-and-drop tools that will allow you to edit the text, images, colour, and layout of your physiotherapy template.
Yes, WordPress is an incredible choice because it offers immense flexibility, is search engine optimised, and is a widely used solution for many healthcare or clinic websites.
Conclusion
Building a physiotherapy website is very simple. It can be built within minutes using WordPress, the Cyberchimps’ Responsive Theme, and the Responsive Plus Starter Templates. This allows you to have a professional site up and running in a matter of minutes.
Start by installing WordPress, then import the physiotherapy template, customize it to meet your clinic’s brand style, and publish your website.
Responsive Plus will allow you to build your healthcare website very easily, whether you have never built one before.
If you enjoyed this article, then consider reading:
- What are Starter Templates? Ultimate Beginners Guide
- How to Find A Cyberchimps Template for Your Business Website?
- Key Website Essentials: Design, Content, and Compliance
Build your physiotherapy website in 10 minutes with Responsive Plus today!