After installing Responsive Theme, from the WordPress dashboard navigate to Appearance > Customize > Blog/Archive.
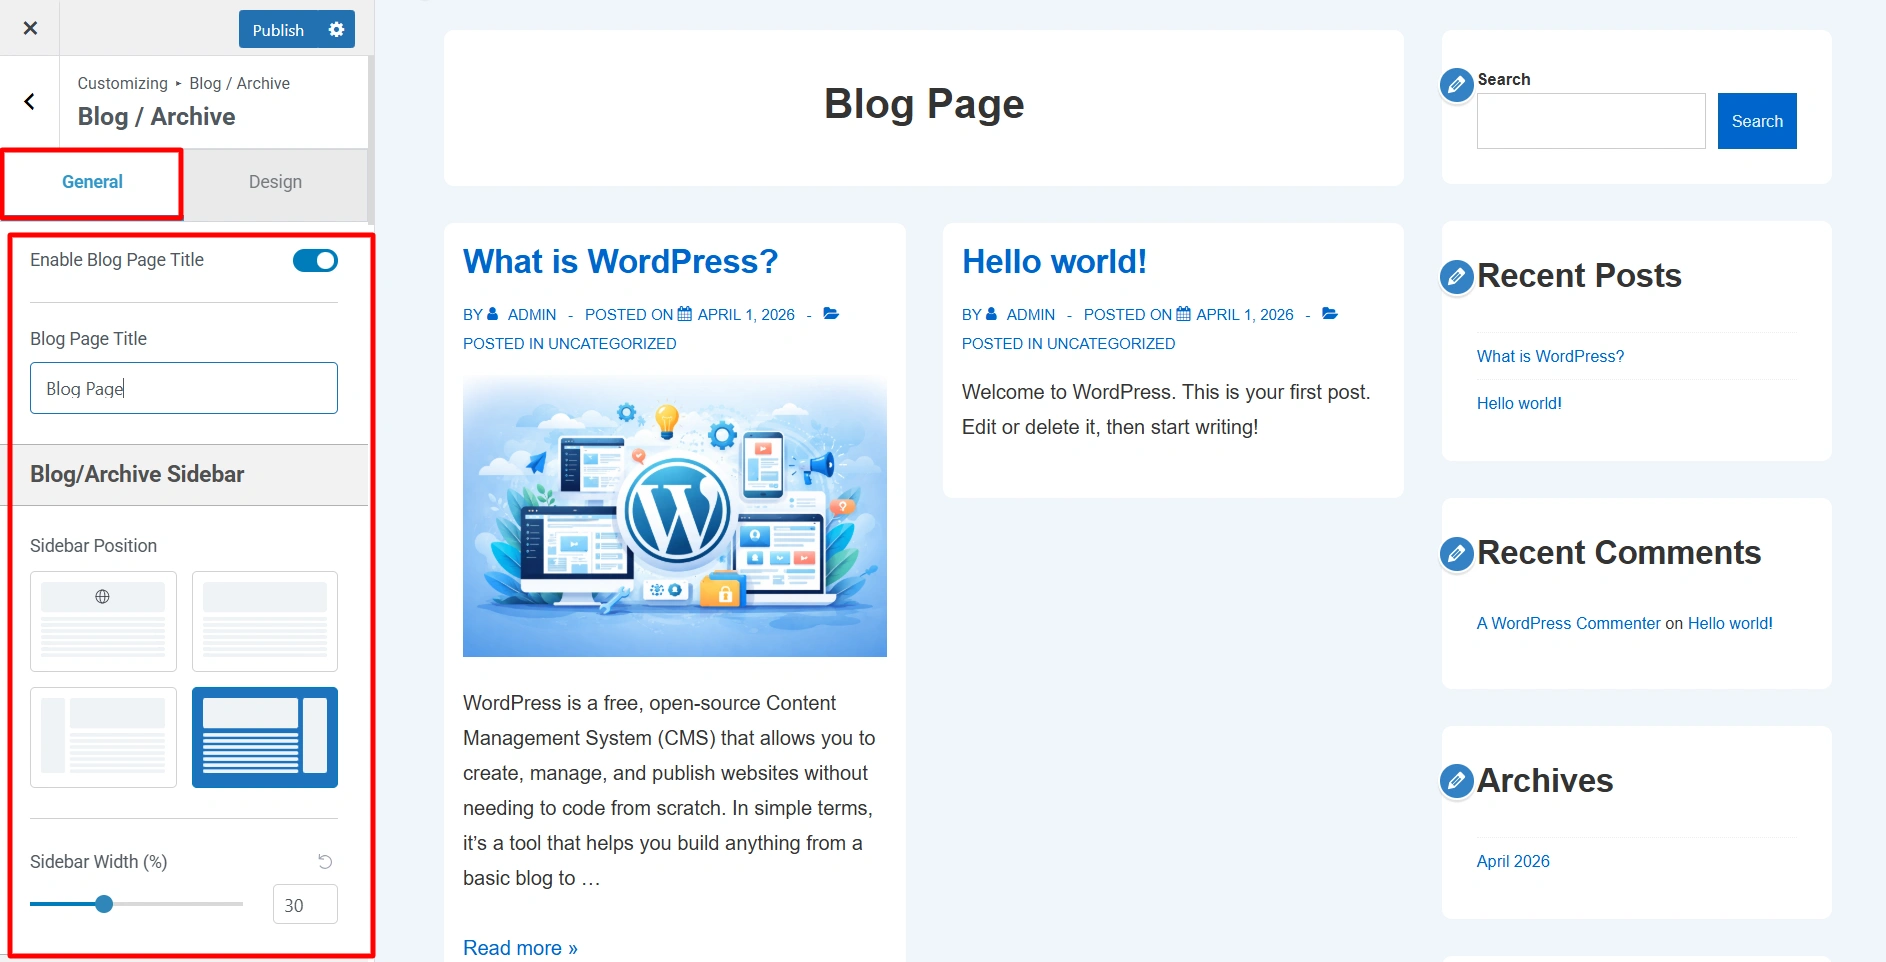
Blog/Archive – General
Enable Blog Page Title – If selected, you can give a title on the Blog page.
Blog / Archive Sidebar – You can select a layout for Blog page from following options
- Right Sidebar – Sidebar will appear on the right side. This is the most traditional way to show sidebar content.
- Left Sidebar – Sidebar will appear on the left side and the main content will be on the right side.
- No Sidebar – Sidebar will not be present and the content will span across the entire container width.
- Sidebar Width (%) – Change the sidebar width as per your liking.
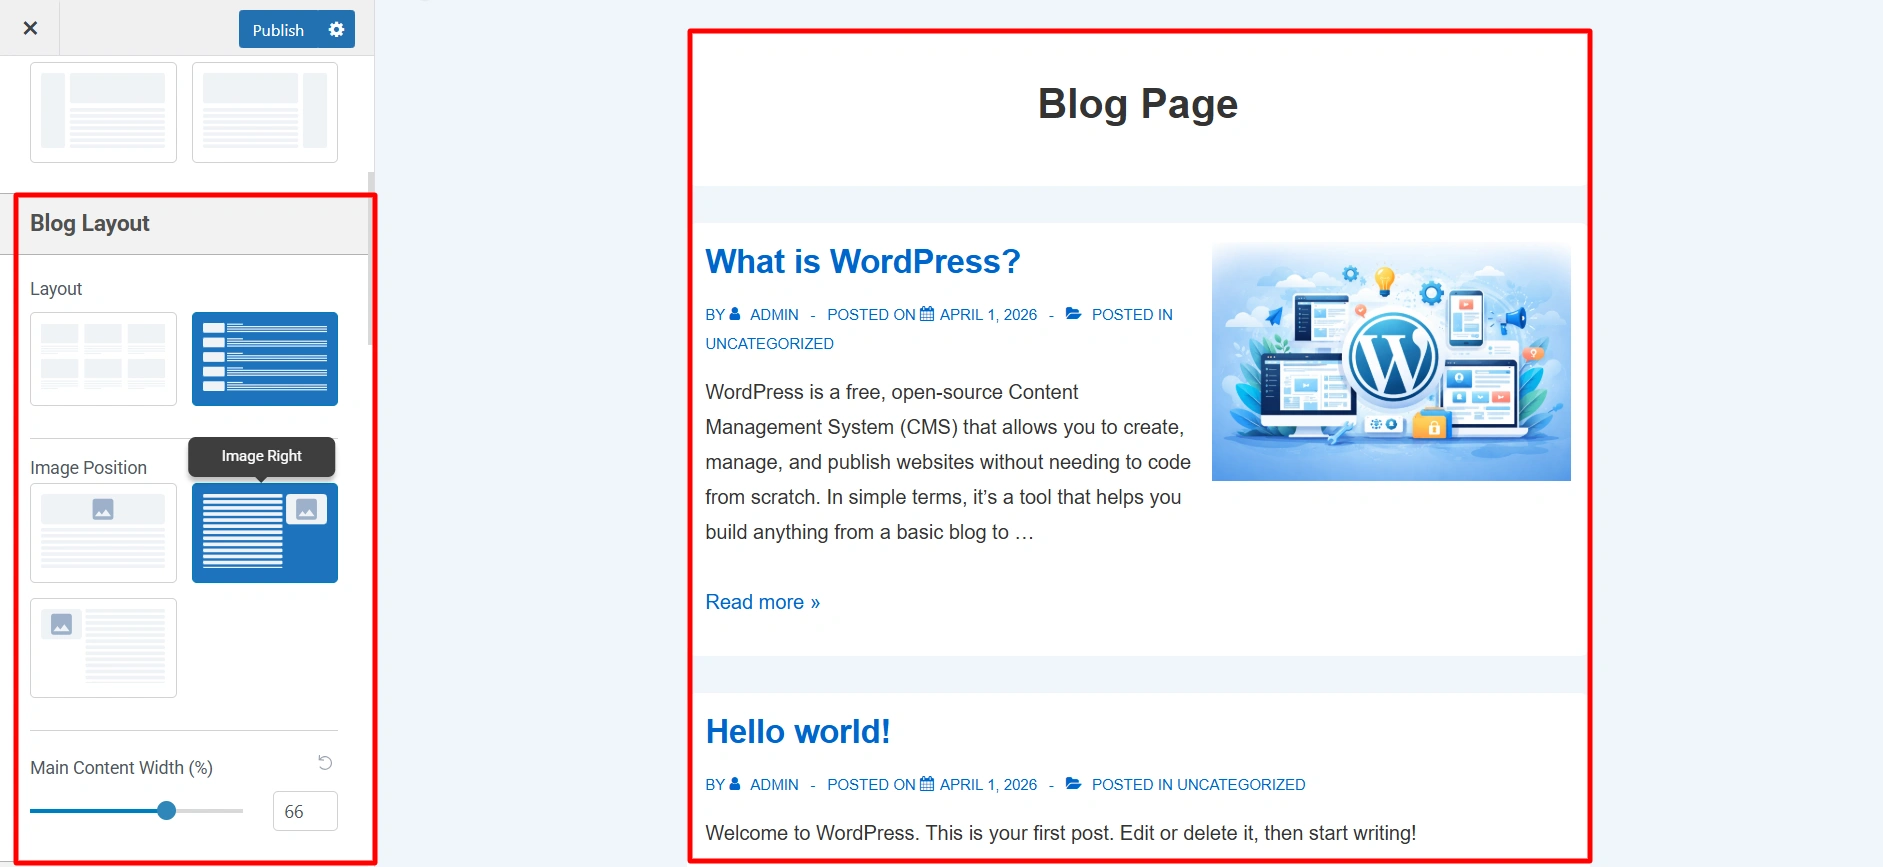
Blog / Archive Layout
- Layout – Here you can choose the overall structure for your blog posts to display (grid or list style).
- Blog Archive Columns – You can set how many columns of posts to show on the blog archive page. You can set up to 4 columns.
- Enable Masonry Layout – For a more dynamic look you can toggle this on to arrange posts in a masonry-style grid.
- Main Content Width (%) – Here you can adjust the width of the main blog content area.
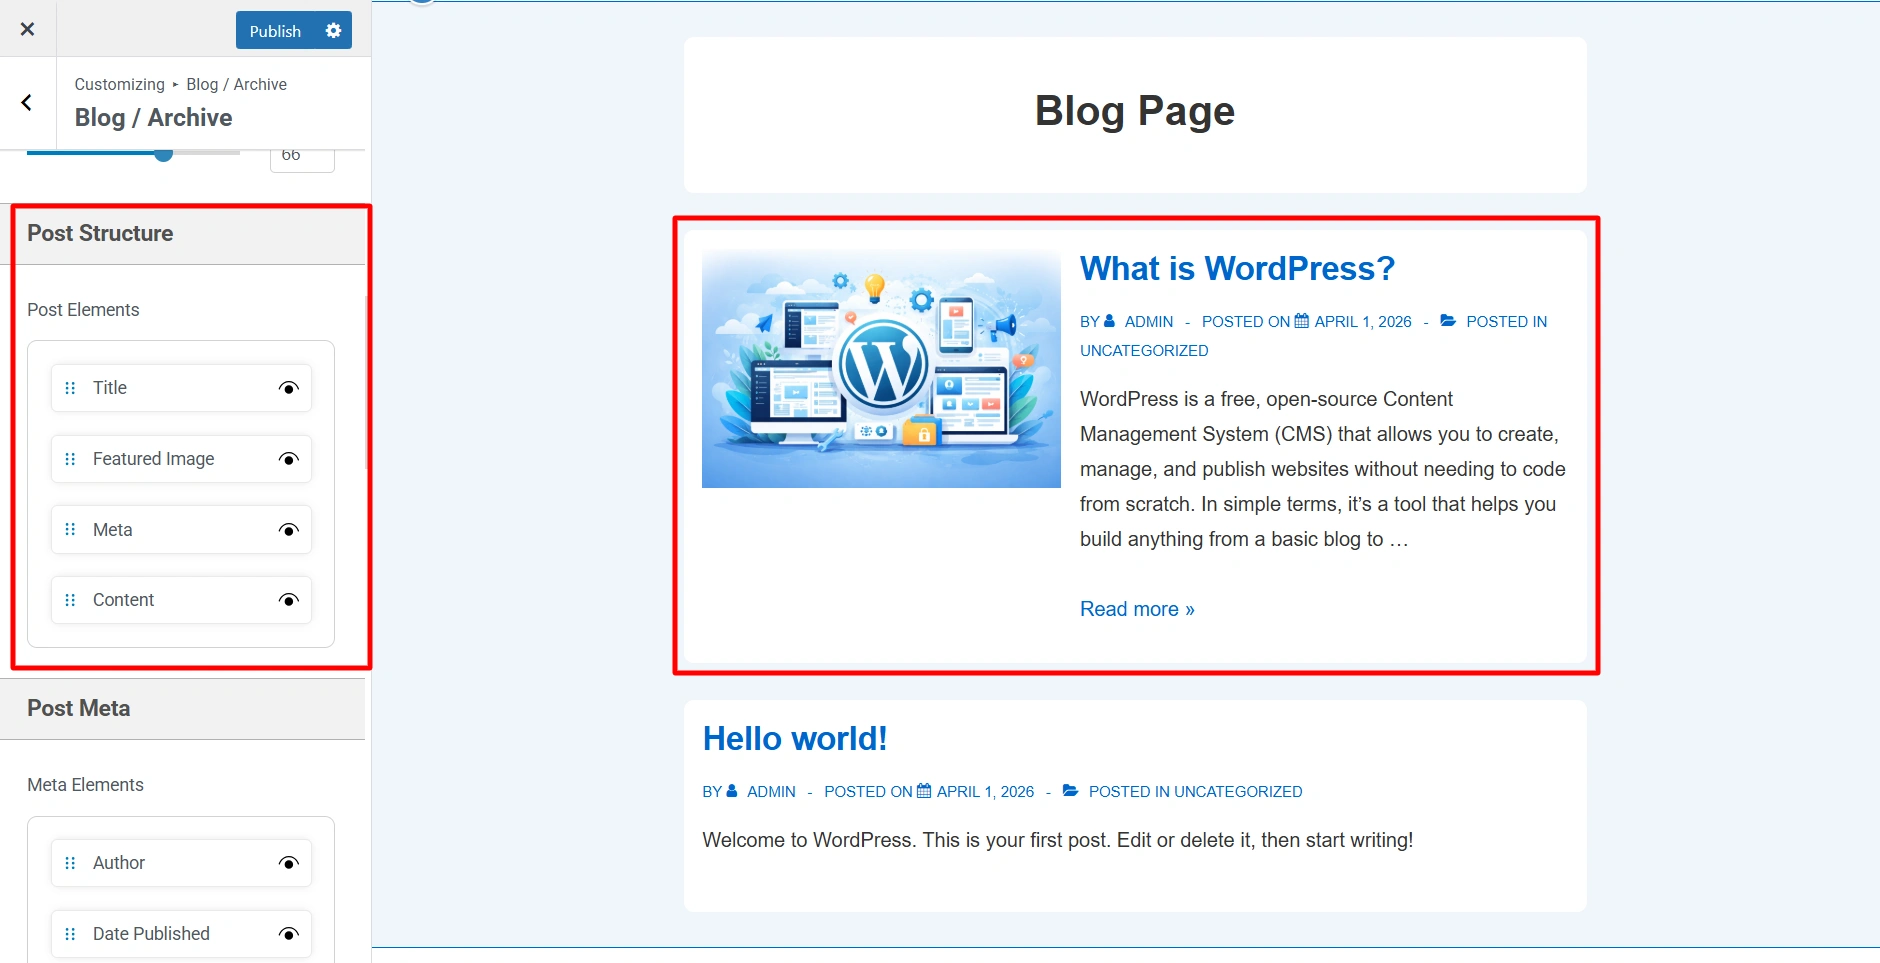
Post Structure
Post Elements – Here you can set the order of Title, Meta, Featured Image and Content in which they appear. You need to drag the elements to change their order. Also, you can toggle click on the eye icon in front of each element to show/hide that element on the page.
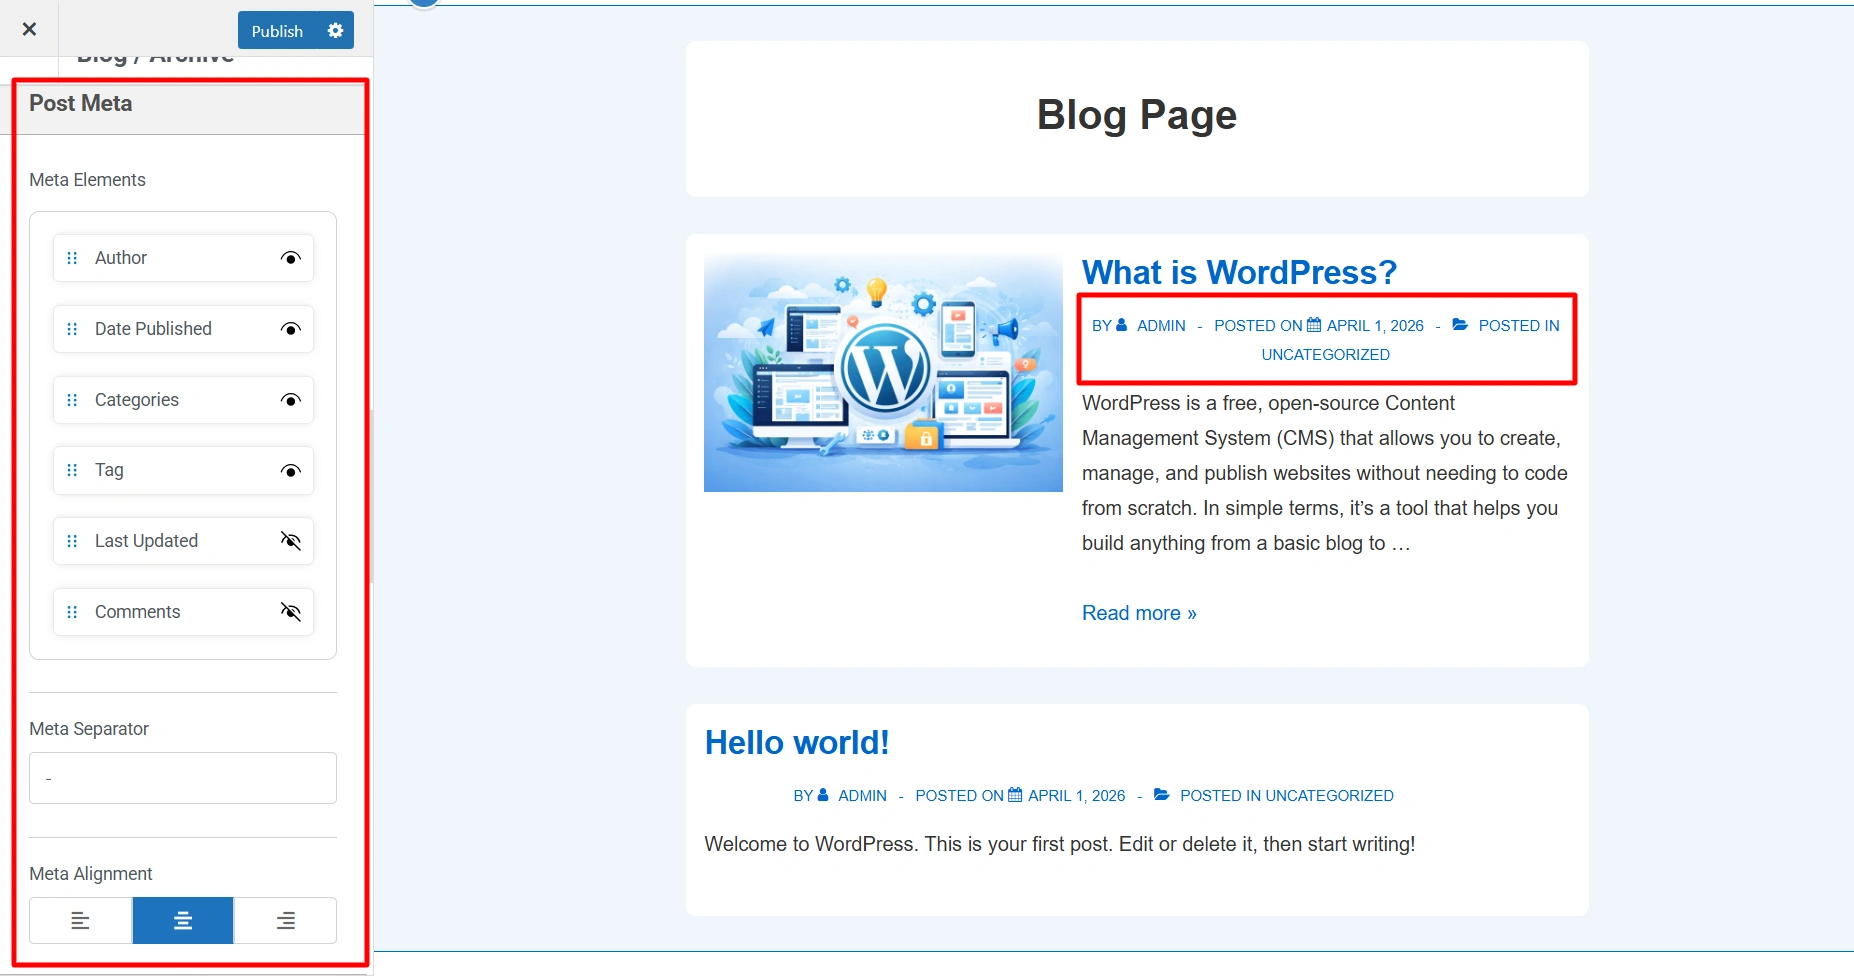
Post Meta
- Meta Elements – If you have kept Meta elements visible in above Post Structure options then you can decide the order and visibility of individual Post Meta including Author, Date Published, Categories, Tags, Last Updated, Comments.
- Meta Separator – Here you can edit the separator that will be present in between different meta elements.
- Meta Alignment – Here you can choose if you want to display the meta of the blog page at left, right, or center.
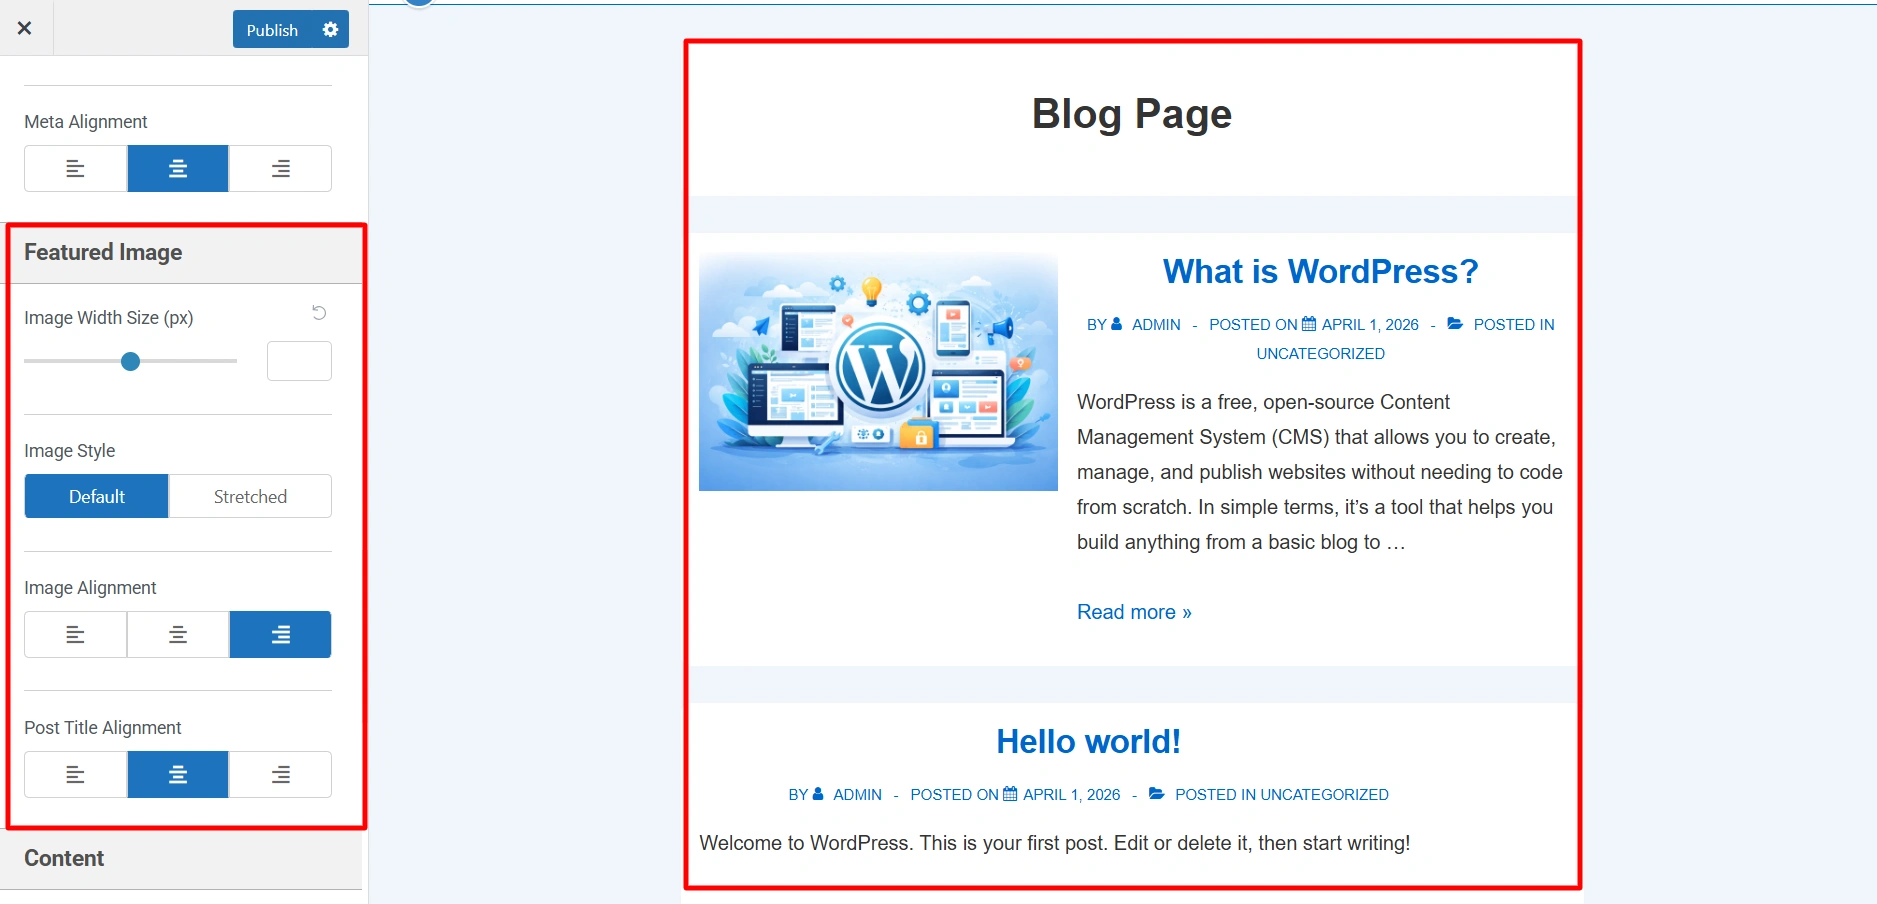
Featured Image
- Image Width Size (px) – Update the Featured image width size by slider. The default value will be used when the slider is in the middle. Dragging the slider to left or right will decrease or increase the image width respectively. You can click the reset button next to the input field to get the default value.
- Image Style – Here you can choose if you want to display the featured image of the blog as default or stretched.
- Image Alignment – Here you can choose if you want to display the image at left, right, or center.
- Post Title Alignment – Here you can choose if you want to display the title of the blog page at left, right, or center.
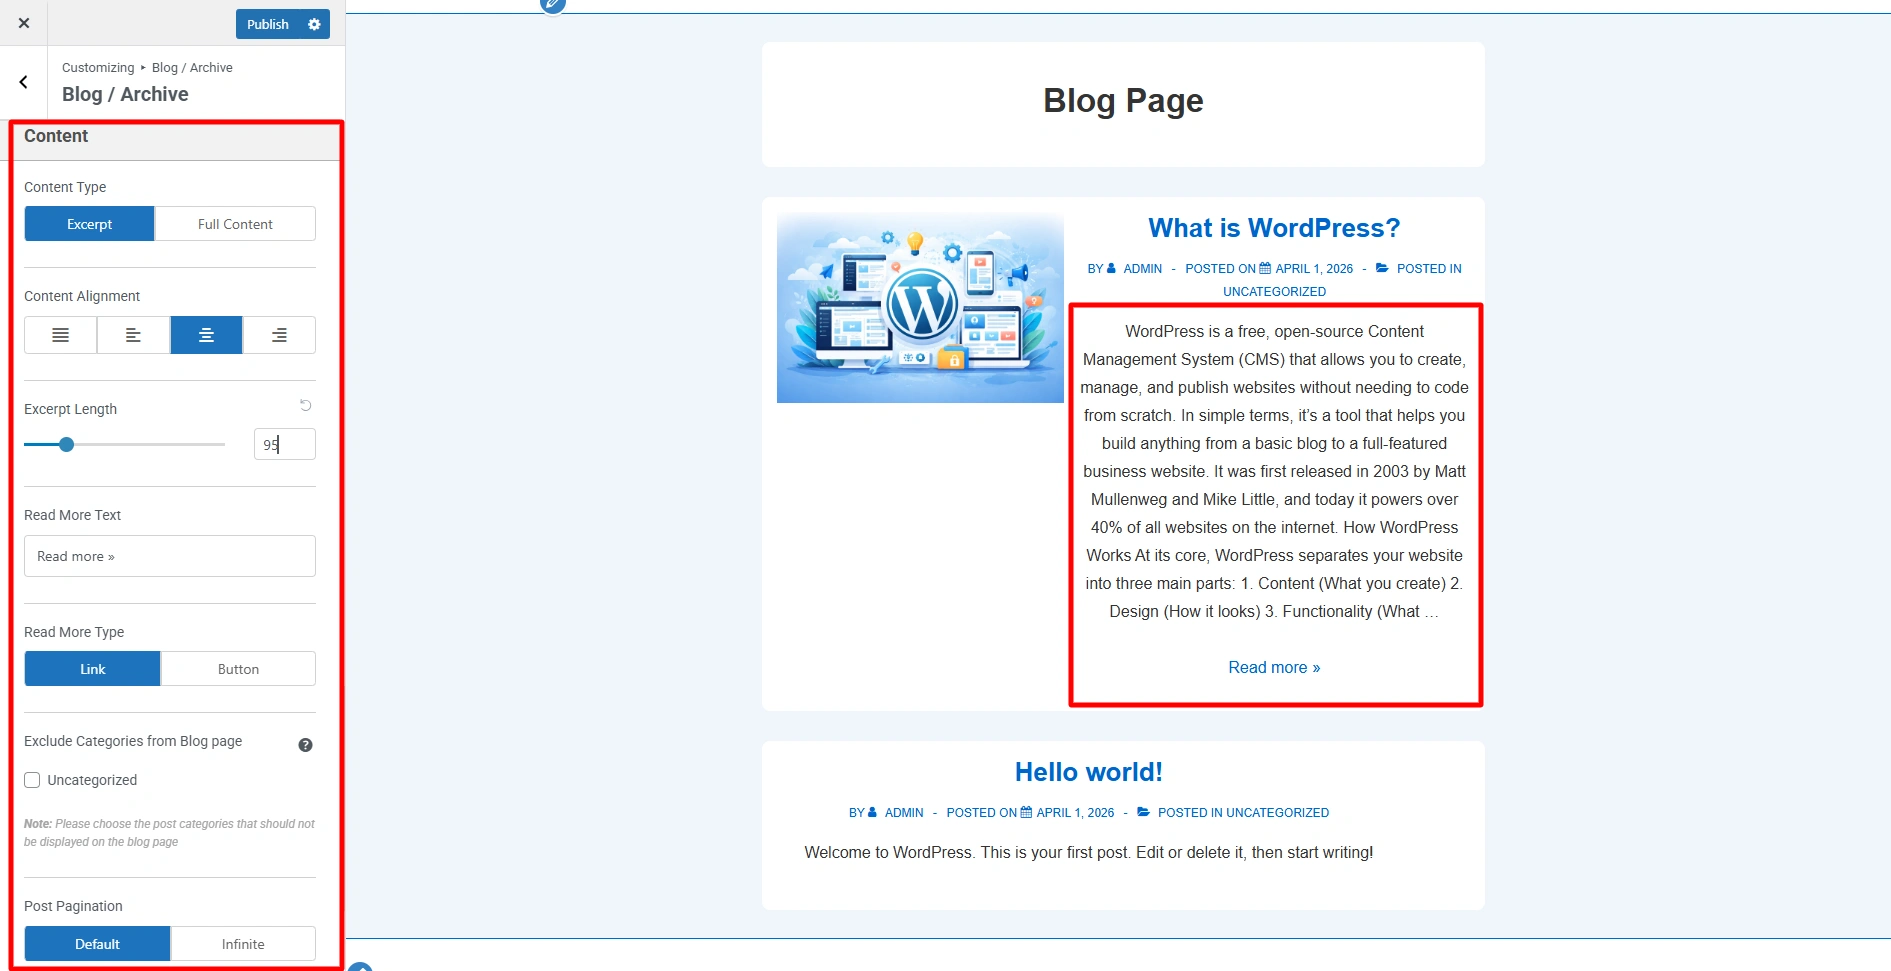
Content
- Content Type – Choose if you want to display post content as Excerpt or full Content.
- Content Alignment – Here you can choose if you want to display the blog page content at left, right, or center.
- Excerpt Length – If you have chosen excerpt as post content, choose the total length of the excerpt to display.
- Read More Text – If you have chosen excerpt as post content, you can edit the read more text here.
- Read More Type – If you have chosen excerpt as post content, you can choose the display of read more text as a link or button.
- Exclude Categories from Blog page – Selected the categories which you wish not to be displayed on the blog page.
- Post Pagination – Here you can choose how the posts will load on the blog page either in default numbered pages or infinite scroll.
Spacing – It lets you set the spacing around and within the blog content container. You get two options to do so:
- Outside Container (px)
- Inside Container (px)
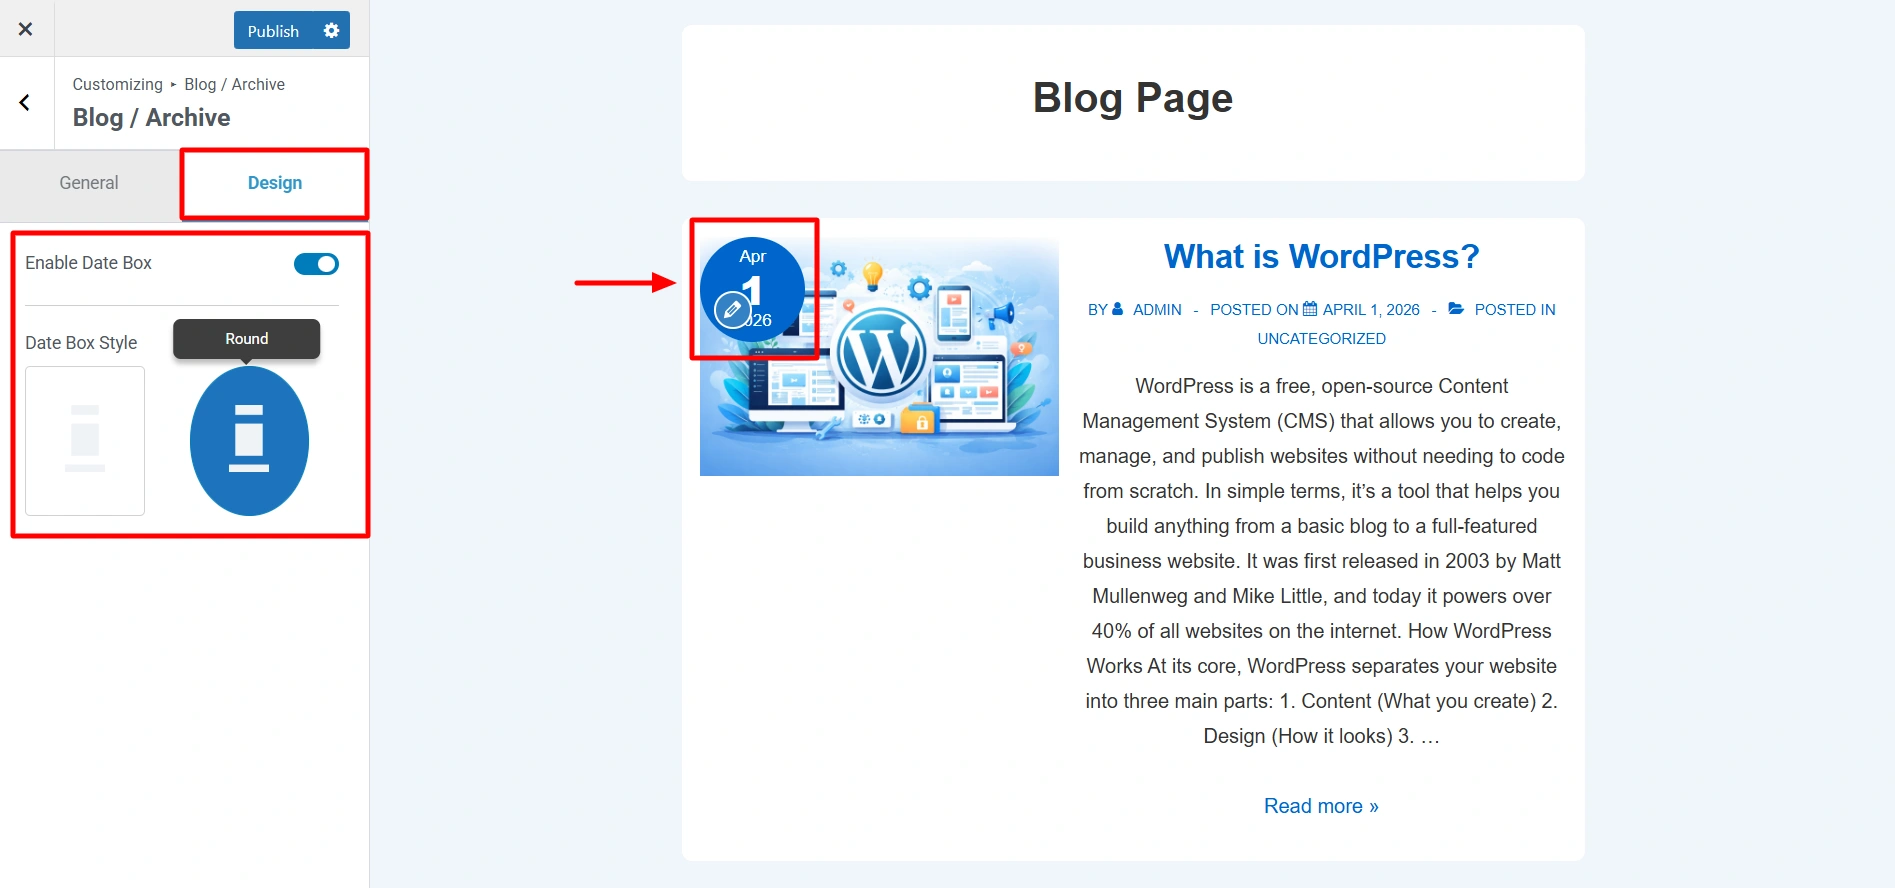
Blog/Archive – Design
Enable Date Box – After you enable this feature the date box will appear on your blog post.
By using these design options you can customize the blogs on your website as per your brand requirements. Happy Designing!


